I burned the cookies. Again. There I was, standing in my kitchen at 11:47 PM, the smell of charred chocolate chips hanging in the air like a guilty secret, wondering why I even bothered turning on the oven in the first place. My neighbor had dropped by earlier that evening, mentioned she loved peanut butter desserts, and my brain immediately went into hostess panic mode. But here's the thing — I'm terrible at baking. Like, really terrible. My cookies either spread into one giant sheet or stay in little rock-hard mounds that could chip a tooth. So at midnight, with zero energy left and a serious craving for something sweet and salty, I started throwing things into a bowl. Pretzels, peanut butter, some chocolate chips I hadn't incinerated yet. No oven, no stress, no possibility of setting off the smoke detector. What emerged from my late-night desperation was so good, so ridiculously addictive, that I ate half the batch standing right there at the counter, still in my pajamas, licking peanut butter off my fingers like a woman possessed.
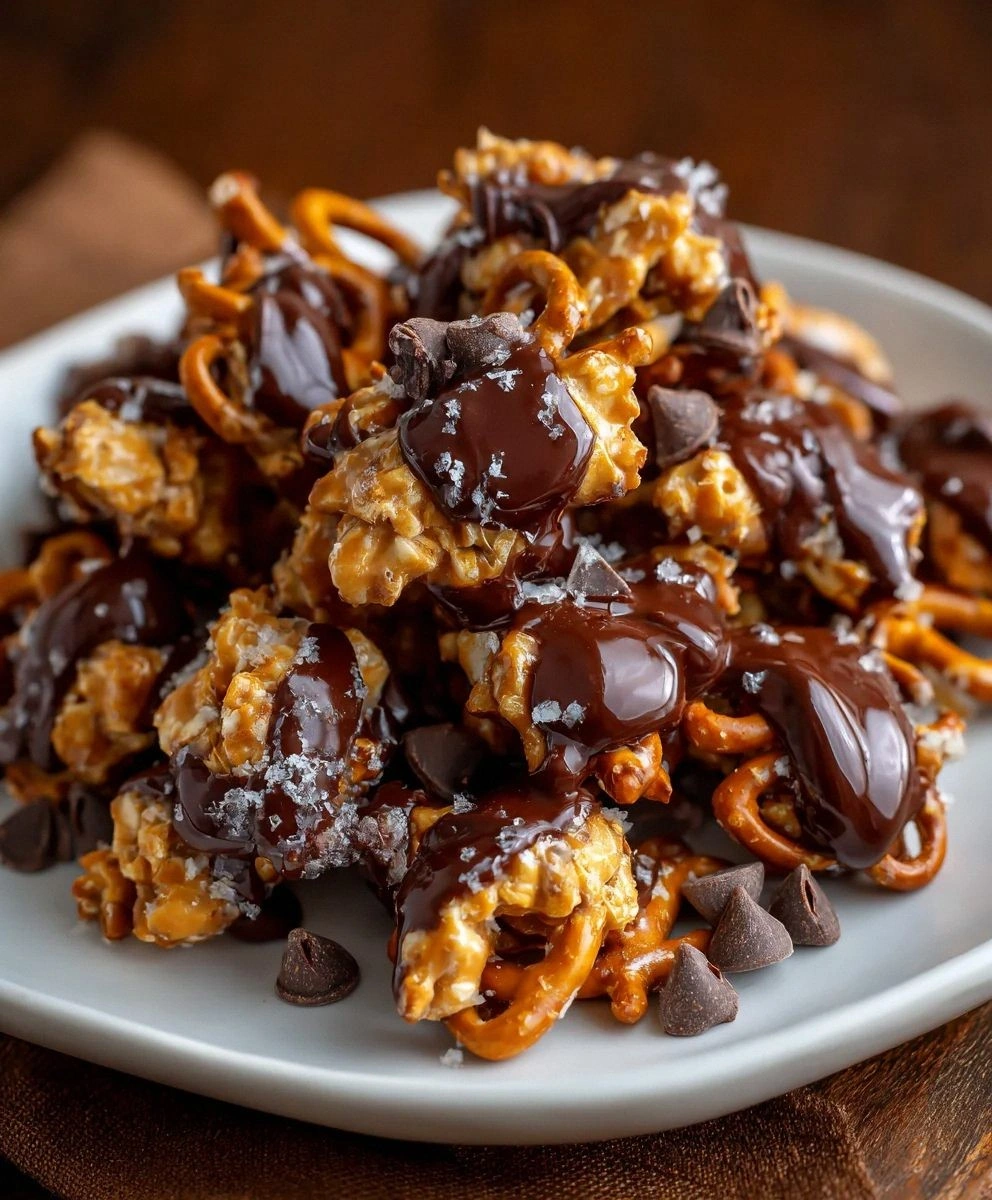
These No-Bake Peanut Butter Pretzel Clusters are what happens when you stop trying so hard and just let deliciousness happen. They're the lazy genius of the dessert world — the treat that tastes like you spent hours fussing over them when really you just stirred some stuff together and let the fridge do all the work. Picture this: salty, crunchy pretzel pieces suspended in creamy peanut butter, held together by just enough chocolate to make everything glossy and indulgent. The contrast is what gets you every time — that first snap of pretzel giving way to smooth, rich peanut butter, the whole thing melting on your tongue like a dream you don't want to wake up from.
What makes these clusters absolutely irresistible is how they play with your expectations. They're not quite candy, not quite cookie, not quite bar. They exist in this perfect in-between space where cravings go to die happy deaths. And here's my favorite part — they come together faster than you can preheat an oven. No special equipment, no candy thermometers, no praying to the baking gods that everything rises properly. Just you, a bowl, and about fifteen minutes of your time. If you've ever struggled with baking, if you've ever felt that pang of dessert despair when everyone else is posting their perfect cookies, this recipe is your redemption song.
Let me walk you through every single step — by the end, you'll wonder how you ever made it any other way.
What Makes This Version Stand Out
Lightning Fast: From pantry to plate in under twenty minutes, these clusters move at the speed of your cravings. While traditional no-bake cookies need time to set up properly, these hit their stride in the fridge after just ten minutes. That means you can go from "I want something sweet" to "I'm eating something sweet" faster than you can watch half an episode of your favorite show.
Texture Paradise: Most no-bake treats are either too soft or weirdly chewy. These clusters crack the code with pretzel pieces that stay shatteringly crisp, wrapped in a coating that somehow manages to be both creamy and snappy. It's like someone took everything good about peanut butter cups and everything great about chocolate-covered pretzels and married them in a tiny, perfect ceremony.
Idiot-Proof Chemistry: There's no boiling sugar, no worrying about soft-ball stages, no wondering if your chocolate will seize. The worst thing that can happen is you eat too much of the mixture before it sets. Actually, that's probably going to happen regardless, so embrace it.
Pantry Staple Magic: Everything you need is probably sitting in your kitchen right now. No hunting for specialty ingredients, no expensive nuts or exotic extracts. Just honest, everyday stuff that transforms into something way greater than the sum of its parts.
Make-Ahead Champion: These clusters actually get better after a day in the fridge. The flavors meld, the texture firms up perfectly, and they develop this almost fudge-like quality that makes them taste like they came from an actual candy shop instead of your slightly chaotic kitchen.
Universal Crowd Pleaser: Kids love them because they're basically candy. Adults love them because they're sophisticated enough to serve with coffee. Your gluten-free friend can enjoy them (just check your pretzels), your peanut-butter-obsessed coworker will propose marriage, and even people who claim they "don't really like sweets" end up asking for the recipe.
The Salty-Sweet Balance: This is where most recipes get it wrong — they go too sweet and you lose that addictive quality that keeps you coming back for more. These clusters hit the perfect 60/40 split of salty to sweet, making them impossible to resist. That little hit of salt makes the peanut butter taste more peanut-buttery, the chocolate taste more chocolatey, and your taste buds do a little happy dance.
Alright, let's break down exactly what goes into this masterpiece...
Inside the Ingredient List
The Flavor Foundation
Peanut butter is obviously the star here, but not all peanut butters are created equal. You want the regular, shelf-stable stuff — not the natural kind that separates into an oil slick on top. I know, I know, the natural stuff is healthier, but it makes these clusters greasy and they won't set up properly. Look for peanut butter that's smooth and emulsified, the kind your mom probably bought when you were a kid. It should spread like a dream and taste like pure nostalgia. If you're feeling fancy, the honey-roasted varieties add an extra layer of flavor that makes people ask what your secret is.
The Texture Crew
Pretzels are where the magic happens, but here's what nobody tells you — the shape matters more than you'd think. Those little mini pretzels? Perfect. Regular twists work too, but avoid the thick pretzel sticks or the giant bakery-style ones. You want something that will break down into manageable pieces without turning into complete dust. And please, for the love of all that is crunchy, don't use stale pretzels. They'll taste like disappointment and have the texture of cardboard. Fresh pretzels snap cleanly and taste properly salty, which is exactly what you want against all that rich peanut butter.
The Binding Agent
Chocolate chips do double duty here — they hold everything together and add that indulgent finish that makes these feel like proper candy. Semi-sweet is classic, but milk chocolate makes these taste like a peanut butter cup had a baby with a pretzel. Dark chocolate works if you want to feel slightly virtuous about eating six clusters in a row. The key is using good quality chips that melt smoothly. Cheap chocolate seizes up and gets chalky, and then you're left with clumps that look like something you'd find in the backyard.
The Unexpected Game-Changer
Here's where I lose some people, but stay with me — a tiny bit of butter. Just one tablespoon makes these clusters taste richer, helps the chocolate set with a beautiful sheen, and prevents that weird waxy texture you sometimes get with no-bake treats. Use unsalted butter since your pretzels are already bringing plenty of salt to the party. And if you're dairy-free, coconut oil works in a pinch, though it will add a subtle coconut flavor that actually plays nicely with the peanut butter.
Everything's prepped? Good. Let's get into the real action...
The Method — Step by Step
- Start by creating your pretzel graveyard — place about two cups of pretzels in a heavy zip-top bag and channel all your frustrations into smashing them. You're looking for pieces ranging from pretzel dust to about the size of your thumbnail. Some whole pieces are fine, but mostly you want a mix that will create pockets of crunch throughout your clusters. The bag method keeps everything contained so you're not finding pretzel fragments in your kitchen for weeks.
- Melt your chocolate chips with the butter in a microwave-safe bowl, but here's the trick — do it in 30-second bursts, stirring between each one. Chocolate is dramatic and will go from perfectly melted to seized and grainy faster than you can say "oops." When it's about 80% melted, take it out and keep stirring. The residual heat will finish the job and you'll have silky smooth chocolate that coats everything like liquid velvet.
- Now comes the moment of truth — stir in your peanut butter while the chocolate is still warm. This is where the magic happens. The warmth loosens up the peanut butter just enough to blend perfectly, creating this glossy, irresistible mixture that you'll want to eat with a spoon. Resist the urge. Actually, don't resist too hard — nobody will know if you "test" a spoonful. Or three.
- Fold in your pretzel pieces with a rubber spatula, making sure every last bit gets coated in that peanut-butter-chocolate heaven. This is where your arm workout happens — you want to be gentle enough to keep some pretzel pieces intact but thorough enough that you're not left with dry pretzels at the bottom of the bowl. It's a delicate dance, but you've got this.
- Using a small cookie scoop or two spoons, drop heaping tablespoons of the mixture onto a parchment-lined baking sheet. They'll spread slightly as they set, so leave some breathing room between clusters. If you want to get fancy, you can press a whole pretzel on top of each one for that bakery-style look that makes people think you actually know what you're doing.
- Slide the tray into the fridge for at least 10 minutes to let everything set up. This is the hardest part — waiting. But here's a secret: if you absolutely cannot wait, pop them in the freezer for 3 minutes. They won't be quite as firm, but they'll be edible, and sometimes that's all that matters in life.
- Once they're set, peel them off the parchment and prepare for your life to change. The bottoms will be glossy and smooth, the tops studded with pretzel pieces that catch the light like little edible jewels. Try not to eat them all while you're supposed to be "testing" them. Fail spectacularly at this, because they're that good.
- Store them in an airtight container in the fridge, where they'll keep for up to a week. But let's be honest — they won't last that long. They barely last a day in my house, and I live alone. I've caught myself opening the fridge "just to check on them" like they're some kind of pet that needs monitoring.
That's it — you did it. But hold on, I've got a few more tricks that'll take this to another level...
Insider Tricks for Flawless Results
The Temperature Rule Nobody Follows
Room temperature peanut butter is your best friend here. Cold peanut butter straight from the fridge fights with the warm chocolate and creates these weird little clumps that never quite blend. Let it sit on the counter for 30 minutes before you start, or if you're impatient (hi, me too), microwave it for 8-10 seconds. You want it soft enough to scoop easily but not melted into a puddle. This tiny step makes the difference between clusters that look professionally made and ones that look like you got distracted halfway through. Which, let's face it, you probably did.
Why Your Nose Knows Best
Here's something they never tell you in recipes — smell your pretzels. Seriously. Fresh pretzels smell like bread and salt and happiness. Stale ones smell like cardboard and regret. Since pretzels are the backbone of this treat, using fresh ones isn't just a suggestion, it's essential. If you can't remember when you bought them, buy new ones. Your taste buds will throw you a thank-you party, and these clusters will taste like they came from an actual candy shop instead of your pantry clean-out.
The 5-Minute Rest That Changes Everything
After you mix everything together, let the bowl sit for exactly five minutes before you start scooping. This brief pause lets the pretzels absorb just enough of the chocolate mixture to soften slightly at the edges while staying crunchy in the centers. It's like a magic trick — you get the perfect texture contrast without any actual work. Use this time to line your baking sheet with parchment, find your scoop, or just stare into space thinking about how smart you are for making these instead of another failed batch of cookies.
The Size Sweet Spot
Don't get cute and try to make these mini. Tiny clusters fall apart because they don't have enough binding mixture to hold together. Don't go giant either — you'll end up with a mouthful that's impossible to eat gracefully. Aim for about two tablespoons of mixture per cluster. This hits the perfect balance where they're substantial enough to feel satisfying but not so big that you feel guilty eating three. Or four. Or, you know, dinner.
Storage Secrets for Maximum Freshness
These clusters hate humidity more than curly hair on rainy days. Store them in an airtight container with a sheet of parchment between layers, and toss in one of those silica gel packets from your vitamin bottles if you have it. They'll stay crisp for a week in the fridge, though they've never lasted long enough in my house to test that limit. If they do start to get soft, 10 minutes in the freezer brings them right back to life, crisp and snappy and ready for their second act.
Creative Twists and Variations
This recipe is a playground. Here are some of my favorite ways to switch things up:
The Elvis Special
Add a diced ripe banana to the peanut butter mixture and use honey-roasted peanuts instead of regular. The combination of peanut butter, banana, and pretzels is like taking a bite of the King's favorite sandwich, but in candy form. Just be warned — these disappear faster than you can say "thank you very much," especially if you drizzle a little honey on top for that extra touch of Graceland glamour.
The Salty Caramel Dream
Swap out half the chocolate for caramel chips and add a generous sprinkle of flaky sea salt on top before they set. The caramel adds this buttery richness that plays beautifully against the salt, and the sea salt on top makes them look like they came from an upscale chocolate shop. People will ask where you bought them, and you get to casually mention that you made them. From scratch. In your kitchen. Like some kind of dessert wizard.
The White Chocolate Wonder
Use white chocolate chips instead of regular and add dried cranberries for a sweet-tart punch that makes these taste like holiday in a cluster. The white chocolate makes them look elegant and sophisticated, perfect for when you want to fool people into thinking you have your life together. They're especially gorgeous with a few gold sugar crystals sprinkled on top, turning your humble kitchen creation into something that looks positively regal.
The Spicy Surprise
Add a teaspoon of cayenne to the chocolate mixture and use chili-infused chocolate for a sweet-heat combo that sneaks up on you. The first bite tastes like regular chocolate-peanut butter heaven, and then the warmth hits — not enough to make your eyes water, just enough to make you reach for another one to figure out what's happening. They're conversation starters, these clusters. Conversation starters that you'll want to keep entirely to yourself.
The Trail Mix Remix
Throw in a handful of dried cherries, some toasted coconut flakes, and a few sunflower seeds along with your pretzels. Suddenly these clusters went from late-night snack to energy-boosting trail treat that you can absolutely justify eating for breakfast. They're basically health food now, what with all those antioxidants and healthy fats. That's my story and I'm sticking to it.
The Birthday Cake Mashup
Use white chocolate, add rainbow sprinkles to the mixture, and a few drops of vanilla extract. These taste like birthday cake and peanut butter had a beautiful baby, and they look like a party in cluster form. Perfect for actual birthdays, fake birthdays, or just Tuesdays that need brightening up. Because honestly, what Tuesday couldn't be improved by edible rainbow confetti?
Storing and Bringing It Back to Life
Fridge Storage
These clusters are fridge divas — they like their space, they like it cold, and they definitely like being the center of attention. Store them in an airtight container with layers separated by parchment paper to prevent them from sticking together. They'll keep beautifully for up to a week, though the texture is best within the first three days. After that, they start to lose that perfect snap, but they're still delicious enough that you won't be tossing them. Trust me, I've tested the limits of their fridge life, and "still delicious" is an understatement.
Freezer Friendly
Here's where these clusters really shine — they freeze like champions. Arrange them in a single layer on a baking sheet, freeze until solid, then transfer to a freezer bag. They'll keep for up to two months, which is approximately how long it takes for the craving to strike again. Eat them straight from the freezer for a firm, almost candy-bar texture, or let them sit for five minutes for a softer bite. Pro tip: hide them behind the frozen peas if you want them to last more than a week. Nobody ever looks behind the frozen peas.
Best Reheating Method
Okay, you don't actually reheat these — they're meant to be eaten cold or at room temperature. But if they've been in the fridge and you want to serve them to company, let them sit out for about 10 minutes first. This takes the chill off and lets the flavors really sing. If they've absorbed fridge odors (rare, but it happens), a quick 30-second stint in the freezer actually refreshes them, bringing back that crisp texture and clean flavor. It's like hitting the reset button on your clusters, turning them back into the fresh, addictive treats they were meant to be.