I still remember the first time I served blue cheese stuffed pears at a dinner party — my friend's skeptical eyebrow shot up so fast I thought it might escape his forehead. "Blue cheese... in fruit?" he muttered, clearly bracing for disaster, yet thirty minutes later he was shamelessly licking his fingers and demanding the recipe. That dramatic transformation from disbelief to obsession is exactly why this dish has become my go-to ace up the sleeve whenever I want to dazzle without sweating over the stove all afternoon.
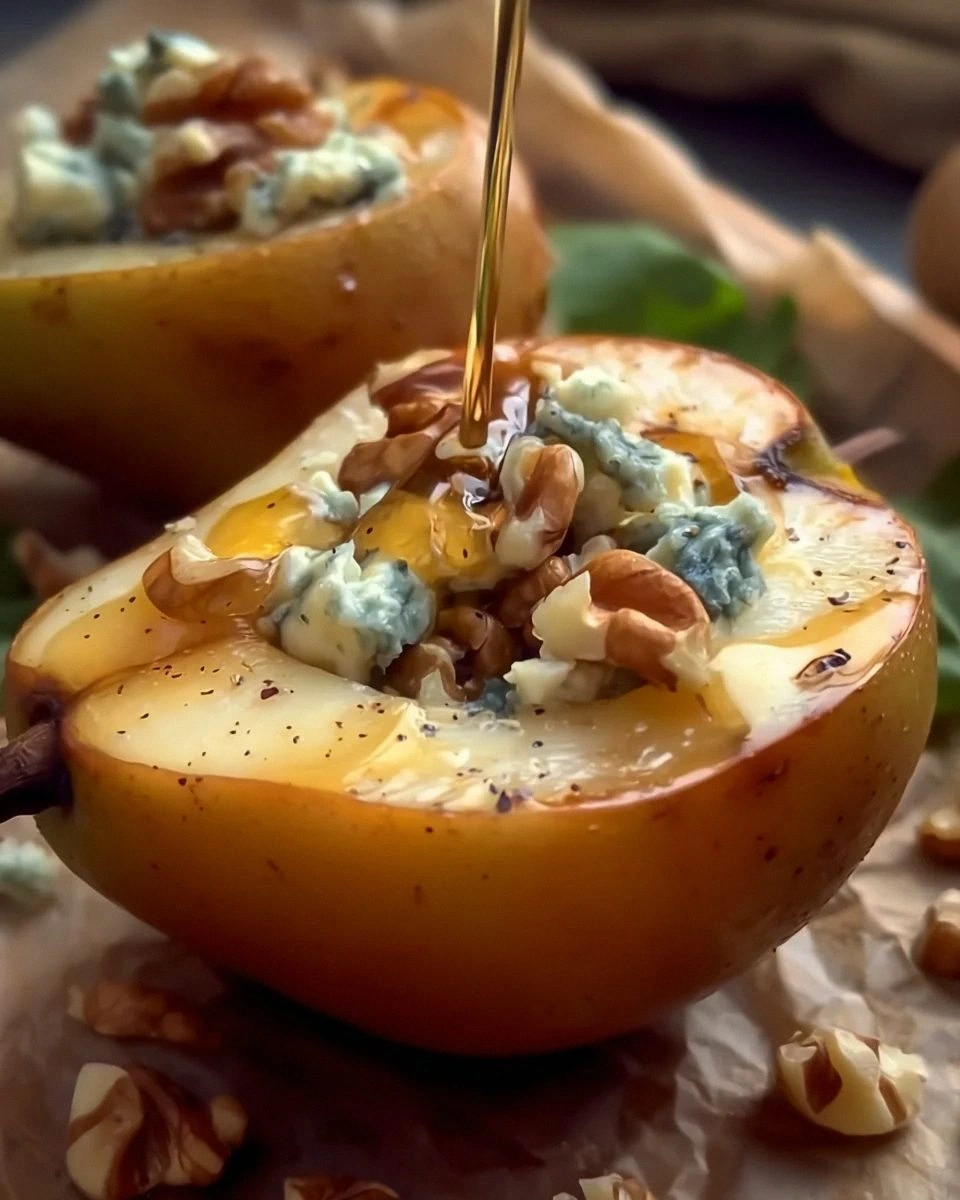
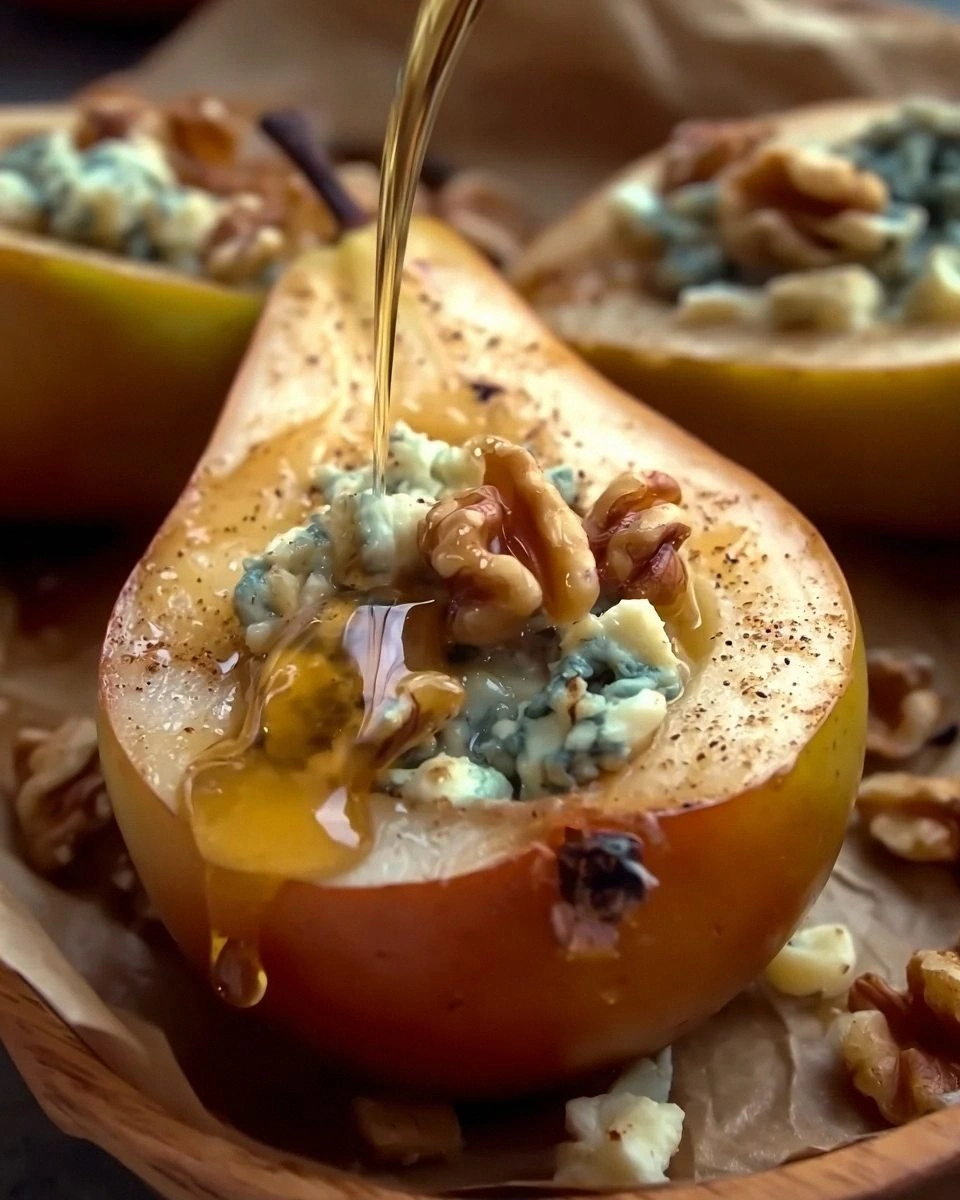
Picture this: tender pears roasted until their edges caramelize like autumn leaves under a late-October sun, their cavities cradling molten blue cheese that pools into a velvety sauce, all kissed with a drizzle of honey that crackles under a quick broiler finish. The aroma alone — a heady perfume of sweet fruit and funky cheese — is enough to prompt neighbors to knock on the door asking if they can join the party. And the texture? You get that yielding, spoon-soft pear flesh against the salty pop of blue cheese, contrasted by a handful of toasted walnuts for crunch that shatters like thin ice under your teeth.
What most recipes get wrong is treating the pear as a mere vessel rather than a co-star. They under-roast, use bland supermarket cheese, skip the honey glaze, and wonder why nobody goes back for seconds. Listen, if you've ever struggled with soggy bottoms or stuffing that tastes like socks, you're not alone — and I've got the fix. We're going to roast the pears until their natural sugars concentrate, balance the funky cheese with a hint of citrus zest, and finish with a honey-balsamic reduction that glazes each half like edible stained glass.
Okay, ready for the game-changer? We'll pre-roast the pears cut-side down so they develop those gorgeous caramelized edges, then flip, stuff, and flash under the broiler so the blue cheese melts into a molten lava of umami. By the end of tonight, you'll have a crowd-pleasing appetizer that feels restaurant-worthy yet takes under an hour from start to finish. Let me walk you through every single step — by the end, you'll wonder how you ever made it any other way.
What Makes This Version Stand Out
Flavor Tug-of-War: The sweet perfume of ripe pears wrestling with the salty, funky punch of blue cheese is culinary drama at its finest. Add honey for glossy sweetness and a squeeze of lemon to brighten the whole affair, and you've got a flavor triangle that'll make your palate do cartwheels. Texture Symphony: Silky pear flesh, molten cheese center, crunchy candied walnuts, and a crackly honey skin give you four distinct textures in one bite. Most appetizers deliver one, maybe two textures; this one gives you a full percussion section. Zero Fuss, All Glam: Fifteen minutes of active work, one sheet pan, and no fancy gadgets. While the pears roast, you can swirl a glass of wine and pretend you're on a cooking show — the oven does the heavy lifting. Make-Ahead Magic: Prep the pears, mix the stuffing, and toast the nuts up to a day ahead. When guests arrive, simply stuff and roast. If you've ever sweated over timing, you're not alone — and this is your new secret weapon. Cheese Upgrade: Skip the plastic-tub blue crumbles. We want a creamy French Roquefort or a crumbly English Stilton that melts into velvet. The difference? Think polyester versus silk sheets. Crowd Shock Factor: Half your guests will raise an eyebrow, the other half will dive in tentatively, and within minutes everyone will be fighting over the last pear. I dare you to taste this and not go back for seconds. Seasonal Flexibility: Pears are available year-round, but this dish feels tailor-made for fall and winter gatherings. Swap in apples or figs when pears aren't at their peak — the method remains bulletproof.Inside the Ingredient List
The Flavor Base
Pears are the star, but not just any pears. You want Bosc or Anjou — varieties sturdy enough to hold their shape under heat yet soft enough to spoon through like butter. Underripe pears will stay stubbornly crunchy; overripe ones collapse into mush. Look for a gentle give near the stem, a floral aroma at the neck, and skin free of bruises. If you sniff and smell nothing, walk away — fragrance is your best ripeness indicator.
Blue cheese delivers the funk, but quality matters. Pre-crumbled tubs are convenient yet often dry and salty. Buy a modest wedge and crumble it yourself; you'll taste sweet cream, pepper, and that signature tang without the harsh edge. Roquefort brings luxurious creaminess, Stilton offers crumbly boldness, and Gorgonzola dolce gives you a milder, crowd-friendly route. Pick your fighter based on how loudly you want to shout.
The Texture Crew
Toasted walnuts add a bitter counterpoint and a crunch that snaps like autumn twigs underfoot. Buy them whole and chop coarse so you get rugged shards, not sawdust. Pecans work in a pinch, offering sweeter, buttery notes, while pistachios bring color and a playful vibe. Whatever nut you choose, toast them dry in a skillet until they smell like warm earth — that's your cue they're ready.
Honey is more than sweetener; it's liquid gold that lacquers the pears under the broiler, forming a paper-thin shell that shatters between teeth. Use a floral wildflower or orange-blossom honey for perfume, or lean into bold buckwheat honey if you want malty depth. Maple syrup is an acceptable substitute, but you'll lose that viscous cling that makes the glaze so irresistible.
The Unexpected Star
Lemon zest may seem like an afterthought, yet it's the high note that keeps the dish from sliding into cloying territory. A whisper of citrus oil perfumes the cheese, elongating the flavor so each bite tastes fresh, not heavy. Skip it and the dish feels like it's wearing a wool sweater in July — still functional but decidedly uncomfortable.
A modest pinch of flaky sea salt on top right before serving amplifies both the sweet and funky elements, much like streetlights suddenly flicking on at dusk. Trust me, this micro-dose of saline crunch is the difference between good and unforgettable.
The Final Flourish
Fresh thyme leaves give an herbaceous whisper that ties fruit and cheese together like a diplomatic interpreter. Strip the leaves off woody stems and scatter just a few — too much and your appetizer starts tasting like potpourri. Rosemary works if you're after pine-forest drama, but go sparingly; it can bully the other flavors into silence.
A final drizzle of syrupy balsamic reduction lends drama and a tart-sweet counterpoint that makes guests close their eyes involuntarily. Buy the good stuff that's been aged until it pours like molasses, or simmer inexpensive balsamic with a spoon of honey until it coats the back of a spoon. The latter takes ten minutes and makes you look like a culinary wizard.
The Method — Step by Step
- Preheat your oven to 400°F and position a rack in the center. While it heats, halve the pears lengthwise and scoop out the seedy core with a melon baller, creating a cavity roomy enough for a decadent spoonful of cheese. Leave a modest border — too thin and the pear collapses under heat, too thick and you lose prime real estate for that molten filling. Rub the cut surfaces with a lemon wedge to prevent browning and to season the fruit with a subtle citrus kiss.
- Slice a paper-thin sliver off the rounded bottom so each pear half sits flat on the sheet pan without wobbling like a tipsy penguin. Arrange them cut-side down on parchment-lined aluminum — this encourages caramelization and prevents the dreaded sticking incident that leaves half your pear glued to the pan. Slide the tray into the oven and roast for fifteen minutes, just until the edges turn amber and the kitchen smells like pear cider and possibility.
- While the pears roast, crumble the blue cheese into a small bowl and stir in the honey, lemon zest, and a few cracks of black pepper. The mixture should resemble chunky icing — sticky enough to hold together yet soft enough to melt into a molten puddle later. If your cheese is especially dry, mash in a teaspoon of cream cheese; this insurance policy guarantees silky flow instead of oily separation. Taste and adjust — add more honey if you want sweetness to dominate, more zest if you crave brightness.
- Remove the tray from the oven and flip each pear with tongs — the undersides should sport a toasty mahogany lacquer that makes you want to eat them just like this. Spoon the cheese mixture into the cavities, mounding it slightly; the cheese will settle as it melts, so don't be shy. Return the tray to the oven for another eight minutes, just until the cheese starts to bubble at the edges like a mini volcanic crater. Keep a close eye; over-baking causes the cheese to separate into greasy pools, and nobody invited those to the party.
- Switch the oven to broil and move the rack up one notch. Scatter the toasted walnuts over the cheese, pressing gently so they adhere. Broil for two to three minutes, rotating the pan halfway for even browning. You're looking for a glossy, blistered top that smells like honeyed caramel and toasted nuts — that scent is your kitchen's version of a victory trumpet. Pull them out the moment the cheese bronzes; lingering here is the difference between Instagram-worthy and charcoal briquette.
- Transfer the pears to a serving platter and let them rest for five minutes — this brief pause allows the cheese to relax from molten to spoonably creamy. Drizzle with balsamic reduction in Jackson Pollock swoops, then shower with fresh thyme leaves and a final pinch of flaky salt. Serve warm with small forks or cocktail picks; guests will spear, bite, and immediately start making involuntary happy noises.
- If you want to gild the lily, add a few ruby pomegranate seeds for jewel-tone sparkle or a whisper of micro-greens for color contrast. But honestly, these pears hold their own without the extra pageantry. I've seen devout blue-cheese haters convert on the spot, and polite dinner parties devolve into fork-dueling tournaments over the last piece.
- Any leftovers — rare, but it happens — reheat beautifully in a low oven for ten minutes. Avoid the microwave; it turns the cheese into a greasy mess faster than you can say "culinary crime." Tuck leftover halves into a lunch salad the next day and prepare to be the envy of the office break room.
Insider Tricks for Flawless Results
The Temperature Rule Nobody Follows
Starting the pears cut-side down in a hot oven sets the Maillard reaction in motion, giving you those gorgeous caramelized edges that scream flavor. Lower temperatures yield pale, steamed fruit; higher and they scorch before softening. Stay goldilocks at 400°F and you'll hit the sweet spot every single time. If your oven runs hot, drop to 375°F but extend the initial roast by three minutes.
Why Your Nose Knows Best
When selecting pears, fragrance trumps feel every time. A ripe pear should smell like honeyed flowers at the stem end; if it's blank, walk away no matter how pretty it looks. Conversely, if the perfume is boozy or fermented, the interior is already mushy. Trust your schnoz — it's the most underutilized kitchen tool you already own.
The 5-Minute Rest That Changes Everything
I know, hot gooey cheese is calling your name, but patience pays dividends. Those five minutes allow the molten center to settle from volcanic to luxuriously spoonable, and the honey glaze sets into a crackly shell. Skip the rest and you'll burn tongues, lose presentation points, and miss that textural contrast that makes guests close their eyes in bliss.
Creative Twists and Variations
This recipe is a playground. Here are some of my favorite ways to switch things up:
The Mediterranean Detour
Swap honey for pomegranate molasses and blue cheese for creamy feta whipped with a splash of cream. Top with toasted pine nuts and fresh mint. The result is tangy, floral, and utterly addictive — perfect for those who find blue cheese too aggressive. Serve alongside lamb chops and prepare to be crowned dinner-party royalty.
Autumn Spice Route
Add a pinch of cinnamon and cardamom to the cheese mixture, and swap honey for maple syrup. Garnish with candied pecans and crisp sage leaves fried in brown butter. The warm spices echo cool-weather cravings and smell like sweater weather in edible form.
Smoky Bacon Make-Over
Fold crumbled crispy bacon into the blue cheese mix for a salty-smoky punch that converts even the most stubborn salad avoiders. Drizzle with a bourbon-honey glaze and finish with snipped chives. It's over-the-top indulgence that pairs ridiculously well with a dark stout.
Buffalo Wing Mash-Up
Blend the blue cheese with a teaspoon of buffalo hot sauce and a whisper of ranch seasoning. Top with crunchy celery leaf instead of thyme. You get all the flavors of wing night minus the sticky fingers, and football fans will erect a tiny statue in your honor.
Chocolate & Cheese Rebellion
For a dessert spin, stuff the pears with a mix of Gorgonzola dolce and mascarpone, add a grating of dark chocolate on top, and finish with candied orange peel. Sweet-savory desserts are having a moment, and this one straddles the line like a tightrope walker.
Storing and Bringing It Back to Life
Fridge Storage
Refrigerate cooled pears in an airtight container for up to three days, but store the walnuts separately so they retain crunch. Layer pears in a single layer if possible; stacking causes the cheese to smear and stick like clingy exes. Bring them to room temperature before reheating for the best texture.
Freezer Friendly
Freeze roasted (un-stuffed) pear halves on a tray until solid, then transfer to a freezer bag for up to two months. Thaw overnight in the fridge, stuff, and reheat in a 375°F oven for ten minutes. Texture softens slightly, but flavor remains surprisingly intact — perfect for emergency dinner-party situations.
Best Reheating Method
Revive pears in a 350°F oven for eight to ten minutes until warmed through; add a fresh sprinkle of cheese if needed. Avoid the microwave unless you enjoy rubbery fruit and greasy cheese. For a quick fix, place under a hot broiler for two minutes, watching like a hawk to prevent burning.