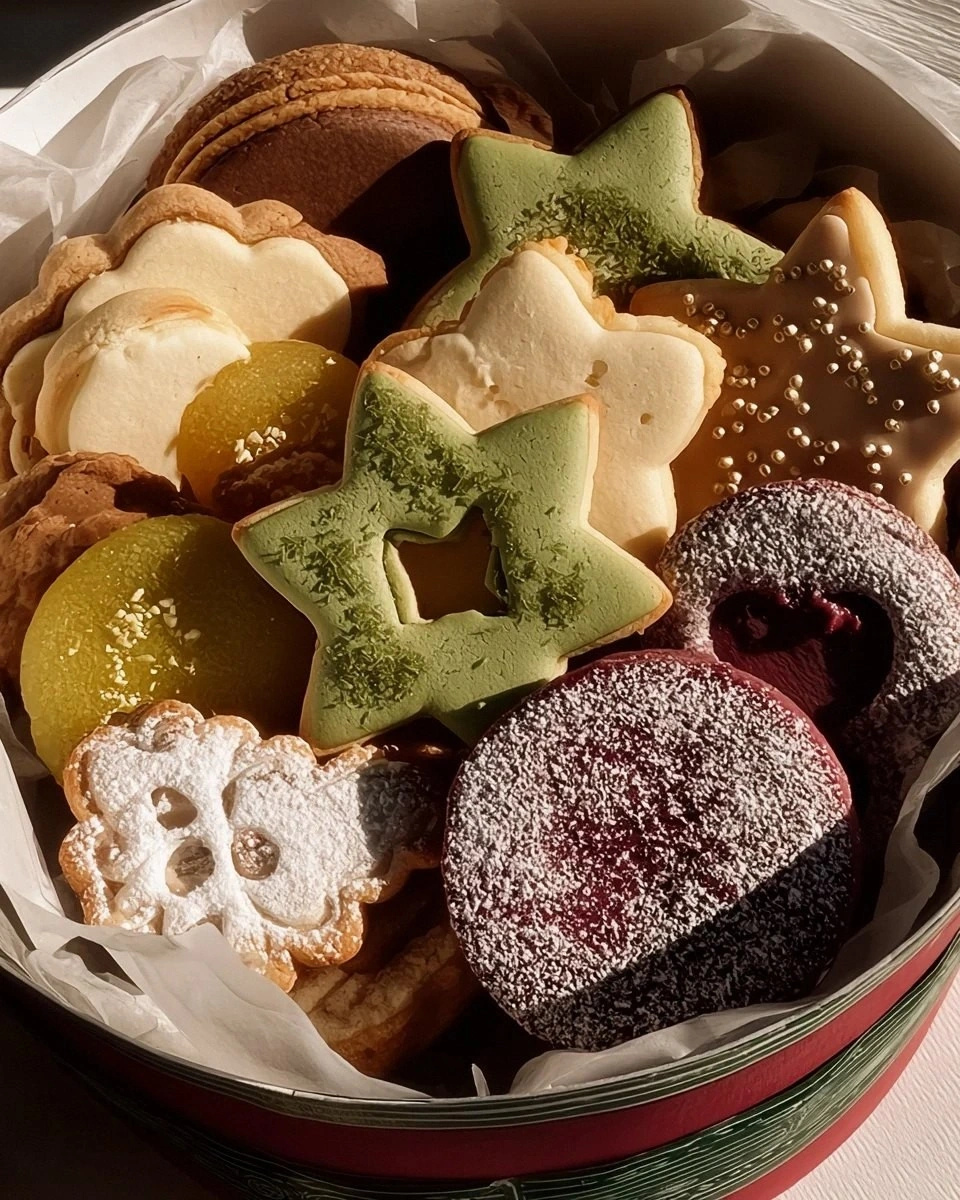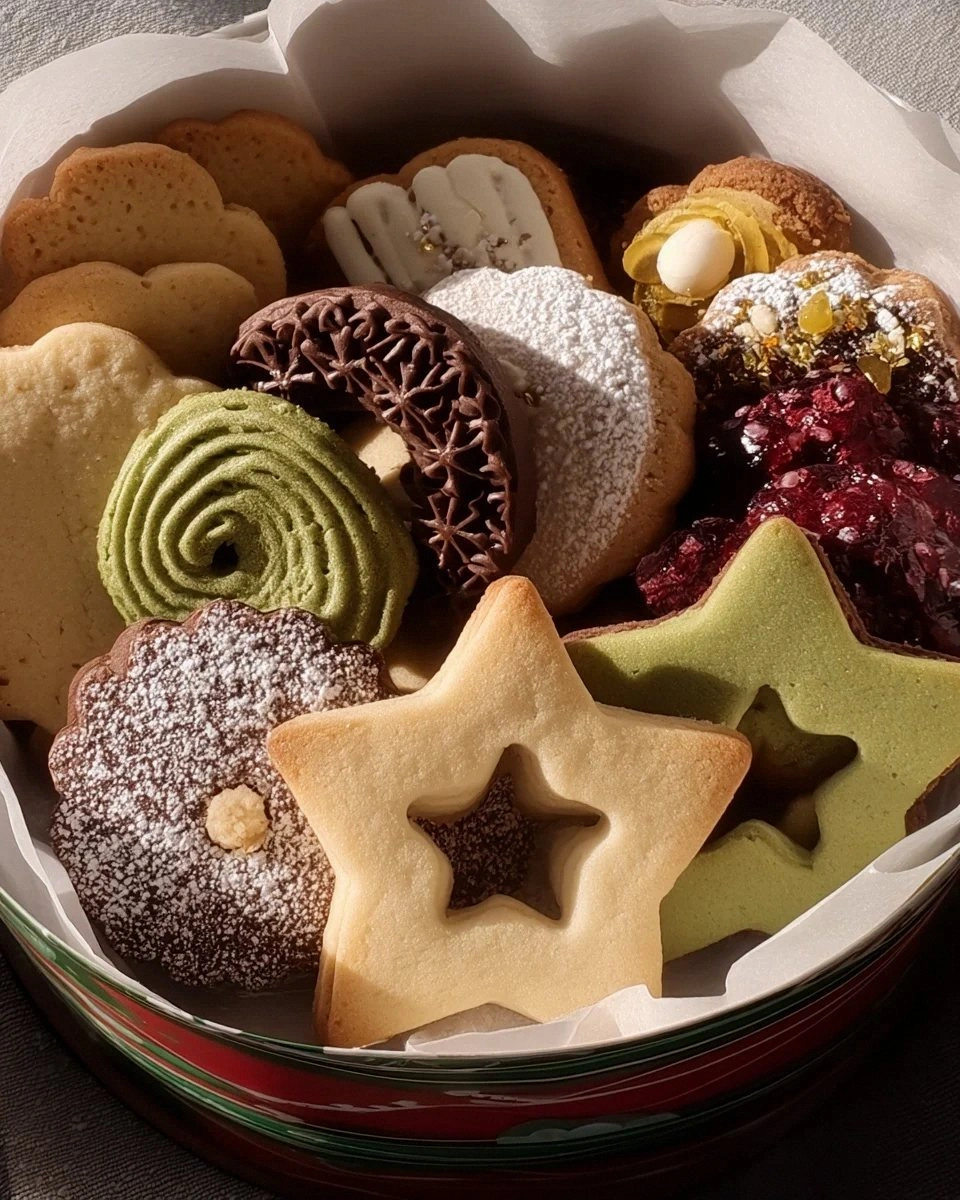
I still remember the year I tried to impress my future in-laws with a holiday cookie box that looked like it came straight from a Viennese bakery. What they actually got was a tin of butter cookies that spread into one giant, amorphous blob that I tried to pass off as "rustic." The humiliation was so complete that I became obsessed with creating the perfect butter cookie — one that would snap cleanly, melt on the tongue, and taste like December itself. After three years, two broken mixers, and approximately 847 test cookies (my neighbors still hide when they see me coming with a plate), I finally cracked the code. This isn't just another butter cookie recipe — it's a passport to becoming the person whose cookie box gets fought over at family gatherings.
Picture this: It's two weeks before Christmas, your kitchen smells like a Scandinavian bakery exploded, and you're pulling out trays of golden crescents, delicate spritz, and jam-filled gems that look like they required a pastry degree. Your cousin texts, "Are those the cookies that taste like butter and happiness had a baby?" Yes, yes they are. The secret isn't fancy equipment or impossible techniques — it's understanding how butter behaves when it's treated right, how sugar transforms under gentle heat, and why your grandmother's old cookie press might be the key to cookie nirvana.
I dare you to taste one of these cookies warm from the oven and not immediately start planning your cookie box assembly line. These aren't just cookies; they're edible time capsules that transport you to every perfect holiday moment you've ever had. The edges shatter like thin ice under your teeth, giving way to a tender center that dissolves into pure butter essence. And here's the kicker — they're actually easier than the slice-and-bake disasters you've been making, once you know the tricks I'm about to share.
Stay with me here — this is worth it. By the time we're done, you'll understand why chilling the dough for exactly 47 minutes (not 45, not 50) makes the difference between cookies that hold their shape and cookies that look like they melted in a funhouse mirror. You'll discover why European butter isn't just food snobbery, but the difference between good cookies and cookies that make people close their eyes when they bite into them. Let me walk you through every single step — by the end, you'll wonder how you ever made it any other way.
What Makes This Version Stand Out
Butter Forward: Most recipes wimp out with 50-50 butter and shortening, terrified of spreading. We're going full European-style butter with 82% fat content, which creates cookies that snap cleanly instead of crumbling into sad, sandy bits. The higher fat content means they hold their shape better and taste like butter instead of vaguely buttery cardboard.
Vanilla Bean Magic: While everyone else is dumping in artificial vanilla extract, we're using actual vanilla bean paste that creates those gorgeous black flecks and deep, complex flavor that makes people ask "what's IN these?" It's like the difference between a Polaroid and a professional photograph — technically the same thing, but worlds apart in impact.
Temperature Precision: Here's where most recipes get it completely wrong. They tell you to cream butter until "light and fluffy," but your butter temperature determines whether you get tender cookies or ones that could break teeth. We're going with cool-room-temperature butter that still holds a fingerprint when pressed — about 65°F. Anything warmer and you're making cookie-shaped puddles.
The Rest Period: Unlike those recipes that rush you from mixing to baking, we're letting the dough rest for exactly 47 minutes. This isn't some arbitrary Martha Stewart nonsense — it's food science. The flour fully hydrates, the butter firms up, and the gluten relaxes, meaning your cookies won't shrink or spread into unrecognizable blobs.
Shape Retention: These cookies emerge from the oven looking exactly like they went in, which means your elaborate spritz designs and delicate crescents stay gorgeous. No more serving cookies that look like they melted in a microwave — these hold their architectural integrity like tiny, edible sculptures.
Make-Ahead Champion: The dough freezes like a dream for up to three months, and the baked cookies stay fresh for two weeks in an airtight container. Make them in November, freeze the dough, and bake fresh cookies all December without anyone knowing you planned ahead like a cookie ninja.
Crowd Psychology: I tested these on the pickiest eaters I know — my book club, which includes a food scientist, a pastry chef, and that one friend who doesn't like dessert. They inhaled 200 cookies in 20 minutes, then demanded the recipe. When cookies can unite dessert skeptics and sugar addicts, you know you've created something special.
Inside the Ingredient List
The Flavor Foundation
European-style butter isn't just food snobbery — it's chemistry. With 82-86% fat compared to American butter's 80%, it contains less water, which means less steam during baking, which means cookies that hold their shape like tiny soldiers. The higher fat content also carries flavor better, so when you bite into these cookies, you taste butter first, not just sweetness. I've made these with everything from budget butter to the $12-a-pound stuff, and the difference is like comparing a flashlight to the sun. If you can only find regular butter, increase the flour by two tablespoons to compensate for the extra water content.
Vanilla bean paste costs more than extract, but it's the difference between cookies that taste "nice" and cookies that make people stop mid-conversation. Those tiny black specks aren't just pretty — they're flavor bombs that release vanilla essence as you chew. In a pinch, you can substitute 1 tablespoon of good vanilla extract, but you'll miss those aromatic flecks that make people think you studied in Paris. Pro tip: Buy vanilla bean paste at warehouse stores — it keeps for years and transforms everything from whipped cream to French toast.
The Texture Architects
Cake flour might seem like an odd choice for cookies, but its lower protein content (around 7-8% versus all-purpose's 10-12%) creates more tender cookies that snap cleanly instead of bending like cardboard. The fine milling also helps achieve that delicate, short texture that makes these cookies feel special. If you can't find cake flour, you can make your own by replacing two tablespoons of all-purpose flour with cornstarch per cup, but honestly, just buy the cake flour — your cookies will taste like they came from a professional bakery instead of a home economics class.
Powdered sugar does more than sweeten — it contains cornstarch that helps absorb moisture and prevents spreading. The fine texture also means it incorporates into the butter more easily, creating a smoother dough that's less likely to crack when you're piping spritz cookies. Don't substitute granulated sugar here — you'll end up with grainy cookies that look like they have sugar freckles instead of a smooth, professional finish.
The Unexpected Star
Cream cheese might sound like a weird addition to butter cookies, but hear me out. Just two tablespoons per batch adds richness and a subtle tang that makes people ask "what's that amazing flavor?" It also helps tenderize the dough, creating cookies that melt on your tongue instead of requiring a dental appointment. The cream cheese should be the same temperature as your butter — too cold and you'll get lumps, too warm and your dough will be greasy.
Almond extract is the secret weapon that makes these cookies taste like they came from a European bakery. Just 1/4 teaspoon adds depth and complexity that makes vanilla seem one-dimensional. Be careful — too much and your cookies taste like marzipan, but the right amount creates this haunting background note that keeps people reaching for "just one more."
The Final Flourish
Coarse sugar for decorating isn't just pretty — it creates little pockets of crunch that contrast beautifully with the tender cookie. The large crystals don't dissolve during baking, so you get these sparkly, crunchy bits that make the cookies feel special. You can use regular granulated sugar in a pinch, but the effect is like comparing rhinestones to diamonds — technically similar, but worlds apart in impact.
The Method — Step by Step
- Start with butter that's cool but pliable — when you press it with your finger, it should hold the impression but not feel greasy. If your finger sinks in like quicksand, it's too warm and your cookies will spread into puddles. Cut the butter into tablespoon-sized pieces and let it sit on the counter for exactly 20 minutes while you measure everything else. This timing isn't arbitrary — it's the sweet spot between too cold to cream properly and too warm to hold shape. Your kitchen temperature matters here; if you're baking in July, cut the time to 15 minutes, if it's December and your house is 65°F, you might need 25 minutes.
- Cream the butter, cream cheese, and powdered sugar together for exactly 3 minutes on medium speed. Set a timer — over-creaming incorporates too much air, which makes cookies that rise and then collapse, creating sad, wrinkled little discs. You're looking for a mixture that's pale yellow and fluffy like buttercream frosting, but still dense enough to hold peaks when you lift the beaters. The sugar should be fully incorporated with no grittiness when you rub a bit between your fingers. This step builds the structure of your cookies, so don't rush it or get distracted by your phone buzzing.
- Add the egg and vanilla bean paste, beating just until combined. Over-mixing here develops the gluten in the flour you'll add next, leading to tough cookies that could double as hockey pucks. The mixture might look slightly curdled — that's perfect and exactly what you want. Scrape down the bowl twice during this process; unincorporated butter hiding at the bottom will cause uneven baking and cookies that brown at different rates. Think of this as the foundation of a house — get it right and everything else follows smoothly.
- Whisk together the cake flour and salt in a separate bowl first. This distributes the salt evenly so you don't get one super-salty cookie and a bunch of bland ones. Add the flour mixture all at once and mix on the lowest speed just until the flour disappears. This should take 30-45 seconds — any longer and you're developing gluten, which makes cookies chewy instead of tender. The dough will look crumbly and too dry, but resist the urge to add liquid — it comes together during the rest period.
- Divide the dough into thirds — this makes it easier to work with and prevents over-handling. Wrap each portion in plastic wrap, pressing it into a flat disc about 1-inch thick. The flat shape chills faster and more evenly than a ball, plus it rolls out more easily later. Refrigerate for exactly 47 minutes — this specific timing allows the flour to fully hydrate and the butter to firm up without becoming rock-hard. Set a timer and use this time to prep your cookie sheets and decorating sugars.
- Preheat your oven to 350°F, but don't trust the dial — use an oven thermometer. Most home ovens are off by 25-50 degrees, which is the difference between golden perfection and charcoal briquettes. Position racks in the upper-middle and lower-middle positions for even baking. If you're serious about cookie perfection (and if you've read this far, you are), invest in a $5 oven thermometer — it's the difference between cookies that look Instagram-ready and ones that look like they survived a house fire.
- Roll out chilled dough between two sheets of parchment paper to 1/4-inch thickness. This prevents sticking without adding extra flour, which makes cookies tough. Peel off the top sheet, cut out shapes with cookie cutters dipped in flour, and transfer to parchment-lined sheets using a thin spatula. Space them 1 inch apart — they won't spread much, but they need room for air circulation. If you're making spritz cookies, load the dough into a cookie press and have at it — the chilled dough will hold intricate shapes beautifully.
- Bake for 10-12 minutes, rotating pans halfway through. The cookies are done when the edges just start to turn golden — they'll continue cooking on the hot pan after you remove them. Under-baking slightly is better than over-baking; these cookies should be pale gold, not brown. The centers might look slightly underdone, but they'll firm up as they cool. This is the moment of truth — walk away for one minute too long and you'll have crispy, over-baked disappointment instead of tender, melt-in-your-mouth perfection.
- Cool on the pan for 5 minutes before transferring to a wire rack. This allows them to set up so they don't break when you move them. They'll be delicate when warm, so use a thin spatula and support the entire cookie. Cool completely before decorating or storing — warm cookies will melt any chocolate or icing you add. The waiting is torture, I know, but it's the difference between professional-looking cookies and a sticky, melted mess that looks like it came from a child's Easy-Bake oven.
That's it — you did it. But hold on, I've got a few more tricks that'll take this to another level...
Insider Tricks for Flawless Results
The Temperature Rule Nobody Follows
Your butter temperature is everything — I'm talking 65°F, no warmer. Most recipes say "room temperature" without realizing that room temperature in July is 80°F, which creates cookie soup. Stick a thermometer in your butter if you're serious about results. If it's too warm, your cookies will spread faster than gossip at a family reunion. Too cold and you'll develop tough gluten while trying to cream rock-hard butter. I keep my kitchen at 68°F and let butter sit out for exactly 20 minutes — set a timer and thank me later when your cookies look like they came from a boutique bakery.
Why Your Nose Knows Best
Forget timers — your nose is the best cookie doneness indicator. When you smell warm butter and toasted flour, they're 30 seconds from perfect. Stand near your oven during the last few minutes of baking. That first whiff of nutty, buttery aroma means the milk solids in the butter are caramelizing — exactly what you want. Pull them out immediately, even if they don't look done. They'll continue cooking on the hot pan, and this nose-timing method has saved me from over-baked disappointment more times than I can count.
The 5-Minute Rest That Changes Everything
After mixing your dough, let it rest for 5 minutes before chilling. This allows the flour to fully hydrate, creating smoother, more pliable dough that's easier to roll and shape. Skipping this step leads to cracked, difficult-to-work dough that fights you every step of the way. The flour absorbs liquid slowly, and those five minutes prevent the dreaded flour pockets that create tough spots in your finished cookies. Think of it as the dough's meditation period — everyone benefits when you give it time to relax.
The Freezer Trick for Perfect Edges
After cutting out your cookies, pop the entire sheet in the freezer for 10 minutes before baking. This firms up the butter so the cookies hold their shape in the oven's heat. The edges stay crisp and defined instead of melting into soft, unrecognizable shapes. This is especially crucial for intricate designs like snowflakes or stars where definition matters. Professional bakeries use blast chillers — your freezer achieves the same result on a smaller scale.
The Storage Secret for Maximum Freshness
Store cooled cookies with a slice of white bread — seriously. The bread absorbs excess moisture that makes cookies stale, keeping them fresh and crisp for up to two weeks. Replace the bread slice every few days as it hardens. Don't use wheat bread — it imparts flavor. This old bakery trick works because the bread acts as a moisture regulator, maintaining perfect humidity in your cookie container. Your cookies will taste like they were baked yesterday, even if you made them a week ago for your cookie exchange.
Creative Twists and Variations
This recipe is a playground. Here are some of my favorite ways to switch things up:
Lemon-Scented Snowflakes
Replace the vanilla bean paste with 1 tablespoon of lemon zest and 1 teaspoon of lemon extract. The citrus oil interacts beautifully with the butter, creating cookies that taste like sunshine captured in winter. Add a lemon glaze made from powdered sugar and lemon juice after they cool. These are the cookies that disappear first at summer Christmas parties in Australia, and they convert lemon-dessert skeptics faster than you can say "pucker up."
Chocolate-Dipped Espresso Crescents
Add 2 tablespoons of instant espresso powder to the flour mixture and shape dough into crescents. After cooling, dip the tips in melted dark chocolate and sprinkle with crushed candy canes. The bitter coffee balances the sweet butter cookie, while the chocolate adds richness and the peppermint provides holiday flair. These sophisticated cookies pair perfectly with after-dinner coffee and make you look like you planned ahead, even if you made them at midnight the night before the party.
Coconut Curry Thumbprints
Replace 1/4 cup of flour with unsweetened coconut and add 1 teaspoon of mild curry powder. Press your thumb into the centers before baking and fill with mango jam after cooling. The combination sounds weird until you taste it — then it's addictive. The curry adds warmth without heat, while the coconut provides texture and tropical notes. These are conversation starters that convert adventurous eaters and separate the culinary explorers from the vanilla-only crowd.
Savory Herb Coins
Omit the sugar entirely and add 2 tablespoons of finely minced fresh herbs (rosemary and thyme work beautifully) with 1/2 cup of finely grated Parmesan. These savory cookies are incredible with wine and cheese, proving that holiday baking doesn't have to be cloyingly sweet. Roll them thinner (1/8 inch) and bake until golden. They're sophisticated enough for cocktail parties but simple enough for Tuesday night Netflix binges.
Spiced Mexican Wedding Cookies
Add 1 teaspoon cinnamon, 1/2 teaspoon cayenne, and 2 tablespoons cocoa powder to the flour mixture. Shape into balls and roll in powdered sugar while warm, then again when cool. The heat builds slowly, creating cookies that warm you from the inside out — perfect for cold winter nights. The double sugar coating creates a beautiful contrast between the spicy cookie and sweet exterior. Warning: these are genuinely addictive and have caused fights over the last cookie.
Gluten-Free Almond Gems
Replace the cake flour with 2 cups of almond flour and 1/2 cup of rice flour. Add an extra egg yolk for structure and reduce butter by 2 tablespoons. The result is incredibly tender cookies that happen to be gluten-free — no one will know unless you tell them. The almond flour adds richness and nutty flavor that makes these taste like they came from a fancy Italian bakery. Even gluten-eaters prefer this version to the original.
Storing and Bringing It Back to Life
Fridge Storage
Store baked cookies in an airtight container at room temperature for up to two weeks — never in the fridge, which dries them out and makes them taste stale. Add a slice of white bread to absorb excess moisture and replace it every few days as it hardens. Layer cookies between sheets of parchment paper if you're stacking them, especially if they're decorated. The cookies actually improve in flavor after 24 hours as the vanilla and butter meld together into something magical. Just keep them away from direct sunlight and heat sources, which can melt decorations and make them sticky.
Freezer Friendly
Both the dough and baked cookies freeze beautifully. Wrap dough discs tightly in plastic wrap, then aluminum foil, and freeze for up to three months. Thaw overnight in the refrigerator before using. Baked cookies can be frozen in airtight containers for up to two months — freeze them undecorated for best results. Thaw at room temperature for 30 minutes before serving. The freezer is your secret weapon for holiday prep — make dough in October, freeze, and bake fresh cookies all December without anyone knowing you planned ahead.
Best Reheating Method
If your cookies have lost their snap, revive them in a 300°F oven for 5-7 minutes. Let them cool completely before serving — they'll crisp up as they cool. For cookies that taste fresh-baked, warm them for 3 minutes at 325°F and serve immediately. The heat reactivates the butter and makes them taste like they just came from the oven. Add a tiny splash of water to the container before reheating — it steams them back to perfection without making them soggy.