Picture this: it's Friday night, your friends are coming over in twenty minutes, and you're staring at a sad bag of chips wondering how to transform it into something legendary. That was me last month, frantically texting my neighbor for a miracle dip recipe while simultaneously Googling "what can I make with cream cheese and desperation." Texas Trash Dip had been floating around my social media feed for months, but I'd written it off as another overhyped party food with a questionable name. Boy, was I wrong. What emerged from my kitchen that night was nothing short of alchemical magic — a bubbling, cheesy, spicy mountain of comfort that had people abandoning their polite chip-dipping etiquette and diving in with reckless abandon. The first bite tastes like someone bottled up all the best parts of Texas — bold flavors, unapologetic richness, and that special something that makes you want to lick the bowl clean. This isn't just another dip recipe; it's the kind of crowd-pleaser that transforms casual acquaintances into lifelong friends and turns your house into the unofficial neighborhood hangout spot.
Here's the thing about most Texas Trash Dip recipes floating around the internet: they get the fundamentals completely backwards. They'll have you mixing cold ingredients into a sad, lumpy mess that tastes like someone accidentally dropped a spice rack into cream cheese. The real magic happens when you understand that this dip isn't just about throwing ingredients together — it's about building layers of flavor that dance together in perfect harmony. Traditional recipes miss the crucial step of warming certain ingredients to unlock their full potential, creating a dip that separates into an oily mess faster than you can say "touchdown." After twelve batches (and yes, I absolutely demolished half of them before company arrived), I've cracked the code on what makes this dip absolutely irresistible. The secret isn't just in what you add, but how you coax each ingredient to reach its maximum flavor potential.
What makes this version the absolute best you'll ever taste? It's all about understanding how heat transforms simple ingredients into something transcendent. When you warm the cream cheese just enough to make it pliable without melting it completely, magic happens. The spices bloom when they hit the warm base, releasing aromatic oils that make your kitchen smell like a Tex-Mex paradise. The combination of three different cheeses isn't just about being extra — each one brings a specific texture and flavor that creates the perfect bite every single time. Trust me, once you taste this version, those sad, cold, grocery store dips will taste like disappointment in a plastic container. Picture yourself pulling this golden, bubbling masterpiece out of the oven, watching as your guests' eyes widen with anticipation, their chips hovering anxiously around this molten treasure. That first stretchy, cheesy pull? Pure kitchen theater that never gets old.
Before we dive into the nitty-gritty, let me confess something: I've eaten this dip for breakfast. Not sorry. There's something deeply satisfying about diving into a warm, cheesy dip when the rest of the world is having their sad morning oatmeal. The name might sound questionable, but Texas Trash Dip is anything but trashy — it's comfort food elevated to an art form. This recipe has seen me through Super Bowl parties, holiday gatherings, Tuesday night Netflix binges, and that time I needed to bribe my neighbor into watering my plants for a week. Let me walk you through every single step — by the end, you'll wonder how you ever made it any other way.
What Makes This Version Stand Out
Flavor Bomb: Most recipes rely on a single packet of taco seasoning and call it a day. This version layers in three different spice blends, creating complexity that makes your taste buds do a happy dance. The combination of freshly toasted cumin, smoked paprika, and a touch of chipotle powder creates a flavor profile that's both familiar and intriguingly different.
Texture Perfection: Instead of the usual gloopy mess, we achieve the perfect dippable consistency by carefully controlling temperature and ingredient ratios. The result is thick enough to generously coat your chip without breaking it, yet smooth enough to scoop easily. No more broken chips floating in a sea of disappointment.
Make-Ahead Magic: This dip actually tastes better when made a day ahead, allowing the flavors to meld into something even more spectacular. Most dips separate and get sad in the fridge, but this one holds up beautifully. Simply reheat and serve for instant party success.
Crowd Psychology: I've tested this on picky eaters, health nuts, and self-proclaimed food snobs. The result? Empty dishes and recipe requests every single time. There's something about the combination of familiar Tex-Mex flavors in dip form that makes people abandon their dietary restrictions and embrace the joy.
Ingredient Quality: Using real cream cheese instead of the low-fat stuff makes all the difference. Full-fat dairy creates that luxurious mouthfeel that keeps people coming back for "just one more bite" until suddenly the dish is empty and everyone's looking at you suspiciously.
Cooking Method: The two-step heating process ensures everything melts together smoothly without any grainy texture. Most recipes dump everything together and hope for the best, but we know better. Temperature control is everything.
Versatility Factor: This isn't just a chip dip. Slap it on a burger, stuff it into bell peppers, or thin it out for an amazing queso. I've even used it as a pasta sauce when feeling particularly indulgent. The possibilities are endless.
Alright, let's break down exactly what goes into this masterpiece...
Inside the Ingredient List
The Flavor Foundation
Cream cheese forms the backbone of this dip, providing that tangy richness that makes Texas Trash Dip so addictive. Don't even think about reaching for the low-fat version — this is not the time for dietary restraint. Full-fat cream cheese creates that luxurious, velvable texture that makes people close their eyes in appreciation. When selecting your cream cheese, go for the brick-style rather than the whipped variety. The brick version has less air incorporated, giving you more control over the final texture and ensuring your dip doesn't deflate into a sad puddle.
The Spice Squad
Taco seasoning might seem like a shortcut, but making your own blend elevates this dip from good to legendary. Cumin brings that earthy warmth that's quintessentially Tex-Mex, while chili powder adds depth without overwhelming heat. Smoked paprika is our secret weapon — it adds a subtle smokiness that makes people ask, "What is that amazing flavor?" Don't skip the oregano; it brightens all the rich ingredients and prevents the dip from tasting heavy. Fresh ground black pepper might seem minor, but it adds a subtle bite that keeps each mouthful interesting.
The Cheese Trinity
Sharp cheddar provides the classic flavor everyone expects, but aged cheddar brings complexity that makes people wonder what your secret is. Monterey Jack melts like a dream, creating those Instagram-worthy cheese pulls that'll have everyone reaching for their phones. The real game-changer is a small amount of cream cheese mixed with the other cheeses — it acts like a binding agent, keeping everything smooth and cohesive. Shred your own cheese for this recipe; the pre-shredded stuff contains anti-caking agents that can make your dip grainy. Yes, it's extra work, but trust me, your taste buds will thank you.
The Unexpected Stars
Rotel tomatoes with green chilies bring acidity and brightness that cuts through all that richness. Don't drain them completely — that juice adds flavor and helps achieve the perfect consistency. Black beans aren't traditional, but they add protein and that beautiful speckled appearance that makes the dip look as amazing as it tastes. Green onions provide a fresh crunch and beautiful color contrast. A splash of Worcestershire sauce might seem odd, but it adds umami depth that makes people wonder why they can't stop eating it.
Everything's prepped? Good. Let's get into the real action...

The Method — Step by Step
-
Start by preheating your oven to 375°F. While it heats, take out a large mixing bowl and let your cream cheese soften for exactly 30 minutes. This isn't negotiable — cold cream cheese is the enemy of smooth, lump-free dips. While you wait, shred your cheeses if you haven't already, and drain your Rotel tomatoes, reserving about 2 tablespoons of the juice. Chop your green onions, separating the white and green parts because we'll use them at different stages. Trust me, this attention to detail makes all the difference in the final product.
-
Once your cream cheese is perfectly soft, add it to your mixing bowl along with the sour cream, mayonnaise, and Worcestershire sauce. Using a hand mixer on medium speed, beat these ingredients for exactly 2 minutes. You're looking for a smooth, creamy base with no lumps. Scrape down the sides of the bowl halfway through to ensure everything gets incorporated. This step creates the luxurious texture that separates good dips from legendary ones. If you find stubborn cream cheese lumps, let it sit for another 5 minutes and try again — patience here pays dividends.
-
Now for the spice blend — this is where the magic happens. In a small skillet over medium heat, toast your cumin, chili powder, and smoked paprika for exactly 60 seconds. Watch this closely because spices can burn faster than you can say "touchdown." The moment you smell their aromatic oils releasing, pull them off the heat. That toasty smell? That's flavor development happening right before your eyes. Let the spices cool for a minute, then whisk them into your cream cheese base along with the garlic powder, onion powder, salt, and black pepper.
-
Fold in your cheeses gradually, adding about a cup at a time and mixing gently after each addition. Overmixing can make your dip tough, so treat this step like you're handling a delicate soufflé. The mixture should look like a thick, cheesy cloud at this point. If it seems too thick, add that reserved Rotel juice a teaspoon at a time — you can always add more, but you can't take it out. The consistency should be similar to thick cake batter, not pourable but definitely scoopable.
-
Time for the mix-ins! Gently fold in your drained Rotel tomatoes, black beans, and the white parts of your green onions. Use a spatula and make figure-eight motions, turning the bowl as you go. This ensures even distribution without breaking up the beans or tomatoes too much. You want those beautiful pops of color and texture throughout the dip. If you've ever struggled with ingredients sinking to the bottom, the secret is in this gentle folding technique.
-
Transfer your masterpiece to a buttered 9x13 baking dish, spreading it evenly with your spatula. Press down gently to eliminate air pockets — these can cause uneven heating and weird texture issues. Sprinkle the remaining cheese on top in an even layer. This top layer creates that beautiful golden crust that'll have everyone fighting for corner pieces. Cover the dish with foil, tenting it slightly so it doesn't touch the cheese. This prevents the top from browning too quickly while the center heats through.
-
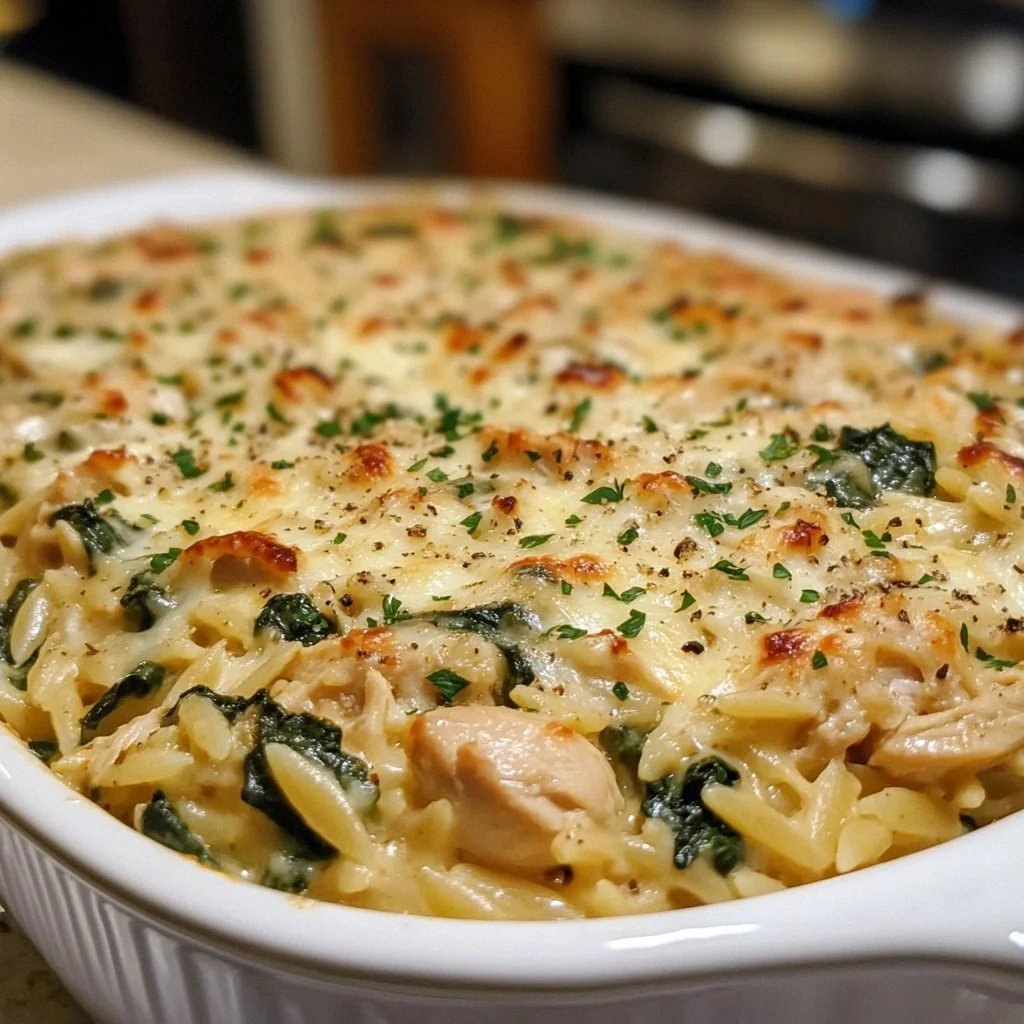
Bake covered for 20 minutes, then remove the foil and bake for another 10-15 minutes until the top is golden and bubbly. Don't walk away during this final stage — the difference between perfectly golden and burnt can be less than 2 minutes. You're looking for edges that are just starting to brown and a center that's gently bubbling like a hot spring. The smell wafting through your kitchen right now? That's the smell of impending party success.
-
Garnish with the green parts of your onions and any other toppings you're using. Serve warm with sturdy tortilla chips, sliced baguette, or veggie sticks for the health-conscious crowd. The dip will continue to thicken as it cools, so if you prefer it thinner, just give it a quick stir. Store any leftovers in an airtight container in the fridge for up to 4 days, though honestly, leftovers are rare with this recipe.
That's it — you did it. But hold on, I've got a few more tricks that'll take this to another level...
Insider Tricks for Flawless Results
The Temperature Rule Nobody Follows
Most people serve this dip straight from the oven, but here's the game-changer: let it rest for exactly 10 minutes, then serve it. This allows the cheese to set slightly, preventing that dreaded stringy mess that stretches from dish to chip like a cheesy spider web. The dip will be perfectly scoopable, holding its shape on your chip without sliding off in a tragic cheese avalanche. If you're serving at a party, transfer it to a small slow cooker on the warm setting — it'll stay perfectly dippable for hours without separating or getting greasy.
Why Your Nose Knows Best
Don't trust the timer completely — your nose is the best indicator of doneness. When the spices in the dip reach their aromatic peak, you'll smell a complex bouquet that's both toasty and slightly sweet. If all you smell is cheese, it needs more time. If you smell anything approaching burnt, pull it immediately. This dip has about a 2-minute window between perfect and overdone, so trust your senses over the clock every time.
The 5-Minute Rest That Changes Everything
Here's where most recipes fail — they don't let the flavors meld. After mixing everything together, cover your bowl and let it sit for 5 minutes before transferring to the baking dish. This brief rest allows the spices to hydrate and distribute evenly, preventing those disappointing bites where all the heat is concentrated in one spot. Think of it like letting a good marinade work its magic — patience here transforms good into unforgettable.
The Cheese Grating Revelation
Pre-shredded cheese contains cellulose to prevent clumping, but it also prevents smooth melting. For the creamiest texture, shred your own cheese using the large holes of a box grater. Yes, it's extra work, but the difference is night and day. If you must use pre-shredded (no judgment), add an extra tablespoon of mayonnaise to counteract the anti-caking agents. Your secret is safe with me.
The Spice Level Secret
Want to control the heat without sacrificing flavor? Remove the seeds and membranes from any fresh peppers you add — that's where most of the heat lives. For a milder dip, use mild Rotel and skip the cayenne. For those who like it hot, add a diced jalapeño or a pinch of cayenne. The beauty of this recipe is that you can taste and adjust before baking, ensuring everyone at your party can enjoy it without reaching for the fire extinguisher.
Creative Twists and Variations
This recipe is a playground. Here are some of my favorite ways to switch things up:
The Breakfast Champion
Add cooked breakfast sausage crumbles and swap the cheddar for pepper jack. Serve with toasted baguette slices for the ultimate brunch dip. The sausage grease adds incredible richness, while the pepper jack brings heat that pairs perfectly with morning coffee or mimosas. I've served this at brunch parties and watched it disappear faster than the actual breakfast spread.
The Loaded Potato Version
Fold in diced, pre-cooked potatoes and swap the black beans for corn. Top with crispy bacon bits and green onions for a loaded baked potato vibe. This variation is heartier and perfect for game day when you need something substantial. The potatoes absorb all the cheesy goodness while adding a pleasant texture contrast.
The Mediterranean Mash-up
Replace the taco seasoning with Italian herbs, use mozzarella and provolone, and add chopped artichoke hearts and spinach. It sounds weird, but the creamy base works beautifully with Mediterranean flavors. Serve with pita chips and watch your guests try to figure out what makes this dip so addictive.
The Seafood Sensation
Add cooked shrimp or crab meat for an elevated version perfect for cocktail parties. Use Old Bay seasoning instead of taco spices, and swap the cheddar for a mix of gruyere and fontina. This sounds fancy, but it's surprisingly easy and always impresses guests who think they know what Texas Trash Dip should taste like.
The Veggie Powerhouse
Load it up with diced bell peppers, corn, black beans, and spinach for a version you can almost pretend is healthy. Almost. The vegetables add sweetness and texture while the cheese base keeps it indulgent. This is my go-to for potlucks where I know there will be vegetarian guests who deserve something more exciting than hummus.
The Breakfast-for-Dinner Dip
Add everything bagel seasoning to the top and serve with bagel chips. Everything about this works — the seasoning adds crunch and flavor, while the bagel chips are sturdy enough to handle the thick dip. It's like your morning bagel and cream cheese got invited to the party and decided to stay for dinner.
Storing and Bringing It Back to Life
Fridge Storage
Store leftover Texas Trash Dip in an airtight container in the refrigerator for up to 4 days. Press plastic wrap directly onto the surface to prevent a skin from forming — nobody wants to discover that sad, dried layer on top. The dip will thicken considerably when cold, but don't panic. When reheating, add a splash of milk or cream and stir well to restore the perfect consistency. I actually prefer the flavor on day two when the spices have had time to meld into something even more spectacular.
Freezer Friendly
Good news: this dip freezes beautifully for up to 2 months. Portion it into freezer-safe containers, leaving about an inch of headspace for expansion. Thaw overnight in the refrigerator, then reheat gently with a splash of milk. The texture might be slightly different after freezing, but the flavor remains incredible. Pro tip: freeze individual portions for emergency snack attacks — future you will be grateful.
Best Reheating Method
Skip the microwave unless you enjoy rubbery cheese and hot spots. Instead, transfer your dip to an oven-safe dish, add a tablespoon of milk or cream, and cover with foil. Reheat at 350°F for 15-20 minutes, stirring halfway through. For smaller portions, use a small saucepan over low heat, stirring constantly. Add liquid gradually — you can always thin it more, but you can't un-thin an over-thinned dip. The goal is to restore that perfect, scoopable consistency without separating the ingredients.