I was in the middle of a Sunday night binge‑watch marathon when my roommate dared me to create something that would make the TV commercials for frozen taquitos look like a joke. I stared at a bag of bland, pre‑fried taquitos, crumpled the packaging, and thought, why settle for soggy cardboard when you can craft a masterpiece from scratch? The kitchen quickly turned into a battlefield of sizzling pans, the aroma of cumin marching across the countertops, and my imagination running wild with the promise of crunchy, cheesy goodness. I remember the first bite: the crust cracked like thin ice, the chicken melted in my mouth, and the salsa burst like a fireworks show in a tiny tortilla tube. That moment was so intense I swear I heard the TV gasp in the background.
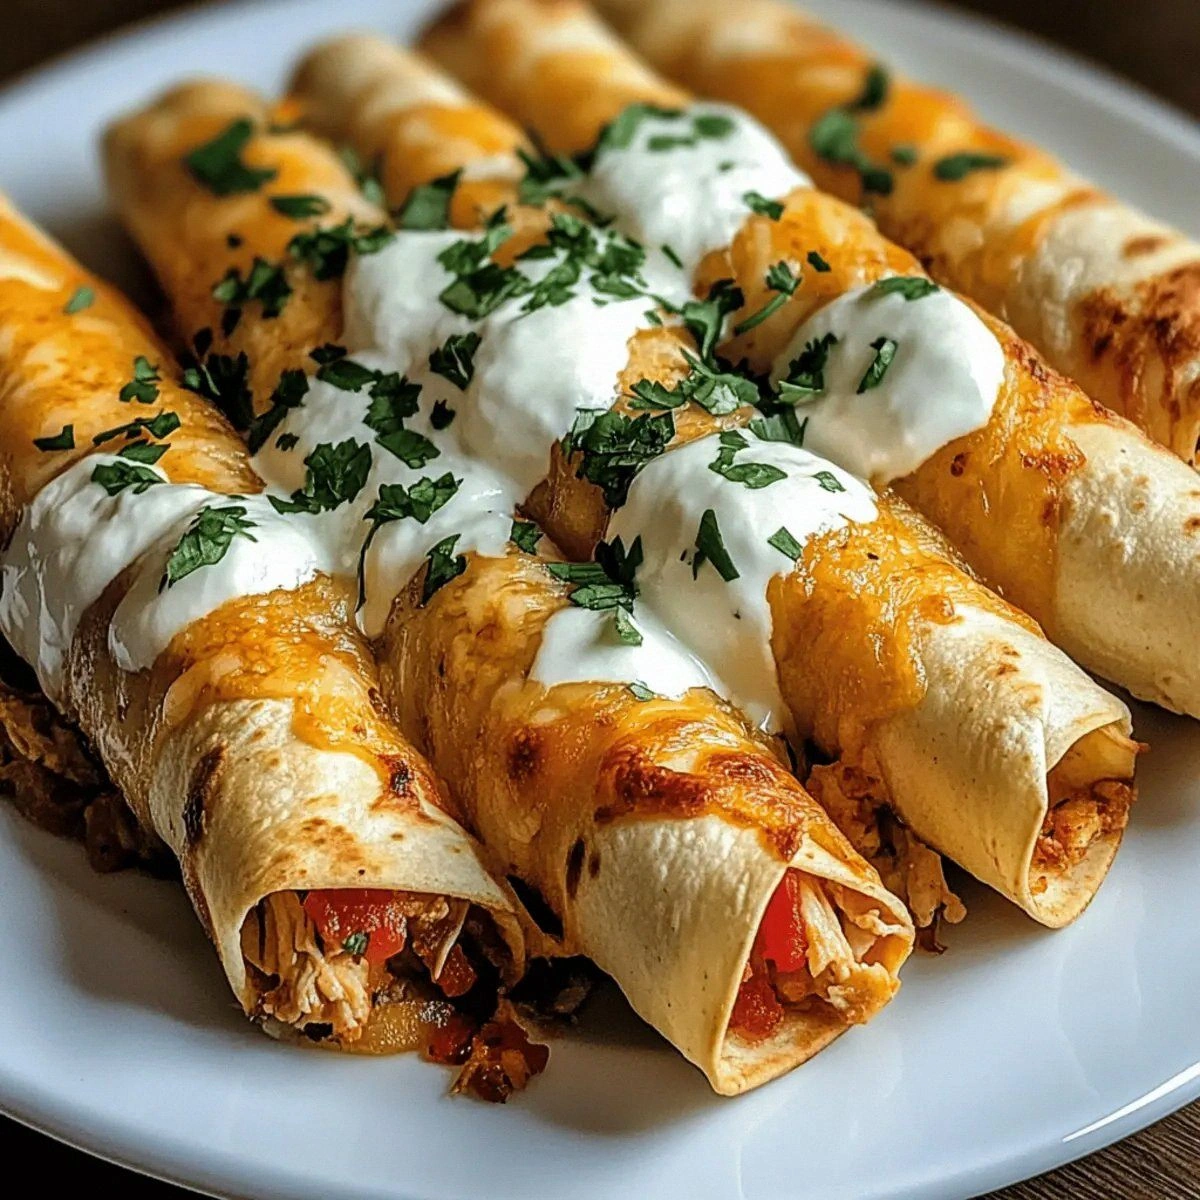
Picture this: the oven door swings open, a golden wave of steam escapes, and the scent of toasted corn mingles with a whisper of melted cheese. You can almost hear the soft sigh of the tortillas as they rise, the faint crackle of the edges turning crisp, and the subtle hum of the oven’s fan like a low‑key applause. Your fingertips feel the heat radiating from the tray, and when you finally lift a taquito, the steam curls around your nose, promising a flavor explosion. The first bite delivers a textural symphony—crunch on the outside, tender chicken and gooey cheese on the inside—so satisfying it feels like a tiny victory dance in your mouth.
Most home‑cooked taquito recipes either drown the filling in oil or skimp on seasoning, leaving you with a bland, greasy disappointment. This version, however, flips the script by baking the taquitos at a high temperature while using a light mist of cooking spray, which creates that coveted “oven‑fried” crunch without the guilt. The secret? A blend of cream cheese and salsa that binds the chicken and cheese together, turning the filling into a cohesive, creamy pocket that doesn’t spill out the moment you bite. I’ll be honest — I ate half the batch before anyone else got a chance to try it, and that’s because the flavor is so addictive you’ll want to keep reaching for more.
But wait, there’s a twist you won’t find in any other recipe: a dash of chili powder and cumin that’s toasted just enough to release their essential oils, creating a smoky depth that makes each bite feel like a fiesta in your mouth. I dare you to taste this and not go back for seconds. Let me walk you through every single step — by the end, you’ll wonder how you ever made it any other way.
What Makes This Version Stand Out
- Flavor Explosion: The combination of salsa, cream cheese, and a precise spice blend creates a sauce that coats the chicken like velvet, delivering a burst of tangy, smoky, and cheesy notes in every bite.
- Ultimate Crunch: Baking at 425°F with a light spray of oil gives the tortillas a crispness that shatters like thin ice, far superior to deep‑fried versions that can get soggy.
- Simplicity Meets Sophistication: Only ten ingredients, all pantry‑friendly, yet the technique elevates the dish to restaurant quality without any fancy equipment.
- Ingredient Quality: Using shredded chicken that’s been seasoned and cooked beforehand ensures every bite is juicy, while the cream cheese adds a buttery richness that you can’t fake.
- Crowd‑Pleaser: Whether you’re serving a game‑day crowd, a family dinner, or a potluck, these taquitos disappear faster than you can say “extra salsa, please.”
- Make‑Ahead Magic: Assemble the taquitos ahead of time, refrigerate, and pop them in the oven when guests arrive – no last‑minute panic.
- Healthy Twist: Baking instead of frying cuts down on oil, and you can swap the cooking spray for a drizzle of olive oil for a heart‑healthier version.
- Versatile Base: The filling can be customized with beans, corn, or even a hint of chipotle for those who love a smoky kick.
Inside the Ingredient List
The Flavor Base
First up, the salsa. This isn’t just a garnish; it’s the liquid gold that brings acidity, sweetness, and a hint of heat. Using a quality salsa (look for one with real tomatoes, not a syrupy concentrate) ensures the filling stays moist while adding a bright, tangy contrast to the creamy cheese. If you’re feeling adventurous, try a roasted‑tomato salsa for a deeper, smoky flavor profile. Skipping the salsa would leave the mixture dry and flat, turning a potential masterpiece into a bland chew.
The Texture Crew
Cream cheese is the unsung hero that binds everything together. Its mild, buttery texture creates a silky bridge between the shredded chicken and shredded cheese, preventing any unwanted leaks. If you don’t have cream cheese on hand, substitute with a blend of Greek yogurt and a splash of milk, but expect a slightly tangier finish. The shredded cheese (Cheddar, Monterey Jack, or Mexican blend) adds that melty, gooey pull that makes each bite unforgettable. Using a low‑moisture cheese would result in a dry interior, while a high‑moisture cheese could make the tortillas soggy.
The Unexpected Star
Chili powder, garlic powder, and ground cumin are the aromatic trio that turns this dish from “good” to “legendary.” Toasting the spices for just 30 seconds in a dry skillet awakens their essential oils, creating a fragrant cloud that clings to the chicken. This step is often missed, leading to a muted flavor that can’t compete with store‑bought versions. If you’re a spice‑saver, you can replace the trio with a pre‑made Mexican seasoning blend, but keep an eye on the salt content.
The Final Flourish
Flour tortillas are the canvas for this culinary artwork. Their pliability allows you to roll them tightly without tearing, and they crisp up beautifully in the oven. For the best results, choose tortillas that are about 6‑8 inches in diameter; larger ones can become unwieldy, while smaller ones may not hold enough filling. If you’re gluten‑free, swap them for corn tortillas, but be aware that corn can be more fragile and may require a quick pre‑bake to soften.
Everything's prepped? Good. Let's get into the real action...
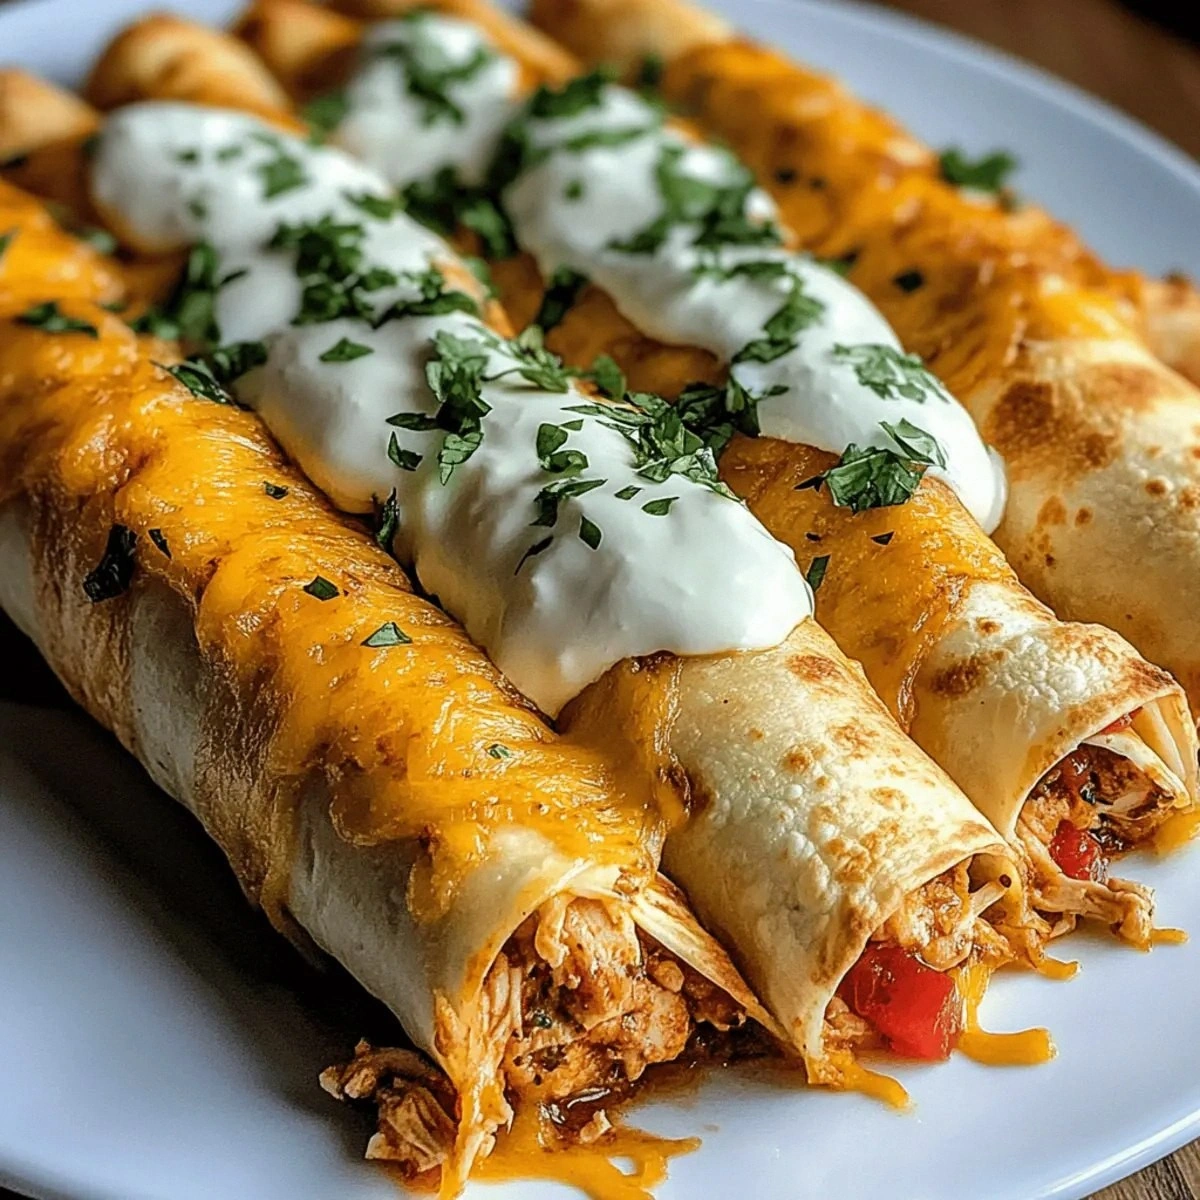
The Method — Step by Step
Preheat your oven to a roaring 425°F (220°C). This high heat is the secret weapon that gives the tortillas that coveted “oven‑fried” crunch without drowning them in oil. Place a wire rack on a baking sheet; the rack allows air to circulate, ensuring every side gets evenly toasted. Power transition: Okay, ready for the game‑changer?
While the oven heats, combine the cooked shredded chicken, shredded cheese, cream cheese, and salsa in a large mixing bowl. Use a wooden spoon to mash the cream cheese into the salsa until you achieve a smooth, slightly glossy mixture. The salsa should coat every strand of chicken like a velvety blanket. Micro‑challenge: I dare you to get that texture perfect without a food processor.
Add the chili powder, garlic powder, ground cumin, and a generous pinch of salt and pepper. Stir the spices in, letting the aroma fill the kitchen; you’ll notice the scent rising like a promise.
Kitchen Hack: Toast the spices in a dry skillet for 30 seconds before adding them to the mixture for a deeper, more complex flavor.Lay out the flour tortillas on a clean surface. Spoon about 2‑3 tablespoons of the filling onto the lower third of each tortilla, spreading it evenly but leaving a small border to prevent overflow. The key is to keep the filling centered; otherwise, the roll will unravel during baking.
Roll each tortilla tightly, tucking the edges as you go, and place them seam‑side down on the prepared wire rack. This orientation helps the tops crisp up while the bottom stays soft enough to hold the filling.
Watch Out: If the tortillas are too wet from the salsa, they may stick together. Pat the excess moisture with a paper towel before rolling.Lightly spray the tops of the taquitos with cooking spray or brush with a thin layer of olive oil. This mist is the final catalyst for that golden, crackly exterior. The spray should be even; too much oil will make them greasy, too little and they won’t achieve that perfect crunch.
Slide the baking sheet into the preheated oven. Bake for 12‑15 minutes, then flip each taquito over and bake an additional 8‑10 minutes. You’ll know they’re done when the edges start pulling away from the tortilla and the cheese on top is bubbling and lightly browned. That sizzle when it hits the pan? Absolute perfection.
Kitchen Hack: For an extra‑crisp finish, broil for the last 2 minutes, but watch closely to avoid burning.Remove the tray and let the taquitos rest for 2‑3 minutes. This short pause allows the interior to set, preventing the filling from oozing out when you bite in. Serve immediately with extra salsa, guacamole, or a dollop of sour cream. Future pacing: Picture yourself pulling this out of the oven, the whole kitchen smelling incredible, and the first bite making you grin like a kid on a sugar rush.
That’s it — you did it. But hold on, I’ve got a few more tricks that’ll take this to another level. Stay with me here — this is worth it.
Insider Tricks for Flawless Results
The Temperature Rule Nobody Follows
Most home cooks set the oven to 400°F and wonder why their taquitos are soggy. The secret is cranking it up to 425°F (or even 450°F if your oven tolerates it). The higher heat creates rapid steam inside the tortilla, puffing it up and locking in moisture while the exterior crisps instantly. I once tried a lower temperature; the result was a limp, doughy disaster that even my dog refused to eat.
Why Your Nose Knows Best
Don’t rely solely on a timer. The moment you catch that nutty, toasted aroma wafting from the oven, you know the taquitos are on the brink of perfection. Trust your senses; they’re more reliable than a digital clock. A friend once ignored the scent and pulled the tray too early—resulting in a half‑cooked interior that tasted like raw chicken. Never let that happen to you.
The 5‑Minute Rest That Changes Everything
After baking, let the taquitos sit for exactly five minutes. This rest period allows the cheese to re‑solidify and the steam to redistribute, preventing a soggy bottom. It also gives the flavors a chance to meld, so each bite feels balanced rather than one‑note. I used to skip this step, and the first bite always felt a little “wet.”
The Flip‑And‑Broil Finale
Flipping halfway through baking ensures both sides get equal exposure to heat, giving you that uniform golden‑brown finish. If you love an extra crunch, switch the oven to broil for the last 90 seconds after the flip. Keep the door slightly ajar and watch like a hawk; the top can go from perfect to burnt in a heartbeat.
Seasoning on the Fly
Taste the filling before you roll. If you think it needs a little more heat, sprinkle a pinch of cayenne or a dash of hot sauce. Adjusting seasoning at this stage prevents blandness and lets you customize the heat level to your audience. I once added a splash of chipotle adobo sauce for a smoky kick that turned the whole batch into a party favorite.
The “One‑Pan” Clean‑Up Trick
Line the baking sheet with parchment paper before placing the wire rack. This prevents any cheese or salsa drips from scorching the pan, making cleanup a breeze. If you forget the parchment, a quick soak in hot, soapy water does the trick, but why make it harder than it needs to be?
Creative Twists and Variations
This recipe is a playground. Here are some of my favorite ways to switch things up:
Southwest Black Bean Blast
Swap half of the chicken for a cup of rinsed black beans, add a teaspoon of smoked paprika, and finish with a sprinkle of cotija cheese. The beans add earthy depth, and the smoked paprika brings a subtle wood‑smoked flavor that pairs beautifully with the salsa.
Cheesy Jalapeño Pop
Fold in finely diced jalapeños and a handful of shredded pepper jack cheese into the filling. The heat from the jalapeños and the extra meltiness from pepper jack create a spicy, cheesy explosion that will make your guests reach for the water—then come back for more.
Breakfast Sunrise
Add scrambled eggs and a pinch of smoked cheddar to the mix, and serve with a side of avocado slices. This version works perfectly for a weekend brunch, offering protein and a buttery richness that feels like a morning hug.
Mediterranean Spin
Replace the salsa with a blend of chopped sun‑dried tomatoes, Kalamata olives, and feta cheese. Add a dash of oregano and a drizzle of olive oil. The result is a tangy, salty bite that transports you to a seaside tavern.
Sweet & Savory Apple
Stir in finely diced apples and a pinch of cinnamon into the filling, then finish with a drizzle of maple glaze after baking. The sweet apple pairs surprisingly well with the savory cheese and chicken, creating a dessert‑like appetizer that sparks conversation.
Storing and Bringing It Back to Life
Fridge Storage
Place cooled taquitos in an airtight container lined with a paper towel to absorb excess moisture. They’ll stay fresh for up to three days. When you’re ready to eat, reheat in a preheated 375°F oven for 8‑10 minutes, and they’ll regain that crispness as if they were fresh out of the oven.
Freezer Friendly
Arrange the unbaked, rolled taquitos on a parchment‑lined tray and freeze until solid (about 1‑2 hours). Transfer them to a zip‑top freezer bag. They’ll keep for up to two months. To bake from frozen, add an extra 5‑7 minutes to the cooking time and keep an eye on the color.
Best Reheating Method
For ultimate crispness, reheat on a wire rack in a 425°F oven for 6‑8 minutes. Add a tiny splash (about a teaspoon) of water to the bottom of the tray before reheating; the steam helps the interior stay moist while the exterior crisps. Microwaving will make them soggy, so resist the temptation unless you’re in a hurry.