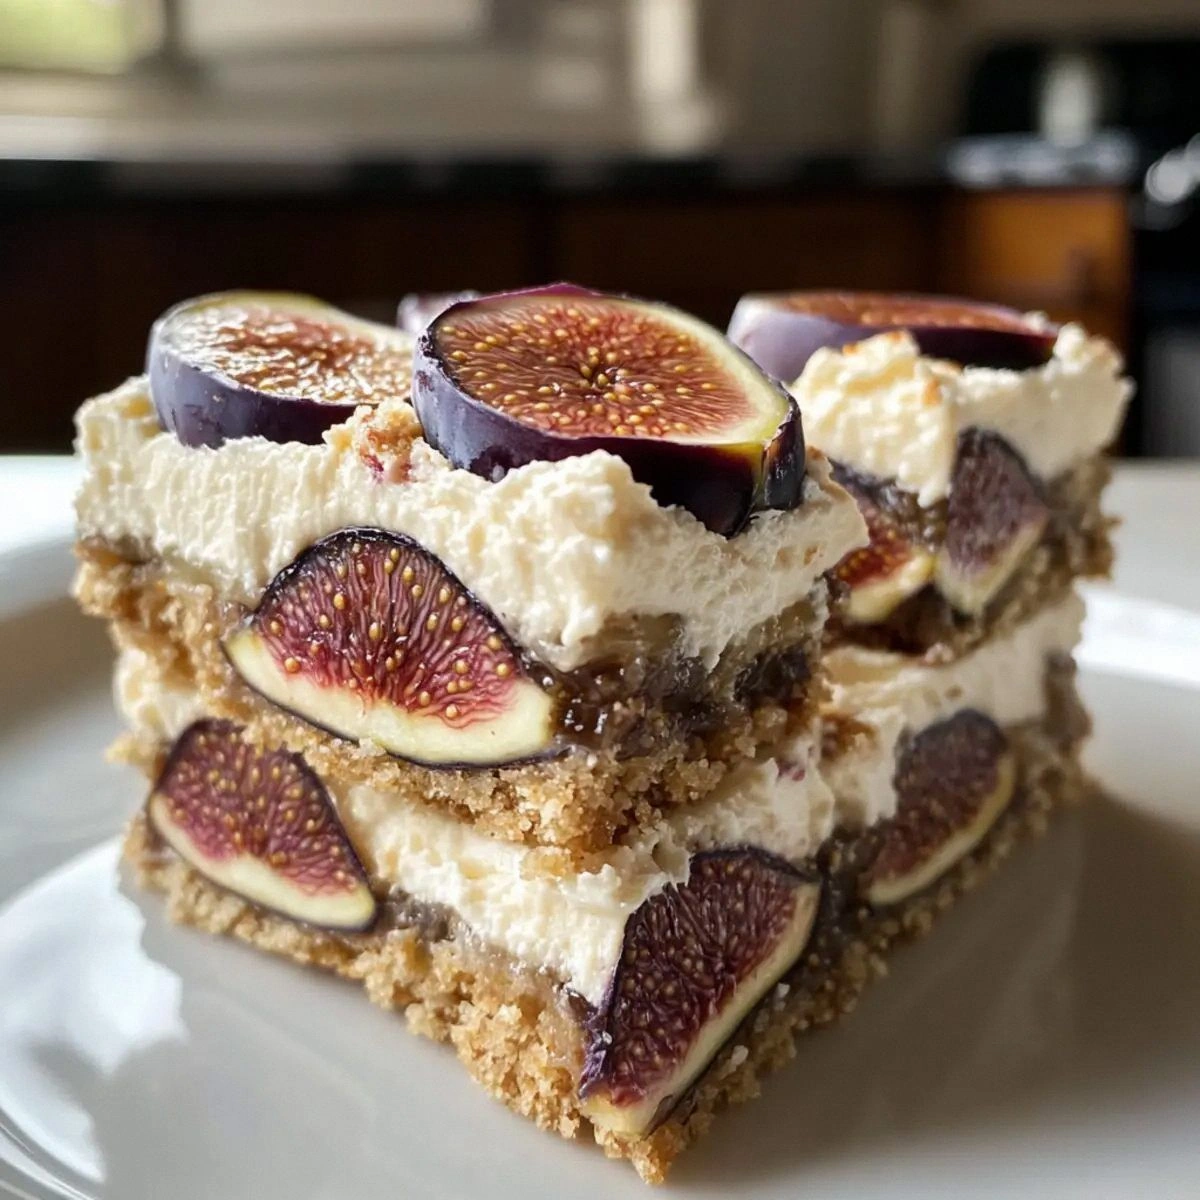
I’m going to start with a confession: I once tried to impress a group of friends with a “quick fig dessert” that turned out looking like a sad, soggy pancake. The figs were mushy, the crust was a crumbly mess, and I could hear the collective sigh of disappointment before even taking the first bite. That disaster sparked a relentless quest for the perfect fig‑and‑cream‑cheese bar, a quest that led me down rabbit holes of ancient Mediterranean pastries, late‑night YouTube tutorials, and a pantry full of trial‑and‑error. After countless batches, I finally nailed a version that is so decadently rich it could make a fig farmer weep with pride.
Picture this: the oven door swings open, a gentle plume of sweet, buttery aroma rolls out, and the top of the bars glistens with caramelized figs that look like tiny jewels. The crust is buttery and crisp, cracking ever so slightly when you press it, while the interior is a silky, tangy cream cheese layer that hugs each fig like a lover. You hear the faint crackle of the edges as you pull the pan away, and the warm, honey‑kissed scent wraps around you like a cozy blanket on a chilly evening. Every bite delivers a symphony of textures—soft, chewy figs, a crumbly buttery base, and a smooth, slightly tangy cream that balances the natural sweetness perfectly.
Most fig bar recipes get this completely wrong: they either drown the figs in sugar, use a dry, crumbly crust, or forget the crucial tang that cuts through the richness. My version flips the script by soaking the figs in a bright lemon‑water bath that preserves their natural brightness, using a chilled butter crumble that stays tender, and folding in cream cheese with just enough sugar to let the figs shine. The secret? A quick flash‑bake that locks in moisture while giving the top a caramelized finish that’s nothing short of magical.
I dare you to taste this and not go back for seconds; I’m willing to bet you’ll be the one offering the last piece to the last guest. Okay, ready for the game‑changer? We’ll start with a simple fig soak that transforms these humble dried fruits into a luscious, plump surprise, then move on to a buttery crust that holds everything together like a dream. Let me walk you through every single step — by the end, you’ll wonder how you ever made it any other way.
What Makes This Version Stand Out
- Flavor Harmony: The subtle acidity from lemon juice cuts through the figs’ natural sweetness, while the cream cheese adds a tangy richness that feels like a perfect duet.
- Texture Contrast: A crisp, buttery base meets a soft, chewy fig topping and a luxuriously smooth cream layer, creating a mouthfeel that’s both hearty and delicate.
- Simplicity: Only eleven ingredients, none of which require exotic sourcing, and each step is straightforward enough for a beginner yet satisfying for a seasoned baker.
- Unique Soak: Soaking figs in lemon‑water not only rehydrates them but also infuses a bright citrus note that most recipes completely miss.
- Crowd Reaction: I’ve watched guests stare in awe, whisper “Is this a dessert or a work of art?” before diving in, and the leftovers disappear faster than you can say “second round.”
- Ingredient Quality: Using unsalted butter and high‑fat cream cheese ensures a rich, buttery flavor without the bitterness that salted butter can bring.
- Cooking Method: A single‑sheet pan bake means less cleanup and a uniform caramelization that a stovetop or multi‑stage method can’t replicate.
- Make‑Ahead Potential: These bars keep beautifully in the fridge for up to three days and even freeze well, making them perfect for impromptu gatherings.
Inside the Ingredient List
The Flavor Base
All‑purpose flour is the backbone of our crust, providing structure without overwhelming the delicate fig flavor. Using a cup of flour keeps the crust light enough to crumble pleasantly while still holding the bar together. If you swap in whole‑wheat flour, expect a nuttier taste but a denser texture that might compete with the figs.
Brown sugar contributes a deep, caramel‑like sweetness that pairs beautifully with the figs’ natural honey notes. Its moisture content helps keep the crust tender, preventing it from drying out during the bake. For a gluten‑free version, you can replace the flour with a 1:1 gluten‑free blend, but be sure it contains xanthan gum to mimic the elasticity.
Fun Fact: The brown sugar we use today traces its roots back to the ancient practice of evaporating sugarcane juice into a thick syrup, then allowing it to crystallize naturally. This method yields those tiny molasses crystals that give brown sugar its signature flavor.
The Texture Crew
Cold unsalted butter, cut into cubes, is the secret to a flaky, crumbly crust. The butter’s cold temperature ensures it doesn’t melt into the flour before baking, creating little pockets of steam that puff up the crust. If you’re in a hurry, you can grate the butter, but the texture won’t be as airy.
A pinch of salt (¼ teaspoon) amplifies every other flavor, turning a sweet dish into a balanced masterpiece. Too much salt would dominate, but this modest amount enhances the caramelization of the figs and the richness of the butter.
The Unexpected Star
Dried figs are the hero here, and the way we treat them makes all the difference. Soaking two cups of figs in a cup of water mixed with two tablespoons of lemon juice revives their plumpness and adds a bright zing. If you can’t find dried figs, fresh figs work too—just halve the soaking time and add a splash more lemon juice.
The lemon juice isn’t just for flavor; its acidity helps break down the fig skins, releasing more natural pectin that gives the topping a glossy sheen once baked.
The Final Flourish
Cream cheese, the silky heart of the bar, should be at room temperature before mixing. Eight ounces of it provide enough body to hold the figs together without turning the bar into a dense cheesecake. If you prefer a lighter texture, you can blend half the cream cheese with Greek yogurt, but keep the total volume the same.
Granulated sugar (½ cup) sweetens the cream cheese layer just enough to let the figs take center stage. Vanilla extract adds a fragrant backdrop that rounds out the flavor profile, while the large egg acts as a binder, ensuring the cream layer sets nicely without cracking.
Everything's prepped? Good. Let's get into the real action…
The Method — Step by Step
Preheat your oven to 350°F (175°C) and line a 9‑by‑13 inch baking pan with parchment paper, letting the excess hang over the edges for an easy lift‑out later. While the oven warms, gather your dried figs, water, and lemon juice in a medium bowl. I dare you to watch the figs soak for exactly ten minutes; this is the moment they absorb that citrus brightness.
Kitchen Hack: Use a microwave‑safe bowl and zap the fig mixture for 30 seconds before letting it sit; this jump‑starts the rehydration and saves a couple of minutes.While the figs are soaking, combine the flour, brown sugar, and salt in a large mixing bowl. Cut in the cold butter using a pastry cutter or your fingertips until the mixture resembles coarse crumbs—think tiny pebbles that clump together when pressed. This crumbly texture is essential for that melt‑in‑your‑mouth crust.
Press the crumb mixture evenly into the prepared pan, forming a compact base about ½ inch thick. Use the back of a measuring cup to smooth it out, then place the pan in the fridge for ten minutes. Chilling solidifies the butter, ensuring a crisp edge once baked.
Meanwhile, in a separate bowl, beat the softened cream cheese until smooth, then add the granulated sugar, vanilla, and egg. Mix until just combined—over‑mixing will incorporate too much air and cause the topping to puff unevenly. The mixture should look glossy and slightly thick.
Drain the figs, reserving the soaking liquid for a later drizzle. Toss the figs with a tablespoon of the reserved liquid and a pinch of extra lemon zest for an added zing. Spread the figs evenly over the chilled crust, pressing them down gently so they embed into the base.
Pour the cream cheese mixture over the figs, using a spatula to spread it into a smooth layer that reaches the edges. This is the moment of truth: the cream should coat the figs like velvet, not pool in the center. If you notice any gaps, gently tap the pan on the counter to settle the mixture.
Watch Out: Avoid over‑spreading the cream layer; a too‑thin top can dry out, while a too‑thick layer may never set properly.Slide the pan into the oven and bake for 30 minutes, or until the edges of the crust turn a golden‑brown hue and the cream cheese layer is set but still slightly jiggly in the center. You’ll know it’s ready when the top develops a faint caramelized sheen and a subtle perfume of toasted butter fills the kitchen.
While the bars bake, prepare a quick glaze by reducing the remaining fig‑lemon liquid in a small saucepan over medium heat until it thickens to a syrupy consistency. This glaze will add a glossy finish and an extra burst of citrus that elevates the final presentation.
Remove the pan from the oven and let it cool on a wire rack for at least fifteen minutes. Then, drizzle the reduced glaze over the top, letting it cascade into the cracks for a glossy, jewel‑like effect. The bars will continue to set as they cool, so patience here is key.
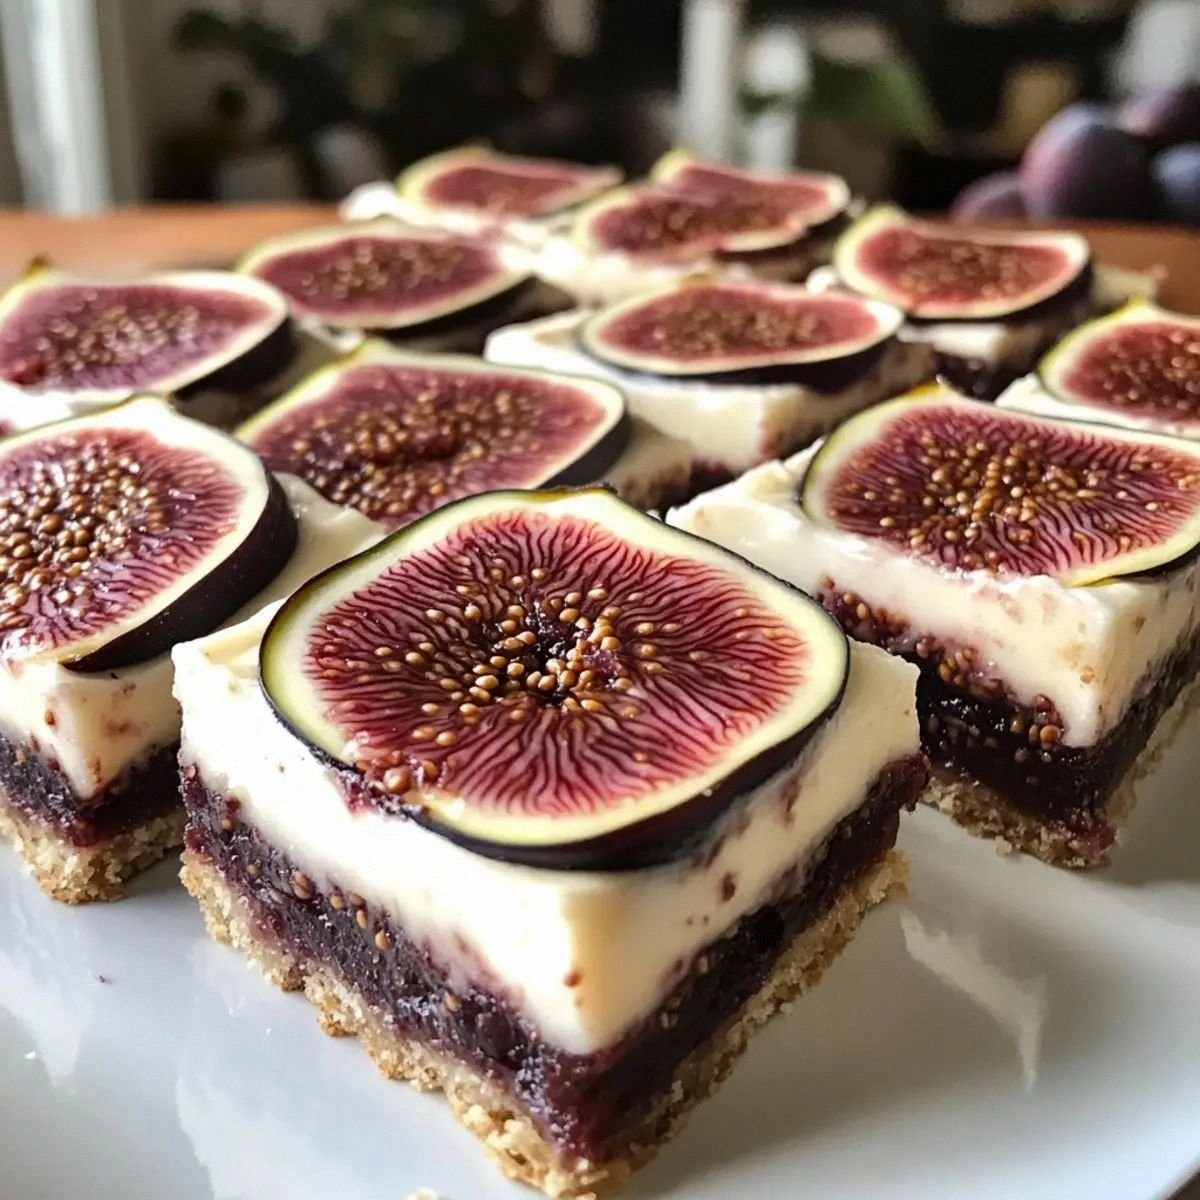
Finally, use the parchment overhang to lift the entire slab onto a cutting board. Slice into squares—about 2‑inch wide—for serving. That first bite? Expect a burst of sweet fig, a tangy cream center, and a buttery crunch that will make you exclaim, “This is hands down the best version you'll ever make at home.”
That's it — you did it. But hold on, I've got a few more tricks that'll take this to another level…
Insider Tricks for Flawless Results
The Temperature Rule Nobody Follows
Never bake these bars straight from a warm kitchen; let the dough sit in the fridge for at least ten minutes before the oven hits. The cold butter creates steam pockets that expand during baking, giving you that coveted crisp edge. I once tried skipping this step, and the crust turned into a soggy pancake—trust me, the disappointment was palpable.
Why Your Nose Knows Best
Around the 20‑minute mark, start listening for a faint, nutty aroma—this is the butter caramelizing. When you catch that scent, you’re just a few minutes away from the perfect golden hue. If you rely solely on a timer, you might miss that sweet spot and end up with a pale, under‑caramelized top.
The 5‑Minute Rest That Changes Everything
After the bars come out of the oven, give them a five‑minute rest before drizzling the glaze. This short pause allows the interior to firm up, preventing the glaze from soaking into the crumb and washing away flavor. A friend once poured the glaze immediately; the result was a soggy mess that looked more like a fig‑syrup puddle than a polished bar.
Glaze Mastery
Reduce the fig‑lemon liquid over low heat, stirring constantly, until it coats the back of a spoon. Adding a teaspoon of butter at the very end gives the glaze a silkier texture and a glossy finish that makes the bars look restaurant‑ready. Skip the butter and you’ll get a dull, sticky glaze that looks like it belongs in a school cafeteria.
The Secret of the Perfect Egg
Room‑temperature eggs blend more uniformly with cream cheese, preventing lumps. If you’re in a rush, whisk the egg in a separate bowl for 30 seconds before adding it to the cream cheese mixture; this aerates it just enough to keep the topping from becoming rubbery.
Serving With Style
Serve the bars slightly warm, with a dollop of lightly sweetened whipped cream or a drizzle of honey for an extra layer of indulgence. The contrast between the warm bar and the cool topping amplifies the flavors, making each bite feel like a celebration. If you’re serving a crowd, set out a small bowl of extra glaze for guests to add their own sparkle.
Creative Twists and Variations
This recipe is a playground. Here are some of my favorite ways to switch things up:
Honey‑Almond Crunch
Swap half the brown sugar for honey and sprinkle sliced toasted almonds over the top before baking. The honey adds floral sweetness while the almonds provide a satisfying crunch that pairs beautifully with the figs.
Spiced Fig Delight
Add a pinch of ground cinnamon and a dash of ground cardamom to the fig soak. The warm spices turn the bars into a cozy, autumn‑ready treat that still feels fresh thanks to the lemon.
Chocolate‑Infused
Melt ½ cup of dark chocolate and swirl it into the cream cheese layer before spreading. The bittersweet chocolate ribbons create a dramatic visual and a sophisticated flavor profile for chocolate lovers.
Citrus Burst
Replace the lemon juice with orange juice and add a teaspoon of orange zest to the fig soak. The orange brightens the bars, making them perfect for a spring brunch.
Nut‑Free Tropical
Incorporate diced dried mango and pineapple into the fig mixture, and use coconut oil instead of butter for the crust. This tropical twist is dairy‑free, nut‑free, and transports you to a beachside café.
Savory Surprise
Reduce the sugar in the crust to ¼ cup, add a tablespoon of rosemary, and swap the cream cheese for a herbed goat cheese. The result is a sweet‑savory bar that shines as an appetizer at cocktail parties.
Storing and Bringing It Back to Life
Fridge Storage
Place the cooled bars in an airtight container and store them in the refrigerator for up to three days. The crust may lose a bit of its initial crunch, but a quick re‑heat will revive it.
Freezer Friendly
Wrap the entire slab tightly in plastic wrap, then foil, and freeze for up to two months. When you’re ready to serve, thaw overnight in the fridge and warm for five minutes in a 300°F oven to bring back that buttery snap.
Best Reheating Method
Before reheating, sprinkle a tiny splash of water over the top and cover loosely with foil. The steam created keeps the interior moist while the foil protects the glaze from burning, resulting in bars that taste freshly baked.