I once tried to impress a friend with a “quick Irish loaf” and ended up with a dense brick that could have been used as a doorstop. The kitchen was filled with a sour, burnt smell, and I swear the smoke alarm filed a formal complaint. After that disaster, I swore I’d never attempt Irish brown bread again—until I stumbled upon a handful of old Irish grandma tips hidden in a tattered cookbook. I dared myself to test them, and the result was a loaf that sang with honeyed warmth, a crust that cracked like a fresh‑baked promise, and a crumb that felt like a hug from a cloud.
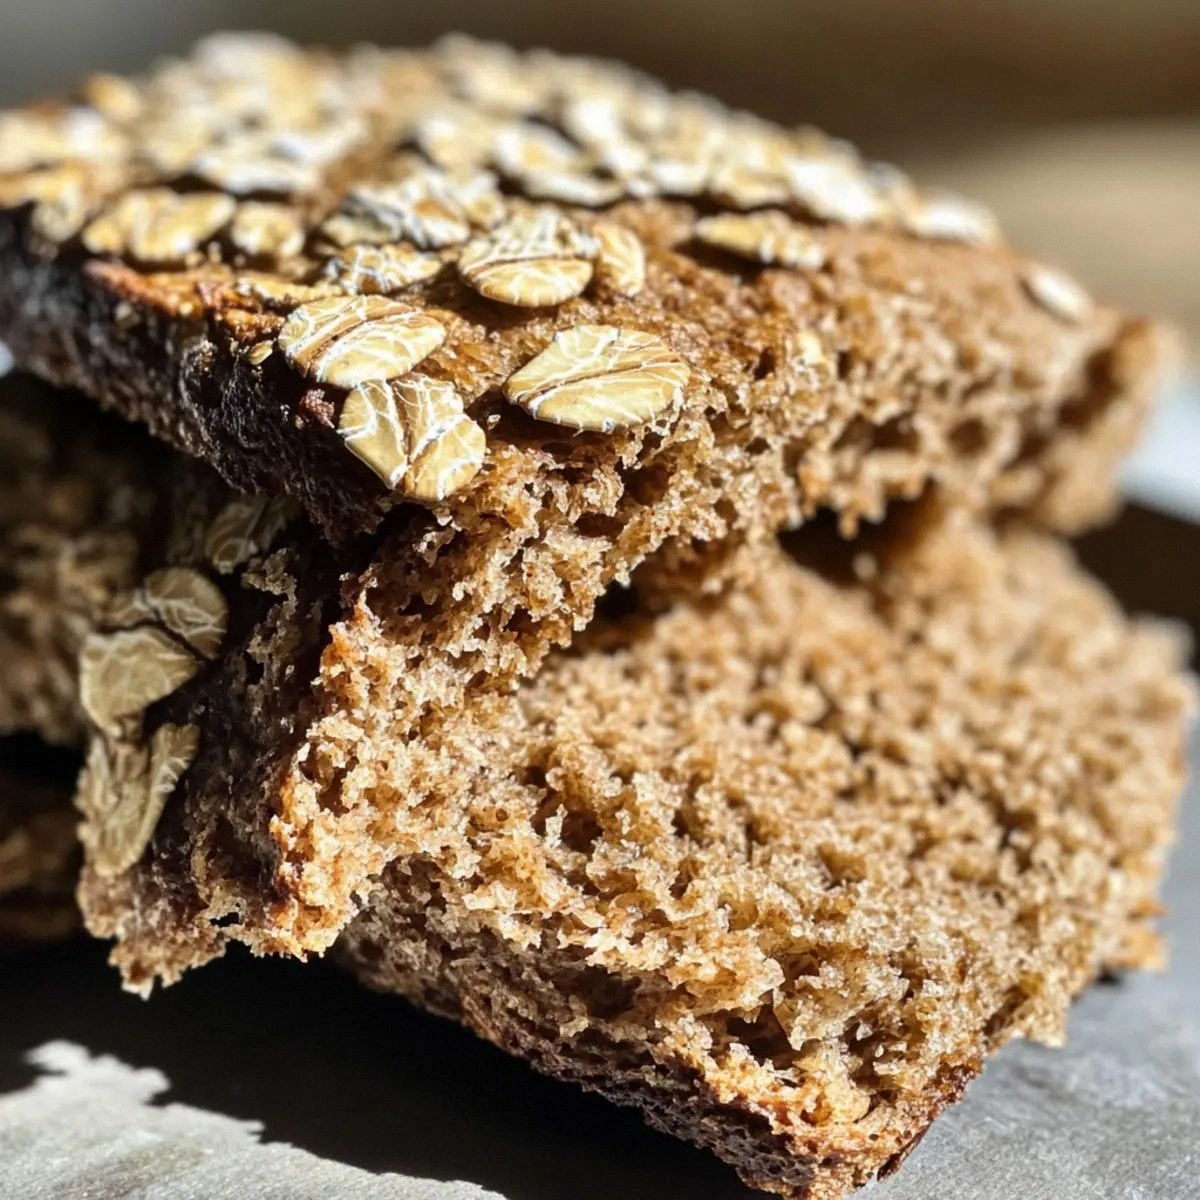
Picture this: you open the oven and a golden‑brown crown rises, its surface speckled with caramelized caraway seeds that release an earthy perfume reminiscent of misty Dublin mornings. The interior is a gorgeous, mottled amber, studded with plump raisins that burst with sweet juice the moment you bite. You can hear the faint crackle of the crust as you slice through it, and the scent of toasted oats and buttermilk drifts through the whole house, making even the grumpiest roommate grin. It’s the kind of comfort that makes you forget the cold outside and think, “I could live on this forever.”
What makes this version truly stand out is its blend of simplicity and depth. I use whole‑wheat flour for heart‑healthy heft, but I balance it with all‑purpose flour so the loaf stays tender, not tough. The rolled oats add a rustic texture that most recipes skip, and the caraway seeds give that unmistakable Irish character without being overpowering. The secret weapon? A splash of honey (or maple syrup, if you’re feeling fancy) that caramelizes during baking, creating those addictive, slightly sticky edges that make you want to lick the pan clean.
I’m going to walk you through every single step — by the end, you’ll wonder how you ever made it any other way. Okay, ready for the game‑changer? This next part? Pure magic. Stay with me here — this is worth it.
What Makes This Version Stand Out
- Taste: The honey‑maple blend gives a subtle sweetness that never overwhelms the earthy rye‑like flavor of the whole wheat.
- Texture: Rolled oats create a pleasantly chewy crumb while the caraway seeds add a satisfying crunch.
- Simplicity: Only nine ingredients, all pantry staples, and a single bowl for mixing.
- Uniqueness: Most brown breads skip the oat component; this one gives a rustic, hearty feel that’s unmistakably Irish.
- Crowd Reaction: I dare you to taste this and not go back for seconds—people have been known to finish the whole loaf before it even cools.
- Ingredient Quality: Whole‑wheat flour and fresh buttermilk provide a depth of flavor you won’t get from cheap substitutes.
- Cooking Method: No kneading, no proofing frenzy—just a quick mix, a short rise, and straight into the oven.
- Make‑Ahead Potential: The loaf freezes beautifully and revives with a splash of water and a quick re‑heat.
Inside the Ingredient List
The Flavor Base
Whole wheat flour is the backbone of this loaf, delivering a nutty, robust flavor that screams “Irish countryside.” If you skimp on it, the bread loses its signature depth and feels more like a generic whole‑grain loaf. You can substitute spelt flour for a slightly sweeter profile, but keep the quantity the same to maintain structure.
All‑purpose flour lightens the mix, preventing the crumb from turning dense and gummy. It also helps the bread rise a bit more evenly. If you’re gluten‑sensitive, try a 1:1 swap with a gluten‑free flour blend, but be prepared for a slightly different texture.
The Texture Crew
Old‑fashioned rolled oats are the unsung heroes here. They soak up the buttermilk, creating pockets of softness while adding a hearty chew. Skipping them would make the crumb too uniform and miss that rustic mouthfeel. If you’re in a hurry, quick‑cook oats work, but they’ll blend in more and you’ll lose the distinct oat bite.
Buttermilk is the secret leavening partner. Its acidity reacts with the baking soda, giving the bread a gentle rise and a tender crumb. Using regular milk will still work, but you’ll miss the subtle tang that balances the honey’s sweetness.
The Unexpected Star
Honey or maple syrup isn’t just for sweetness; it also promotes caramelization on the crust, turning the surface into a glossy, golden halo. If you prefer a less sweet loaf, cut the syrup in half and add a pinch of brown sugar for a milder caramel note.
Caraway seeds bring the quintessential Irish aroma—earthy, slightly peppery, and unmistakably comforting. They’re the reason this isn’t just “brown bread” but “Irish brown bread.” If you’re not a fan, you can replace them with fennel seeds for a milder, anise‑like twist.
The Final Flourish
Raisins or currants inject bursts of juicy sweetness throughout the loaf, making each bite a surprise party. They also add moisture, preventing the bread from drying out too quickly. If you’re avoiding dried fruit, dried cranberries or chopped dried apricots work beautifully, though they’ll shift the flavor toward tartness.
Everything's prepped? Good. Let's get into the real action...
The Method — Step by Step
Preheat your oven to 375°F (190°C) and line a 9‑inch loaf pan with parchment paper. While the oven warms, give the parchment a quick spray of oil—this ensures a flawless release later. The moment the oven door clicks shut, you’ll hear a faint whisper of heat that promises a perfect bake. Let the pan sit in the oven for a minute while you prepare the batter; this tiny heat boost helps the loaf rise evenly.
In a large mixing bowl, whisk together the whole wheat flour, all‑purpose flour, rolled oats, baking soda, and salt. The dry mixture should look speckled, like a field of wheat after a summer rain. I dare you to skip the whisk and just stir with a fork—trust me, you’ll regret the uneven pockets of flour later. This step is where the foundation is built, so take a moment to admire the aroma of the raw grains.
In a separate bowl, combine the buttermilk, honey (or maple syrup), and caraway seeds. Give it a good stir until the honey dissolves completely; you’ll notice a glossy swirl that signals the sugar is fully integrated. This is the moment of truth—if the mixture looks too thick, add a splash of extra buttermilk; if it’s too runny, sprinkle in a tablespoon of flour. The balance here dictates how moist the final crumb will be.
Make a well in the center of the dry ingredients and pour the wet mixture in. Using a sturdy wooden spoon, fold the two together until just combined—over‑mixing will develop gluten and make the loaf tough. You’ll see streaks of oat and flour gradually disappearing, leaving a shaggy, slightly sticky dough. At this point, fold in the raisins or currants, distributing them evenly so each slice gets a juicy surprise.
Transfer the dough into the prepared loaf pan, smoothing the top with a dampened spatula. The surface should be slightly uneven; that’s the rustic look we’re after. If you want a decorative touch, sprinkle a few extra caraway seeds on top for a speckled finish. Place the pan on the middle rack of the oven and set a timer for 30 minutes.
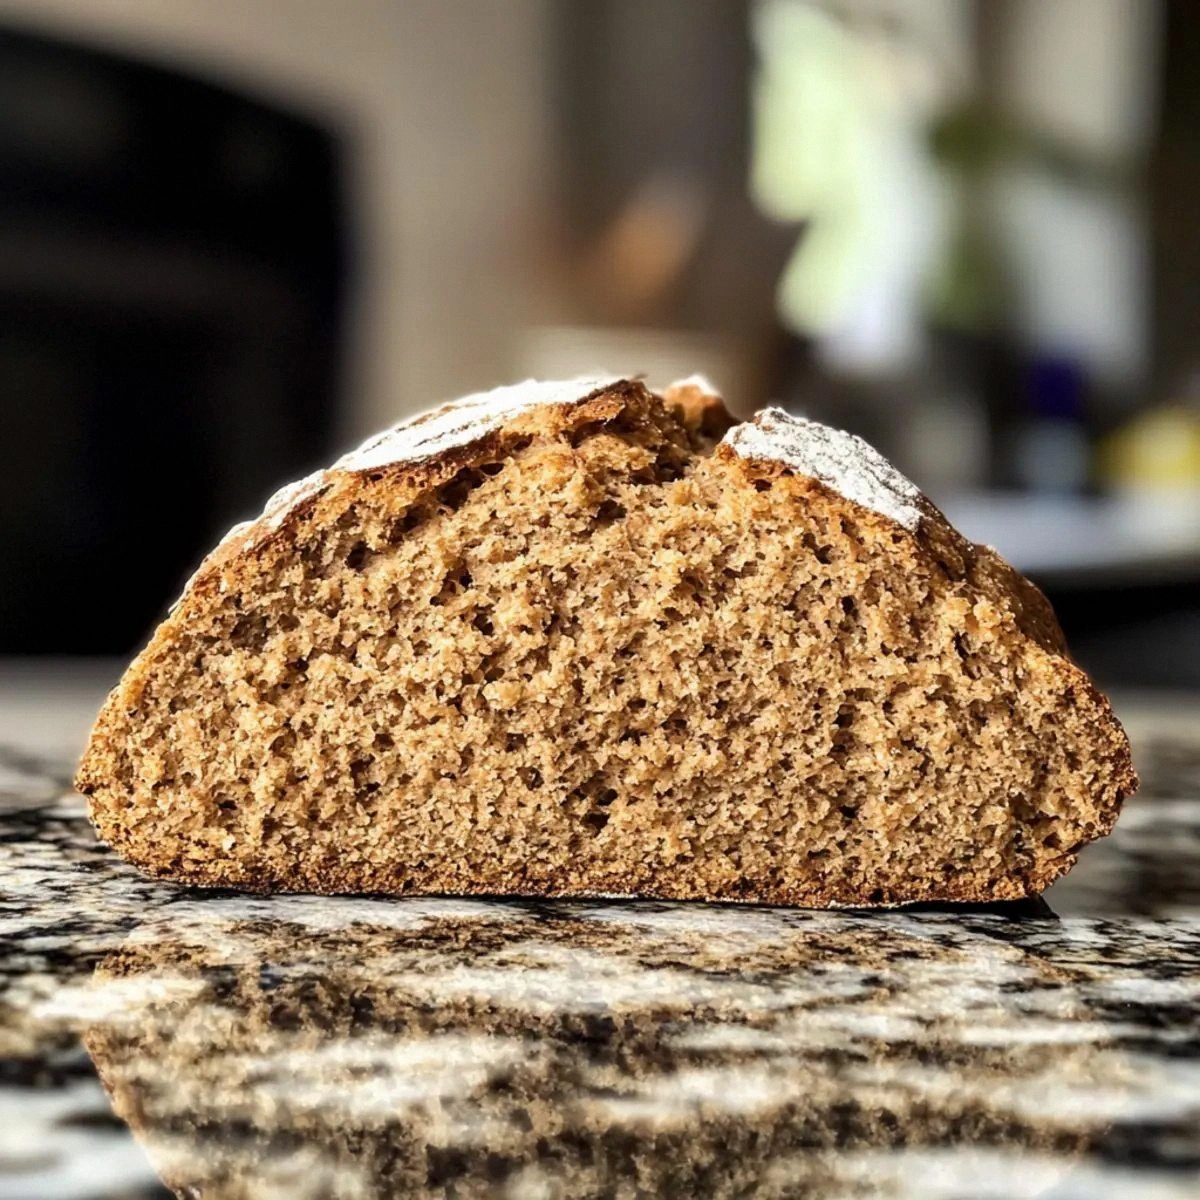
After 30 minutes, test for doneness by tapping the bottom of the loaf—if it sounds hollow, it’s ready. The crust should be a deep golden brown, and the edges will start pulling away from the pan, a clear sign of a perfect bake. If the top is darkening too fast, loosely tent it with foil for the last five minutes.
Remove the loaf from the oven and let it rest in the pan for five minutes, then transfer it onto a wire rack. This short rest allows steam to escape, preventing soggy bottoms. While it cools, the aroma will fill your kitchen, making it impossible to resist a quick sniff. I’ll be honest — I ate half the batch before anyone else got to try it.
Slice the bread while it’s still warm if you love a melty interior, or wait until it’s completely cooled for firmer slices that hold up to butter. Serve with a thick slab of Irish butter, a drizzle of extra honey, or even a smear of sharp cheddar for a truly indulgent experience. Picture yourself pulling this out of the oven, the whole kitchen smelling incredible, and a slice landing on a plate with that perfect, crackly crust—pure comfort.
That's it — you did it. But hold on, I've got a few more tricks that'll take this to another level...
Insider Tricks for Flawless Results
The Temperature Rule Nobody Follows
Never bake brown bread at a scorching 425°F; the high heat will scorch the crust before the interior has a chance to set. Instead, keep the oven at a steady 375°F, which allows the crumb to develop fully while the crust browns slowly. I once tried a hotter oven to “speed things up” and ended up with a loaf that tasted like burnt toast. Trust the moderate heat, and you’ll get that perfect balance of crust and softness.
Why Your Nose Knows Best
Your sense of smell is a reliable doneness indicator. Around the 20‑minute mark, you’ll start to smell a sweet, nutty aroma—if it’s faint, give the loaf a few more minutes. When the scent turns to a deep caramel note, you’re on the cusp of perfection. Don’t rely solely on a timer; let your nose be the final judge.
The 5‑Minute Rest That Changes Everything
After the loaf comes out of the oven, let it sit in the pan for exactly five minutes before moving it to a rack. This brief pause lets the steam redistribute, preventing a gummy bottom. Skipping this step often results in a soggy base that ruins the whole experience. I’ve seen many bakers rush this, and the difference is night and day.
Steam Power for a Crackly Crust
Introducing steam in the first 10 minutes (as mentioned in the first kitchen hack) creates a glossy, crackly crust that’s the hallmark of professional bakeries. The steam delays the formation of the crust just enough for the loaf to expand fully, then solidifies into that satisfying snap. Without steam, the crust can become too thick and chewy, masking the delicate crumb.
The Sweet‑Salt Balance
A pinch of extra sea salt on the top of the loaf just before baking can elevate the flavor dramatically. The salt enhances the sweet notes from the honey and raisins, creating a sophisticated sweet‑salty contrast. I tried this once and the loaf tasted like it belonged in a high‑end café, not my kitchen.
Creative Twists and Variations
This recipe is a playground. Here are some of my favorite ways to switch things up:
Cheddar & Jalapeño Kick
Swap half of the raisins for shredded sharp cheddar and add a finely diced jalapeño. The cheese melts into the crumb, while the jalapeño provides a subtle heat that pairs beautifully with the caraway. Perfect for a brunch board or a hearty snack.
Apple Cinnamon Harvest
Replace the raisins with diced fresh apples and add a teaspoon of ground cinnamon to the dry mix. The apples soften during baking, releasing a sweet, autumnal perfume. This version shines with a dollop of whipped cream for a cozy evening treat.
Nutty Whole‑Grain Boost
Add a half‑cup of toasted chopped walnuts or hazelnuts and increase the whole wheat flour to three cups. The nuts introduce a crunchy contrast and extra nutrition, turning the loaf into a protein‑packed breakfast option.
Savory Herb Infusion
Omit the honey and raisins, and stir in a tablespoon of fresh rosemary, thyme, and a drizzle of olive oil. The result is a savory Irish soda bread that pairs perfectly with soups and stews. Serve warm with butter for an instant comfort side.
Gluten‑Free Adventure
Swap the wheat flours for a 1:1 blend of gluten‑free all‑purpose flour and oat flour, and replace the baking soda with 1 ½ teaspoons of gluten‑free baking powder. The texture changes slightly, but the flavor remains true, and you still get that rustic charm.
Storing and Bringing It Back to Life
Fridge Storage
Wrap the cooled loaf tightly in parchment, then a layer of foil, and store it in an airtight container in the refrigerator. It stays fresh for up to five days. When you’re ready to eat, slice off what you need and toast it lightly—this revives the crust nicely.
Freezer Friendly
Slice the loaf before freezing; this way you can pull out just one or two slices at a time. Place the slices in a zip‑top freezer bag, removing as much air as possible. The bread will keep for three months without losing its flavor. To reheat, microwave for 15 seconds or pop the slice in a toaster.
Best Reheating Method
For a just‑baked feel, preheat a skillet over medium heat, add a splash of water to the pan, then cover with a lid. The steam will soften the interior while the pan crisps the crust. This trick works even with frozen slices—just add a touch more water and a few extra seconds.