I still remember the first time I made these chicken nachos for a game night. I'd promised my friends "just some snacks," but what emerged from my oven was a mountain of cheesy, crispy, absolutely irresistible perfection that had people elbowing each other out of the way like it was Black Friday. The smell alone — that intoxicating blend of roasted chicken, melting cheese, and slightly charred tortillas — made one friend abandon his fantasy football draft mid-pick. By halftime, we'd devoured the entire tray, and I found myself fielding text messages for weeks asking when I'd make them again.
Here's the thing about most nacho recipes: they're liars. They promise you that sad pile of stale chips with a few shreds of cheese and some dry chicken will somehow transform into something magical. Instead, you end up with a soggy mess where half the chips are naked and the other half are drowning in a cheese swamp. I've been there, standing over a baking sheet of disappointment, wondering where it all went wrong. That's exactly why I became obsessed with creating the ultimate chicken nacho — one where every single chip gets its moment in the spotlight, where the cheese creates those Instagram-worthy cheese pulls, and where the chicken is so flavorful it could stand alone as its own dish.
After months of testing (my waistline has the battle scars to prove it), I cracked the code. The secret isn't just throwing more ingredients at the problem — it's about building layers of flavor and texture that work together like a well-rehearsed symphony. We're talking about chips that stay crispy for hours, chicken that's been marinated and seared to juicy perfection, a cheese blend that melts like a dream, and toppings that add pops of freshness and heat exactly when you need them. I dare you to taste this and not go back for seconds — actually, I dare you to stop at seconds.
Picture yourself pulling this out of the oven, the whole kitchen smelling incredible, cheese bubbling like hot lava, and your guests' eyes widening with that special kind of hunger that only truly great food can inspire. The edges of the chips will be golden and crispy, the cheese will be molten and stringy, and the chicken will be so tender it practically melts on your tongue. Stay with me here — this is worth it. Let me walk you through every single step — by the end, you'll wonder how you ever made it any other way.
What Makes This Version Stand Out
I've eaten my way through enough disappointing nachos to become a bit of a nacho snob, and I'm not sorry about it. Most recipes get this completely wrong by treating nachos like an afterthought — a quick pile of chips with some cheese melted on top. Here's what actually works, and why this version will ruin all other nachos for you forever.
- Double-Decker Construction: Instead of a single sad layer, we build these nachos like a skyscraper with strategic cheese placement between each level. This means every chip gets its fair share of toppings, and you won't encounter those depressing naked chips at the bottom.
- Seasoned Chicken That Steals the Show: The chicken isn't just cooked — it's marinated in a blend of lime, smoked paprika, and secret spices that make it taste like it came from the best taqueria in town. Most recipes use plain shredded chicken and wonder why their nachos taste bland.
- The Three-Cheese Blend: One cheese is never enough. We use sharp cheddar for flavor, Monterey Jack for meltability, and a touch of queso quesadilla for that authentic stretch. The combination creates a cheese pull that would make a food stylist weep with joy.
- Crisp-For-Hours Technique: Say goodbye to soggy chips forever. Our method involves a quick pre-toast of the chips and strategic placement of wet ingredients that keeps everything crispy even if these sit out during the whole game.
- Fresh vs. Hot Balance: Cold toppings go on after baking to create temperature and texture contrasts that'll make your tastebuds dance. Hot melted cheese meets cool sour cream and fresh pico de gallo — it's like a party where everyone actually gets along.
- Make-Ahead Magic: Everything can be prepped ahead, making this the ultimate stress-free entertaining dish. The chicken actually tastes better when made a day ahead, and all components can be stored separately until you're ready to assemble.
Alright, let's break down exactly what goes into this masterpiece, because understanding your ingredients is what separates the nacho masters from the nacho disasters. Trust me, once you see how these components work together, you'll never look at a bag of chips the same way again.
Inside the Ingredient List
The Flavor Foundation
Let's start with the chicken, because honestly, this is where most nacho recipes fall flat faster than a soufflé in a thunderstorm. I'm using boneless, skinless chicken thighs instead of breasts — and before you breast loyalists come for me, hear me out. Thighs have more fat, which means more flavor and zero chance of drying out under all that cheese. The marinade is where the magic happens: lime juice for brightness, smoked paprika for depth, cumin for earthiness, and a touch of brown sugar that helps create gorgeous caramelization when you sear the chicken.
The tortilla chips are not an afterthought — they're the canvas for our masterpiece. Look for thick-cut restaurant-style chips that can stand up to serious toppings without crumbling like my willpower at a pizza buffet. I prefer yellow corn for their sturdiness and slightly sweet flavor that pairs beautifully with the savory toppings. If you can find locally made chips, grab them — they usually have better flavor and texture than the national brands that taste like cardboard's sad cousin.
The Cheese Trinity
Here's where we get scientific about melting. Sharp white cheddar brings the flavor punch, but it can get oily when overheated. Monterey Jack is our melter — it creates those Instagram-worthy cheese pulls that stretch from here to next week. Queso quesadilla is the secret weapon, a Mexican cheese that melts like a dream and adds authentic flavor that pre-shredded bags can only dream of. Speaking of pre-shredded, we're grating our own because those anti-caking agents in bagged cheese are why your nachos sometimes taste like they've been dusted with chalk.
The ratio matters here: two parts Monterey Jack to one part cheddar to one part queso quesadilla. This isn't just me being persnickety — it's chemistry. Too much cheddar and you get a greasy puddle. Too little and you miss that sharp tang that makes cheese worth eating in the first place.
The Fresh Brigade
After baking is when we bring in the cool, fresh elements that create those swoon-worthy contrasts. Roma tomatoes work best for pico de gallo because they're less watery than their beefsteak cousins — nobody wants soggy chips. Cilantro divides the world like pineapple on pizza, so I make it optional but highly recommended. The key is adding it after baking so it stays bright and doesn't wilt into sad green flecks.
Sour cream gets a lime zest upgrade that makes it taste like you spent way more time on this than you actually did. Green onions provide that sharp, fresh bite that cuts through all the richness. And pickled jalapeños — oh, these aren't just for heat. They add acidity and brightness that makes all the other flavors pop like they're at a flavor disco.
The Unexpected Star
This is where I lose some people, but trust the process: a light drizzle of honey over the finished nachos. Not enough to make them sweet — just enough to create this beautiful contrast with the salty cheese and spicy jalapeños. It's like the honey is the diplomatic mediator that helps all the flavors get along in perfect harmony. I've seen grown adults close their eyes and sigh when they taste this combination for the first time.
Everything's prepped? Good. Let's get into the real action, because knowing why these ingredients matter is what transforms you from someone who follows recipes to someone who understands food on a deeper level. And now the fun part — we're about to build something beautiful.
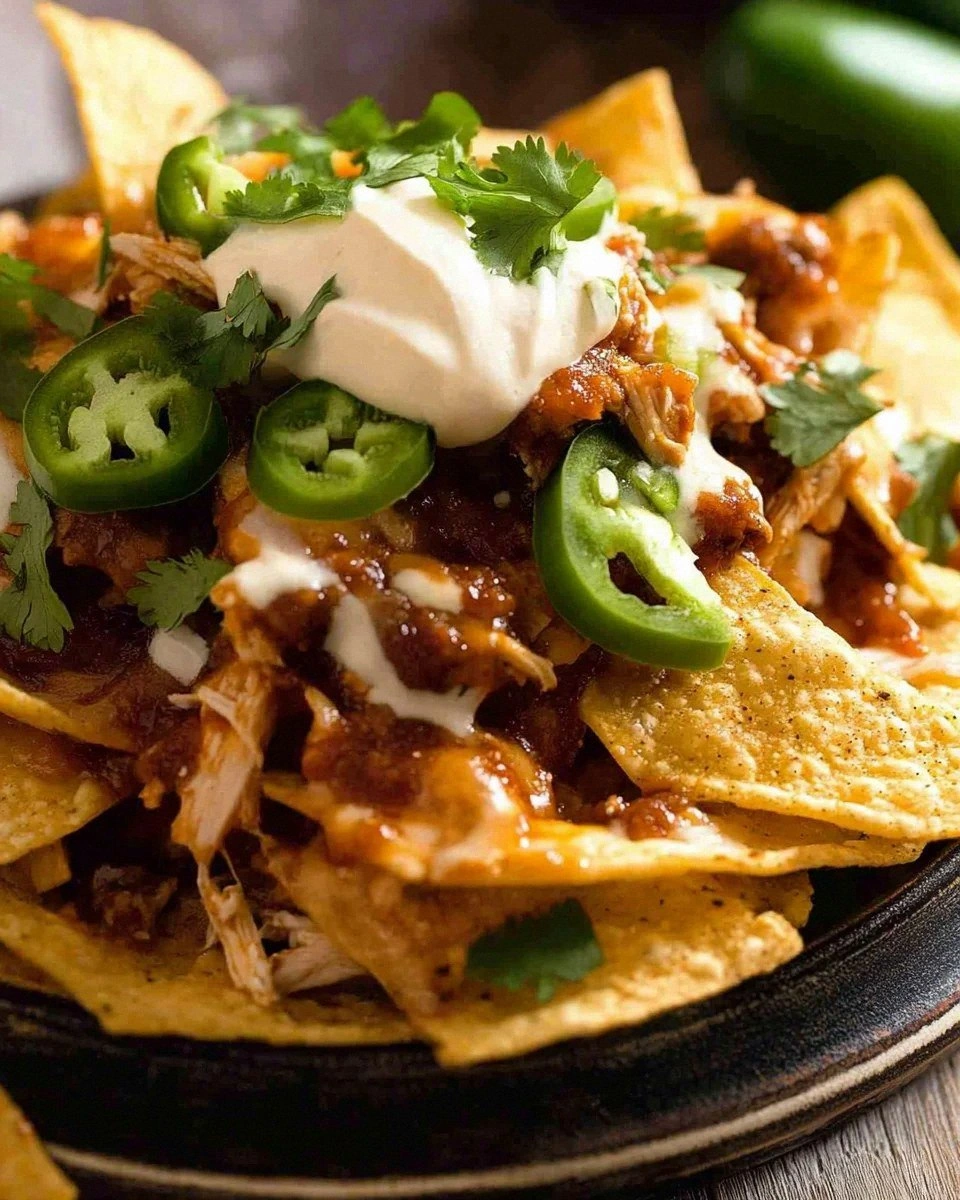
The Method — Step by Step
- Start by marinating your chicken at least 30 minutes before you plan to cook — but here's the kicker: if you can swing it, marinate it overnight. Mix the lime juice, smoked paprika, cumin, brown sugar, salt, and pepper in a bowl that makes you feel like a real chef. Add the chicken thighs and massage the marinade in like you're giving them a spa treatment. Cover with plastic wrap and let those flavors penetrate deep into the meat. That sizzle when it hits the pan later? Absolute perfection.
- Heat a cast-iron skillet over medium-high heat until it's smoking — I'm talking about 3-4 minutes of patience here. Add a tablespoon of oil and swirl it around; it should shimmer like a mirage in the desert. Lay your chicken thighs down and don't you dare move them for the next 5 minutes. We want that gorgeous brown crust that looks like it came from a restaurant. When you flip them, you'll see the caramelization that makes all the difference between boring chicken and chicken that makes people ask for your secret.
- While the chicken cooks, prep your cheese blend like your nacho happiness depends on it — because it does. Grate all three cheeses and mix them in a bowl, but save about a cup of the Monterey Jack for the top layer. This creates that beautiful golden blanket that'll make your Instagram followers jealous. Pop the cheese blend in the freezer for 10 minutes while you finish the chicken; this prevents it from getting oily when it melts. Okay, ready for the game-changer?
- Preheat your oven to 425°F and position the rack in the middle — this temperature is crucial for achieving that perfect melt without burning. Line a baking sheet with parchment paper for easy cleanup, because nobody wants to spend game night scrubbing baked-on cheese. Spread your tortilla chips in a single layer and toast them for exactly 5 minutes. This step is what keeps them crispy under all those toppings, creating a barrier that laughs in the face of moisture. Pull them out when they smell toasty and look slightly golden around the edges.
- Shred your cooked chicken with two forks, but here's the insider trick: add two tablespoons of the chicken juices back into the shredded meat. This keeps it moist and flavorful instead of turning into dry, sad strands that no amount of cheese can save. Taste the chicken now — it should be so good you could eat it straight from the bowl. If you've ever struggled with dry chicken on your nachos, you're not alone — and I've got the fix right here.
- Now we're building, and this is where most people get it wrong. Start with a layer of toasted chips, then sprinkle on one-third of your cheese blend. Add half your chicken, then another layer of chips. Repeat this process, creating distinct layers that ensure every bite has the perfect ratio of chip to topping. Think of it like building the most delicious lasagna, but with chips instead of pasta. The cheese between layers acts like delicious glue that holds everything together.
- Slide your creation into the oven and set a timer for 8 minutes — but don't walk away. Watch through the oven door like it's your favorite TV show. When the cheese is melted and just starting to bubble, switch to broil for the final 2-3 minutes. This creates those beautiful golden spots that make your nachos look professionally made. The edges will start pulling away from the pan slightly, and that's your cue that magic is happening.
- Remove from the oven and let it rest for exactly 2 minutes — I know it's torture, but this prevents the cheese from sliding off when you add cold toppings. During this agonizing wait, prep your fresh toppings: dice your pico de gallo ingredients, slice your green onions, and get that lime-zested sour cream ready. The contrast between hot and cold is what elevates these from good nachos to life-changing nachos.
- Scatter your fresh toppings over the hot nachos like you're Jackson Pollock with a culinary degree. Start with the pico de gallo, then drizzle the sour cream in a zigzag pattern that looks artistic even if you're not artistic. Add the green onions, pickled jalapeños, and finally that whisper of honey. Serve immediately with extra lime wedges on the side, because someone always wants more brightness. This next part? Pure magic.
That's it — you did it. But hold on, I've got a few more tricks that'll take this to another level, because understanding the science behind why these work so well is what separates the nacho enthusiasts from the nacho masters.
Insider Tricks for Flawless Results
The Temperature Rule Nobody Follows
Here's the thing about cheese: it has a sweet spot between 150°F and 170°F where it melts perfectly without separating into an oily mess. Most people crank their oven to 350°F and wonder why their cheese looks like it's crying. The solution? Start at 425°F to get everything hot, then drop to 350°F once the cheese is melted. This two-temperature method ensures maximum meltage without the grease slick that ruins so many nacho attempts. I'll be honest — I ate half the batch the first time I nailed this technique before anyone else got to try it.
Why Your Nose Knows Best
Your nose is actually the best timer for perfect nachos. When you smell the toasty aroma of chips mingling with melting cheese, you're about 2 minutes away from peak perfection. This is when you should switch to broil mode. The Maillard reaction — that magical browning that creates incredible flavor — happens when proteins and sugars meet high heat. Your nose can detect these compounds forming before your eyes can see them. A friend tried skipping this sensory check once — let's just say it didn't end well for their smoke detector.
The 5-Minute Rest That Changes Everything
I know you're hungry and that tray of molten deliciousness is calling your name, but patience is a virtue that pays off in nacho heaven. Letting the nachos rest for 5 minutes after baking allows the cheese to set slightly, preventing that tragic landslide when you add cold toppings. During this rest, the flavors meld together like they're at a team-building retreat. The chips that were slightly soft from steam will crisp back up, and the temperature will drop to that perfect "I won't burn my mouth" level. Picture yourself pulling this out of the oven, the whole kitchen smelling incredible, and actually being able to taste it instead of nursing a scorched tongue.
The Serving Size Sweet Spot
Here's my confession: I used to make nachos on a small baking sheet and wondered why people were fighting like vultures over the last chip. The secret is using a large surface area so you can spread everything thinly. This ensures maximum crispiness and prevents that dreaded chip pile-up that steams everything into sad, limp triangles. For a crowd, use two baking sheets rather than one overcrowded one. Your guests will thank you, and you'll actually get to eat some yourself instead of refereeing chip distribution disputes.
Creative Twists and Variations
This recipe is a playground. Here are some of my favorite ways to switch things up, because once you've mastered the base technique, the flavor possibilities are endless. Each variation keeps the fundamental structure but swaps in ingredients that create entirely new taste experiences.
The BBQ Ranch Revolution
Replace the Mexican seasoning with your favorite BBQ rub, then swap the pico de gallo for a mix of red onion and cilantro. Drizzle with ranch dressing instead of sour cream, and add crispy fried onions on top. The sweet-smoky BBQ flavor with cool ranch creates a flavor profile that'll make you wonder why all nachos don't taste like this. Use pulled chicken instead of diced for that authentic BBQ joint feel.
The Breakfast of Champions
Add scrambled eggs to the layering process and swap the chicken for chorizo. Top with hot sauce and serve with maple syrup on the side for dipping. The sweet-savory-spicy combination is breakfast perfection that works just as well at 2 AM as it does at 9 AM. The runny yolk from perfectly cooked eggs creates a sauce that coats everything in breakfast magic.
The Mediterranean Escape
Use za'atar seasoning on your chicken, swap the cheddar for feta, and add kalamata olives and sun-dried tomatoes. Replace sour cream with tzatziki and add fresh oregano. The bright, herbaceous flavors transport you straight to a Greek island, even if you're actually in your studio apartment in February. The briny olives and creamy feta create a flavor explosion that makes regular nachos seem one-dimensional.
The Buffalo Wing Transformation
Toss your cooked chicken in Buffalo sauce, use blue cheese crumbles instead of cheddar, and add chopped celery for crunch. The cooling sour cream becomes essential here, balancing the spicy Buffalo heat. This variation captures everything you love about Buffalo wings but in nacho form, which is basically the best of both worlds. Add extra hot sauce for the brave souls who like to live dangerously.
The Veggie Powerhouse
Skip the chicken entirely and load up with roasted vegetables — zucchini, bell peppers, and corn work beautifully. Add black beans for protein and smoked paprika for depth. Even meat lovers devour this version, proving that vegetables can absolutely steal the show when treated right. The roasted vegetables develop a caramelized sweetness that pairs beautifully with the salty cheese.
The Hawaiian Luau
Add diced pineapple to your chicken marinade, use a blend of mozzarella and cheddar for that Hawaiian pizza vibe, and include Canadian bacon instead of regular chicken. The sweet pineapple creates an unexpected but delicious contrast with the salty cheese and savory meat. Top with fresh mint instead of cilantro for a tropical twist that'll have you dreaming of beaches and luaus.
Storing and Bringing It Back to Life
Fridge Storage
Here's the reality: these nachos are best fresh, but sometimes life happens and you need to store leftovers. Separate the components before refrigerating — store the chips in an airtight container at room temperature, keep the chicken and cheese mixture in one container, and fresh toppings in another. This prevents the soggy tragedy that occurs when everything gets stored together. The chicken mixture will keep for up to 4 days refrigerated, and honestly, it gets even more flavorful as the spices meld together.
Freezer Friendly
You can freeze the cooked chicken for up to 3 months, but I don't recommend freezing assembled nachos — it's a texture disaster waiting to happen. Instead, freeze the chicken in portion-sized bags so you can whip up fresh nachos whenever the craving strikes. The cheese blend actually freezes beautifully, so make a big batch and freeze what you don't use. When you're ready to nacho again, just thaw overnight in the fridge and proceed with fresh chips and toppings.
Best Reheating Method
If your nachos have gotten soggy (the tragedy!), don't despair. Preheat your oven to 400°F and spread the nachos on a baking sheet. Add a tiny splash of water before reheating — it steams back to perfection by creating just enough moisture to re-crisp without drying out. Heat for 5-7 minutes until crispy again. The microwave is nacho enemy number one, turning everything rubbery and sad. Trust the oven method; your taste buds will thank you for the extra 10 minutes of patience.