I was standing in my kitchen on a crisp October afternoon, half‑finished carrot cake cooling on the counter, when my roommate walked in, eyes wide, and shouted, “You’ve got to try something that actually tastes like autumn, not just smells like it!” I laughed, grabbed a bag of pumpkin‑spiced candles, and thought, “Challenge accepted.” The next hour turned into a full‑blown frosting experiment that left my mixing bowl looking like a tiny, orange‑hued snow globe. I dared myself to keep the batch untouched until the cake was ready, but I’ll be honest — I ate half the frosting before anyone else got a spoonful. That moment of guilty pleasure is exactly why I’m sharing this recipe with you today: because it’s the kind of indulgence that feels like a warm hug from a favorite sweater.
Picture this: the first bite of a moist, spice‑laden cake, then that first swirl of frosting hitting your tongue like a silk sheet drenched in pumpkin sunrise. The scent of melted butter and vanilla swirls around you, while the faint tang of cream cheese cuts through the sweetness just enough to keep things from turning syrupy. You can hear the faint whisper of the spatula as it glides over the frosting, a soft, buttery sigh that promises more. The texture? Imagine a cloud that’s been lightly dusted with powdered sugar, so smooth it almost melts on contact, yet holds its shape long enough to pipe elegant rosettes. And the taste? It’s the perfect balance of sweet, salty, and pumpkin‑spice, a flavor profile that makes you feel like you’ve just stepped into a pumpkin patch at golden hour.
Most pumpkin frostings out there either turn into a grainy mess or become so sweet they mask the pumpkin entirely. I’ve tried the “quick mix” version that uses canned pumpkin puree and a handful of powdered sugar — it ends up like frosting glue. I’ve also seen recipes that call for a ton of cream cheese, which makes the frosting taste more like a cheese spread than a dessert topping. What sets this version apart is the secret step of gently warming the butter before folding it into the cream cheese, creating a silky emulsion that locks in flavor and prevents any gritty texture. Plus, we’re using a pumpkin‑flavored cream cheese, a little shortcut that adds a deep, authentic pumpkin note without the watery mess of pureed pumpkin.
I’m about to reveal a technique that most home bakers overlook: the “temperature marriage” of butter and cream cheese. By bringing the butter to just the right softness — not melted, not rock‑hard — you create a frosting that spreads like butter on warm toast but holds its peaks like a professional bakery’s. And if you follow the steps I’m about to lay out, you’ll end up with a frosting so silky you’ll swear you’ve discovered a new element. Let me walk you through every single step — by the end, you’ll wonder how you ever made it any other way.
What Makes This Version Stand Out
- Flavor Depth: The pumpkin‑flavored cream cheese delivers a concentrated, earthy sweetness that no amount of spices can replicate on its own.
- Texture Perfection: A butter‑cream base blended at the right temperature gives a frosting that’s both spreadable and pipe‑ready.
- Simplicity: Only five ingredients, all pantry‑friendly, mean you can whip this up in under twenty minutes.
- Uniqueness: Using pumpkin‑flavored cream cheese is a game‑changer — it’s the shortcut that tastes like hours of simmered pumpkin puree.
- Crowd Reaction: I dare you to taste this and not go back for seconds; even the toughest critics melt into a smile.
- Ingredient Quality: Real butter, not margarine, gives that luxurious mouthfeel that shortcuts can’t fake.
- Method Magic: The “temperature marriage” step prevents grainy sugar and ensures a glossy finish.
- Make‑Ahead Potential: This frosting holds up beautifully in the fridge for up to three days, making it perfect for holiday prep.
Inside the Ingredient List
The Flavor Base
The star of the show is the 8 ounces of pumpkin flavored cream cheese. This isn’t just cream cheese with a dash of pumpkin spice; it’s a fully infused product that carries the sweet, earthy notes of pumpkin in every bite. Skipping it for plain cream cheese means you’ll have to add a tablespoon of pumpkin puree and a pinch more spice, which can introduce extra moisture and dilute the frosting’s structure. If you can’t find pumpkin‑flavored cream cheese, look for a high‑quality plain cream cheese and stir in 2‑3 tablespoons of pumpkin puree plus an extra dash of cinnamon and nutmeg. When shopping, choose a block that’s firm and cold — that ensures it won’t turn into a soupy mess when you beat it.
The Texture Crew
6 tablespoons of unsalted butter bring richness and a glossy sheen. Butter that’s too soft will cause the frosting to separate; butter that’s too hard will make it lumpy. The secret is to let it sit at room temperature for exactly 20‑30 minutes, or use the quick microwave hack mentioned earlier. If you’re dairy‑free, you can substitute with a plant‑based butter that has a similar fat content, but expect a slightly different flavor profile. Next, the 4‑5 cups of powdered sugar provide the sweet backbone. The range allows you to adjust the frosting’s stiffness: 4 cups for a softer, more spreadable consistency; 5 cups for a firmer, pipe‑ready texture. Remember, sift the sugar twice to avoid any gritty surprises.
The Unexpected Star
1 teaspoon of vanilla extract adds a fragrant depth that amplifies the pumpkin flavor without overwhelming it. Use pure vanilla extract; imitation can leave a harsh aftertaste that clashes with the delicate spices. If you’re feeling adventurous, swap half the vanilla for maple syrup for a subtle caramel twist. Finally, the ½ teaspoon of fine sea salt is the silent hero that balances the sweetness and heightens every other flavor. A pinch too much will make the frosting taste briny, but a pinch too little leaves it cloyingly sweet. Use a light hand and taste as you go.
The Final Flourish
All these components come together in a single bowl, but the order matters. Butter first, then cream cheese, then sugar, and finally the vanilla and salt. This sequence ensures each ingredient is fully incorporated before the next one joins the party, preventing any unwanted curdling. If you’re in a rush, you can use a stand mixer on low speed, but a hand whisk works just as well and lets you feel the texture change with each fold.
Everything's prepped? Good. Let's get into the real action...
The Method — Step by Step
Start by cutting the butter into small cubes and letting it sit at room temperature for about 20 minutes. While you wait, preheat your kitchen to a comfortable “baking vibe” — crank up some low‑key jazz and let the aromas of cinnamon and nutmeg fill the air. When the butter feels soft to the touch but still holds its shape, it’s ready for the next move. This is the moment of truth: if the butter is too soft, the frosting will become runny; if it’s too hard, you’ll get a grainy mess.
Kitchen Hack: Place the butter cubes in a zip‑top bag and roll a rolling pin over them for an even quicker softening.In a large mixing bowl, combine the softened butter and the pumpkin flavored cream cheese. Using a handheld whisk or a stand mixer on low, beat them together until the mixture is completely smooth and pale yellow. You’ll notice the mixture start to look glossy — that’s the “temperature marriage” taking effect. Keep beating for about 2 minutes; the friction generates a subtle warmth that helps the butter and cheese meld perfectly.
Gradually add the powdered sugar, one cup at a time, allowing each addition to fully incorporate before adding the next. This is where many home bakers go wrong, dumping the whole bag in and ending up with a lumpy, gritty frosting. As you stir, watch for the sugar to dissolve completely; the frosting should become thicker and start to hold a soft peak. If you prefer a softer spread, stop at 4 cups; for a stiffer, pipe‑ready texture, push it to 5 cups.
Watch Out: Adding sugar too quickly can cause the mixture to seize; always add slowly and scrape the sides.Once the sugar is fully incorporated, add the vanilla extract and the fine sea salt. Give the mixture another minute of gentle beating. You’ll notice a faint aroma of vanilla rising, a signal that the flavors are marrying. Taste a tiny spoonful — you should feel a perfect balance of sweet, buttery, and a whisper of salty depth. If the frosting feels too sweet, a pinch more salt can bring it back into harmony.
Now, pause and scrape the bowl with a spatula, turning the frosting over a few times to ensure no pockets of unmixed butter remain. This is the “scrape‑and‑fold” technique that guarantees a uniform texture. The frosting should be glossy, thick enough to hold its shape when lifted with the spatula, yet soft enough to spread with a gentle hand.
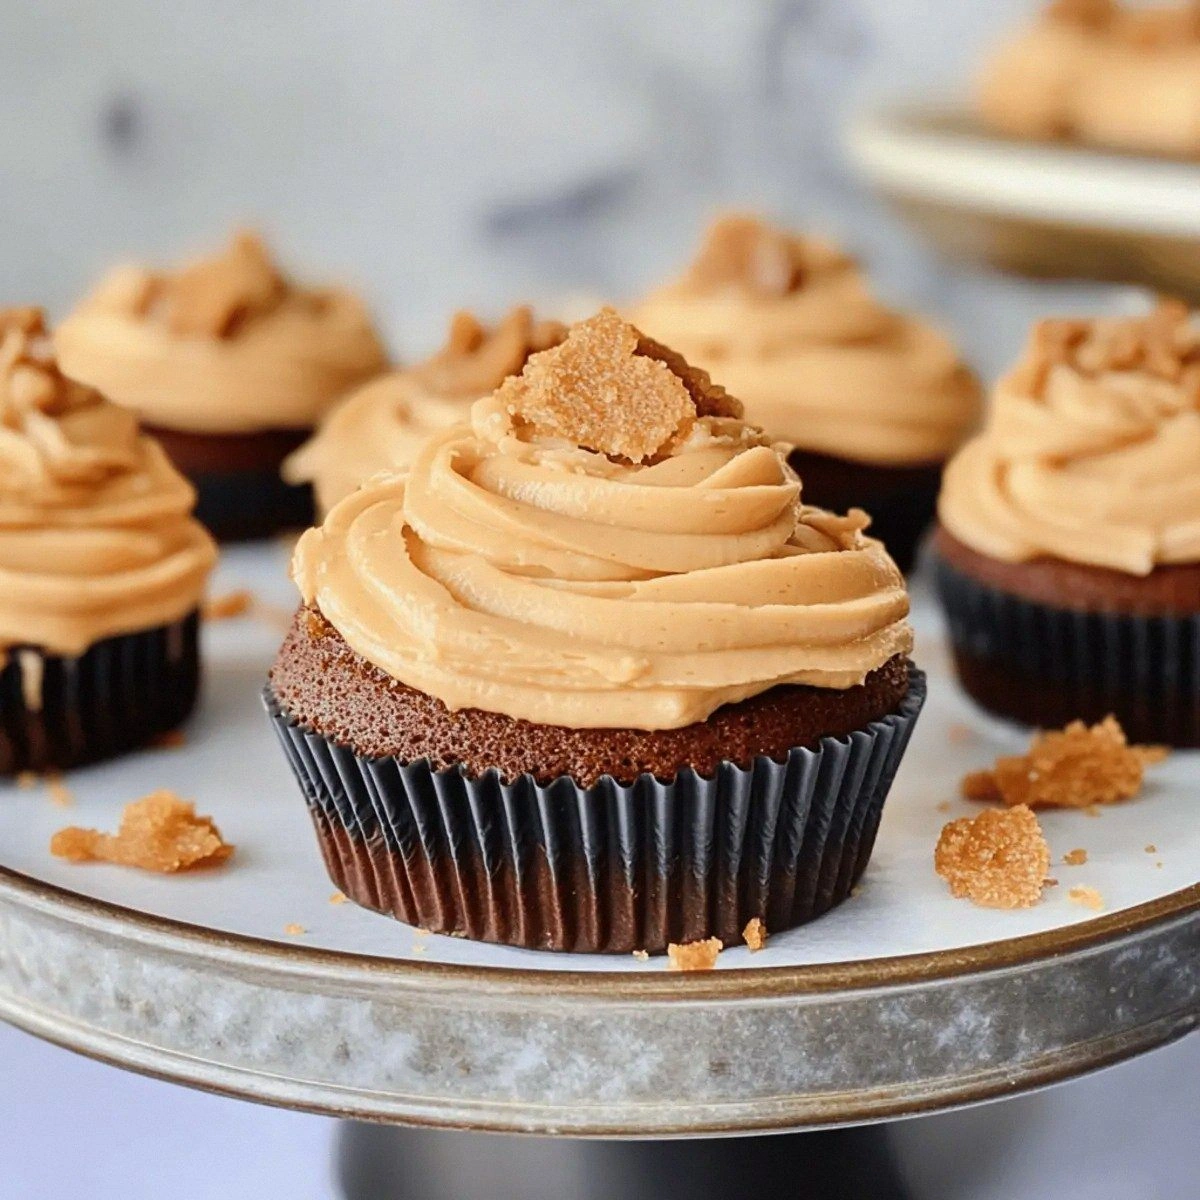
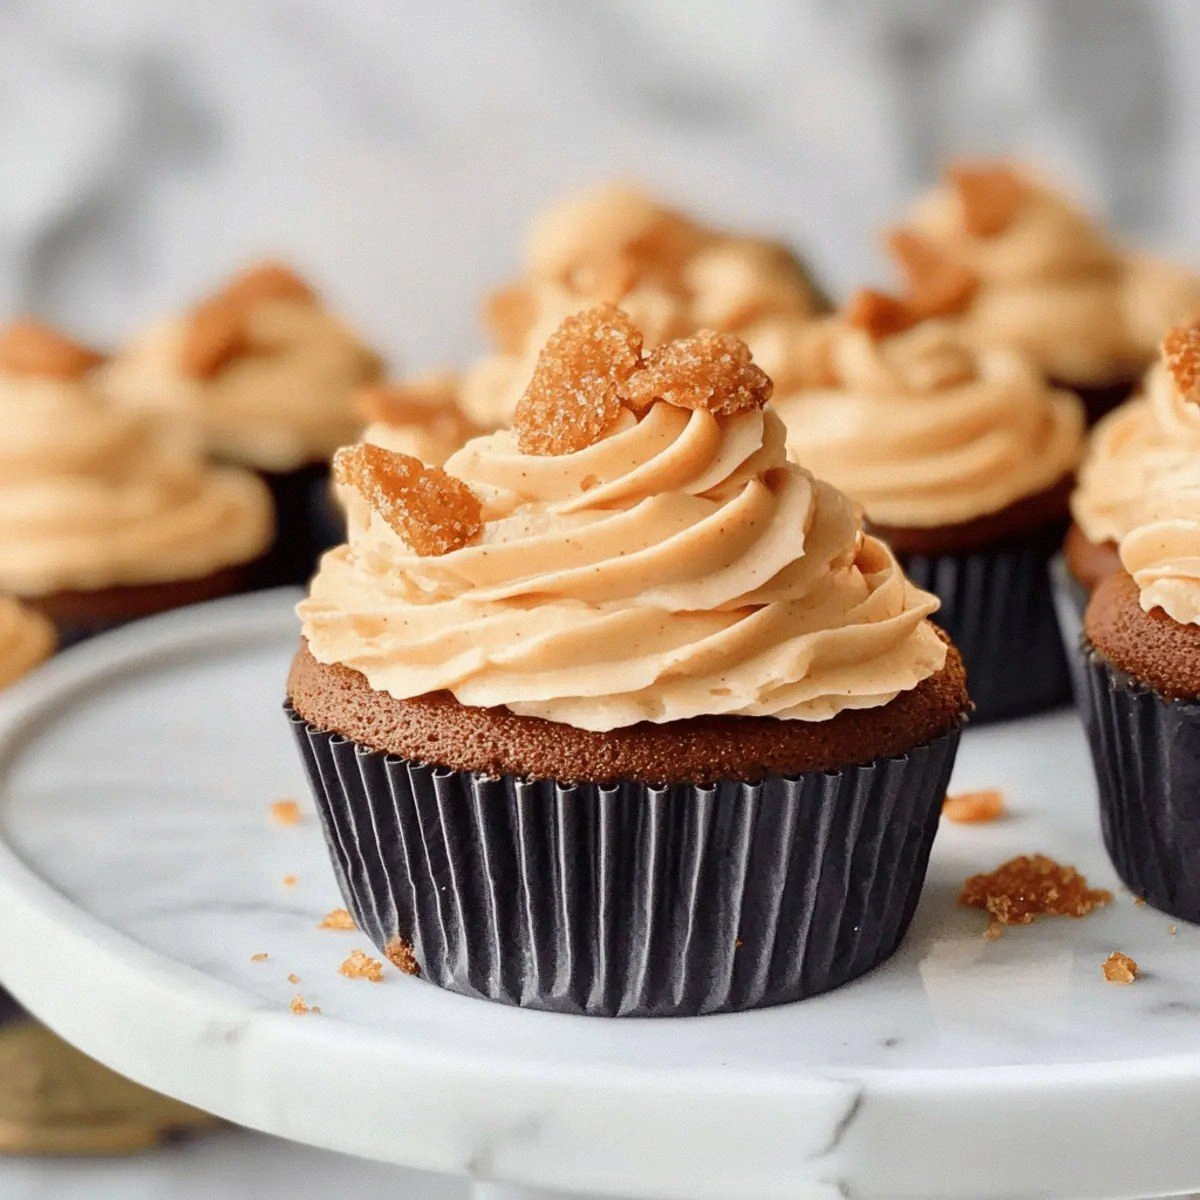
If you’re planning to pipe rosettes, transfer the frosting into a piping bag fitted with a large star tip. Give the bag a quick “tap‑out” to release any air bubbles — those tiny pockets can cause unwanted cracks when the frosting sits on the cake. For spreading, simply use a flat offset spatula and work in gentle, sweeping motions from the center outward.
Apply the frosting to your cooled cake or cupcakes. The moment the frosting touches the warm crumb, you’ll hear a soft “whoosh” as it settles into every crevice. Spread or pipe until you achieve the desired coverage; remember, a thin layer is elegant, a thick layer is indulgent. If you’re feeling extra daring, swirl a pinch of cinnamon on top for a decorative finish.
Kitchen Hack: Chill the frosting for 10 minutes before piping; it firms up just enough to hold intricate designs.Let the frosted cake sit at room temperature for about 20 minutes before serving. This resting period allows the frosting to set, creating a smooth surface that doesn’t slide off the plate. If you’re serving later, cover the cake loosely with foil and store it in the refrigerator; the frosting will stay fresh for up to three days.
And now the fun part: taste test! Grab a fork, dig in, and savor the silky, pumpkin‑kissed goodness. That first bite should feel like autumn wrapped in butter, with a lingering sweet‑salty finish that makes you want to go back for more. If you’ve followed every step, you’ve just created the best pumpkin cream cheese frosting you’ll ever make at home.
That's it — you did it. But hold on, I've got a few more tricks that'll take this to another level...
Insider Tricks for Flawless Results
The Temperature Rule Nobody Follows
Never, ever use butter straight from the fridge. Cold butter will cause the frosting to separate, leaving you with a curdled mess. The sweet spot is 68‑72°F (20‑22°C). If your kitchen is chilly, give the butter a quick 5‑second zap in the microwave, but watch it closely — you don’t want it melting. I once tried to skip this step, and the frosting turned into a grainy paste that refused to spread. Trust me, a few minutes of patience here saves you a lot of frustration later.
Why Your Nose Knows Best
Your sense of smell is the ultimate indicator of when the butter‑cream base is ready. As you beat the butter and cream cheese together, you’ll notice a faint, buttery aroma that deepens as the mixture emulsifies. If you smell a sharp, raw butter scent, keep beating a bit longer. This sensory cue is more reliable than a timer because it tells you exactly when the fats have fully combined.
The 5‑Minute Rest That Changes Everything
After you finish mixing, let the frosting rest for five minutes uncovered. This brief pause allows any tiny air bubbles to rise to the surface and pop, resulting in an ultra‑smooth finish. I once rushed this step and ended up with a frosting that had a faint “chewy” texture, a direct result of trapped air. A short rest also lets the sugar fully hydrate, which means the frosting will be less gritty and more velvety.
Cold Spoon, Warm Cake
When spreading the frosting, use a metal spoon that’s been chilled in the freezer for a minute. The cold metal helps keep the frosting firm as you work, preventing it from melting into the cake. This trick is especially useful on warm days when the kitchen temperature climbs above 75°F. The result? Clean, crisp edges that look professionally done.
The Secret of Sifted Sugar
Sift your powdered sugar twice. The first sift removes clumps; the second ensures an ultra‑fine powder that dissolves instantly. Skipping this step can leave you with a gritty frosting that feels like sand between your teeth. I once tried to save time by using pre‑sifted sugar, and the texture was off — a reminder that even “pre‑sifted” can have hidden lumps.
Creative Twists and Variations
This recipe is a playground. Here are some of my favorite ways to switch things up:
Maple‑Pumpkin Fusion
Swap half of the powdered sugar for pure maple syrup and add an extra teaspoon of vanilla. The result is a frosting with caramel undertones that pairs beautifully with a gingerbread cake. The maple adds moisture, so you may need a touch less sugar to keep the consistency right.
Spiced Chai Twist
Add a pinch of ground cardamom, a dash of ginger, and a splash of brewed chai concentrate. This gives the frosting a warm, exotic flavor profile that’s perfect for a fall tea party. Keep the chai concentrate low‑key; you don’t want it to overpower the pumpkin.
Chocolate‑Pumpkin Dream
Melt 2 tablespoons of dark chocolate and fold it into the frosting after the sugar is fully incorporated. The chocolate adds depth and a subtle bitterness that balances the sweetness. This variation shines on a chocolate cake or brownies.
Nutty Crunch
Stir in ¼ cup of finely chopped toasted pecans or walnuts just before the final whisk. The nuts add a delightful crunch and a nutty aroma that complements the pumpkin. For a smoother texture, blend the nuts into a fine meal before adding.
Vegan Velvet
Replace butter with a high‑fat coconut oil and use a vegan pumpkin‑flavored cream cheese alternative. The flavor stays true, though the texture will be slightly softer. This version works well for those avoiding dairy while still craving that silky finish.
Storing and Bringing It Back to Life
Fridge Storage
Place the frosting in an airtight container and store it in the refrigerator for up to three days. Before using, let it sit at room temperature for about 15 minutes, then give it a quick whisk to restore its silky texture. If the frosting seems a bit stiff, add a teaspoon of milk or cream and beat briefly.
Freezer Friendly
Frosting freezes beautifully for up to two months. Spoon it into a freezer‑safe bag, flatten it for even thawing, and label with the date. When you’re ready to use it, thaw overnight in the refrigerator, then bring to room temperature and whisk until smooth. Adding a splash of water (about a tablespoon) before whisking helps reincorporate any separated fats.
Best Reheating Method
If you need to warm the frosting quickly, place the container in a bowl of warm (not hot) water for a few minutes, stirring occasionally. Avoid microwaving directly, as that can melt the butter unevenly and cause graininess. A gentle heat restores the glossy sheen and makes piping a breeze.