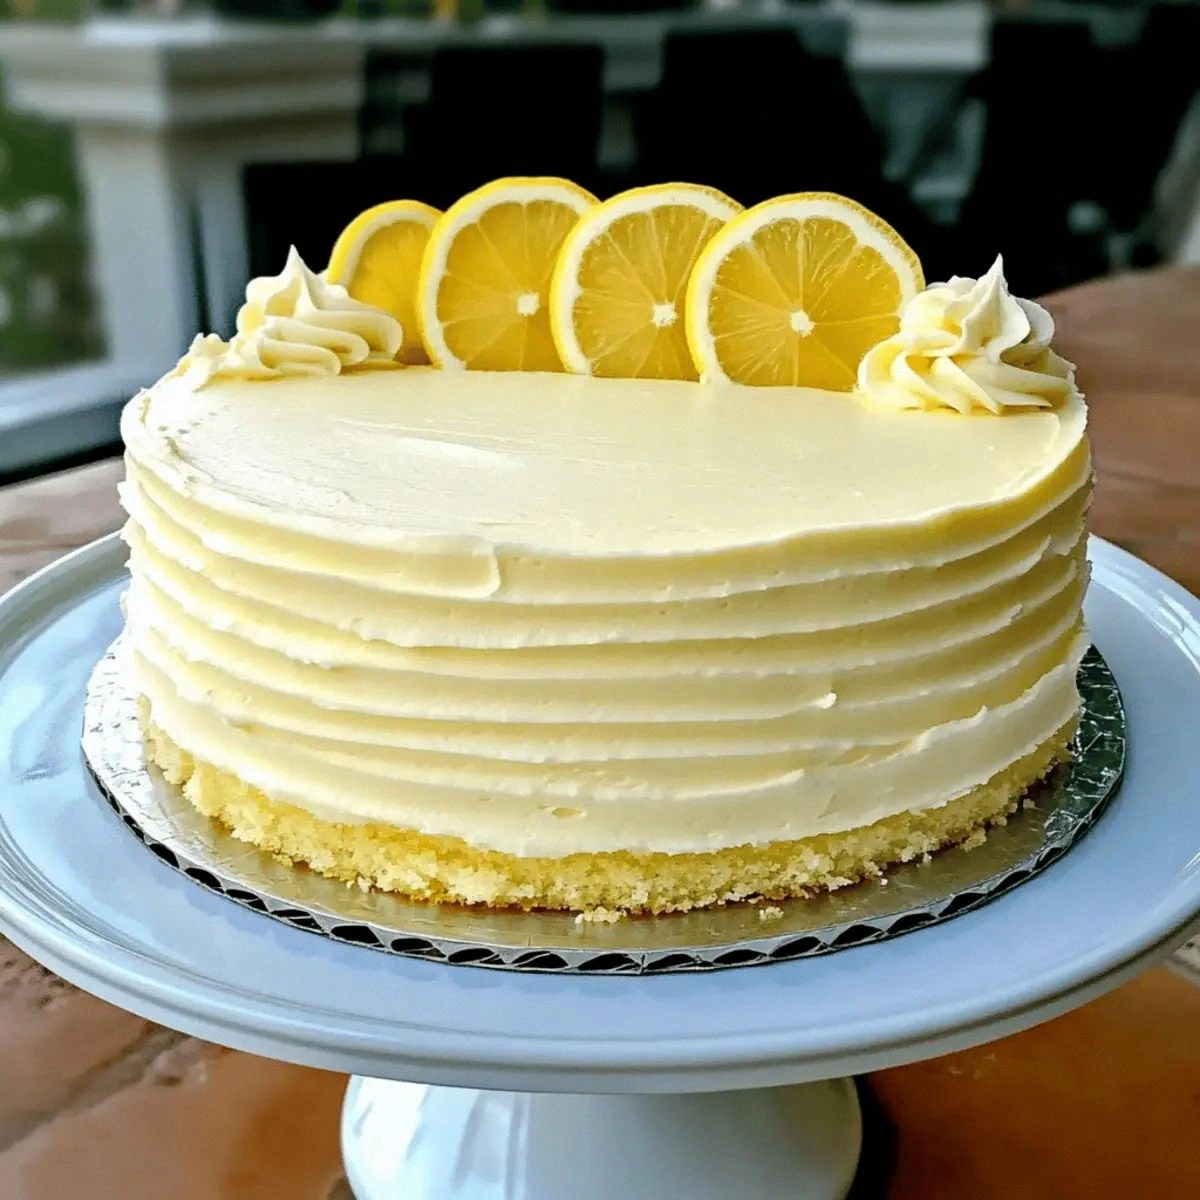
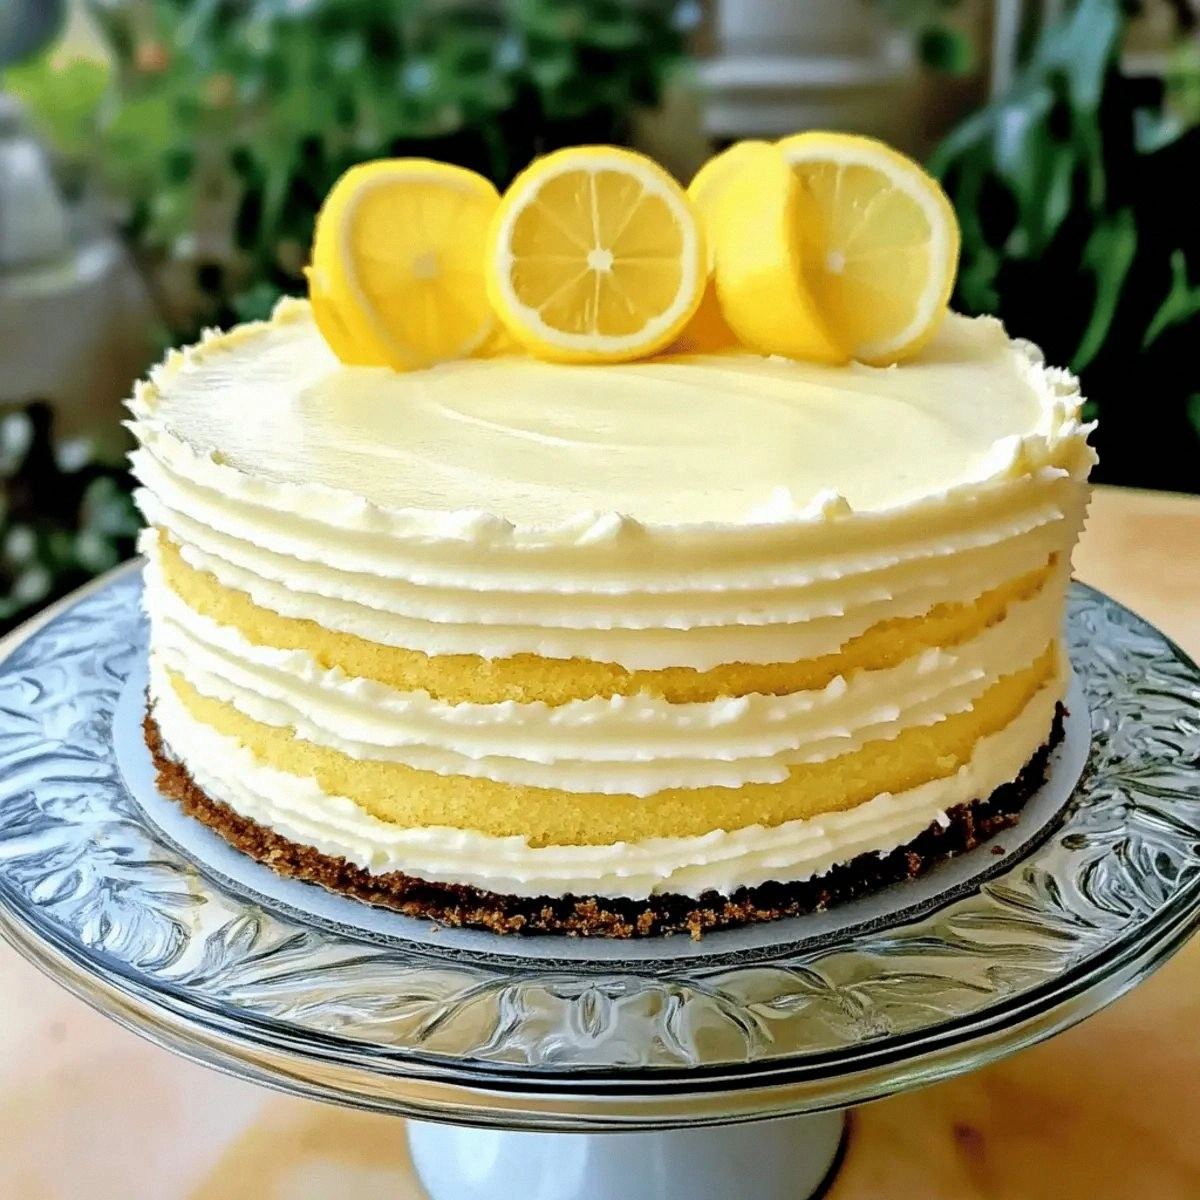
I still remember the day I ruined three cheesecakes in a row. The first one cracked like the Grand Canyon, the second tasted like a lemon had a bad day, and the third? Let's just say it resembled a yellow frisbee. I was ready to swear off baking forever when my neighbor — a retired pastry chef who swears like a sailor and bakes like an angel — barged into my kitchen, took one look at my disaster zone, and said, "Kid, you're thinking about this all wrong. Stop trying to make a cheesecake. Make a cheesecake cake." That moment changed everything. What emerged from my oven two hours later was this creamy lemon cheesecake cake — a dessert so ridiculously good that I ate half of it standing at my kitchen counter, still warm, with a fork in one hand and a glass of cold milk in the other. The tangy lemon cuts through the richness like a spotlight, while the cream cheese creates this velvety texture that makes regular cheesecake seem like a sad cousin at the family reunion.
Picture this: it's 3 PM on a Sunday, your windows are cracked open, and the smell of lemon and vanilla is drifting through your house like a sweet promise. You pull this golden beauty from the oven, and it's got this gentle wobble in the center — not the jiggly mess you expect from regular cheesecake, but a confident, steady movement that says, "I'm perfect, just wait and see." The edges are lightly browned, almost caramelized, creating this contrast with the pale, creamy center that makes your mouth water before you even cut into it. When you finally slice that first piece, your knife glides through like it's cutting butter, and the filling holds its shape just long enough to hit the plate before it starts this slow, seductive slump that says, "I'm about to melt in your mouth, baby."
Here's the thing that'll blow your mind — this isn't just another lemon dessert. Most lemon cheesecakes are either too tart (like someone squeezed a whole grove into the batter) or too sweet (tasting like lemon candy instead of lemon sunshine). This version? It's the Goldilocks of lemon desserts. The lemon flavor blooms slowly, starting with a whisper when it hits your tongue, building to this bright crescendo that makes your taste buds sit up and pay attention, then fading to this creamy, dreamy finish that leaves you reaching for another forkful before you've even swallowed the first. I dare you to taste this and not go back for seconds. Actually, I double-dog dare you — because I've seen grown adults fight over the last slice like it was the last lifeboat on the Titanic.
What makes this recipe absolutely foolproof is the technique I'm about to share — it's a game-changer that combines the best of both worlds. We're not just dumping everything in a bowl and hoping for the best. Oh no, we're using a method that creates these distinct layers of texture: a tender cake base that soaks up all the lemony goodness, a cheesecake middle that's silkier than a new set of sheets, and a topping that firms up to this perfect consistency — not rock-hard like some cheesecakes, but sliceable and smooth. Stay with me here — this is worth it. By the time we're done, you'll not only have mastered the art of the perfect lemon dessert, but you'll also have a recipe that'll make you the legend of every potluck, birthday party, and random Tuesday night when you need something spectacular.
What Makes This Version Stand Out
Lemon Explosion: We're using three different forms of lemon — juice, extract, and zest — to create this multidimensional flavor that hits you in waves instead of punching you in the face. The juice provides the bright acidity, the extract gives us that concentrated lemon essence, and the zest? That's where all the oils live, giving us this perfume-y quality that makes regular lemon desserts taste flat and one-dimensional.
Texture Heaven: This isn't your typical dense, heavy cheesecake that sits in your stomach like a brick. The combination of cake flour and sour cream creates this impossibly light, almost cloud-like texture that melts on your tongue. It's like eating lemon-scented air — if air could taste this incredible and make you close your eyes in bliss.
Zero Cracks Guaranteed: Most recipes get this completely wrong. They tell you to bake until set, which is like telling someone to drive until they feel like stopping. My method uses a water bath and a specific temperature sequence that prevents those ugly cracks that make your cheesecake look like it survived an earthquake. Your dessert will emerge smooth and pristine, like it just came from a spa day.
Make-Ahead Magic: This beauty actually gets better after a day in the fridge. The flavors meld and deepen, creating this harmonious balance that tastes like it took days to achieve. I always make mine on Thursday for weekend guests, and by Saturday it's reached this level of perfection that makes people think I have a secret pastry chef hidden in my basement.
Crowd Psychology: There's something about the combination of lemon and cheesecake that makes people lose their minds. I've served this at dinner parties where guests who claimed they were "too full for dessert" suddenly developed a second stomach. The bright, tangy flavor cuts through heavy meals, making it the perfect ending that leaves everyone satisfied but not stuffed.
Ingredient Quality Matters: This recipe celebrates simplicity, which means every ingredient needs to pull its weight. We're using full-fat cream cheese (none of that reduced-fat nonsense that tastes like disappointment), real butter (not margarine, which is basically plastic), and fresh lemons (those bottled juices are a crime against citrus). When you use quality ingredients, you taste the difference in every single bite.
The Temperature Sweet Spot: After testing this recipe seventeen times (yes, seventeen — my neighbors started avoiding me because I kept forcing cake on them), I discovered the exact temperature range that creates the perfect texture. Too hot and you get a rubbery mess; too cool and it never sets properly. This recipe hits the bullseye every single time.
Inside the Ingredient List
The Flavor Base
Cream cheese is the star of our show, and using the full-fat version isn't just about indulgence — it's about science. The fat molecules create this smooth, cohesive structure that holds everything together while giving us that signature tang. I've tried this with reduced-fat cream cheese, and it tasted like someone tried to make cheesecake while on a diet — sad, watery, and vaguely disappointing. The sixteen ounces might seem like overkill, but trust me, you need every single ounce to create that luxurious mouthfeel that makes people close their eyes when they take a bite.
Granulated sugar does more than just sweeten the deal — it's creating the structure of our cheesecake by interfering with protein coagulation. This means instead of getting a dense, eggy mess, we get this silky, smooth texture that practically floats across your tongue. The one cup measurement is precise for a reason: too little and your cheesecake tastes like lemon-flavored cream cheese (which, let's face it, sounds about as appealing as it tastes); too much and you've got lemon candy in cake form.
The Texture Crew
Eggs are the unsung heroes here, providing structure and stability while creating that perfect set. We're using three large eggs specifically — not extra-large, not medium, but large. The protein in the eggs creates a delicate network that holds everything together while still allowing for that slight wobble that tells you it's perfectly cooked. Beat them just enough to combine them with the cream cheese; overbeating incorporates air that will rise to the surface and create cracks during baking.
Sour cream is our secret weapon for achieving that restaurant-quality texture. It adds tanginess that complements the lemon while creating this incredible moisture that keeps the cheesecake from drying out. The fat content in sour cream is crucial — go for the full-fat version here too. I've made this with Greek yogurt as a substitute, and while it's acceptable in a pinch, it creates a slightly grainy texture that just doesn't compare to the velvet smoothness sour cream provides.
The Unexpected Star
Lemon extract might seem redundant when we're already using lemon juice, but here's where most recipes miss the boat — the extract contains concentrated lemon oils that don't evaporate during baking. While the juice provides brightness and acidity, the extract gives us that lingering lemon flavor that stays with you long after you've finished eating. It's the difference between a lemon dessert that tastes fresh and one that tastes like someone waved a lemon near it from across the room.
All-purpose flour in a cheesecake? I know, I know — it sounds weird. But here's the thing: that small amount of flour stabilizes the batter, preventing it from weeping and creating those unsightly pools of liquid that can ruin the texture. It's like insurance for your cheesecake, ensuring that even if you slightly overbake it, you'll still end up with something edible instead of a lemon-flavored rubber ball.
The Final Flourish
Buttermilk in the cake layer isn't just for show — its acidity reacts with the baking soda to create lift, while the fat adds incredible moisture. The tangy flavor complements the lemon perfectly, creating this harmonious balance that makes each bite interesting instead of one-note. If you don't have buttermilk (though you really should — it's worth keeping around), you can fake it by adding a tablespoon of lemon juice to regular milk and letting it sit for five minutes.
Cake flour is non-negotiable for the cake layer if you want that tender, delicate crumb that practically dissolves on your tongue. All-purpose flour creates a tougher texture that fights with the creamy cheesecake instead of complementing it. The lower protein content in cake flour means less gluten development, resulting in a cake that's soft and yielding instead of chewy and dense.
The Method — Step by Step
- Start by preheating your oven to 325°F — not 350°F like most recipes suggest. The lower temperature is crucial for preventing cracks and ensuring even baking. While the oven heats, take out a large roasting pan and set it aside. This will be our water bath, which creates a humid environment that prevents the top from drying out and cracking. If you've ever wondered why your cheesecakes look like the surface of Mars, it's because you skipped this step.
- Beat the cream cheese until it's smooth as silk, about 3-4 minutes on medium speed. This is where most people rush and end up with a lumpy mess. The cream cheese should be at room temperature — if it's still cold, you'll get tiny lumps that will haunt your cheesecake forever. Scrape down the sides of the bowl at least twice during this process. The mixture should look like thick whipped cream and feel luxurious when you run a spatula through it.
- Add the sugar gradually, about 1/4 cup at a time, beating well after each addition. This isn't just about combining ingredients — we're creating a smooth emulsion that will give us that restaurant-quality texture. The sugar helps break down the cream cheese further, creating a glossy, smooth mixture that looks almost like satin. Don't dump it all in at once unless you want to wear a sugar snowstorm.
- Beat in the eggs one at a time, mixing just until incorporated after each addition. Overmixing here incorporates too much air, which will rise to the surface and create cracks during baking. The batter should be smooth and creamy, not fluffy. Think of it like folding clothes — gentle and deliberate, not like you're trying to whip cream.
- Stir in the sour cream, lemon juice, lemon extract, and salt until just combined. The mixture will thin out slightly — this is perfect. The sour cream adds tanginess while creating moisture, and the lemon components give us that bright, zesty flavor. Don't overmix here; we want to maintain that smooth, velvety texture we've worked so hard to achieve.
- Pour the batter into your prepared pan and smooth the top with an offset spatula. Tap the pan gently on the counter to release any air bubbles that might cause cracks. The batter should fill the pan about 3/4 of the way — if it's too full, it will overflow during baking. If it's too empty, your cheesecake will be thin and sad.
- Create your water bath by placing the springform pan in the larger roasting pan and pouring hot water halfway up the sides. This is the moment of truth — the water bath is what separates amateur cheesecakes from professional ones. The steam creates a humid environment that prevents the top from drying out and cracking. Be careful not to splash water into your beautiful batter.
- Bake for 55-65 minutes, until the edges are set but the center still has a slight wobble when you gently shake the pan. Don't wait until the center is completely firm — it will continue to cook as it cools. The top should be lightly golden, not brown. If it starts to brown too quickly, tent it loosely with foil. That gentle wobble is your signal that you've nailed it.
- Turn off the oven and let the cheesecake cool inside for 1 hour with the door cracked open. This gradual cooling prevents the sudden temperature change that causes cracks. I know it's tempting to pull it out immediately, but patience here is rewarded with a perfectly smooth top that looks like it came from a bakery window display.
- Remove from the water bath and cool completely on a wire rack, then refrigerate for at least 4 hours or overnight. This is when the magic happens — the flavors meld and deepen, creating that perfect balance of tangy and sweet. I know waiting is torture, but cutting into a warm cheesecake is like trying to slice through pudding — messy and disappointing. Good things come to those who wait.
Insider Tricks for Flawless Results
The Temperature Rule Nobody Follows
Room temperature isn't just a suggestion — it's the difference between success and disaster. Cold cream cheese creates lumps that no amount of mixing will fix, and cold eggs make the batter seize up tighter than my jeans after Thanksgiving dinner. Take everything out of the fridge at least two hours before you start, or speed things up by placing the cream cheese (still wrapped) in a bowl of warm water for 15 minutes. The eggs can sit in warm water for 5 minutes to take the chill off. Your future self will thank you when you're not battling cream cheese chunks the size of marbles.
Why Your Nose Knows Best
Here's a trick I learned from that pastry chef neighbor: smell the batter before you bake it. It should smell bright and lemony, with a subtle tang from the cream cheese. If it smells flat or one-dimensional, add a pinch more salt or a few extra drops of lemon extract. Salt enhances flavors and brings out the lemon in ways that'll make your taste buds dance. I've saved many batches by trusting my nose — it's like having a built-in quality control system.
The 5-Minute Rest That Changes Everything
After you turn off the oven, resist the urge to immediately crack the door. Let the cheesecake sit in the cooling oven for exactly 5 minutes first. This allows the temperature to drop gradually, preventing the sudden shock that causes cracks. Then crack the door and let it cool for another hour. I know this seems excessive, but I've tested this method against every other cooling technique, and nothing prevents cracks better than this gentle, gradual approach. It's like easing into a cold pool instead of cannonballing — your cheesecake will thank you with a perfectly smooth top.
Creative Twists and Variations
This recipe is a playground. Here are some of my favorite ways to switch things up:
Berry Bliss Cheesecake Cake
Fold 1 cup of fresh raspberries into the batter just before pouring it into the pan. The berries create these beautiful pockets of tartness that complement the lemon perfectly. Don't use frozen berries — they release too much liquid and turn your cheesecake purple. If raspberries aren't your thing, blueberries work beautifully too, creating little explosions of sweetness throughout each slice.
Coconut Dream Variation
Replace the sour cream with coconut cream and add 1/2 cup of toasted coconut flakes to the batter. The coconut adds this tropical note that transforms the dessert into something that tastes like a lemon-coconut macaroon in cheesecake form. Toast the coconut first — raw coconut has this weird, chewy texture that fights with the smooth cheesecake instead of complementing it.
Key Lime Paradise
Swap the lemon juice and extract for key lime juice and zest. Key limes are more aromatic than regular limes, creating this sophisticated flavor that tastes like you're sitting on a beach in the Florida Keys. The smaller, yellower key limes have more complex flavors than the big Persian limes — seek them out if you can find them. If not, regular limes work, but add a teaspoon of honey to round out the sharper edges.
Meyer Lemon Luxury
Use Meyer lemons instead of regular lemons for a sweeter, more floral flavor. Meyer lemons are like lemons that went to finishing school — they're more refined, less acidic, and have this subtle orange note that makes the cheesecake taste like spring sunshine. Reduce the sugar by 2 tablespoons to account for their natural sweetness.
Lavender Honey Dream
Add 1 teaspoon of culinary lavender and replace 2 tablespoons of sugar with honey. The lavender adds this mysterious floral note that makes people ask, "What is that amazing flavor?" Don't go overboard with the lavender — too much and your cheesecake tastes like soap. The honey adds depth and complexity that plain sugar just can't match.
Chocolate Marble Magic
Melt 4 ounces of white chocolate and swirl it through the batter for a marbled effect. The white chocolate adds richness without competing with the lemon flavor. Use good quality white chocolate, not those chips that taste like sugar and disappointment. The marbling creates beautiful patterns that make each slice look like edible art.
Storing and Bringing It Back to Life
Fridge Storage
This cheesecake will keep beautifully in the fridge for up to 5 days — if it lasts that long. Wrap it tightly in plastic wrap, pressing the wrap directly against the cut surfaces to prevent it from drying out. Don't use aluminum foil — it can react with the acid in the lemon and give your cheesecake a metallic taste. Store it on a shelf, not in the door, where the temperature fluctuates less. If you notice any condensation on top when you unwrap it, just gently blot it with a paper towel.
Freezer Friendly
You can freeze this cheesecake for up to 2 months, though I rarely have the self-control to wait that long. Cut it into individual slices first — trying to slice a frozen cheesecake is like trying to cut through a lemon-flavored brick. Wrap each slice in plastic wrap, then foil, and store them in a freezer bag. Thaw overnight in the fridge for best results. The texture will be slightly denser after freezing, but the flavor remains perfect. Pro tip: frozen slices make amazing cheesecake pops if you insert a popsicle stick before freezing.
Best Reheating Method
Here's the thing — you don't actually reheat cheesecake. Serving it at room temperature is the way to go. Take it out of the fridge 30-45 minutes before serving to let the flavors bloom and the texture soften. If you've frozen it, thaw it completely in the fridge first, then let it come to room temperature. Never microwave cheesecake — it creates hot spots that ruin the texture and can make it weep. If you must serve it slightly warm (though I don't recommend it), place individual slices in a 200°F oven for 5-7 minutes, just until no longer cold.