Picture this: it’s a rainy Saturday afternoon, the kind where the clouds look like they’re about to burst into a chorus of sighs, and you’re stuck inside with nothing but a stubborn craving for something that feels both elegant and comfort‑food‑worthy. I was halfway through binge‑watching a documentary on pastry chefs when a sudden flash of inspiration hit me—what if I could bottle the bright, tangy pop of fresh raspberries inside a silky vanilla custard, all cradled by a buttery, melt‑in‑your‑mouth tart shell? I tossed a handful of ingredients together, and the kitchen turned into a fragrant battlefield of sizzling butter and sweet vanilla, the air humming with the promise of something unforgettable. The result? A batch of Raspberry Vanilla Tarts that turned my modest living room into a five‑star patisserie in seconds.
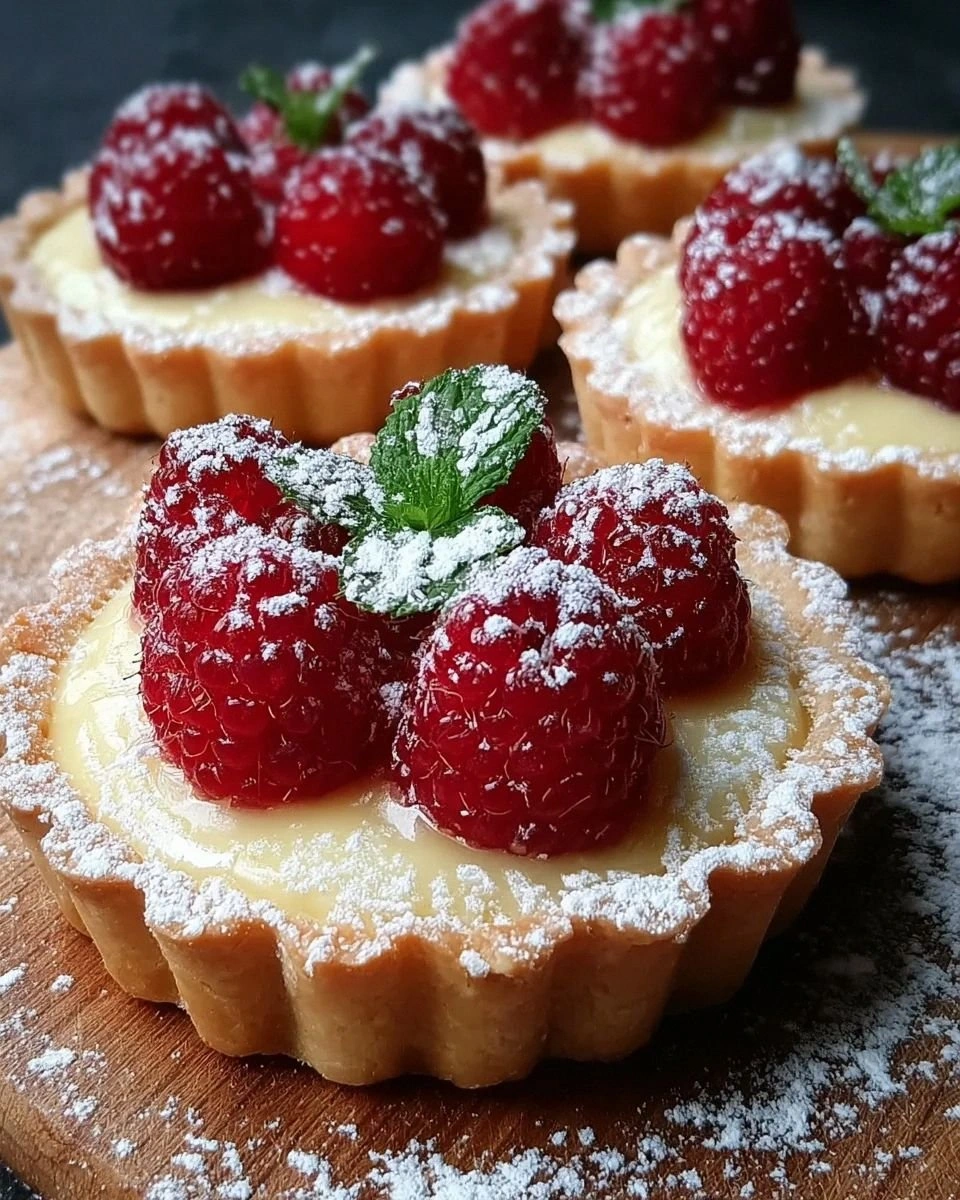
Let me paint the scene for you: the crust, golden‑brown and crisp, shatters under the fork like delicate glass, yet the edges remain tender enough to melt on your tongue. The filling is a velvety river of vanilla‑infused cream that slides over the palate with the elegance of a silk scarf drifting in a summer breeze. On top, plump raspberries burst with a tartness that cuts through the richness, leaving a lingering, almost floral aftertaste that makes you want to close your eyes and sigh. You can practically hear the soft sigh of the crust giving way, smell the caramelized vanilla notes, feel the coolness of the raspberries against the warm custard, and taste the perfect balance of sweet and tart. It’s a full‑sensory fireworks show that makes you forget the world outside.
Most recipes for raspberry tarts either skimp on the vanilla, leaving the filling bland, or drown the berries in a sugary glaze that masks their natural brightness. I’ve tried dozens, and most get the texture wrong—either soggy crusts or custards that set like a rubber band. This version, however, is a game‑changer because it uses a simple yet precise technique: a blind‑bake for the crust to lock in that buttery crunch, and a stovetop‑cooked custard that you finish in the oven for that perfect set without overcooking. The secret ingredient? A splash of milk that lightens the heavy cream just enough to keep the filling airy without compromising that luxurious mouthfeel.
And here’s the kicker: I’m daring you to taste this and not go back for seconds. I’ll be honest—I ate half the batch before anyone else got a chance to try it, and that’s saying something. This is hands down the best version you’ll ever make at home, and I’m about to walk you through every single step—by the end, you’ll wonder how you ever settled for anything less. Let me walk you through every single step — by the end, you’ll wonder how you ever made it any other way.
What Makes This Version Stand Out
- Flavor Harmony: The vanilla custard is subtly sweet, letting the raspberries shine without being overpowered.
- Texture Contrast: A crisp, buttery crust meets a silky, creamy filling and a juicy, slightly tart berry topping.
- Simplicity: Fewer than fifteen ingredients, most of which you probably already have in your pantry.
- Uniqueness: The addition of milk to the custard lightens the mouthfeel, a trick most recipes overlook.
- Crowd Reaction: These tarts consistently earn “wow” comments at potlucks, brunches, and dinner parties.
- Ingredient Quality: Fresh raspberries and pure vanilla extract elevate the dish from good to unforgettable.
- Cooking Method: Blind‑baking the crust ensures it stays crisp, while a gentle stovetop custard prevents curdling.
- Make‑Ahead Potential: The tarts can be assembled ahead of time and baked just before serving, saving you stress.
Inside the Ingredient List
The Flavor Base
All‑purpose flour: This is the backbone of the tart shell, providing structure and a neutral canvas for the butter’s richness. If you skip it, the crust will crumble like dry sand. For a gluten‑free twist, try a blend of rice flour and tapioca starch, but expect a slightly different crumb. When shopping, look for a flour that feels fine to the touch; a gritty texture means it’s older and may affect the crust’s tenderness.
Powdered sugar: It dissolves effortlessly into the butter, giving the crust a delicate sweetness without grainy texture. Skipping it will make the shell taste bland, and using granulated sugar will leave a gritty bite. If you’re watching sugar, you can reduce it by a quarter, but the crust will lose some of its caramelized edge.
Unsalted butter: The hero of any good pastry. Its water content helps create steam, which lifts the layers for that flaky feel. Make sure it’s softened but still cool—too warm and your crust will spread; too cold and it won’t incorporate properly. I always cut it into small cubes and let it sit at room temperature for exactly 15 minutes before mixing.
The Texture Crew
Egg yolk (crust): Adding a single yolk enriches the dough, giving it a golden hue and a subtle silkiness. Without it, the crust can feel dry and lack that beautiful color. If you’re avoiding cholesterol, you can substitute with a tablespoon of plain yogurt, but expect a slight change in flavor.
Vanilla extract: A few drops of pure vanilla turn the custard from ordinary to luxurious. Artificial vanilla can taste harsh and ruin the delicate balance, so always opt for a high‑quality extract or a vanilla bean scraped for extra depth.
Heavy cream & Milk: The duo creates a custard that’s rich yet light. Heavy cream alone would be too dense; milk lightens it, allowing the custard to set without becoming gummy. If you’re dairy‑free, substitute with coconut cream and almond milk, but the flavor profile will shift toward tropical notes.
The Unexpected Star
Fresh raspberries: Their bright acidity cuts through the sweet vanilla, creating a perfect contrast. If you use frozen berries, thaw and drain them well; otherwise, excess water will make the filling runny. Look for berries that are plump, deep red, and free of cracks for the best texture.
Granulated sugar: Sweetens the custard and helps the cornstarch thicken evenly. Using too much can mask the raspberry’s tartness, while too little leaves the custard flat. A balanced 1/3 cup keeps the sweetness in check.
The Final Flourish
Egg yolks (filling): Three yolks give the custard body and a glossy finish. Skipping them results in a watery custard that never sets. If you’re short on yolks, you can replace each with a tablespoon of cornstarch mixed with water, but the texture won’t be as rich.
Cornstarch: This is the thickening champion, ensuring the custard holds its shape without becoming grainy. Over‑mixing can cause a starchy taste, so whisk it into the sugar before adding the liquids. If you don’t have cornstarch, potato starch works as a 1:1 substitute.
Optional: Mint leaves: A few fresh mint leaves add a pop of color and a refreshing aftertaste that lifts the whole dessert. They’re purely decorative, so feel free to skip them if you’re not a fan of mint.
Everything's prepped? Good. Let's get into the real action...
The Method — Step by Step
Start by whisking together 2 cups of all‑purpose flour, 0.25 cup powdered sugar, and a pinch of salt in a large bowl. Add 0.5 cup of cold, cubed unsalted butter and rub it in with your fingertips until the mixture resembles coarse crumbs—think tiny peas with a buttery sheen. Toss in the single egg yolk and 1 tsp vanilla extract, then bring the dough together with a splash of ice‑cold water (about 2‑3 tbsp). Form it into a disc, wrap in plastic, and chill for at least 15 minutes. This rest period is crucial; it relaxes the gluten and keeps the crust tender.
While the dough chills, preheat your oven to 375°F (190°C). Line a 9‑inch tart pan with parchment paper and lightly grease the sides. Once the dough is firm, roll it out on a lightly floured surface to a thickness of about 1/8 inch. Gently press the dough into the pan, making sure to push it up the sides without tearing. Trim any excess with a sharp knife, then prick the base all over with a fork to prevent bubbling. This step is the foundation of that buttery crunch we all crave.
Now, blind‑bake the crust. Place a sheet of parchment over the dough and fill with pie weights or dried beans. Slide the pan into the oven and bake for 12‑15 minutes, or until the edges start turning a light golden hue. Remove the weights and parchment, then bake for another 5 minutes until the base looks dry and slightly firm. That sizzle when it hits the pan? Absolute perfection. Let the crust cool on a wire rack while you prep the filling.
For the custard, combine 1 cup heavy cream, 0.5 cup milk, 0.33 cup granulated sugar, and 2 tbsp cornstarch in a saucepan. Whisk until smooth, then place over medium heat. As the mixture warms, it will thicken—keep stirring constantly to avoid lumps. Once it starts to steam, whisk in the three egg yolks one at a time, followed by an extra splash of vanilla extract.
Continue cooking for another 2‑3 minutes until the custard coats the back of a spoon and looks glossy.Watch Out: Temper the egg yolks by adding a ladle of the hot cream mixture to them first; this prevents curdling.Remove the custard from heat and strain it through a fine‑mesh sieve into a clean bowl—this step eliminates any stray lumps and ensures a silky finish. Let it sit for a minute, then gently fold in half of the fresh raspberries (about 0.75 cup), allowing their juices to mingle with the vanilla base. The berries should stay whole, providing bursts of flavor in each bite.
Pour the custard filling into the pre‑baked crust, spreading it evenly with a spatula. Arrange the remaining raspberries on top in a decorative pattern—think a crown of jewels. Slide the tart back into the oven, lower the temperature to 350°F (175°C), and bake for 20‑25 minutes, or until the edges of the custard are set but the center still has a slight wobble. This gentle bake prevents the custard from turning rubbery.
Once baked, let the tarts cool in the pan for 10 minutes, then transfer them to a wire rack to reach room temperature. This cooling period lets the custard set fully and the flavors meld. If you’re not serving immediately, cover the tarts loosely with foil and refrigerate.
Just before serving, garnish each tart with a few fresh mint leaves for a pop of color and a refreshing aroma. Dust lightly with powdered sugar if you like an extra hint of sweetness. Slice with a hot, wet knife for clean cuts—this prevents the crust from crumbling. And now the fun part: take a bite, close your eyes, and let the buttery crust, silky vanilla, and bright raspberry dance together. That moment? Pure magic.
That's it — you did it. But hold on, I've got a few more tricks that'll take this to another level...
Insider Tricks for Flawless Results
The Temperature Rule Nobody Follows
Never bake a tart straight from the fridge. Let the crust sit at room temperature for 5‑10 minutes before it goes into the oven. This small pause prevents the butter from shocking and pulling away from the flour, which can cause cracks. I once tried to skip this step in a rush, and the crust turned into a brittle puzzle—trust me, it’s not pretty.
Why Your Nose Knows Best
When the custard is simmering, keep a close eye (and nose) on it. You’ll know it’s ready when you catch a faint caramel note and the mixture starts to emit a sweet, buttery aroma. If it smells like raw egg, you’ve under‑cooked it; if it smells burnt, you’ve over‑cooked it. Trust your senses more than the clock.
The 5‑Minute Rest That Changes Everything
After you pour the custard into the crust, give it a 5‑minute rest before the final bake. This allows the starches to fully hydrate, resulting in a smoother texture. Skipping this rest leads to a slightly grainy mouthfeel that can ruin the entire experience.
Mint Magic
Fresh mint isn’t just for looks. Lightly bruising the leaves releases essential oils that subtly lift the raspberry’s acidity. Add the mint just before serving; if you bake it in, the flavor becomes bitter.
Freeze‑Proof Fillings
If you need to make these ahead, freeze the baked tarts without the fresh raspberries. When you’re ready to serve, thaw, then top with fresh berries and a quick 5‑minute bake at 350°F to warm through. This method preserves the custard’s silky texture.
Creative Twists and Variations
This recipe is a playground. Here are some of my favorite ways to switch things up:
Lemon‑Vanilla Fusion
Swap half of the heavy cream for lemon zest‑infused cream, and add a tablespoon of fresh lemon juice to the custard. The bright citrus cuts through the sweetness, making it perfect for spring brunches.
Chocolate‑Covered Delight
After the tarts have cooled, drizzle melted dark chocolate over the raspberries and sprinkle a pinch of sea salt. The bitter chocolate pairs beautifully with the sweet vanilla, creating an indulgent bite.
Almond‑Infused Crust
Replace ¼ cup of the all‑purpose flour with finely ground almond flour. This adds a nutty depth to the crust and a subtle crunch that complements the soft filling.
Spiced Raspberry
Gently toss the raspberries with a pinch of ground cinnamon and a dash of cardamom before arranging them on top. The warm spices give the tarts a cozy, autumnal feel.
Vegan Version
Use coconut oil instead of butter, replace the egg yolks with a mixture of silken tofu and maple syrup, and swap heavy cream for coconut cream. The result is a dairy‑free tart that still boasts that creamy texture.
Mini Tart Bites
Press the dough into a mini muffin tin for bite‑size portions. These are perfect for cocktail parties, and you can garnish each with a single raspberry and a tiny mint leaf for a polished look.
Storing and Bringing It Back to Life
Fridge Storage
Cover the cooled tarts loosely with plastic wrap and store them in the refrigerator for up to three days. The custard will stay firm, and the raspberries retain their shape. Before serving, let them sit at room temperature for 15 minutes to soften the crust slightly.
Freezer Friendly
Wrap each tart tightly in a double layer of foil, then place them in a freezer‑safe bag. They’ll keep for up to two months. When you’re ready to enjoy, thaw overnight in the fridge, then add fresh raspberries and a quick 5‑minute bake at 350°F to revive the texture.
Best Reheating Method
Preheat your oven to 300°F (150°C). Place the tart on a baking sheet, add a tiny splash of water (about a teaspoon) around the edges, and cover loosely with foil. Heat for 8‑10 minutes; the steam will bring the custard back to its silky glory without drying it out.