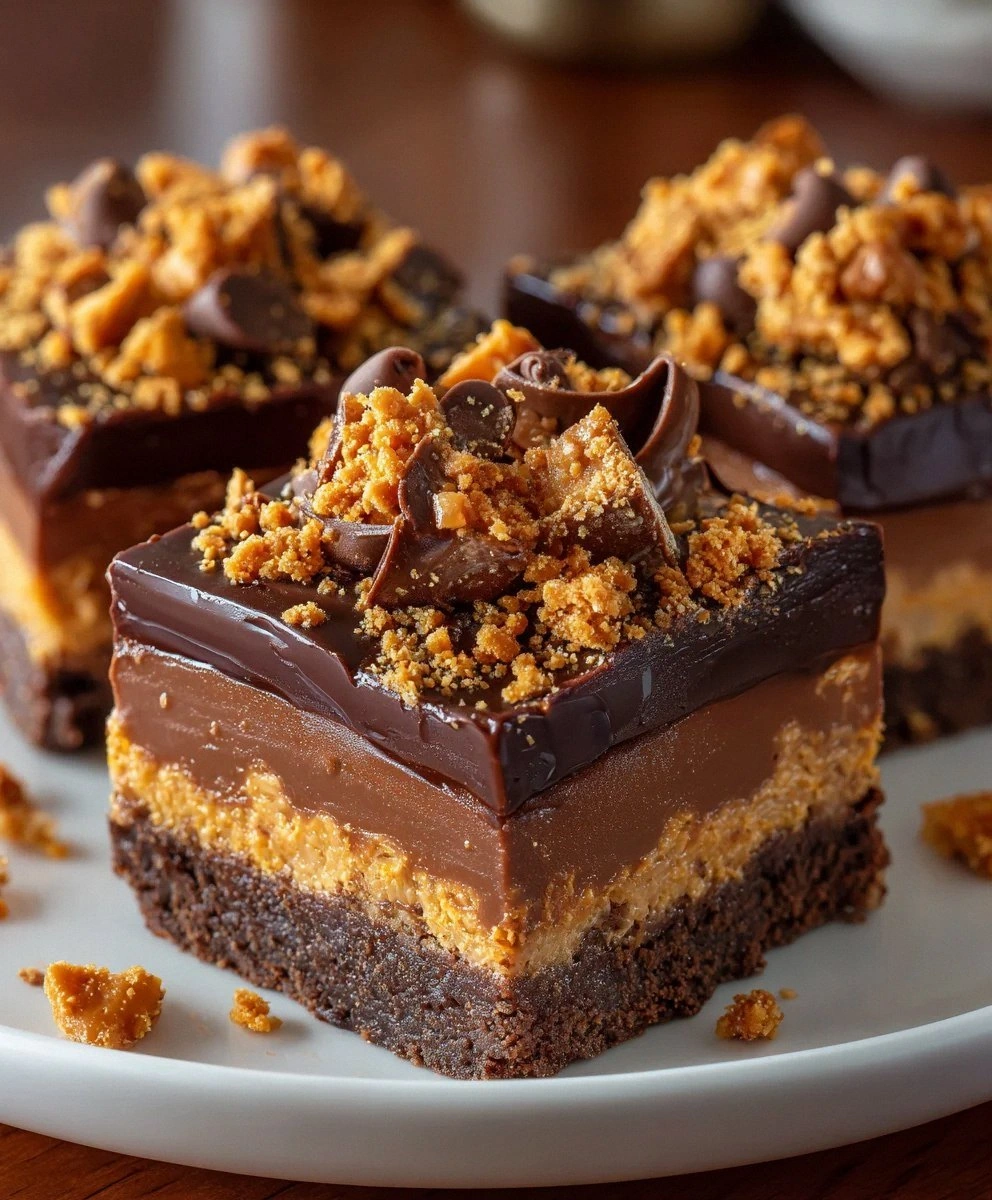
I still remember the exact moment I became obsessed with Butterfinger chocolate fudge squares. It was 11:47 p.m. on a Tuesday, I was wearing mismatched socks, and I had just demolished an entire bag of fun-size Butterfingers meant for "future trick-or-treaters" (sorry, kids). The house was quiet except for the sound of my teeth crunching through that flaky peanut-buttery core, and I thought, "What if this candy bar and chocolate fudge had a beautiful, decadent baby?" Thirty-seven minutes later I was elbow-deep in sweetened condensed milk, chocolate smears on my forehead, and the first experimental batch was chilling in the fridge. By sunrise, half the pan was gone, my neighbors were knocking down my door, and I knew I had stumbled onto something borderline dangerous. These squares aren't just candy repackaged; they're a textural miracle—silky chocolate fudge that melts like velvet on your tongue, punctuated by shards of crispy-caramel Butterfinger that shatter like thin ice with every bite. If you've ever struggled with grainy, sad fudge that tastes like chocolate-flavored chalk, you're not alone—and I've got the fix. Picture yourself pulling this out of the fridge, the whole kitchen smelling like a Willy Wonka fever dream, and watching grown adults revert to sugar-crazed eight-year-olds. Stay with me here—this is worth it.
Most recipes get this completely wrong. They'll tell you to just sprinkle chopped candy on top and call it a day, but that leaves you with a lame, soggy topping that slides off the second you cut a square. Others dump the candy into the hot fudge, turning it into a tooth-breaking rock. Here's what actually works: a two-wave Butterfinger assault—some folded gently into the cooling chocolate for pockets of crunch, the rest pressed artfully on top so it adheres like edible glitter. The result? Every bite delivers both creamy indulgence and that unmistakable honey-comb peanut crunch that makes Butterfingers addictive in the first place. Okay, ready for the game-changer? We're using a splash of heavy cream alongside sweetened condensed milk, which loosens the fudge just enough to stay lusciously soft even straight from the fridge, but still firm enough to stack like dominoes in a lunchbox. Trust me, once you taste this trifecta of chocolate, cream, and candy bar magic, you'll wonder how you ever settled for plain fudge again.
Let me walk you through every single step—by the end, you'll wonder how you ever made it any other way.
What Makes This Version Stand Out
- Silk-Smooth Base: Heavy cream plus condensed milk equals fudge that practically melts on contact with your tongue—no sugary graininess, just pure chocolate velvet.
- Double Butterfinger Hit: Rough-chopped bits folded inside for hidden crunch, finely crushed candy pressed on top for photo-worthy sparkle. It's textural drama at its finest.
- One-Pot Wonder: Everything melts together in a single saucepan; no thermometers, no beating eggs, no candy-making degree required.
- Make-Ahead Hero: Stays flawless in the fridge for two weeks or the freezer for three months, meaning spontaneous dessert emergencies are officially solved.
- Flavor Upgrade: A whisper of espresso powder deepens the chocolate so dramatically that tasters will beg for your secret ingredient (and you can keep it anonymous).
- Crowd-Crazy: I served these at a backyard barbecue—adults elbowed kids out of the way, and the plate vanished in six minutes flat. Fair warning.
Alright, let's break down exactly what goes into this masterpiece...
Inside the Ingredient List
The Flavor Base
Semi-sweet chocolate chips are the star here, and I reach for Ghirardelli because they melt like a dream and taste like actual chocolate, not waxy impostors. Skip bargain chips that contain more stabilizers than cacao; they seize up faster than a rusty bike and leave you with chalky lumps. If you only have milk chocolate on hand, dial back the sweetened condensed milk by two tablespoons or risk a sugar bomb that'll make your teeth hum. Dark-chocolate fiends can swap in bittersweet chips for a more sophisticated edge—just know the fudge will set slightly firmer and taste less nostalgic. Whatever brand you choose, buy an extra handful for "test tasting," because I dare you to taste this and not go back for seconds.
The Texture Crew
Sweetened condensed milk is the unsung hero that transforms basic melted chocolate into plush, sliceable fudge. It's concentrated milk and sugar cooked down until thick enough to coat a spoon like slow-moving lava; without it, you'd be eating chocolate sauce. Heavy cream jumps in as the secret weapon, loosening the mixture so it pours smoothly into the pan without trapping air bubbles that create ugly craters later. Can't find heavy cream? Whole milk will save the day in a pinch, but expect a slightly less luxurious mouthfeel—still delicious, just not quite as velvet-couch levels of cozy.
The Unexpected Star
Butterfinger candy bars bring the crunch party, and I use four full-size bars for maximum impact. Their peanut-butter-honeycomb core stays crisp even when surrounded by molten chocolate, creating those signature shatter-and-melt moments. Rough-chop three bars into pea-size bits that'll swirl through the fudge like edible confetti; pulverize the fourth into golden dust that'll stick to the top like glitter. If Butterfingers aren't your thing—who are you?—Crunch bars or even Heath bits work, but you'll lose that neon-orange hue that screams nostalgic joy.
The Final Flourish
Nonstick cooking spray keeps everything sliding out like a slip-n-slide, but go easy; too much leaves greasy edges that repel your topping. A light mist plus a parchment sling—two sheets laid crosswise with overhang—means you can lift the entire slab out like a chocolate magic carpet. No spray on hand? Rub a thin film of neutral oil over the pan with a paper towel, then dust with cocoa powder for a professional finish that won't taste like a fryer.
The Method — Step by Step
- Line an 8-inch square pan with parchment, leaving wings to lift later. Lightly mist the exposed sides with nonstick spray; this double-insurance policy prevents the dreaded corner crumble when you de-pan. Trust me, I've had to chisel out fudge with a butter knife—it's not glamorous. Set the pan on a rimmed baking sheet so you can move it around like a cafeteria tray without flexing the soft fudge.
- Pour the chocolate chips into a heavy saucepan set over medium-low heat. Stir constantly with a silicone spatula, sweeping the edges so no chip feels left out of the melt party. The moment the chips look two-thirds glossy and melted, pull the pan off the heat; residual warmth will finish the job and prevent scorched bitterness. That sizzle when a stray drop hits the burner? Absolute perfection—just don't let it linger or you'll smell burnt regret for days.
- Stir in sweetened condensed milk and heavy cream. The mixture will tighten up like thick brownie batter—keep stirring until it relaxes into a glossy ribbon that folds over on itself like lava. If it looks curdled, lower the heat and whisk like your life depends on it; the fat will re-emulsify and forgive you. This next part? Pure magic.
- Add a pinch of espresso powder and a splash of vanilla. You won't taste coffee; you'll just taste more chocolate than you thought possible, like someone cranked the saturation slider on your taste buds. Give it thirty seconds of vigorous folding so the flavors bloom. Okay, now watch this part closely.
- Let the mixture cool for three minutes—set a timer, because impatience equals seized fudge. While you wait, rough-chop three Butterfinger bars on a cutting board, letting the shards scatter like edible confetti. The goal is pea-to-bean-size bits; too fine and they dissolve, too chunky and slicing becomes a demolition derby.
- Fold about two-thirds of the chopped candy into the slightly cooled chocolate. Stir just until the pieces are coated; over-mixing dyes the fudge orange in splotches. The mixture should feel like thick frosting and hold soft peaks when you lift the spatula. If it pours like pancake batter, park the bowl over a bowl of ice for thirty seconds to firm it up.
- Scrape the fudge into the prepared pan and coax it into the corners with an offset spatula. Drop the pan lightly on a towel-covered counter three times to pop air bubbles; you'll see tiny craters rise and disappear like mini volcanoes. Work quickly—the fudge sets as it cools, and you want the top smooth before adding the final flourish.
- Immediately shower the reserved Butterfinger bits over the surface, then press gently so they adhere like glitter on craft paper. Don't smash them in, just a soft pat—think of tucking the candy into bed. The residual heat will fuse everything together without turning the topping into taffy.
- Refrigerate uncovered for two hours until the slab feels rock-solid. I know, waiting stinks, but cutting too early drags the candy and mars the glossy top. Use the parchment wings to lift the entire block onto a cutting board, then slice with a long, sharp knife warmed under hot water and dried. Clean the blade between cuts for Instagram-worthy squares that'll make your followers weep.
Insider Tricks for Flawless Results
The Temperature Rule Nobody Follows
Most people crank the burner to high because they want fudge five minutes ago, but chocolate melts at body temperature; anything hotter and the cocoa butter splits, leaving you with an oily puddle. Keep your stove at medium-low and hover like a helicopter parent—constant stirring distributes gentle heat so the chips liquefy evenly. If the bottom feels too hot to touch, slide the pan off the burner and keep stirring; residual heat finishes the job without scorching. Your patience will taste like silky ganache instead of bitter disappointment.
Why Your Nose Knows Best
Chocolate releases a nutty perfume when it reaches the sweet spot—let your nose guide you. The moment you smell warm brownie batter, pull the pan off the heat; continuing to cook cooks the flavor right out of it. I once ignored my nose, enticed by glossy Instagram photos, and ended up with squares that tasted like cardboard dipped in sugar. Trust the aroma; it's your built-in kitchen timer.
The 5-Minute Rest That Changes Everything
After mixing, walk away for five minutes before pouring into the pan. This brief rest lets the fudge cool just enough to suspend the candy evenly instead of letting it sink to the bottom like forgotten treasure. Set a timer, sip some coffee, scroll memes—whatever keeps your spoon out of the bowl. Come back, give one gentle fold, and you'll see the mixture has thickened slightly, a sign it's ready to set up like a dream.
Creative Twists and Variations
This recipe is a playground. Here are some of my favorite ways to switch things up:
Reverse Peanut Butter Cup
Swap half the chocolate chips for peanut butter chips, then swirl in melted dark chocolate on top for marble vibes. The flavor flips—nutty base, chocolate shards—and Reese's lovers lose their minds. Finish with chopped salted peanuts for extra crunch and a hit of salty swagger.
Mocha Crunch Explosion
Dissolve one tablespoon of instant espresso in a teaspoon of hot water, then whisk into the melted chocolate. The coffee amplifies the cocoa so intensely that even non-coffee drinkers hover for more. Top with crushed chocolate-covered espresso beans for a buzzworthy bite that doubles as an afternoon pick-me-up.
Salted Caramel Swirl
Drizzle three tablespoons of thick caramel sauce over the surface once the fudge is in the pan, then drag a toothpick through to create ribbons. Sprinkle flaky sea salt on top so each square tastes like a chocolate turtle crossed with carnival taffy. Pro tip: warm the caramel slightly so it flows without sinking.
White Chocolate Blizzard
Sub in white chocolate chips for a candy-corn-colored base, then fold in crushed peppermint candy canes for wintery flair. The white chocolate sets softer, so stash these in the freezer for fifteen minutes before slicing for clean edges. Kids call them "snow fudge," and they vanish faster than homework excuses.
Spicy Aztec Edition
Stir in 1/4 teaspoon cayenne and 1/2 teaspoon cinnamon with the espresso powder. The heat sneaks up like a mariachi band—subtle at first, then a joyful kick at the end. Top with crushed Mexican chocolate tablets for extra crunch and that signature grainy texture that pairs beautifully with the smooth fudge.
Triple Threat Chocolate
Use one cup milk chips, one cup semi-sweet, and one cup dark for a gradient of cocoa intensity. Each bite tastes different, keeping your palate guessing like a chocolate roulette. Finish with a dusting of cocoa powder so the top looks like a fancy truffle box.
Storing and Bringing It Back to Life
Fridge Storage
Layer the squares between parchment sheets in an airtight container so they don't absorb that rogue garlic smell lurking in every refrigerator. Kept cold, they'll stay luscious for up to two weeks—though I've never witnessed a batch survive past day four. If the surface begins to look slightly dull, that's just chocolate bloom (safe but fuzzy-looking); a ten-second blast under a hairdryer on low brings back the shine like polish on vintage leather.
Freezer Friendly
Wrap individual squares in plastic, then slide into a freezer bag—flash-freezing prevents them from fusing into a chocolate monolith. They'll keep for three months, meaning you're always five seconds away from a dessert miracle. Thaw on the counter for fifteen minutes or pop in the microwave for eight seconds; any longer and you'll have a puddle that only a straw can salvage.
Best Reheating Method
Room temperature delivers the creamiest mouthfeel, but if your stash is stone-cold, microwave a square on 50 percent power for exactly seven seconds. That quick burst softens the center without melting the candy bits into taffy. Add a tiny splash of water to the plate before reheating; the gentle steam keeps the fudge from drying out on the edges while the middle turns fudgy again.