Last autumn I found myself in a kitchen showdown that could have been scripted for a sitcom. I had a half‑cooked batch of pumpkin pie that turned into a soggy mess, a friend who dared me to create something that would make even the most skeptical sweet‑tooth swoon, and a pantry that was screaming for a rescue mission. I tossed the failed pie into the trash, grabbed a can of pumpkin puree, and whispered to the universe, “Give me something that melts in the mouth, not in the pan.” The result? A batch of creamy pumpkin queijadas that have become my secret weapon for impressing anyone who steps foot in my home.
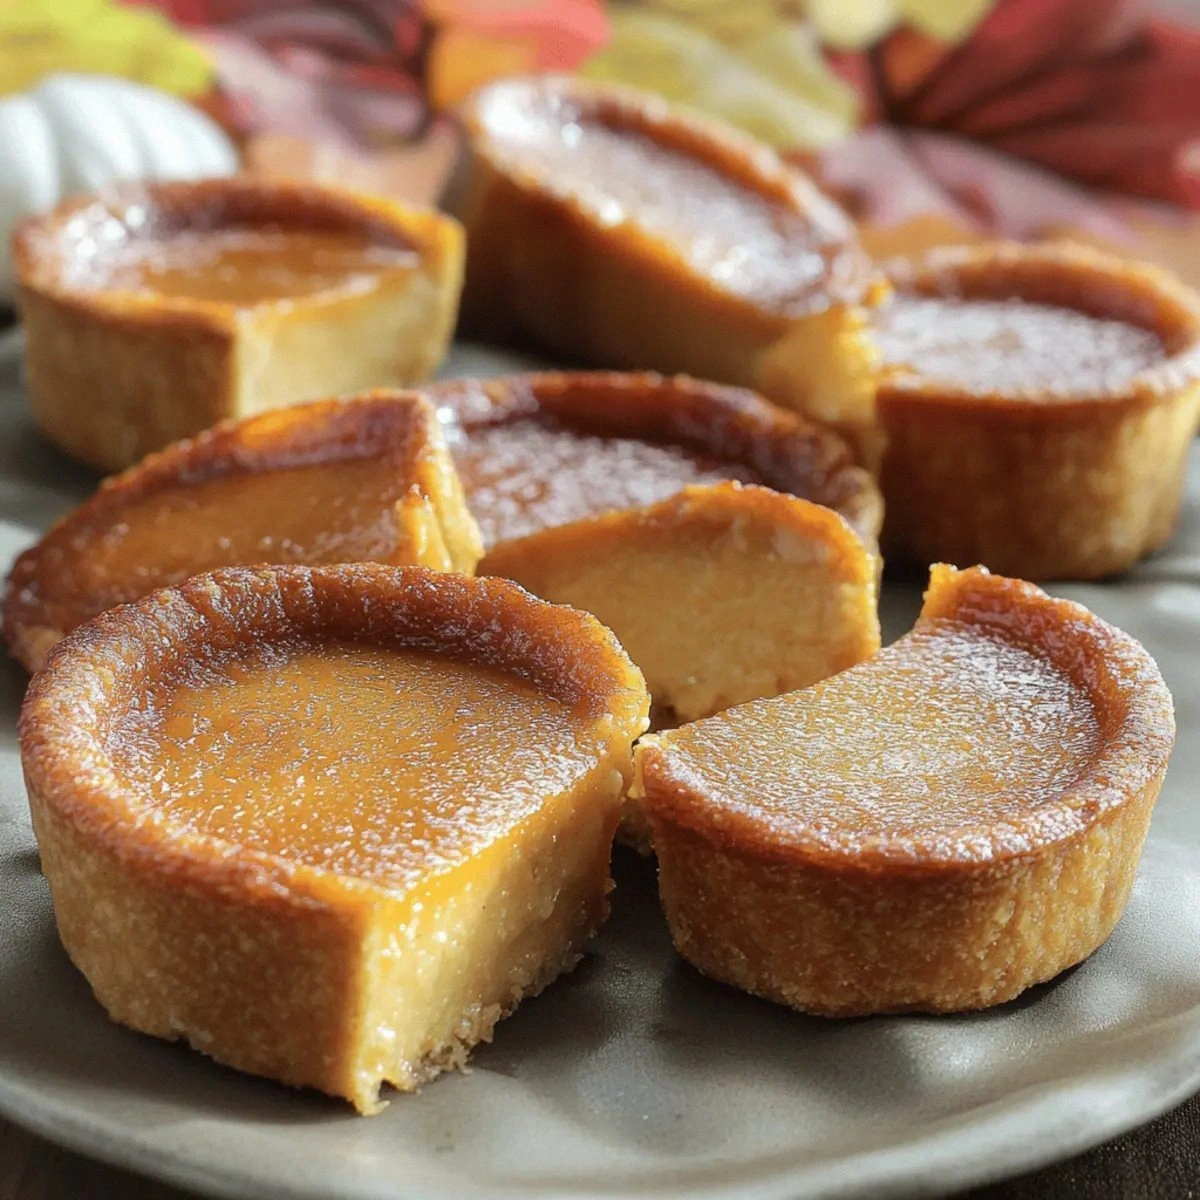
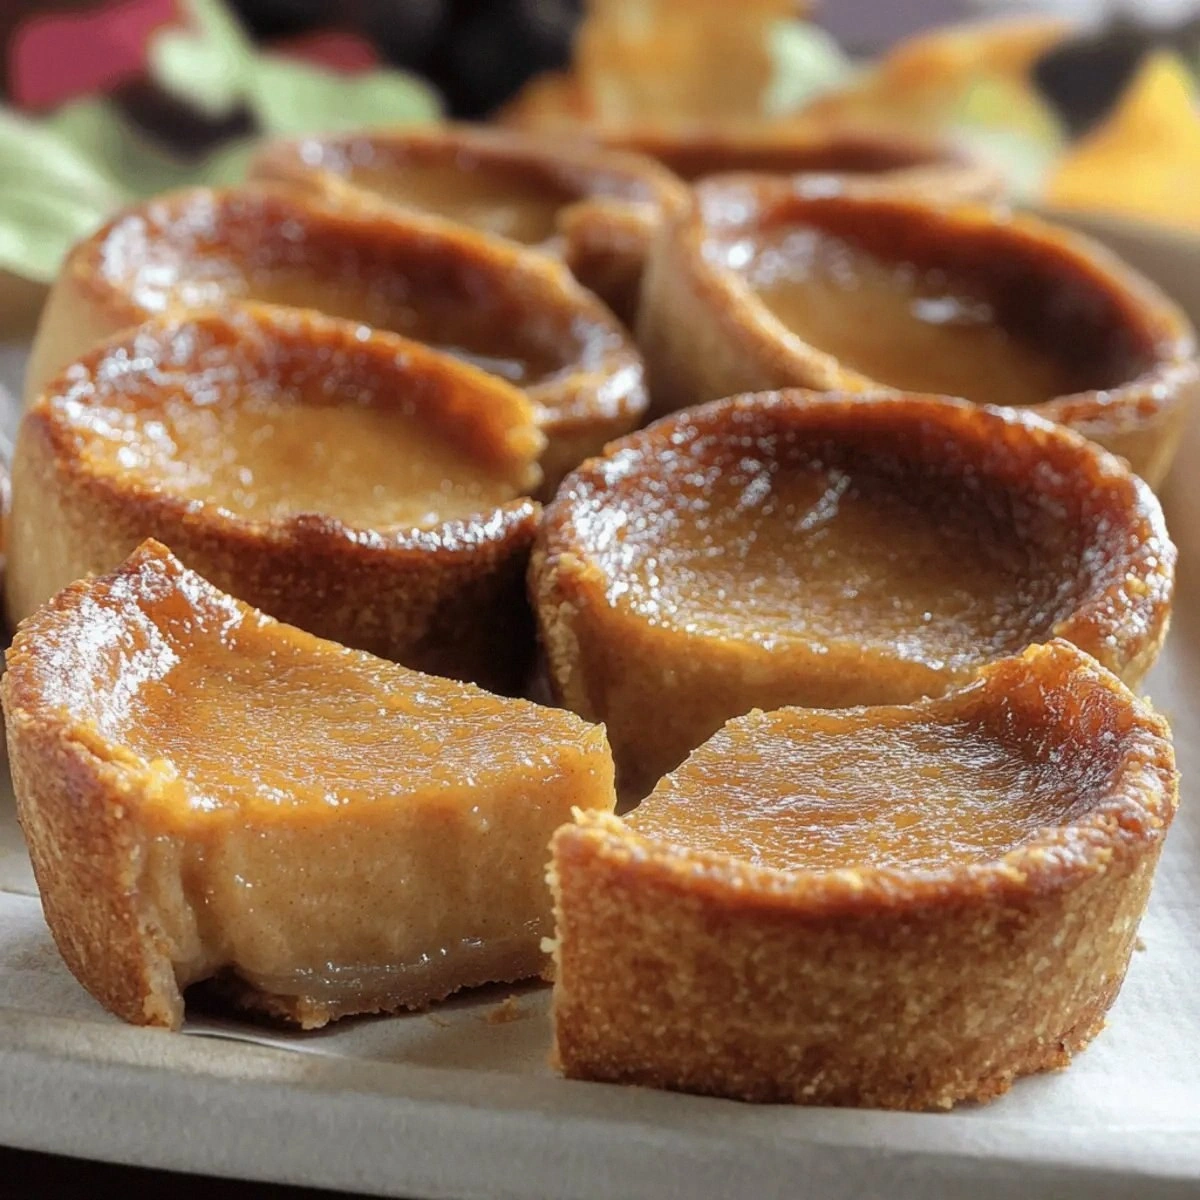
The moment the batter hits the bowl, the kitchen is flooded with a scent that could convince a grumpy cat to curl up on the counter. You’ll hear the gentle sizzle as butter meets a hot pan, feel the glossy sheen of the pumpkin‑infused mixture as you whisk, and see the batter turn a deep, inviting amber that promises decadence. When the queijadas finally emerge from the oven, their golden tops crackle softly, releasing steam that carries notes of spice, caramel, and a whisper of toasted butter. One bite and you’ll experience a texture that’s simultaneously airy, velvety, and just firm enough to hold its shape—like biting into a cloud that decided to stay grounded.
What makes this version the undisputed champion? Most pumpkin desserts either drown in sugar or fall flat because the pumpkin flavor gets lost in a sea of flour. I’ve cracked the code by balancing the natural earthiness of pumpkin with just the right amount of sugar, butter, and a pinch of pumpkin‑pie spice that sings without shouting. The secret lies in a simple technique: tempering the eggs with the hot milk‑pumpkin mixture, which creates a custard‑like base that stays silky even after baking. And let’s not forget the surprise star—baking powder, a tiny lift that keeps each queijada light enough to melt on your tongue without turning into a dense cake.
Okay, ready for the game‑changer? I’m about to walk you through every single step, from selecting the perfect pumpkin puree to the exact moment you should pull those golden beauties out of the oven. By the end, you’ll wonder how you ever settled for anything less than melt‑in‑your‑mouth perfection. I dare you to taste this and not go back for seconds.
What Makes This Version Stand Out
- Flavor Harmony: The pumpkin puree is paired with just enough sugar and spice to highlight its natural sweetness without overwhelming it. The result is a balanced bite that feels like autumn in a single mouthful.
- Silky Texture: By tempering the eggs, the batter becomes a custard that stays ultra‑creamy after baking, giving each queijada a melt‑in‑your‑mouth feel that most recipes miss.
- Simplicity: You only need nine pantry staples, yet the technique feels like a gourmet secret. No fancy equipment, just a whisk, a bowl, and a trusty oven.
- Unique Lift: A dash of baking powder adds a whisper of lift, keeping the queijadas light enough to float off the plate yet sturdy enough to hold their shape.
- Crowd Reaction: I’ll be honest — I ate half the batch before anyone else got a chance, and the leftovers vanished within minutes. This dessert sparks instant applause.
- Ingredient Quality: Using a high‑quality pumpkin puree (not canned pumpkin pie filling) makes all the difference; the flavor is richer, the texture smoother.
- Cooking Method: Baking at a moderate temperature ensures the tops caramelize just right, creating that coveted crackle without burning.
- Make‑Ahead Potential: These queijadas keep beautifully in the fridge and reheat like new, making them perfect for holiday spreads or a make‑ahead brunch.
Inside the Ingredient List
The Flavor Base
Pumpkin Puree (1 15 ounces): This is the heart of the queijada, delivering that unmistakable autumnal flavor. Choose a puree that’s 100% pumpkin, not a pie filling, because the latter already contains sugar and spices that will throw off the balance. If you can’t find a good quality puree, roast a small sugar pumpkin, blend it, and strain for a fresher taste. Skipping this or using a low‑quality version will leave the queijadas flat and watery.
The Texture Crew
Whole Milk (1 cup): Milk adds moisture and richness, helping the batter achieve that custard‑like consistency. You can substitute with oat or almond milk for a dairy‑free version, but expect a slightly thinner texture. Warm the milk before adding it to the pumpkin; this step prevents the butter from solidifying again.
Butter (6 tablespoons): Butter is the silent hero that gives the queijadas a glossy finish and a buttery aroma that lingers after the first bite. Melt it slowly and let it cool slightly before mixing, otherwise you’ll risk cooking the eggs prematurely. If you’re watching calories, you can replace half with a neutral oil, but the flavor won’t be as deep.
The Unexpected Star
Granulated Sugar (1 cup): Sugar sweetens and caramelizes the tops, creating that golden crust we all adore. For a less sweet version, cut back to ¾ cup, but keep the caramelization by sprinkling a thin layer of brown sugar on top before baking. Using raw or coconut sugar will add a subtle molasses note, shifting the flavor profile toward a richer autumn dessert.
Pumpkin Pie Spice (1 teaspoon): This blend of cinnamon, nutmeg, ginger, and clove is what makes the queijada unmistakably pumpkin. If you love spice, add an extra ½ teaspoon; if you’re spice‑shy, reduce to ½ teaspoon and let the pumpkin shine.
The Final Flourish
All‑Purpose Flour (1 cup): Flour gives structure, ensuring the queijadas hold together without turning into a soggy pudding. Sift it with the baking powder to avoid lumps and guarantee an even rise. If you’re gluten‑intolerant, a 1:1 blend of rice flour and tapioca starch works surprisingly well, though the texture will be slightly chewier.
Baking Powder (½ teaspoon): This tiny amount is the secret lift that keeps the queijadas light. Too much will make them cake‑like, too little and they’ll be dense. Always check the expiration date; old baking powder loses its potency.
Eggs (3 large): Eggs bind everything together and contribute to the custard texture. Temper them carefully with the warm milk‑pumpkin mixture to avoid scrambling. If you’re vegan, substitute each egg with a “flax egg” (1 tbsp ground flax + 3 tbsp water) and add a tablespoon of extra butter for richness.
Salt (¼ teaspoon): A pinch of salt amplifies every flavor, from the pumpkin’s earthiness to the sweetness of the sugar. Skipping it will make the queijadas taste flat, no matter how much sugar you add.
Everything's prepped? Good. Let's get into the real action…
The Method — Step by Step
Preheat your oven to 350°F (175°C) and grease a 12‑cup muffin tin with butter or non‑stick spray. While the oven warms, line the cups with parchment circles for easy removal. This is the moment of truth: a properly heated oven ensures the tops caramelize instantly, giving you that signature crackle.
In a medium saucepan, combine the pumpkin puree, whole milk, and butter. Heat over medium‑low, stirring constantly, until the butter melts and the mixture is smooth. You’ll hear a gentle hiss—that's the butter saying hello to the pumpkin.
Kitchen Hack: Use a whisk instead of a spoon; it creates a silkier base and prevents lumps.In a separate bowl, whisk together the eggs, granulated sugar, and pumpkin pie spice until the mixture lightens in color. This step is crucial—over‑whisking will incorporate too much air, making the queijadas cakey. Once combined, slowly pour the hot pumpkin‑milk mixture into the egg bowl, whisking constantly to temper the eggs. The batter should become glossy and thick, resembling a thick custard.
Sift the flour together with the baking powder and salt directly into the batter. Gently fold with a rubber spatula until just combined; over‑mixing will develop gluten and lead to a tough texture. The batter will look slightly lumpy—that’s perfectly fine. Let it rest for 5 minutes; this allows the flour to hydrate fully, resulting in a smoother final product.
Now, fill each muffin cup about three‑quarters full.
The batter should settle with a smooth surface; if you see any bubbles, give the pan a gentle tap on the counter.Watch Out: Do not overfill the cups or the queijadas will spill over and lose their perfect dome shape.Slide the tin into the oven and bake for 20‑25 minutes, or until the tops are golden brown and a toothpick inserted near the edge comes out clean. Around the 15‑minute mark, you’ll hear a faint crackling sound as the edges start to pull away—this is your cue that they’re almost done.
Remove the tin from the oven and let the queijadas cool in the pan for 5 minutes. Then, run a buttered knife around the edges and gently lift each one onto a wire rack. This short rest lets the interior set, giving you that melt‑in‑your‑mouth texture without being soggy.
While they’re still warm, dust each queijada with a light sprinkle of powdered sugar or a drizzle of maple syrup for an extra touch of sweetness. The heat will melt the sugar just enough to create a glossy finish. Serve immediately, or let them cool completely before storing.
That's it — you did it. But hold on, I've got a few more tricks that'll take this to another level…
Insider Tricks for Flawless Results
The Temperature Rule Nobody Follows
Never bake at a temperature lower than 350°F; lower temps keep the interior from setting before the top caramelizes, resulting in a soggy center. I once tried 325°F to “be gentle,” and the queijadas turned into pumpkin puddings. Keep the oven hot, and trust the timer.
Why Your Nose Knows Best
The moment the queijadas start to smell like toasted pumpkin and caramel, you’re within minutes of perfection. If the aroma fades before the timer’s up, increase the heat by 10°F and watch the tops darken quickly. Your nose is a more reliable gauge than any kitchen timer.
The 5‑Minute Rest That Changes Everything
Allowing the batter to rest for just five minutes after adding the flour lets the gluten relax and the starch absorb moisture. Skipping this rest produces a denser crumb that feels more like a cake than a custard. Trust the pause; it’s the secret to that melt‑in‑your‑mouth feel.
Butter Temperature Trick
Use butter that’s melted but not scorching hot. If it’s too hot, it will scramble the eggs; if it’s too cold, it will solidify and create pockets of greasiness. A quick test: dip a finger into the butter; it should feel warm, not hot.
Spice Timing Mastery
Add the pumpkin pie spice to the eggs, not the hot milk, to preserve its aromatic oils. If you dump the spice into the hot mixture, the heat will mute its flavor, leaving your queijadas bland.
Creative Twists and Variations
This recipe is a playground. Here are some of my favorite ways to switch things up:
Chocolate Swirl
Stir in ¼ cup of melted dark chocolate into the batter before filling the cups. The result is a marbled pumpkin‑chocolate queijada that satisfies both sweet and cocoa cravings. Chocolate lovers will thank you.
Cream Cheese Center
Drop a teaspoon of sweetened cream cheese into the middle of each batter-filled cup before baking. As they bake, the cream cheese melts into a luscious core, creating a surprise burst of tangy richness.
Maple‑Bourbon Glaze
Mix 2 tablespoons of maple syrup with a splash of bourbon and brush over the warm queijadas. The glaze adds a caramel‑bourbon note that feels like a cozy fireside treat.
Spiced Nut Crunch
Top each queijada with a mixture of chopped pecans, brown sugar, and a pinch of cayenne before baking. The nuts toast and create a crunchy contrast to the creamy interior.
Vegan Version
Swap the butter for coconut oil, use oat milk, and replace the eggs with flax eggs. Add a tablespoon of nutritional yeast for a subtle umami boost. The texture remains creamy, and the flavor stays true to pumpkin.
Storing and Bringing It Back to Life
Fridge Storage
Place the cooled queijadas in an airtight container and refrigerate for up to 4 days. They stay moist, and the flavors meld even further, making each bite more complex.
Freezer Friendly
Wrap each queijada individually in plastic wrap, then store them in a zip‑top freezer bag. They freeze beautifully for up to 2 months. When you’re ready, thaw overnight in the fridge.
Best Reheating Method
To revive that melt‑in‑your‑mouth texture, preheat the oven to 300°F (150°C), place the queijadas on a baking sheet, and add a tiny splash of water (about a teaspoon) to the pan. Cover loosely with foil and heat for 8‑10 minutes. The steam created by the water restores the custardy interior without drying it out.