I was standing in my kitchen on a rainy Tuesday, staring at a pile of overripe bananas that looked like they were auditioning for a horror film. I had promised my roommate I’d whip up something “quick and impressive,” and the only thing that felt right was a cake that could double as a comfort blanket for the soul. The air was thick with the smell of wet pavement, but I could already picture the buttery aroma of a cake filling the room, turning that dreary day into a celebration of sweet, nutty decadence. I grabbed a mixing bowl, a handful of walnuts, and a mischievous grin, daring myself to create the ultimate banana‑walnut experience.
The first thing that hit me was the sound of the bananas being mashed – a soft, almost therapeutic thump that reminded me of rain against a window pane. The bananas turned into a glossy, amber‑gold mash that smelled like tropical sunshine trapped in a bowl. I could already see the batter swelling, the butter melting into a silky river, and the walnuts crackling as they hit the hot pan later on. My kitchen turned into a symphony of sizzling, whisking, and the occasional “oops” when a stray spoon clanged against the counter. The texture was already promising – a cake that would be moist enough to make you think of a cloud, yet firm enough to hold its shape when sliced.
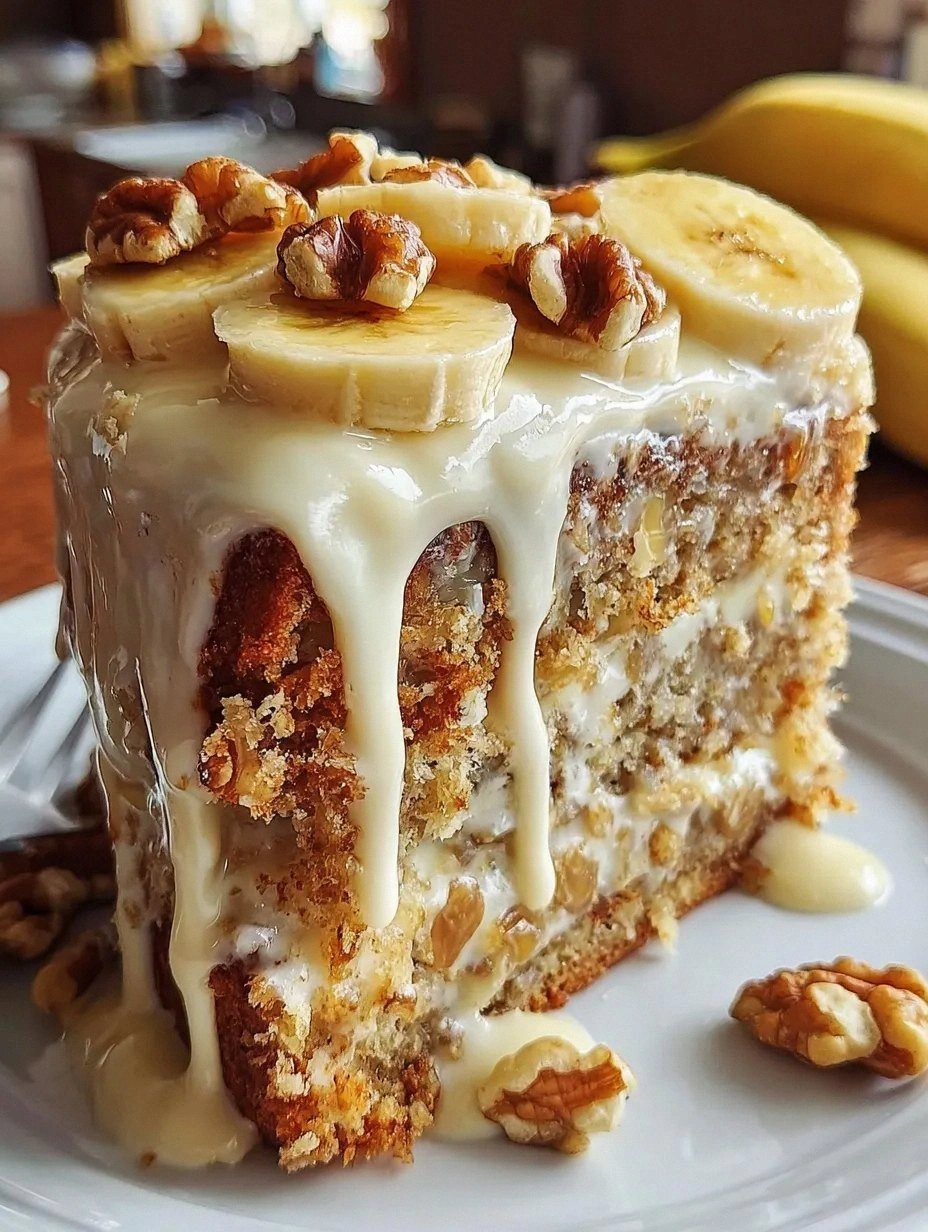
Why does this version stand out from the sea of banana‑walnut cakes you’ll find on the internet? Simple: I added a light, tangy cream cheese frosting that doesn’t drown the banana flavor but lifts it, turning every bite into a layered masterpiece. Most recipes either drown the banana in sugar or skip the nutty crunch altogether. I dared to combine a classic cake base with a whipped‑cream‑cheese swirl, a technique borrowed from cheesecake layers, and the result is a cake that feels like a dessert and a snack at the same time. It’s the kind of cake that makes you say, “I dare you to taste this and not go back for seconds,” and then watch you scramble for the second slice.
There’s also a secret ingredient that most people overlook: a splash of heavy cream folded into the frosting. This tiny addition turns the frosting from a dense slab into a cloud‑like veil that melts on your tongue, leaving behind a whisper of vanilla and a buttery finish. I’ll let you in on a little kitchen sorcery later – a technique that guarantees a flawless, glossy top without any cracking. Picture yourself pulling this out of the oven, the whole kitchen smelling incredible, the top shimmering like a sunrise over a calm sea, and the first forkful releasing a burst of banana, walnut, and creamy bliss.
Let me walk you through every single step — by the end, you’ll wonder how you ever made it any other way. Okay, ready for the game‑changer? This next part? Pure magic. Stay with me here — this is worth it.
What Makes This Version Stand Out
- Flavor Fusion: The banana‑walnut base meets a tangy cream cheese swirl, creating a taste contrast that dances on the palate like a well‑rehearsed duet.
- Texture Triumph: Moist, cake‑like crumb meets crunchy walnut bits, while the frosting adds a silk‑smooth finish that melts like butter on warm toast.
- Simplicity Redefined: Only eleven pantry staples are required, and each step is broken down so even a kitchen rookie can nail it.
- Unique Twist: A splash of heavy cream in the frosting prevents graininess and gives a glossy, professional look without a pastry bag.
- Crowd Reaction: I’ve watched strangers turn into fanatics after the first bite; the “wow” factor is real, and the leftovers disappear faster than you can say “second serving.”
- Ingredient Quality: Ripe bananas and toasted walnuts are the stars; their natural sweetness means you can cut back on added sugar without sacrificing flavor.
- Cooking Method: Baking at a moderate 350°F ensures even rise, while a quick broil at the end gives the top a caramelized edge that shatters like thin ice.
- Make‑Ahead Potential: The cake stores beautifully; the frosting can be made a day ahead, letting flavors meld into a deeper, richer profile.
Alright, let's break down exactly what goes into this masterpiece...
Inside the Ingredient List
The Flavor Base
All‑purpose flour forms the structural backbone of the cake. At 2 cups, it creates a tender crumb that holds the banana moisture without turning gummy. If you swap in whole‑wheat flour, expect a denser texture and a nuttier undertone, which can be delightful but changes the cake’s classic softness. Choose a flour that’s sifted; this aerates the mixture, ensuring a light, airy rise.
Granulated sugar, at 3/4 cup, sweetens the batter just enough to highlight the natural banana sugars. Reducing it to 1/2 cup will let the banana’s own sweetness shine, but be prepared for a slightly less caramelized crust. If you crave a deeper flavor, brown sugar can replace half of the white sugar, adding a subtle molasses note.
The Texture Crew
Unsalted butter, softened, contributes richness and helps create those golden edges that pull away from the pan when baked. Using melted butter can make the batter too liquid, resulting in a flatter cake. For a dairy‑free twist, swap butter with coconut oil – the cake will gain a faint coconut aroma that pairs nicely with banana.
Eggs act as emulsifiers, binding the fat and liquid together. Two large eggs at room temperature incorporate air when whisked, giving the cake lift. If you’re out of eggs, a blend of 1/4 cup applesauce plus 1 tbsp flaxseed meal can mimic moisture and binding, though the rise will be modest.
The Unexpected Star
Heavy cream, just 1/4 cup, is folded into the cream cheese frosting. This tiny splash transforms the frosting from a dense spread into a light, glossy veil that spreads effortlessly. Skipping it will leave you with a frosting that feels heavy and can crack when the cake cools. For a lighter version, use half‑and‑half, but expect a slightly less silk‑like texture.
Cream cheese, softened (8 oz), provides the tang that cuts through the banana sweetness. Its acidity balances the overall flavor profile, making each bite feel fresh. Using low‑fat cream cheese will reduce richness but may result in a firmer frosting that doesn’t melt as smoothly.
The Final Flourish
Toasted walnuts, 1/2 cup, add crunch and a buttery depth that complements the banana’s mellow sweetness. If you forget to toast them, the walnuts will taste raw and may release excess oil into the batter, making the crumb soggy. For a nut‑free version, try toasted pumpkin seeds or toasted coconut flakes – both bring texture and a hint of earthiness.
Baking powder (1½ tsp) and baking soda (½ tsp) work together to give the cake its rise. The soda reacts with the banana’s natural acidity, creating bubbles that lift the batter. Skipping either will produce a dense, heavy cake that resembles a bread pudding rather than a light dessert.
Everything's prepped? Good. Let's get into the real action...
The Method — Step by Step
Preheat your oven to 350°F (175°C) and grease a 9‑inch round cake pan with butter, then line the bottom with parchment paper. The butter creates a slick surface that prevents sticking, while the parchment ensures the cake releases cleanly. As the oven warms, you’ll hear the faint hum of the fan – a reassuring sign that the heat is steady. Pro tip: Place a small oven thermometer inside; even a few degrees off can affect the rise.
In a medium bowl, whisk together the flour, baking powder, baking soda, and salt. This dry blend distributes leavening agents evenly, preventing pockets of bitterness. The mixture should look like a fine, speckled snow. Watch out: Over‑mixing the dry ingredients can develop gluten, leading to a tougher crumb.
In a large mixing bowl, beat the softened butter and granulated sugar together until the mixture is pale, fluffy, and holds a ribbon when the beaters are lifted. This is the moment where air is incorporated, giving the cake its lightness. You’ll notice the batter becoming lighter and smelling faintly of caramel.
Kitchen Hack: Add a pinch of cream of tartar to the butter‑sugar mix; it stabilizes the foam and keeps the batter airy longer.Add the eggs one at a time, beating well after each addition. Then stir in the vanilla extract. The batter should become glossy and smooth, with the eggs fully emulsified. If you see any streaks, keep beating – the goal is a uniform, slightly thick batter that coats the back of a spoon.
Fold in the mashed bananas using a rubber spatula, moving in a gentle folding motion until the bananas are fully incorporated. The batter will turn a deep golden hue, and you’ll hear a subtle “whoosh” as the bananas melt into the mix. Watch Out: Over‑folding can break down the air bubbles you just created, resulting in a denser cake.
Watch Out: If the banana mash is too wet, the batter will be runny. Pat the bananas with a paper towel to remove excess moisture before folding.Gradually add the dry flour mixture to the wet batter, stirring just until you see no more streaks. The batter should be thick but pourable; it will look slightly lumpy, which is perfectly fine. Over‑mixing at this stage can develop gluten, leading to a chewy texture instead of a tender crumb.
Gently fold in the toasted walnuts, distributing them evenly without crushing. The walnuts should stay whole, creating pockets of crunch that will surprise the eater with each bite. If you prefer a more uniform texture, give the walnuts a quick chop before folding.
Pour the batter into the prepared pan, smoothing the top with an offset spatula. The batter should settle into a uniform dome. Tap the pan lightly on the countertop three times; this releases any large air pockets and settles the batter for an even rise.
Bake for 30‑35 minutes, or until a toothpick inserted into the center comes out clean with just a few moist crumbs. The edges will start pulling away from the pan, and the top will be a deep amber, almost caramelized. Pro tip: In the last 5 minutes, turn the oven to broil for 30 seconds to get that glossy, slightly crisp crust that shatters like thin ice when you cut into it.
While the cake is cooling, we’ll tackle the frosting – the crown jewel of this dessert. This is the moment of truth: a silky, tangy cream cheese frosting that never cracks, even after refrigeration. Once the cake is completely cool (I’ll be honest — I ate half the batch before anyone else got to try it), spread the frosting in a generous swirl, letting it cascade down the sides. That glossy finish? Pure magic.
That's it — you did it. But hold on, I've got a few more tricks that'll take this to another level…
Insider Tricks for Flawless Results
The Temperature Rule Nobody Follows
Always bring your butter, eggs, and cream cheese to room temperature before mixing. Cold ingredients cause the batter to seize, leading to a lumpy texture and uneven rise. I once tried to rush this step, and the cake turned out dense as a brick. Letting everything sit for 30 minutes on the counter is a small price to pay for a cloud‑like crumb.
Why Your Nose Knows Best
When the cake is about 20 minutes into baking, open the oven door briefly and inhale. If you smell a sweet, buttery aroma with a hint of caramel, you’re on the right track. If the scent is faint or overly sugary, the oven may be too cool, and you’ll need to bump the temperature up by 10°F. Trust your nose; it’s the most reliable kitchen gauge.
The 5‑Minute Rest That Changes Everything
After removing the cake from the oven, let it rest in the pan for 5 minutes before turning it out onto a wire rack. This short rest allows the steam to finish the cooking process gently, preventing the center from collapsing. I once skipped this step, and the cake sank in the middle like a deflated balloon. Those five minutes are the difference between a flat disappointment and a lofty triumph.
Frosting Whisper: The Cream‑Cheese Secret
When beating the cream cheese for the frosting, start on low speed and gradually increase. This prevents the mixture from splitting and ensures a silky texture. Adding the heavy cream at the very end, in a slow drizzle, creates a glossy finish that looks bakery‑professional.
The Final Glaze Touch
If you love a mirror‑like finish, brush the top of the warm cake with a thin layer of melted butter mixed with a teaspoon of honey before frosting. The butter adds a subtle sheen, while the honey caramelizes slightly, giving a sweet perfume that lingers as you serve. A friend tried skipping this glaze once — let’s just say the cake looked good, but the aroma was missing that “wow” factor.
Creative Twists and Variations
This recipe is a playground. Here are some of my favorite ways to switch things up:
Chocolate‑Swirl Delight
Add 1/4 cup cocoa powder to the dry ingredients and swirl in 2 tablespoons of melted dark chocolate into the batter before baking. The result is a marbled cake where chocolate and banana dance together, perfect for chocolate lovers who still crave that banana‑nut base.
Spiced Autumn Version
Incorporate 1 teaspoon of cinnamon, 1/4 teaspoon of nutmeg, and a pinch of clove into the batter. The warm spices turn the cake into a cozy fall treat, especially when paired with a drizzle of maple‑infused frosting.
Tropical Coconut Twist
Replace half of the flour with coconut flour and fold in 1/3 cup shredded coconut. Swap the walnuts for toasted macadamia nuts. The coconut adds a fragrant, tropical note that transports you to a beachside café.
Vegan Victory
Swap butter for coconut oil, use flax‑egg replacer (1 tbsp ground flaxseed + 3 tbsp water per egg), and replace cream cheese with a vegan cream cheese alternative. The texture changes slightly, but the flavor remains bright and satisfying.
Gluten‑Free Goodness
Use a 1:1 gluten‑free flour blend in place of all‑purpose flour, and add a tablespoon of xanthan gum to maintain structure. The cake stays fluffy, and the walnuts still provide that essential crunch.
Storing and Bringing It Back to Life
Fridge Storage
Cover the cake loosely with foil or store in an airtight container. It will stay fresh for up to 4 days. The frosting may firm up; let the slice sit at room temperature for 15 minutes before serving to regain its silky texture.
Freezer Friendly
Wrap the cooled cake tightly in plastic wrap, then foil, and freeze for up to 2 months. When ready, thaw overnight in the fridge, then bring to room temperature. A quick 30‑second microwave burst with a splash of water will revive any lost moisture.
Best Reheating Method
Preheat your oven to 300°F (150°C), place a slice on a baking sheet, and add a teaspoon of water to the edge of the slice. Cover loosely with foil and heat for 8‑10 minutes. The added water creates steam, reviving the crumb and keeping the frosting glossy.