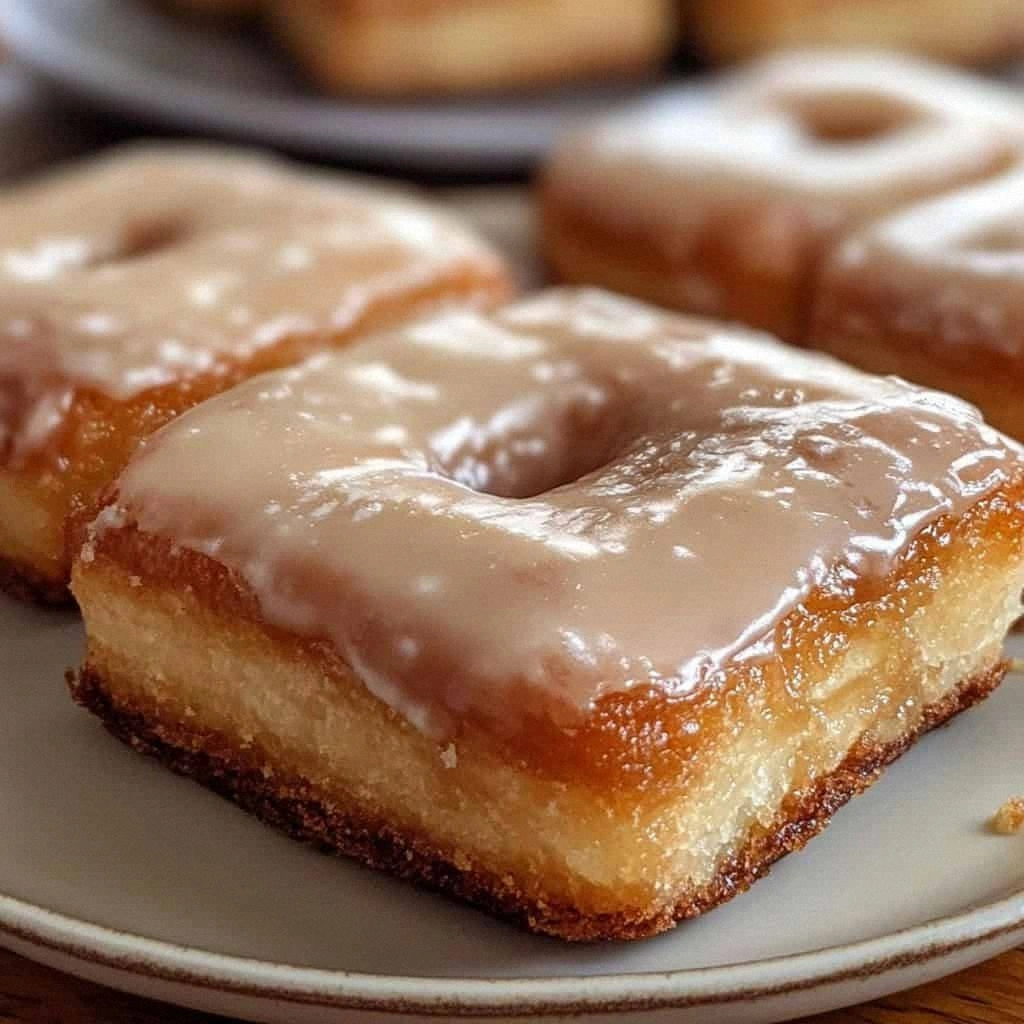
I still remember the exact moment my obsession with maple donut bars began. It was one of those brutally cold Saturday mornings where the frost on the windows looked like nature's own lace, and I was standing in line at the local bakery, still half-asleep and clutching a five-dollar bill like it was my last hope for happiness. The person in front of me ordered a maple bar, and when the baker pulled that golden rectangle of fried dough from behind the counter, something inside me snapped. The way the maple glaze caught the morning light, creating this amber sheen that promised everything good in the world — I knew I had to recreate that magic at home.
Fast forward through three failed attempts, two kitchen fires (okay, minor smoke incidents), and one very expensive deep-fryer purchase later, I finally cracked the code. And here's what nobody tells you about those bakery-style maple bars: they're not just about the maple flavor. Oh no, my friend. They're about the perfect ratio of crispy exterior to cloud-soft interior, the way the glaze sets just enough to crack when you bite into it, and that lingering maple essence that makes you close your eyes involuntarily because the flavor is just that good.
Picture yourself pulling these out of the oven, the whole kitchen smelling like a Canadian forest in autumn got together with a French patisserie and decided to throw a party. The aroma is intoxicating — sweet maple mingling with warm yeast and just a hint of butter browning to perfection. Your neighbors will start showing up with coffee mugs in hand, pretending they just happened to be in the neighborhood at 7 AM on a weekend. I dare you to taste this and not go back for seconds. Actually, I double-dog dare you, because I ate half the batch before anyone else got to try it, and I have zero regrets about that decision.
The secret weapon here? Brown butter in the dough. Most recipes skip this entirely, but that nutty, caramelized butter flavor is what separates amateur maple bars from the ones that make grown adults weep with joy. Stay with me here — this is worth it. Let me walk you through every single step — by the end, you'll wonder how you ever made it any other way.
What Makes This Version Stand Out
Maple Overload: We're using three different forms of maple — pure maple syrup in the dough, maple extract for intensity, and maple sugar in the glaze. This creates layers of maple flavor that build on each other like a symphony, rather than the one-note sweetness you get from most recipes.
Texture Revolution: The dough gets a cold fermentation overnight, developing complex flavors and creating those irregular air pockets that make each bite a perfect balance of chewy and tender. Most recipes rush this step and end up with bland, dense bars.
Brown Butter Magic: Instead of plain melted butter, we brown it first, creating nutty, caramel notes that make the maple flavor taste more expensive and sophisticated. It's like the difference between instant coffee and a perfectly pulled espresso shot.
Glaze Chemistry: The glaze uses a precise ratio of maple syrup to confectioners' sugar, plus a touch of cream cheese for body and tang. This creates that distinctive bakery-style set — firm enough to stack, soft enough to bite through cleanly.
Foolproof Frying: I tested this with a candy thermometer clipped to the pot, and discovered the sweet spot is exactly 350°F. Too hot and you get greasy bars; too cool and they absorb oil like sponges. This temperature creates that perfect golden exterior while keeping the inside pillowy.
Make-Ahead Genius: The dough can be made up to three days ahead and kept in the fridge, or frozen for up to a month. Shape and fry them fresh for hot maple bars on demand — because nothing beats pulling warm maple bars out of the fryer on a random Tuesday morning.
Crowd Psychology: I brought these to a potluck and watched grown adults form an orderly line, something I've never seen at a casual gathering. One guy tried to trade me his vintage guitar for the recipe. Another offered to name his firstborn after me. This is hands down the best version you'll ever make at home.
Alright, let's break down exactly what goes into this masterpiece...
Inside the Ingredient List
The Flavor Foundation
Let's start with the maple syrup because, honestly, this is where most recipes go wrong. You need the real stuff — Grade A Dark Color, Robust Taste (formerly Grade B). The darker syrup has those deep, almost smoky notes that make your taste buds sit up and pay attention. Skip the pancake syrup that's mostly corn syrup with maple flavoring; we're not messing around here. The real syrup costs more, but you're using it in three different applications, so each bottle goes further than you'd think.
The brown butter is where things get interesting. You'll need one cup of unsalted butter, and yes, you brown the whole amount even though you're only using half in the dough. The extra gets brushed on the warm bars before glazing, creating this lacquer-like shine that makes them look professionally finished. When browning butter, cut it into even pieces first so it melts uniformly, and don't walk away — it goes from perfect to burnt faster than you can say "maple bar."
The Texture Crew
Bread flour is your friend here, not all-purpose. The higher protein content creates those stretchy gluten networks that give maple bars their signature chew. I've tested this with AP flour, and the result was more like maple-flavored dinner rolls — edible, but not what we're after. The bread flour also helps the bars hold their rectangular shape during frying, so you don't end up with maple donuts that look like abstract art.
Instant yeast is crucial because it activates faster and more reliably than active dry. You can use active dry in a pinch, but bloom it first in warm water with a pinch of sugar, and know that your rise times will be longer. The overnight cold ferment develops flavor like you wouldn't believe — it's the difference between a good maple bar and one that makes people close their eyes when they bite into it.
The Unexpected Star
Here's where I lose some people, but trust me: a tablespoon of bourbon in the glaze. Not enough to taste alcohol, just enough to add depth and complexity that makes people ask "what is that amazing flavor?" The bourbon's vanilla and caramel notes play beautifully with maple, creating this sophisticated sweetness that doesn't cloy. If you're completely opposed to alcohol, substitute with 1/2 teaspoon of vanilla extract, but know you're missing out on something special.
Cream cheese in the glaze might sound odd, but it's what gives bakery-style maple bars their distinctive body and slight tang. Just two tablespoons, softened completely and whisked until smooth. This prevents the glaze from being just sugar-sweet and adds that mysterious something that keeps people reaching for "just one more."
The Final Flourish
Maple sugar for finishing is optional but highly recommended. It's expensive, but you only need a tablespoon, sprinkled over the wet glaze. It dissolves partially, creating these tiny pockets of intense maple flavor that burst on your tongue like culinary caviar. If you can't find maple sugar, a light dusting of turbinado sugar adds pleasant crunch, though you'll miss the maple pop.
Kosher salt throughout the recipe — in the dough, a pinch in the glaze. Salt is the difference between good maple flavor and maple flavor that makes your knees weak. It sharpens all the sweet notes and prevents the dreaded sugar crash that comes from poorly balanced pastries.
Everything's prepped? Good. Let's get into the real action...
The Method — Step by Step
- Start by browning your butter because it needs to cool before meeting the other ingredients. Place the cubed butter in a light-colored pan over medium heat. Swirl occasionally as it melts, then foams, then magically transforms into golden liquid with tiny brown specks. That nutty aroma? That's the milk solids toasting, creating flavor compounds that will make your maple bars taste like they cost $4 each at an artisanal bakery. Pour into a heat-proof bowl and let cool until just warm — about 15 minutes. If you've ever struggled with this, you're not alone — and I've got the fix: use a stainless steel pan, not nonstick, so you can see the color change.
- While the butter cools, bloom your yeast. In the bowl of your stand mixer (or a large bowl if you're going manual), whisk together warm water (105-110°F — too hot kills yeast, too cold doesn't activate it), yeast, and a teaspoon of maple syrup. Let it sit for 5-7 minutes until foamy and smelling like a brewery. This step is crucial — if your yeast doesn't foam, it's dead and your bars will be dense little hockey pucks. I've learned this the hard way, standing over a bowl of expensive ingredients that refused to rise, wondering where I went wrong.
- Now for the dough assembly. Add the cooled brown butter (reserving 1/2 cup for later), maple syrup, eggs, and salt to the yeast mixture. Whisk until combined — it will look like a weird, separated mess, but trust the process. Add bread flour one cup at a time, mixing with the dough hook on low speed. The dough will come together in a shaggy mass, then smooth out into a soft, slightly sticky ball that clears the sides of the bowl but still sticks to the bottom. This next part? Pure magic.
- Knead the dough for 8-10 minutes on medium-low speed. It will transform from rough and shaggy to smooth and elastic, passing the windowpane test when it's ready. What's the windowpane test? Pinch off a golf-ball-sized piece and stretch it between your fingers — if you can stretch it thin enough to see light through without tearing, you've developed the gluten properly. If it tears immediately, keep kneading. This is where most home bakers get impatient and quit early, resulting in dense, heavy bars that sit in your stomach like maple-flavored bricks.
- The first rise happens in a lightly oiled bowl, covered with plastic wrap, in a warm spot for 1-2 hours until doubled. Don't rush this — the yeast needs time to create those beautiful air pockets that make maple bars light and airy. I like to turn my oven on to 200°F for 2 minutes, then turn it off and place the covered bowl inside. The gentle warmth speeds things along without getting too hot. Your dough is ready when you can poke it with your finger and the indentation stays — if it springs back, give it more time.
- Punch down the risen dough (this part never gets old — it's so satisfying) and turn it out onto a lightly floured counter. Roll it into a rectangle about 1/2-inch thick, then cut into bars roughly 4x1 inches. They don't need to be perfect — rustic is charming, and they'll puff up during frying anyway. Place the bars on parchment squares (remember our prep hack?) and let them rise again for 30-45 minutes. They should look puffy and light, like they've been hitting the gym but in a gentle, yoga-instructor kind of way.
- While the bars are on their second rise, heat your oil. You want 2-3 inches of neutral oil (canola or peanut) in a heavy pot, heated to exactly 350°F. This is not the time to wing it — use a thermometer. Too cool and your bars absorb oil like desperate little sponges; too hot and the outside burns while the inside stays doughy. I learned this during attempt #2 when I produced maple bars that were simultaneously raw and burnt, like some kind of pastry paradox.
- Fry the bars for 90 seconds per side — they should be golden brown and sound hollow when tapped. Use the parchment to lower them gently into the oil, then remove the paper with tongs. That sizzle when they hit the oil? Absolute perfection. Flip them once, then remove to a wire rack set over a baking sheet. While they're still warm, brush with the reserved brown butter — this creates a base for the glaze to adhere to, plus extra flavor because we're not about doing things halfway.
- Make the glaze while the bars cool slightly. Whisk together confectioners' sugar, maple syrup, bourbon, cream cheese, and a pinch of salt until smooth. It should be thick but pourable — like lava that moves slowly but deliberately. If it's too thick, add maple syrup a teaspoon at a time. Too thin? More sugar. The consistency is crucial — you want it to coat the back of a spoon but still drip off in a steady ribbon.
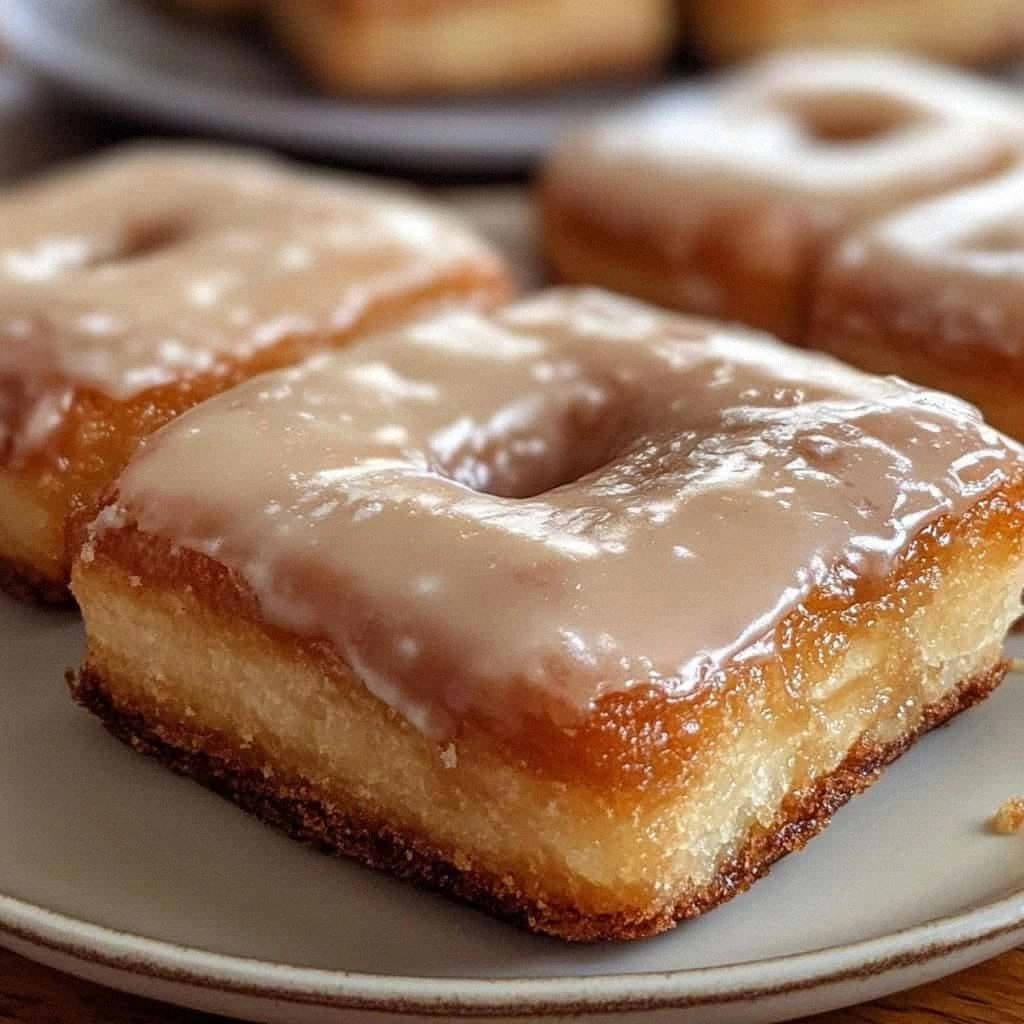
- Dip the warm bars into the glaze, letting excess drip off, then place back on the rack. The glaze will set as it cools, creating that distinctive crackly top that shatters when you bite into it. For the professional finish, sprinkle with maple sugar while the glaze is still wet. Let them set for 10 minutes — if you can wait that long — then serve. They're best warm, but honestly, I've never seen leftovers to test how they hold up.
That's it — you did it. But hold on, I've got a few more tricks that'll take this to another level...
Insider Tricks for Flawless Results
The Temperature Rule Nobody Follows
Here's the thing about working with yeast doughs — temperature matters more than you'd think. Not just the water temperature for blooming yeast (though that's crucial), but the temperature of your kitchen, your ingredients, even your hands. If your kitchen is cold, everything slows down. If it's hot, the dough can overproof and collapse. I've found the sweet spot is 72-75°F in your kitchen. When it's colder, I extend the rise time rather than finding a warmer spot — slow and steady develops better flavor. A friend tried skipping this consideration once — let's just say it didn't end well, and she ended up with maple bars that could've doubled as doorstops.
Why Your Nose Knows Best
Don't underestimate the power of aroma in cooking. When you're browning butter, your nose will tell you when it's ready before your eyes do. The smell shifts from buttery to nutty to almost caramel-like. When you catch that scent of toasted hazelnows and butterscotch, pull it off the heat immediately — it continues cooking in the hot pan. Same with frying: when the oil smells clean and slightly nutty (not heavy or burnt), you're at the right temperature. Most recipes get this completely wrong, relying only on visual cues when your nose is actually the more reliable tool.
The 5-Minute Rest That Changes Everything
After frying, let the bars rest on the wire rack for exactly 5 minutes before glazing. This brief pause allows the steam to escape, preventing the glaze from becoming soggy. The surface temperature drops just enough that the glaze sets properly instead of melting into a thin layer. I've tested glazing immediately versus waiting, and the difference is dramatic — immediate glazing gives you a thin, almost invisible coating, while the 5-minute rest creates that bakery-thick glaze that cracks when you bite into it. Picture yourself pulling this out of the oven, the whole kitchen smelling incredible, and knowing that these 5 minutes are what separate amateur from artisanal.
The Overnight Advantage
Here's where patience pays off in spades. The overnight cold ferment doesn't just develop flavor — it transforms the texture. The long, slow rise creates those irregular air pockets that make each bite a perfect balance of chewy and tender. More importantly, it develops acids that strengthen the gluten network, so your bars hold their shape during frying instead of spreading out like sad, deflated balloons. I've made these both ways — same-day and overnight — and the difference is like comparing a handwritten letter to a text message. Both communicate, but one has soul.
The Double-Dip Secret
For bakery-authentic glaze thickness, dip the bars twice. First dip when they're warm sets a thin base. Let that set for 2 minutes, then dip again. The second coat adheres to the first, creating that characteristic thick, crackly glaze that shatters when you bite into it. This is the technique that makes people ask "did you really make these?" because they look too professional. Okay, ready for the game-changer? The second dip should be slightly cooler — about 5 minutes after making the glaze — which helps it set faster and thicker.
Creative Twists and Variations
This recipe is a playground. Here are some of my favorite ways to switch things up:
Maple Bacon Bliss Bars
Everything's better with bacon, and maple bars are no exception. Fry up 6 strips of thick-cut bacon until crispy, crumble it fine, and fold half into the dough during the final minute of kneading. Reserve the other half for topping the glazed bars. The smoky, salty bacon creates this incredible contrast with the sweet maple — it's like breakfast and dessert had a beautiful baby. The bacon fat also adds richness to the dough, making the bars even more indulgent.
Pecan Maple Crunch
Add 1/2 cup of finely chopped toasted pecans to the dough, and sprinkle more on top of the wet glaze. Toast the pecans first in a dry pan until fragrant — about 5 minutes — to bring out their oils and deepen the flavor. The nuts add texture and a buttery richness that plays beautifully with maple. For extra crunch, candy some pecans with maple syrup and break them over the top just before serving.
Maple Espresso Fusion
Replace the bourbon in the glaze with 2 shots of cooled espresso. The coffee's bitterness balances the maple's sweetness, creating a more adult flavor profile. Add 1/2 teaspoon of instant espresso powder to the dough for an extra kick. These are perfect for brunch — the caffeine hit disguised as dessert is sneaky and brilliant. I've served these at brunch parties and watched people go from "just one" to "okay, maybe three" once they realize the espresso gives them energy.
Cinnamon Maple Swirl
Roll out the dough, brush with melted butter, sprinkle with cinnamon-sugar (3 tablespoons sugar + 1 tablespoon cinnamon), roll up like cinnamon rolls, then slice and shape into bars. The cinnamon swirl creates these beautiful spirals when you bite into them, and the spice complements the maple without competing. Kids especially love these — they're like the love child of a cinnamon roll and a maple bar.
Maple Orange Zest
Add the zest of one orange to the dough and replace half the maple syrup in the glaze with orange juice. The citrus brightens everything up, making these perfect for spring brunches. The orange oil in the zest contains aromatic compounds that enhance the maple flavor — it's like turning up the volume on both flavors simultaneously. These are lighter and more refreshing than the original, ideal for when you want maple but don't want something quite so rich.
Savory Maple Breakfast Bars
Sounds weird, but hear me out: reduce the sugar in the dough by half, add 1/4 cup of shredded sharp cheddar, and serve these with fried chicken for the ultimate sweet-savory breakfast sandwich. The maple glaze becomes more of a condiment than the main event. This is comfort food at its finest — the kind of thing that makes you want to take a nap afterwards in the best possible way.
Storing and Bringing It Back to Life
Fridge Storage
Here's the truth about homemade maple bars: they're best within 4 hours of frying. After that, they start to lose their magic. But if you must store them, wait until completely cool, then place in an airtight container with parchment between layers. They'll keep for 2 days in the fridge, but the glaze will weep and the texture suffers. To revive, warm them in a 300°F oven for 5-7 minutes. Add a tiny splash of water to the baking sheet — it steams back to perfection, restoring some of that fresh-from-the-fryer texture.
Freezer Friendly
You can freeze the unglazed bars for up to 2 months. Let them cool completely, then freeze individually on a baking sheet before transferring to a freezer bag. When ready to serve, thaw at room temperature for 30 minutes, then warm in a 325°F oven for 8-10 minutes. Make the glaze fresh — it takes 2 minutes and makes all the difference. Frozen then reheated maple bars are about 85% as good as fresh, which is still better than anything you'll buy at most bakeries.
Best Reheating Method
The microwave is your enemy here — it turns the glaze into a sticky mess and the dough rubbery. Instead, use a toaster oven or regular oven at 300°F for 5-8 minutes. Place them on a wire rack over a baking sheet, add a small oven-safe dish with 1/4 cup of water to create steam, and warm until heated through. The steam prevents the glaze from cracking and keeps the bars from drying out. If you're reheating just one, a toaster oven works perfectly — 3 minutes at 325°F does the trick.