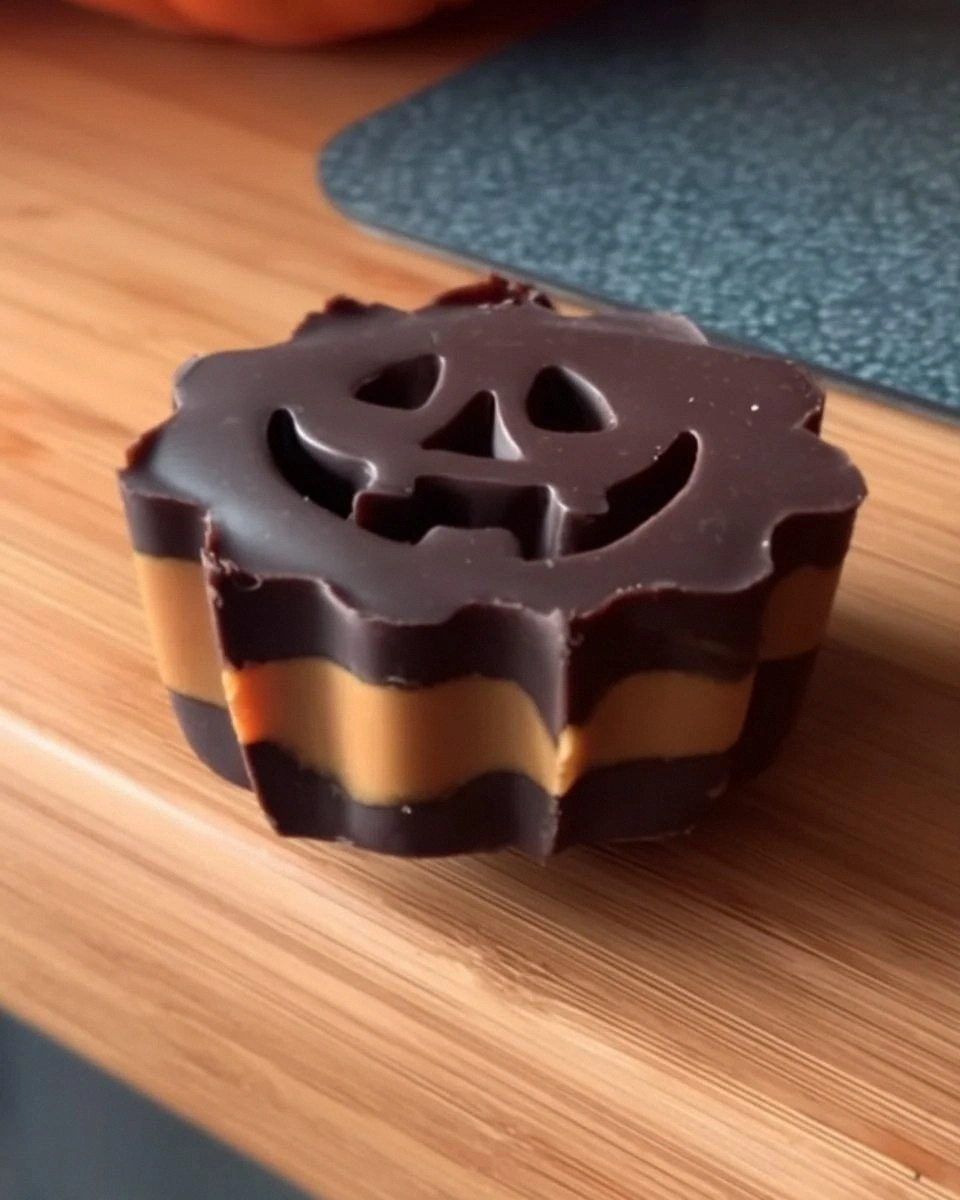
Picture this: it is 11:37 p.m. on October 29, the wind is whipping maple leaves against the kitchen window like tiny skeletal fingers, and you just realized you promised to bring “something homemade” to the office pumpkin-carving contest tomorrow. The grocery store aisles have already been ransacked by parents hunting for the last bag of fun-sized candy, and the only thing left in your pantry is a half-eaten jar of peanut butter and a suspiciously old bag of semi-sweet chocolate chips. Most people would surrender to store-bought cookies. I, however, took it as a dare from the universe and emerged three hours later with a platter of glossy, crimp-edged Halloween peanut butter cups that made my coworkers forget every other dessert on the potluck table. The secret? A whisper of smoked salt, a bronzy swirl of edible shimmer, and a peanut-butter filling so silky it practically tap-dances across your tongue.
Now, before you roll your eyes and mutter “Oh great, another peanut butter cup recipe,” let me confess something: I have eaten my way through every hipster confection shop from Brooklyn to Portland, and I still believe the best version is the one you can make in your own kitchen wearing mismatched socks and a witch’s hat. These cups are not the chalky, overly sweet disks that stick to the roof of your mouth like grade-school paste. They are the dark-horse rock stars of Halloween candy: deep, fudgy chocolate that cracks like thin ice, revealing a whipped peanut-butter cloud that tastes like the inside of a Reese’s that went on a spa retreat and came back meditating on its own deliciousness. The edges shatter, the centers swoon, and the whole thing dissolves into a salty-sweet pool that makes you close your eyes involuntarily. I dare you to taste one and not go back for seconds—actually, I double-dog dare you, because I have never seen it happen.
What pushed me over the edge from casual peanut-butter-cup enjoyer to full-blown evangelist was the year my nephew’s nut-allergy pal showed up at the trunk-or-treat. I watched that kid’s face crumple when he realized every single candy in the bowl either contained peanuts or was made on equipment that once sneezed in the direction of a peanut. I went home, stayed up until the owls clocked out, and devised a sunflower-seed-butter version that tasted so uncannily similar that even the grown-ups swore I was running a covert peanut operation. That night I learned two things: first, toasted sunflower seeds plus a pinch of cinnamon can masquerade as peanut butter if you let them cool completely before folding in powdered sugar; second, Halloween is not about the costume— it is about the moment someone bites into your candy and feels included, seen, and a little bit magic.
Okay, ready for the game-changer? We are going to bloom the cocoa in melted butter before we ever think about adding chocolate to the mix. Most recipes dump everything in a bowl, microwave until it is a lumpy disaster, and call it a day. I am asking you to treat the cocoa like coffee grounds: coax out the bitter oils, let the kitchen fill with that dark, almost wood-smoke aroma, and then build the rest of the layers on that foundation. You will also chill the filling first so it stays proud and mounded instead of slumping like a defeated ghost. By the end of this post you will wonder how you ever made it any other way, and you will probably volunteer to host next year’s Halloween bash just to show off. Let me walk you through every single step—yes, even the part where you impatiently poke the tops to see if they are set yet and end up with chocolate fingerprints on your witchy black apron.
What Makes This Version Stand Out
Silk-Smooth Filling: Instead of stirring confectioners’ sugar into plain peanut butter and calling it quits, we whip in a shot of heavy cream and a thread of maple syrup. The result is airy, almost mousse-like, and it refuses to glue your mouth shut.
Two-Temper Chocolate: We melt two thirds of the chocolate first, cool it to 89 °F—yes, use that candy thermometer gathering dust—then seed it with the remaining shards. You get the snap of a professional candy bar without any paraffin wax nonsense.
Smoked Salt Stardust: A micro-dusting of smoked flaky salt on top accentuates the roasted notes in both the chocolate and the peanut butter, giving you a whisper of campfire that screams autumn instead of cloying sweetness.
Sunflower-Seed Swap: Peanut allergy? No problem. The recipe includes a one-for-one sunflower-seed-butter variation that tastes eerily identical once you add the maple and vanilla. Kids will never know the difference, and parents will nominate you for sainthood.
Make-Ahead Magic: These cups freeze like champions. Layer them in parchment, stash in a zip bag, and you have instant Halloween currency all month. Thaw five minutes at room temp and they taste freshly made—promise.
Muffin-Tin Perfection: No specialty molds required. A standard mini-muffin pan plus paper liners gives you crimped edges that look boutique-bought but cost pennies. You probably own both right now.
Kid-Friendly Assembly Line: Little goblins can press the peanut-butter centers, sprinkle the salt, and paint on edible shimmer. Ten minutes of sticky chaos equals lifelong kitchen confidence and Instagram-worthy memories.
Alright, let us break down exactly what goes into this masterpiece, starting with the ingredient intel that will save you from a last-minute grocery-store scream fest.
Everything is prepped? Good. Let us get into the real action, starting with the mise en place that keeps you from frantically rummaging through drawers while your chocolate siezes.
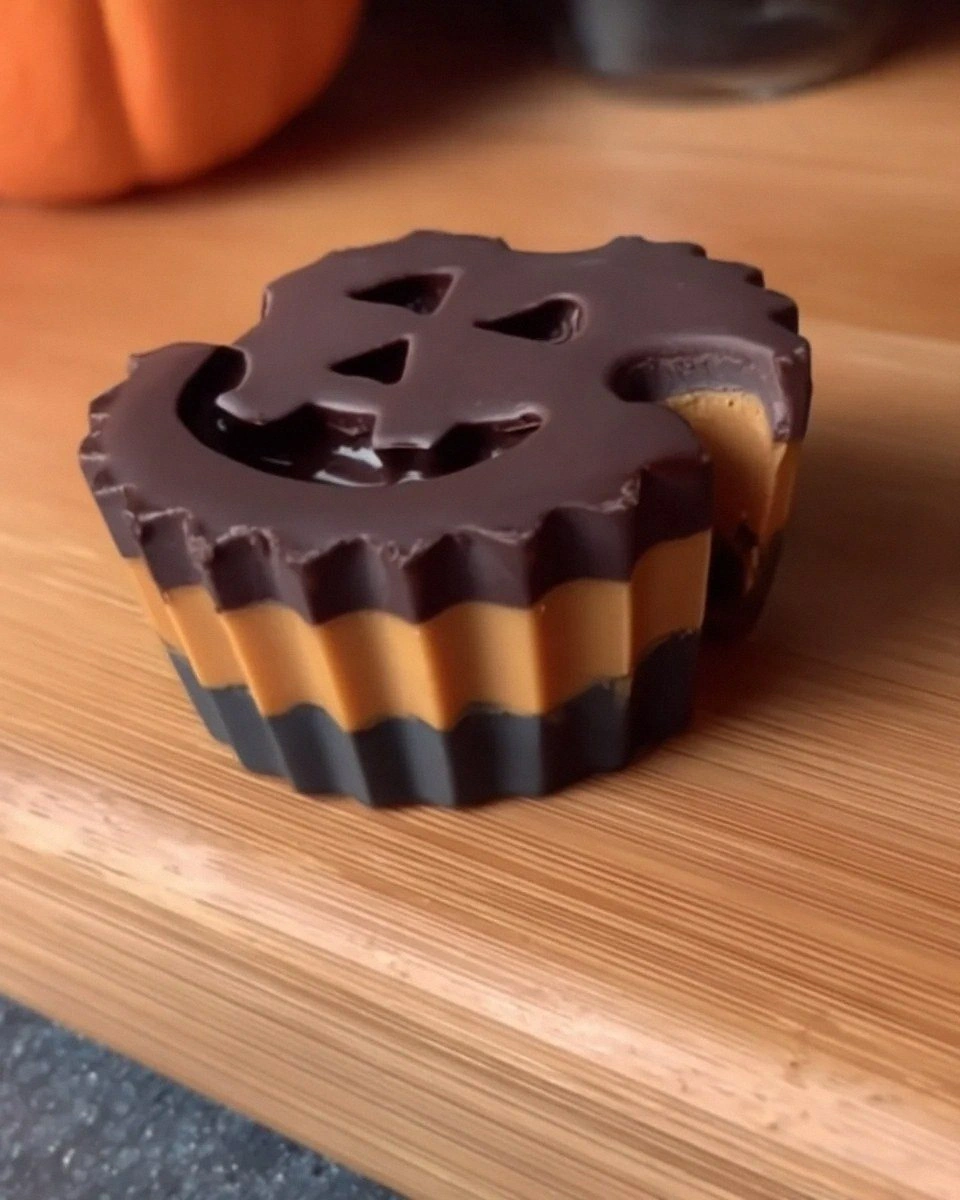
The Method — Step by Step
-
Line a mini-muffin tin with 24 paper liners and set it on a flat shelf in your freezer. Cold metal is your insurance policy against streaky chocolate. While the pan chills, chop 12 ounces of chocolate into almond-sized shards; reserve one third for seeding later. The smaller the pieces, the quicker they melt, and the less likely you scorch half the batch because TikTok lured you away.
-
In a glass bowl set over a pot of barely simmering water, melt two thirds of the chocolate, stirring with a silicone spatula. Keep the flame low—steam should whisper, not shout. Once the temperature kisses 115 °F on an instant-read thermometer, remove the bowl and place it on a kitchen towel to stabilize. Stir continuously for 30 seconds; the chocolate should look like glossy pudding and smell like brownies cooling on a rack.
-
Now the seeding magic: sprinkle in the reserved chocolate a little at a time, stirring until each addition vanishes. You are teaching the melted cocoa butter to crystallize into the shiny form-five structure that gives professional candy its snap. When the mixture drops to 89 °F, test by daubing a teaspoon on parchment; it should set within three minutes with a satiny sheen. If it looks dull, keep stirring and let it cool another degree.
-
Spoon one heaping teaspoon of tempered chocolate into each liner, then use a small pastry brush to paint the chocolate up the sides almost to the rim. Work fast—tempered chocolate waits for no one. Slide the tray back into the freezer for exactly four minutes. The shell needs to be firm enough to support filling but still tacky enough to bond with the top layer later.
-
Meanwhile, make the filling. In a stand mixer fitted with the paddle, beat peanut butter, maple sugar, powdered sugar, heavy cream, vanilla, sesame oil, and corn syrup on medium-high for 90 seconds. The mixture will lighten and resemble whipped frosting. Scrape the bowl once to expose any hidden sugar pockets, then beat another 30 seconds. You want it pipe-able but not runny; think buttercream that holds a soft peak.
-
Transfer the filling to a zip bag, snip an ½-inch corner, and pipe a generous marble-sized mound into each chocolate shell. Leave a ⅛-inch border so the top chocolate can seal like a lid. If you overfill, the cups will burst at the seam and look like sad volcanoes. Pop the tray back into the freezer for two minutes while you re-warm the remaining tempered chocolate to 89 °F.
-
Spoon another teaspoon of chocolate over each mound, nudging it to the edges with the back of the spoon to create a seamless seal. Give the tray a gentle rap on the counter to collapse air bubbles and level the tops. Immediately shower each cup with three crystals of smoked salt and a fairy-dust wink of gold shimmer. The salt adheres best while the surface is still molten.
-
Refrigerate the finished cups for 15 minutes to lock in the shine, then transfer to an airtight container. They will keep at cool room temperature for a week, but good luck stretching them past Halloween night. When you peel back the paper, you should hear a crisp snap and see glossy tops that reflect string-lights like a black mirror.
That is it—you did it. But hold on, I have got a few more tricks that will take this to another level, including the temperature rule nobody follows.
Insider Tricks for Flawless Results
The Temperature Rule Nobody Follows
Room-temperature peanut butter will ooze like lava and split your chocolate seams. Chill it 20 minutes before piping and your cross-sections will look bakery-case perfect. Likewise, let the finished cups sit at 65 °F for an hour before serving; colder chocolate mutes flavor, and you want every nuance singing.
Why Your Nose Knows Best
When the centers smell like roasted peanuts and faint caramel, they are ready. No smell equals bland; overly sweet aroma means you have crossed into sugar overload. Trust your olfactory instincts—evolution gave us that radar for a reason.
The 5-Minute Rest That Changes Everything
After tempering, let the chocolate rest off the heat for five minutes before you start painting shells. This brief pause allows unstable crystals to melt away, so you are left with only the shiny Form V army that gives professional snap.
Double-Tray Insurance
Set your muffin tin inside a second empty tray; the air pocket insulates against temperature shocks and prevents dreaded “fat bloom” streaks that look like spider webs across the tops.
Flavor Layer Cheat Code
Add a micro-layer of raspberry jam—just ⅛ teaspoon—between chocolate shell and peanut butter. The tartness amplifies both chocolate and peanut notes without screaming fruit. A friend tried skipping this once; let us just say it ended with polite nibbles and a tray of leftovers.
Creative Twists and Variations
This recipe is a playground. Here are some of my favorite ways to switch things up:
Mexican Hot-Chocolate Heat
Whisk ¼ teaspoon each of cinnamon and ancho chile powder into the tempered chocolate. The gentle burn creeps in after the sweet fade, making guests reach for a second cup to quell the pleasant fire.
Ghost-White Vanilla Bean
Swap the chocolate for melted cocoa-butter-based white chocolate tinted with activated-charcoal “dirt.” The jet-black shells hide a snow-white center that oozes dramatically when bitten—perfect for spooky theatrics.
Spiked Espresso Mocha
Dissolve one teaspoon of instant espresso into the heavy cream before adding it to the peanut butter. The coffee bitterness marries the nuttiness and makes adults feel like they are eating a Halloween affogato.
Coconut-Caramel Macadamia
Substitute half the peanut butter with macadamia butter and fold in soft caramel bits. Top with toasted coconut shards for a tropical escape that still fits the orange-and-black theme.
Frankenstein Matcha
Replace 10 % of the chocolate with matcha-infused white chocolate for a green, earthy shell that looks like monster skin. Kids love the color; adults love the grassy complexity against sweet filling.
Candy-Corn Gradient
Paint the inside of each liner with three stripes—white, orange, yellow—using colored cocoa butter before adding chocolate. The finished cups reveal a candy-corn rainbow that sends Instagram into overdrive.
Storing and Bringing It Back to Life
Fridge Storage
Layer cups between parchment in an airtight box; they will keep two weeks at 40 °F. Let them sit out 10 minutes before serving so the chocolate regains its snap and the filling softens to creamy bliss.
Freezer Friendly
Flash-freeze on a tray, then tumble into a zip bag with as much air removed as possible. They stay pristine for three months. Thaw overnight in the fridge, then the counter for 15 minutes. Texture remains showroom perfect.
Best Reheating Method
There is no reheating here—chocolate bloom is irreversible—but if your kitchen is warm and the cups get soft, pop them into the fridge for five minutes. A tiny pinch of flaky salt on top revives the flavor spark that refrigeration sometimes dulls.