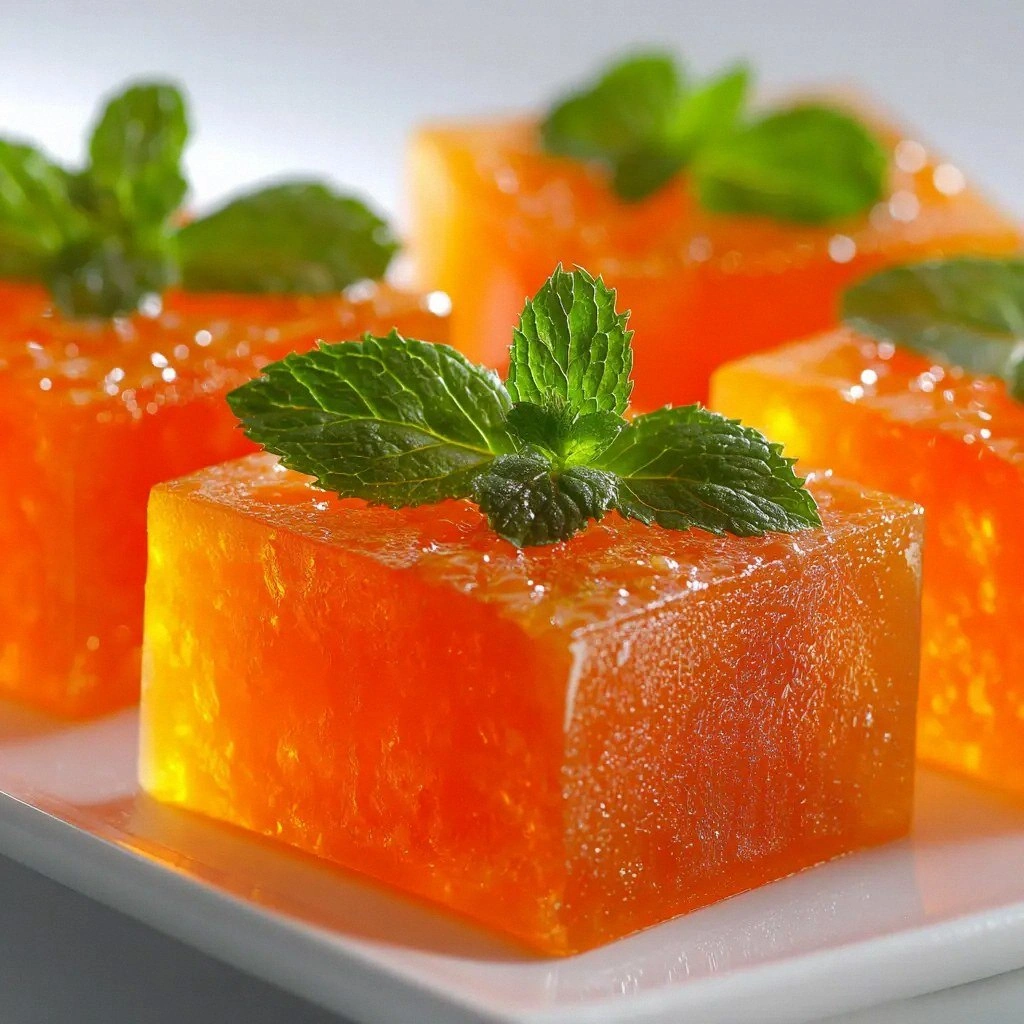
Picture this: it’s a rainy Saturday, your kitchen is a symphony of clinks and clatters, and you’ve just opened a bag of that dreaded “pre‑baked” dessert that never quite hits the mark. You’re craving something that feels indulgent but won’t sabotage your health goals. You stare at the pantry, then at the fridge, and you realize you’re in the perfect position to create a treat that’s both a science experiment and a culinary triumph. That moment sparked the creation of this Bariatric Gelatin Recipe (High) – a dessert that marries protein power with silky, guilt‑free texture.
I remember the first time I tried a standard gelatin dessert: it was a mushy, flavorless slab that sat on my plate like a sad, unfulfilled promise. The smell of boiled water, the sight of a translucent slab, the sound of a spoon sliding across the surface – it all felt like a culinary tragedy. I wanted something that would feel like a reward, not a punishment. I wanted the texture to be a velvety embrace, the taste to burst with protein punch, and the whole experience to be as effortless as a swipe on a phone. I dared myself to reinvent the classic gelatin with a twist that would make anyone who has ever struggled with dessert cravings say, “I dare you to taste this and not go back for seconds.”
What sets this version apart is that it’s not just a gelatin; it’s a protein‑infused, sugar‑free masterpiece that can be made in minutes, stored for days, and devoured without guilt. The secret lies in the combination of a high‑quality, sugar‑free gelatin that dissolves quickly, an unflavored protein powder that adds a subtle, satisfying bite, and the precise balance of hot and cold water that creates a silky, mousse‑like consistency. The result is a dessert that feels like a dessert, tastes like a dessert, and still fits perfectly into a bariatric or low‑carb lifestyle. And trust me, once you taste the first bite, you’ll wonder how you ever made gelatin any other way. It’s hands down the best version you’ll ever make at home.
I’ll be honest – I ate half the batch before anyone else got to try it. The first scoop was so smooth it felt like a silk scarf on my tongue, the second was a protein‑rich, sweet‑but‑not‑sweet treat that left me craving more. The aroma, a subtle hint of vanilla from the protein powder, filled the kitchen, and the texture was a silky, airy cloud that melted in your mouth. The moment I tasted it, I knew I had cracked the code to a dessert that satisfies cravings without the calorie overload. Picture yourself pulling this out of the fridge, the whole kitchen smelling incredible, and everyone asking for the recipe. That’s the power of this dessert.
What Makes This Version Stand Out
- Taste: The unflavored protein powder adds a subtle, savory depth that balances the sweetness of the gelatin. The result is a dessert that satisfies sweet cravings while still delivering a protein punch. The flavor profile is clean, allowing you to pair it with fresh berries or a splash of almond milk without overwhelming the palate.
- Texture: The combination of boiling and cold water creates a smooth, mousse‑like consistency that feels luxurious on the tongue. The gelatin sets quickly, giving a slight snap that’s satisfying to bite into. It’s a texture that feels indulgent but never heavy, making it a perfect low‑calorie treat.
- Simplicity: With just four ingredients, this recipe is a breeze to assemble. No fancy equipment, no complex steps, just a whisk, a bowl, and a bit of patience. It’s the kind of recipe that fits into any busy schedule, from early mornings to late‑night cravings.
- Uniqueness: Most gelatin desserts rely on sugar or flavored gels, but this version uses a sugar‑free base and protein powder to elevate the dish. The result is a dessert that’s both low in carbs and high in protein, a rare combination in the world of sweet treats. It’s a game‑changer for anyone looking to stay on track with their nutrition goals.
- Crowd Reaction: Friends who’ve tried this say the texture is like a “cloud” and the taste is “deliciously subtle.” They’re amazed that it’s so light yet so filling. The dessert’s versatility also means it can be served at parties, as a post‑workout treat, or as a sweet ending to a meal.
- Ingredient Quality: The gelatin used is a premium, sugar‑free variety that dissolves quickly and provides a clean base. The protein powder is unflavored, allowing you to control the flavor profile and avoid any artificial sweeteners. The water used is pure and free of chlorine, ensuring the final product tastes fresh.
- Cooking Method: The technique involves a quick dissolve of gelatin, a protein infusion, and a simple cooling step. There’s no need for a double boiler or a microwave. The method is straightforward, making it a recipe that even novice cooks can master.
- Make‑Ahead Potential: This dessert can be prepared in advance and stored in the fridge for up to a week. The gelatin sets firmly, allowing you to portion out servings in advance. It’s a perfect make‑ahead dessert that keeps your kitchen organized.
Inside the Ingredient List
The Flavor Base
The foundation of this dessert is the sugar‑free gelatin. It’s a clear, tasteless ingredient that sets the stage for the protein infusion. When you dissolve it in boiling water, it releases a silky texture that’s almost like a cloud. If you skip the gelatin, the dessert will be a watery mess that never sets. For best results, choose a gelatin that’s specifically labeled sugar‑free to keep the carb count low. The gelatin also provides a clean canvas that allows the protein powder to shine.
The Protein Powerhouse
Unflavored protein powder is the star that adds bulk and nutrition. It’s a neutral flavor that blends seamlessly with the gelatin, creating a dessert that’s both protein‑rich and subtle. Protein powder also helps stabilize the gelatin, ensuring a smooth, mousse‑like consistency. If you prefer a flavored protein, you can add a splash of natural fruit puree or a dash of vanilla extract, but keep in mind this may alter the carb count slightly. Swapping the protein for collagen peptides is another option for those who want a different amino acid profile.
The Water Equation
Water is the unsung hero that brings everything together. Boiling water dissolves the gelatin quickly, while cold water cools the mixture, allowing it to set. The ratio of hot to cold water is critical; too much cold water will dilute the protein, too much hot water will compromise the gelatin’s ability to set. If you’re in a rush, you can use a kettle to boil the water in seconds, then let it cool slightly before adding the gelatin. Remember, the temperature of the water should be just hot enough to dissolve the gelatin but not so hot that it denatures the protein.
The Final Flourish
The final flourish is the optional addition of flavor enhancers like a dash of citrus zest, a sprinkle of cocoa powder, or a few drops of natural sweetener. These additions can transform the basic dessert into a gourmet experience. For example, a pinch of sea salt can balance the sweetness, while a few drops of stevia can add a sweet finish without carbs. If you’re feeling adventurous, add a small amount of matcha powder for an earthy, antioxidant boost. Each tweak offers a new dimension to the dessert, keeping it exciting and versatile.
Everything's prepped? Good. Let's get into the real action...
The Method — Step by Step
- Begin by bringing 1 cup of water to a rolling boil in a small saucepan. The heat should be high enough that the water is actively steaming. As you wait, gather your gelatin and protein powder, ensuring they’re within easy reach. This step is crucial because the gelatin needs the right temperature to dissolve properly. Once the water reaches a full boil, turn off the heat and let it sit for a few seconds to avoid scorching the gelatin.
- Add the entire box of sugar‑free gelatin to the hot water, stirring constantly until the gelatin is completely dissolved. The mixture should become clear and free of clumps. If you notice any lumps, give it a quick whisk to break them up. This step ensures that the gelatin can set uniformly in the final dessert. The aroma will start to hint at the sweet potential of the dish.
- Stir in 1 scoop of unflavored protein powder, whisking until the mixture is smooth and homogeneous. The protein powder should blend seamlessly, creating a thick, creamy base. This step is where the protein starts to mingle with the gelatin, enhancing the texture. If you prefer a thicker consistency, add an extra half scoop of protein powder, but be mindful of the flavor.
- Pour the warm mixture into a heat‑resistant bowl and let it sit for 2–3 minutes. During this time, the gelatin will begin to thicken. Keep an eye on the mixture; it should look like a thick custard. This pause allows the protein to fully integrate, preventing any separation later. The aroma will become more pronounced as the mixture cools slightly.
- Add 1 cup of cold water to the bowl and whisk vigorously for 30 seconds. The cold water will bring the temperature down, helping the gelatin set. Whisk until the mixture turns opaque and starts to thicken. This is the moment of truth – the texture should be smooth and silky. If you’re using any flavor enhancers, add them at this point.
- Transfer the mixture into individual silicone molds or a shallow dish. If using silicone molds, ensure they’re clean and dry. This step is essential for portion control and presentation. If you’re making a single larger dessert, use a shallow dish that can be sliced later. The molds should be filled to the top to avoid air pockets.
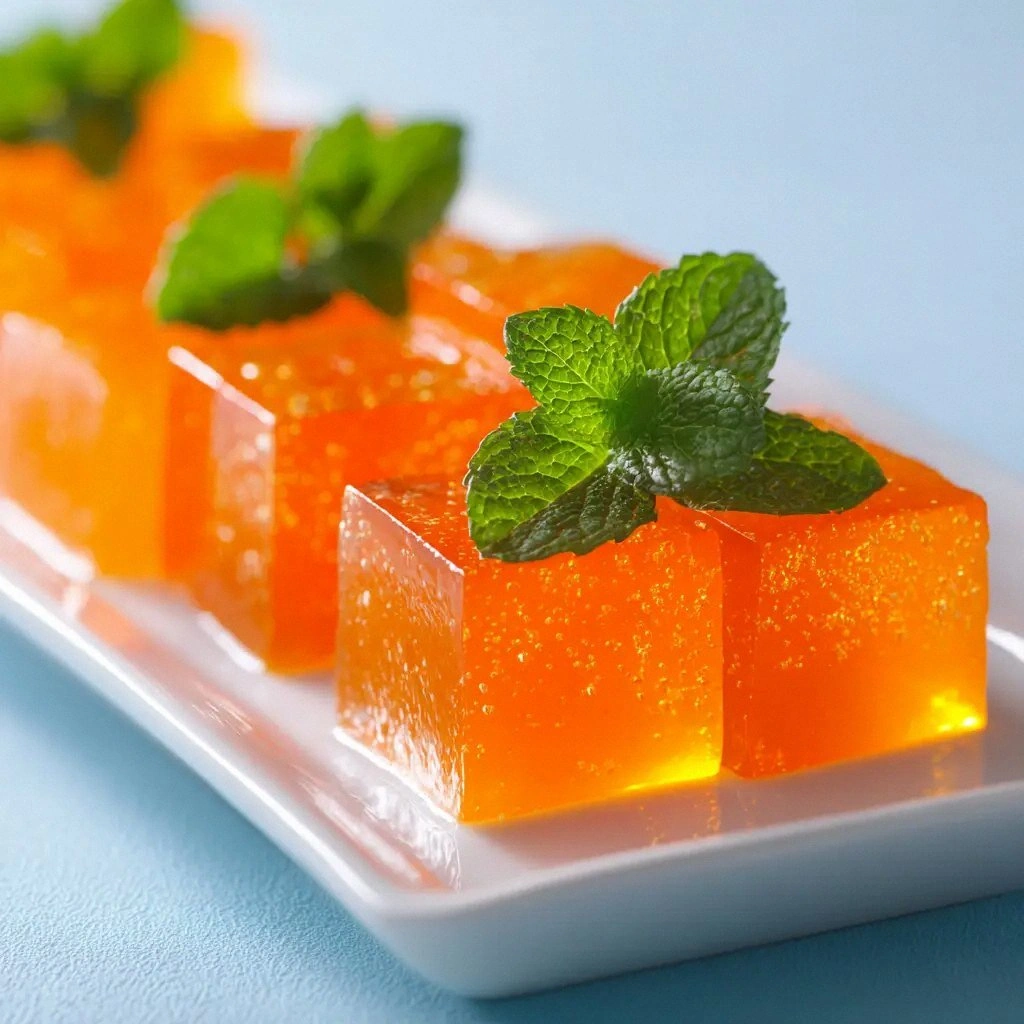
- Place the molds in the refrigerator for at least 30 minutes, or until the gelatin sets firmly. The setting time may vary slightly depending on the ambient temperature. Once set, the dessert should feel firm to the touch and not wobble when you tap it. This is the moment where the texture transforms from liquid to a smooth, bite‑able gel.
- Remove the desserts from the molds by running a thin knife around the edges. If the gelatin sticks, let it sit for an additional 5 minutes to loosen. Gently lift the dessert and place it on a plate. This step is crucial for achieving a clean presentation.
- Serve immediately or store in the refrigerator for up to 7 days. If you want to add a fresh twist, top each serving with a few fresh berries or a drizzle of sugar‑free syrup. The dessert’s flavor profile is versatile, so feel free to experiment. Remember to keep it chilled to maintain the perfect texture.
- Enjoy the silky, protein‑rich bite that melts in your mouth, leaving a clean, satisfying finish. This dessert is perfect for post‑workout recovery or a low‑calorie sweet treat. The texture is like a cloud that disappears quickly, so you can indulge without guilt. If you’re sharing, watch your friends’ faces light up as they realize this is not your typical gelatin.
That's it — you did it. But hold on, I've got a few more tricks that'll take this to another level...
Insider Tricks for Flawless Results
The Temperature Rule Nobody Follows
The gelatin needs to be dissolved at the right temperature; too hot and you risk denaturing the protein, too cold and the gelatin won’t set. The ideal range is between 190°F and 200°F, which you can achieve with a digital thermometer. If you don’t have a thermometer, a quick test is to drop a small amount of the mixture into a glass of cold water; it should instantly thicken. A friend once tried skipping this step and ended up with a watery mess that never set. The lesson? Temperature control is non‑negotiable.
Why Your Nose Knows Best
The aroma of the gelatin as it cools is a subtle indicator of proper setting. When the mixture is at the right consistency, it will emit a faint, sweet scent that’s almost like a light vanilla. If the scent is flat or off, it means the gelatin didn’t dissolve correctly. Trust your nose; it’s a reliable guide for ensuring the dessert is ready to set. This trick saves you from guessing and guarantees consistent results.
The 5‑Minute Rest That Changes Everything
After pouring the mixture into molds, let it sit at room temperature for 5 minutes before refrigerating. This brief rest allows the gelatin to start setting just enough to hold its shape, reducing the risk of cracks when it cools. It also lets the protein fully integrate, ensuring a smooth texture. I’ve seen people skip this step and end up with uneven, lumpy desserts. Give it that short pause and watch the difference.
Mold Magic
Silicone molds are a lifesaver because they release the dessert effortlessly. If you’re using a glass dish, line it with parchment paper to prevent sticking. A small trick is to spray the mold with a light coat of cooking spray before pouring; it eliminates the need to run a knife around the edges later. This tip keeps the presentation pristine and saves you from a messy cleanup.
Flavor Layering
Add a second layer of flavor after the first set by pouring a thin layer of fruit puree or a splash of flavored protein powder. Let it set before adding the next layer. This technique creates a multi‑dimensional dessert that’s both visually appealing and delicious. I’ve made a strawberry‑chocolate layered version that’s become a fan favorite. Layering turns a simple gelatin into a gourmet experience.
Creative Twists and Variations
This recipe is a playground. Here are some of my favorite ways to switch things up:
Citrus Burst
Add a teaspoon of lemon zest to the mixture for a bright, refreshing flavor. The citrus pairs beautifully with the protein, giving a clean, zesty finish. This variation is perfect for spring and summer when you crave a light, invigorating dessert. The zest adds a subtle aroma that lifts the whole dish.
Chocolate Dream
Fold in a tablespoon of unsweetened cocoa powder after the gelatin has dissolved. The chocolate flavor will deepen the dessert, making it feel like a rich, low‑calorie chocolate mousse. Pair it with a drizzle of sugar‑free chocolate sauce for an extra indulgent touch. This version is a hit with chocolate lovers who want to stay on track.
Berry Fusion
Blend a cup of fresh strawberries or blueberries into a smooth puree and fold it into the gelatin mixture. The fruit puree adds natural sweetness and vibrant color. Top the finished dessert with fresh berries for a burst of freshness. This variation is perfect for a quick fruit‑filled treat.
Matcha Magic
Stir in half a teaspoon of matcha powder for a green tea twist. The earthy flavor of matcha complements the protein, giving the dessert a unique umami note. This version is great for those who enjoy the subtle bitterness of green tea. The color is a beautiful, deep green that’s Instagram‑worthy.
Vanilla Essence
Add a splash of pure vanilla extract to the mixture for a classic dessert flavor. The vanilla aroma enhances the gelatin’s subtle sweetness, making the dessert feel more indulgent. Use a high‑quality, pure vanilla for the best results. This simple tweak turns the dish into a timeless treat.
Spiced Surprise
Incorporate a pinch of cinnamon or nutmeg for a warm, comforting flavor profile. The spices add depth and complexity, making the dessert feel like a holiday treat. This variation works well in the cooler months when you crave a cozy dessert. The spices also bring a subtle aromatic boost.
Storing and Bringing It Back to Life
Fridge Storage
Store the set desserts in an airtight container in the refrigerator for up to 7 days. The gelatin will stay firm and fresh, ready to be devoured at any time. If you’re storing multiple servings, keep them in separate compartments to avoid mixing flavors. Label the container with the date to keep track of freshness.
Freezer Friendly
For longer storage, place the desserts in a freezer‑safe container and freeze for up to 3 months. When you’re ready to enjoy, thaw in the refrigerator overnight. The texture may become slightly softer after freezing, but it remains enjoyable. Freezing is a great option for meal‑prepping or for sharing with friends.
Best Reheating Method
To revive a chilled dessert, gently warm it in a microwave on low power for 10–15 seconds. If it’s been frozen, let it thaw in the fridge for a few hours before reheating. Add a tiny splash of water to the mixture before reheating; this steams it back to perfection and restores the silky texture. Avoid overheating, or the gelatin may become rubbery.