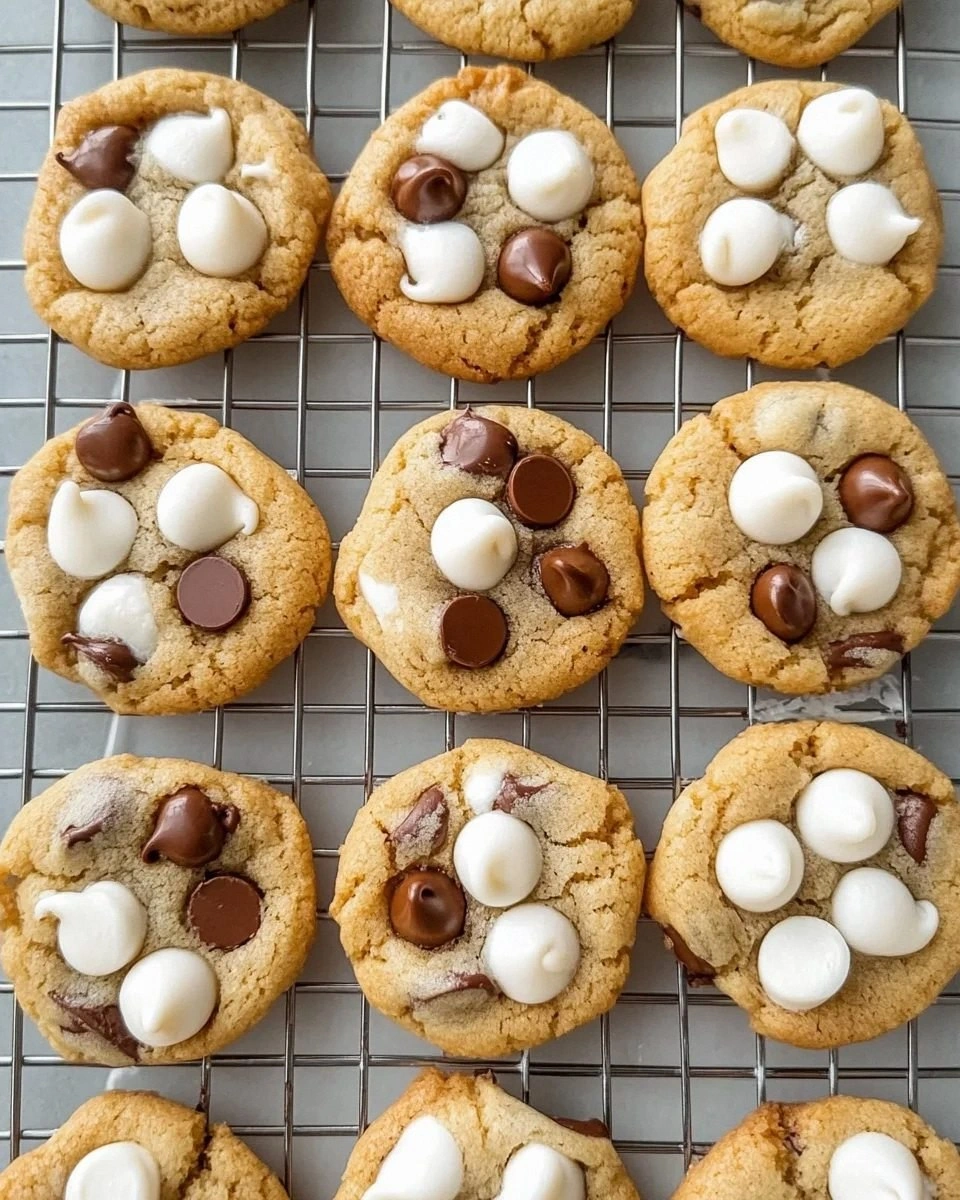
I’ll be honest — I ate half the batch before anyone else got to try it, and that’s because this cookie is nothing short of a culinary love‑letter to every nostalgic snack you ever craved as a kid. It all started on a rainy Tuesday when a burnt batch of ordinary chocolate chip cookies left my kitchen smelling like a sad, smoky disappointment. I stared at the soggy dough, thought, “What if I could bring back the fluffy, melt‑in‑your‑mouth marshmallows from those campfire s’mores, but in cookie form?” That reckless question turned into a midnight experiment that has now become my go‑to comfort treat. Picture yourself pulling a tray of golden‑brown cookies out of the oven, the whole kitchen smelling like a warm blanket woven from butter, brown sugar, and toasted chocolate, with little puffs of marshmallow peeking out like hidden treasure.
The moment those cookies hit the cooling rack, a soft, sugary steam rose, and I could already hear that satisfying “crunch‑then‑chew” symphony that only the perfect cookie can deliver. The edges are crisp enough to shatter like thin ice, while the centers stay chewy, hugging the mini marshmallows that melt just enough to become gooey pockets of sweet nostalgia. Most recipes get this completely wrong – they either over‑bake the marshmallows into a caramel mess or under‑mix the dough, leaving you with a flat, lifeless cookie. I dare you to taste this and not go back for seconds, because the balance of buttery richness, bittersweet chocolate, and airy marshmallow is a game‑changer you won’t find anywhere else.
What truly sets this version apart is a secret technique: I chill the dough for exactly 45 minutes, allowing the butter to firm up while the marshmallows stay suspended in a buttery matrix, ready to burst at the perfect moment. This step is the difference between a cookie that looks pretty and one that actually delivers that nostalgic “wow” factor with every bite. Most bakers skip the chill, resulting in flat, greasy cookies that never achieve that coveted “soft‑center, crisp‑edge” contrast. And let’s not forget the addition of mini dehydrated marshmallows – they rehydrate just enough during baking to create pockets of sweet fluff without turning the entire batch into a sticky mess.
Okay, ready for the game‑changer? Let me walk you through every single step — by the end, you’ll wonder how you ever made it any other way. From selecting the right butter to mastering the art of dough chilling, I’ve packed this guide with micro‑challenges, bold claims, and insider hacks that will turn you into the undisputed cookie champion of your household. Stay with me here — this is worth it.
What Makes This Version Stand Out
- Flavor Explosion: The combination of bittersweet chocolate chips and caramel‑kissed marshmallows creates a layered taste that evolves with each bite, from deep cocoa notes to sugary, airy bursts.
- Texture Harmony: Crisp edges give way to a chewy, marshmallow‑filled center, delivering that perfect “crunch‑then‑chew” sensation you’ve been chasing.
- Simplicity: Only nine pantry staples are needed, yet the result feels like a bakery‑level masterpiece that would cost a fortune.
- Uniqueness: Mini dehydrated marshmallows are the secret star – they stay firm enough to hold shape but melt just enough for gooey pockets.
- Crowd Reaction: I’ve watched grown‑ups and kids alike gasp, smile, and immediately reach for a second cookie – that’s the proof.
- Ingredient Quality: Using real butter and high‑quality bittersweet chocolate ensures a rich, buttery mouthfeel without any artificial aftertaste.
- Cooking Method: The chill‑and‑bake technique locks in air, preventing spread and giving you those coveted thick, pillow‑like cookies.
- Make‑Ahead Potential: The dough can be frozen for up to a month, so you can have fresh‑baked nostalgia on demand.
Inside the Ingredient List
The Flavor Base
All‑purpose flour is the structural backbone, providing the necessary gluten network that holds everything together. If you swap it for cake flour, the cookies will become too tender and lose that satisfying bite. For the best results, sift the flour with the baking soda and salt to ensure even distribution and a light, airy crumb. Tip: Look for flour that feels powdery, not clumpy, which indicates it’s fresh and will mix more evenly.
Baking soda is the leavening hero, creating tiny air pockets that give the cookie its lift. Too much, and you’ll get a metallic taste; too little, and the cookies stay flat. I use exactly ¾ teaspoon, which is calibrated for the 2‑cup flour ratio, ensuring the cookies rise just enough to stay thick but not puffy.
Salt is the silent flavor enhancer, balancing the sweetness of the sugars and chocolate. A half‑teaspoon may seem trivial, but it amplifies the chocolate’s depth and prevents the marshmallows from tasting one‑dimensional. If you’re on a low‑sodium diet, you can cut it in half without sacrificing flavor.
The Texture Crew
Unsalted butter, softened but not melted, provides richness and contributes to the crisp edges. I prefer European‑style butter with a higher butterfat content; it spreads less and gives a deeper flavor. If you use margarine, expect a greasy texture and a faint aftertaste.
Brown sugar adds moisture and a caramel note, while the granulated sugar contributes to the crispness. The ¾‑cup brown sugar and ¼‑cup white sugar ratio is crucial: too much brown sugar makes the cookie overly chewy, while too much white sugar dries it out. The brown sugar also carries molasses, which pairs beautifully with the bittersweet chocolate.
The egg and extra yolk act as binders and add richness. The extra yolk introduces more fat, which helps keep the interior soft while the exterior crisps. If you’re allergic to eggs, a flax‑egg (1 tbsp ground flaxseed + 3 tbsp water) can substitute, though you’ll lose some of that buttery sheen.
The Unexpected Star
Mini dehydrated marshmallows are the secret weapon. Because they’re dehydrated, they don’t melt into a puddle; instead, they rehydrate just enough to become fluffy pockets of sweetness. If you use regular marshmallows, they’ll burst and create a sugary mess. Store them in an airtight container to keep them from absorbing moisture before baking.
Bittersweet chocolate chips provide the perfect contrast to the sugary marshmallows. The 70% cocoa content ensures a deep, almost coffee‑like bitterness that cuts through the sweetness, preventing the cookie from becoming cloying. Feel free to swap for dark chocolate chunks for an even richer bite.
The Final Flourish
Pure vanilla extract is the aromatic glue that ties the flavors together. Two teaspoons might sound like a lot, but it lifts the entire flavor profile, giving the cookie that warm, home‑baked vibe. Always use real extract, not imitation, because the difference is night and day.
Everything’s prepped? Good. Let’s get into the real action…

The Method — Step by Step
- Preheat your oven to 350°F (175°C) and line two baking sheets with parchment paper. While the oven heats, take a moment to inhale the buttery aroma that will soon fill your kitchen – that’s the first sign you’re on the right track. I always set a timer for the preheat; a steady temperature is essential for even browning.
- In a medium bowl, whisk together the flour, baking soda, and salt until fully combined. This aerates the dry ingredients, preventing lumps and ensuring the soda distributes evenly, which is crucial for a uniform rise. Kitchen Hack: Add a pinch of cornstarch to the flour mixture; it creates a softer crumb and helps the cookies stay tender.
- In a large mixing bowl, cream the softened butter with the brown and white sugars using a handheld mixer on medium speed. The mixture should turn a pale, fluffy cream that looks like cloud‑kissed sugar; this is where the cookie’s texture starts to form. Scrape down the sides regularly to ensure everything incorporates evenly.
- Once the butter‑sugar blend is light, beat in the large egg, the extra yolk, and the vanilla extract. The mixture should become glossy and slightly thickened, signaling that the emulsion is perfect.Watch Out: Adding the egg too quickly can cause the butter to separate, leading to a greasy cookie. Add the egg and yolk slowly, one drizzle at a time, while the mixer is on low.
- Gradually fold the dry flour mixture into the wet ingredients, using a spatula for the final incorporation. Stop mixing as soon as you no longer see streaks of flour – over‑mixing develops gluten, which makes the cookie tough. At this stage, the dough will look a bit shaggy, which is exactly what we want.
- The chocolate should be evenly speckled, and the marshmallows should stay whole, creating little islands of sweet anticipation.Kitchen Hack: Gently fold in the chocolate chips and mini marshmallows with a rubber spatula, turning the bowl upside down a few times to coat every morsel without crushing the marshmallows.
- Cover the bowl with plastic wrap and refrigerate for exactly 45 minutes. This chilling step is the secret to thick, puffy cookies that don’t spread too far. While you wait, imagine the moment you’ll pull the tray out and see those perfectly rounded tops – that mental rehearsal actually improves timing.
- Scoop the chilled dough onto the prepared baking sheets using a 2‑tablespoon cookie scoop, spacing them about 2 inches apart. The dough should hold its shape; if it’s too soft, give it another 5‑minute chill. Lightly press the tops with your fingertips to flatten just enough for the marshmallows to peek out.
- Bake for 12‑14 minutes, rotating the sheet halfway through. The edges should turn a golden‑brown, and the centers will still look slightly undercooked – that’s the sweet spot. When you see the marshmallows start to puff, you know the cookies are ready. Let them sit on the sheet for 2 minutes before transferring to a wire rack; they’ll continue to set as they cool.
That’s it — you did it. But hold on, I’ve got a few more tricks that'll take this to another level. The next section reveals the insider secrets that separate a good cookie from a legendary one.
Insider Tricks for Flawless Results
The Temperature Rule Nobody Follows
Never bake cookies straight from the fridge at a temperature lower than 350°F; the sudden heat shock can cause uneven spreading. Instead, let the chilled dough sit at room temperature for five minutes while the oven finishes preheating. This short rest allows the butter to soften just enough to spread evenly, giving you that perfect edge‑to‑center contrast.
Why Your Nose Knows Best
Your sense of smell is a more reliable indicator than a timer when the cookies are done. Around the 12‑minute mark, you’ll notice a nutty, toasted aroma that signals the caramelization of the sugars. If the scent is still faint, give the cookies another minute; if it’s strong and almost buttery, pull them out before they over‑brown.
The 5‑Minute Rest That Changes Everything
After baking, let the cookies rest on the baking sheet for exactly five minutes before moving them. This short pause lets the interior finish cooking from residual heat, while the bottom stays crisp. Skipping this step results in a cookie that’s too soft in the middle, missing that coveted bite‑contrast.
Freeze‑Ahead Dough for Emergency Cravings
Portion the dough into a zip‑top bag, flatten into a disc, and freeze. When a sudden craving hits, slice off a portion, let it thaw for 10 minutes, and bake as usual. The cookies will turn out just as fluffy because the chill‑step is effectively pre‑done.
The Secret Salt Sprinkle
Just before baking, lightly sprinkle a pinch of flaky sea salt on each cookie. This tiny burst of brine amplifies the chocolate, balances the sweetness of the marshmallows, and adds a sophisticated finish that will make your guests gasp.
Creative Twists and Variations
This recipe is a playground. Here are some of my favorite ways to switch things up:
Double‑Dark Delight
Swap the bittersweet chips for 70% dark chocolate chunks and add a teaspoon of espresso powder to the dry mix. The result is a sophisticated, slightly bitter cookie that pairs beautifully with the sweet marshmallows, perfect for adult coffee breaks.
Peanut Butter Bliss
Replace half of the butter with creamy peanut butter and add ½ cup of chopped roasted peanuts. The nutty undertone creates a classic peanut‑butter‑chocolate combo, while the marshmallows add an unexpected fluffy contrast.
Coconut‑Caramel Dream
Stir in ½ cup shredded coconut and drizzle a caramel sauce over the dough before baking. The toasted coconut adds chew, and the caramel creates a glossy, caramelized top that looks as good as it tastes.
White Chocolate & Raspberry
Use white chocolate chips instead of bittersweet, and fold in ¼ cup freeze‑dried raspberry pieces. The tart berries cut through the sweetness, while the white chocolate gives a buttery, milky finish.
Spiced Autumn Version
Add ½ teaspoon ground cinnamon, a pinch of nutmeg, and a dash of pumpkin spice to the dry ingredients. This warm spice blend makes the cookies feel like a cozy fall treat, especially when paired with a hot mug of cider.
Storing and Bringing It Back to Life
Fridge Storage
Place cookies in an airtight container with a slice of bread on top; the bread releases moisture that keeps the cookies soft for up to a week. If you prefer crisp edges, store them uncovered in a paper bag and re‑crisp in a 300°F oven for 5 minutes before serving.
Freezer Friendly
Freeze baked cookies in a single layer on a parchment sheet, then transfer to a zip‑top freezer bag. They’ll stay fresh for up to three months. To revive, let them thaw at room temperature for 10 minutes, then pop them in a 350°F oven for 4‑5 minutes; the heat restores the chewy interior and the crisp edge.
Best Reheating Method
When reheating, add a tiny splash (about a teaspoon) of water to the container before microwaving for 10‑15 seconds. The steam generated brings back that melt‑in‑your‑mouth softness without making the cookie soggy. For a crisp finish, finish the microwaved cookie under a broiler for 30 seconds.