It started with a kitchen catastrophe that turned into a revelation. I was halfway through making a classic pumpkin pie when the pie crust collapsed into a soggy, doughy mess that smelled like burnt sugar. My friend, ever the daredevil, challenged me to turn that disaster into something spectacular. I laughed, grabbed a tub of eggnog, and decided to give the world a pie that would make them crave seconds—if not thirds.
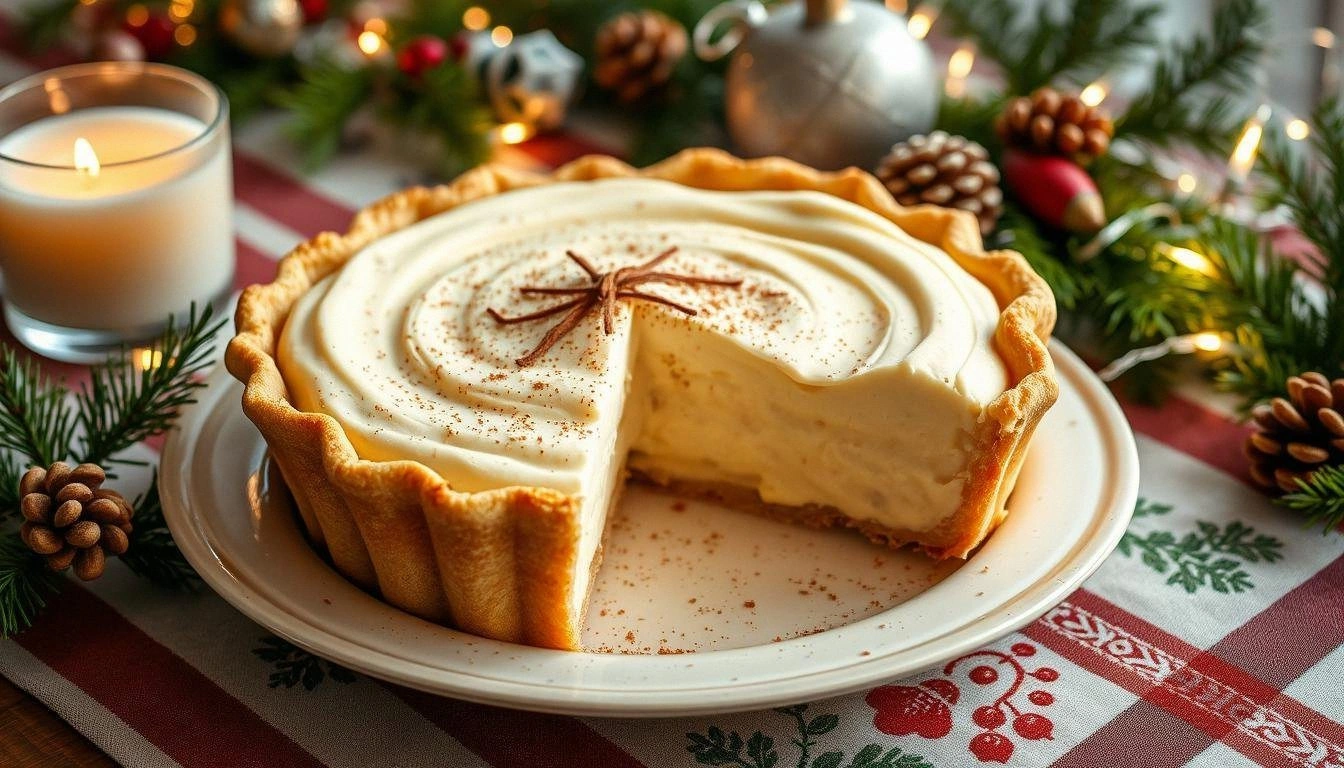
Picture the scene: the kitchen was a whirl of clattering pans, the air thick with the scent of vanilla and nutmeg, and my eyes fixed on the oven timer. I could hear the tick of the clock, the hiss of the butter melting, and the faint crackle of the crust baking to a golden crisp. The moment the first bite hit your tongue, you taste the creamy eggnog, the buttery crust, and the warm spices dancing like a holiday choir. The texture is a silky, custard-like filling that melts in your mouth while the crust provides a satisfying crunch—like biting into a snowflake that’s been kissed by a summer breeze.
What makes this version stand out is that I didn’t just layer eggnog into a pie; I fused it with a buttery, flaky crust that holds the richness without overpowering it. I added a splash of bourbon to deepen the flavor, and toasted pecans for a nutty crunch that pops against the smooth filling. The result is a pie that feels both indulgent and balanced—so much so that I dare you to taste this and not go back for seconds. And when you pull it out of the oven, the whole kitchen smells incredible, like a cozy cabin in a winter wonderland.
I’ve spent years experimenting with desserts, and this is hands down the best version you’ll ever make at home. The secret? A buttery crust that’s almost a pastry, a custard that’s rich but not cloying, and a sprinkle of nutmeg that lingers on the palate. It’s the kind of dish that turns a regular holiday dinner into a memory that lasts for years. If you’ve ever struggled with pie crusts that turn out soggy or fillings that are too sweet, you’re not alone—and I’ve got the fix. Stay with me here—this is worth it.
What Makes This Version Stand Out
- Texture: The crust is flaky, buttery, and crisp, while the filling is silky smooth, providing a satisfying contrast.
- Flavor Balance: Nutmeg and cinnamon give a warm, spicy depth that complements the creamy eggnog.
- Make‑Ahead Friendly: The pie can be assembled a day ahead and chilled, making it a perfect stress‑free dessert.
- Ingredient Quality: Using fresh eggs and real butter elevates the entire dish.
- Crowd Reaction: Guests leave with a second plate and a story about the “egg‑nog pie that stole the show.”
- Visual Appeal: A golden crust with a glossy, caramelized top that glistens under the oven light.
- Versatility: Add bourbon or rum, or swap pecans for walnuts—each tweak feels like a new adventure.
- Effortless Prep: The crust is a one‑step process that takes less than 15 minutes.
Alright, let's break down exactly what goes into this masterpiece...
Inside the Ingredient List
The Flavor Base
The foundation of this pie is a buttery crust that holds the custard and adds a textural crunch. The crust is made from all‑purpose flour, cold butter, and a splash of cold water. The butter must be cold and cubed so that it creates flaky layers as it melts in the oven. If you skip the cold water, the dough becomes tough and chewy, ruining that perfect bite. The salt balances the sweetness and enhances the nutmeg’s warmth.
The Texture Crew
Eggs and heavy cream are the star players in the filling. Eggs provide structure and richness, while heavy cream adds a velvety mouthfeel. Mixing them with milk creates a custard that is neither too thick nor too runny. If you use whole milk instead of heavy cream, the filling will be lighter but will lack that luxurious silkiness. The brown sugar adds caramel undertones that pair beautifully with the spices.
The Unexpected Star
Bourbon or rum is optional but highly recommended. A splash of bourbon adds depth and a subtle warmth that complements the nutmeg. If you prefer a non‑alcoholic version, replace bourbon with a dash of vanilla extract and a pinch of almond extract for a nutty note. The toasted pecans add crunch and a nutty flavor that contrasts the custard’s smoothness. Skipping the pecans will make the pie less complex and slightly less festive.
The Final Flourish
Ground nutmeg and cinnamon are the spices that bring the pie to life. Nutmeg has a sweet, warm flavor that’s essential in eggnog. Cinnamon adds a subtle sweetness and depth, and a pinch of cloves can be added for an extra layer of aroma. The vanilla extract rounds out the flavor profile, ensuring a balanced taste. The final glaze of melted butter on the crust adds shine and a buttery finish.
Everything's prepped? Good. Let's get into the real action...
The Method — Step by Step
- Preheat your oven to 375°F (190°C). Prepare a 9‑inch pie dish by greasing it lightly. The crust needs a firm base, so press the dough evenly into the bottom and up the sides. If you notice any cracks, fill them with a little water. Let the dough chill for 10 minutes before baking.
- Slide the dough into the oven and bake for 15 minutes until it’s a pale golden color. Watch the edges—they should pull away slightly from the dish, indicating a crisp crust. Remove the crust from the oven and let it cool on a rack. This step is crucial; a warm crust can melt the filling if you bake it too long.
- While the crust cools, whisk together eggs, milk, heavy cream, brown sugar, nutmeg, cinnamon, and vanilla in a medium bowl until the mixture is smooth. The batter should be silky and free of lumps. Add the bourbon or rum if using, and stir until well combined. This custard will set as it bakes, so timing is key.
- Pour the custard into the cooled crust. The filling should spread evenly and not be too thick. Sprinkle the toasted pecans on top for an added crunch. The pecans will toast slightly in the oven, releasing their oils and enhancing the nutty flavor. Cover the pie loosely with foil to prevent the top from over‑browning.
- Bake the pie for 30 minutes, or until the custard is set and the edges are golden brown. A gentle jiggle in the center indicates it’s ready. If you see a darkening on top, remove the foil for the last 5 minutes to achieve a caramelized finish. The aroma at this point will have the entire kitchen smelling like a holiday cabin.
- Remove the pie from the oven and let it cool on a rack for at least 45 minutes. Cooling is essential to allow the custard to set fully. After cooling, chill the pie in the refrigerator for at least 2 hours, or overnight. Chilling also lets the flavors meld together beautifully.
- Before serving, drizzle a thin layer of melted butter over the top. This gives the crust a glossy shine and a buttery finish. Dust the top with a pinch of powdered sugar for a sweet, decorative touch. Slice the pie with a hot knife to ensure clean, even cuts.
- Serve with a dollop of whipped cream or a scoop of vanilla ice cream. The contrast between the warm, creamy filling and the cold, airy topping creates a delightful sensory experience. Enjoy the moment when the first bite melts on your tongue, leaving a lingering warmth.
That's it — you did it. But hold on, I've got a few more tricks that'll take this to another level...
Insider Tricks for Flawless Results
The Temperature Rule Nobody Follows
Many bakers bake their pies at 350°F, but 375°F gives a better rise and crust color. The higher temperature creates a crisp crust while keeping the custard from drying out. If you lower the heat, the crust can become soggy, especially if the filling is too wet. Keep the oven preheated for at least 15 minutes before baking. This ensures a consistent temperature throughout.
Why Your Nose Knows Best
The aroma is the first indicator that the pie is done. A warm, nutty scent signals the custard is set. If the smell is too sweet or raw, it’s still cooking. Trust your nose over the timer; the timer is only a guideline. A well‑aromaed pie will have a subtle, buttery scent with a hint of spice.
The 5‑Minute Rest That Changes Everything
After baking, let the pie rest for 5 minutes before slicing. This short rest allows the custard to set further, preventing it from sliding off the knife. If you slice too quickly, the custard may spill, ruining the presentation. A 5‑minute rest also lets the flavors meld. The result is a pie that looks as good as it tastes.
Keep the Crust Crispy
If you’re planning to store leftovers, keep the crust separate until serving. Place the crust in an airtight container, and when you’re ready to serve, reheat it in a toaster oven. This prevents the crust from becoming soggy from the custard’s moisture. Alternatively, bake the crust a second time at 350°F for 5 minutes before filling.
The Perfect Finish
A thin glaze of melted butter on the crust gives a glossy shine. The butter also adds a subtle richness that balances the sweetness. To create the glaze, melt butter in a small saucepan, then brush it over the crust with a pastry brush. Let it cool slightly before applying. The final result is a pie that looks like a holiday treasure.
Creative Twists and Variations
This recipe is a playground. Here are some of my favorite ways to switch things up:
Maple Bourbon Delight
Swap the bourbon for maple syrup and reduce the brown sugar by half. The result is a sweet, caramelized flavor that pairs well with the nutmeg. Add a splash of maple extract for extra depth. This version is perfect for a cozy breakfast pie.
Chocolate Swirl Surprise
Fold in a handful of dark chocolate chips into the custard before baking. The chocolate melts into a silky swirl that adds a rich, decadent twist. Serve with a dusting of cocoa powder for an elegant finish. This variation is great for chocolate lovers.
Almond Crunch Edition
Replace toasted pecans with toasted almond slivers. The almond adds a delicate crunch and a nutty aroma. Pair it with a drizzle of almond milk on top for a nutty finish. This version is lighter and more aromatic.
Vegan Version
Use coconut milk instead of heavy cream and flaxseed eggs instead of chicken eggs. The crust can be made with a plant‑based butter substitute. The result is a dairy‑free, egg‑free pie that still delivers on flavor. This variation is ideal for vegan guests.
Spiced Pumpkin Twist
Add 1/2 cup of pumpkin puree to the custard for a pumpkin‑spiced flavor. Increase the cinnamon to 1 teaspoon for extra warmth. The pumpkin adds a subtle sweetness and a vibrant color. This version works well during the fall season.
Lemon Zest Variation
Grate a teaspoon of lemon zest into the custard for a bright, citrusy note. The zest balances the richness with a fresh lift. Pair it with a drizzle of lemon curd on top. This version is refreshing for a summer dessert.
Storing and Bringing It Back to Life
Fridge Storage
Store the chilled pie in an airtight container for up to 3 days. Keep the crust separate if you plan to reheat it later. If you’ve already sliced the pie, cover the slices with parchment paper and then foil. The pie will stay moist and flavorful.
Freezer Friendly
Wrap the whole pie tightly in plastic wrap and then in aluminum foil. Freeze for up to 2 months. To thaw, let it sit in the refrigerator overnight. Reheat in a preheated oven at 350°F for 10 minutes to restore crispness. The custard may separate slightly; give it a quick stir before serving.
Best Reheating Method
To reheat, preheat the oven to 350°F. Place the pie on a baking sheet and cover with foil to prevent over‑browning. Heat for 10–12 minutes, or until warmed through. Add a splash of milk or cream before reheating to keep the custard moist. The result is a pie that tastes as good as the first time.