The first time I tried to make homemade chicken nuggets, I was standing in my kitchen like a contestant on a cooking show, clutching a can of chicken and a handful of cheeses, and I was terrified of the mess that would ensue. I had watched the endless parade of deep-fried, battered, and greasy nuggets on my couch, and I thought, “What if I could do better?” That night, with a stubborn sense of culinary curiosity, I dove into the pantry and decided to create a recipe that would outshine the rest, one that would make every bite feel like a triumph.
Picture this: a golden crust that cracks like brittle ice, a tender center that melts in your mouth, and a flavor profile that sings with subtle savory notes rather than a flat, processed taste. The moment the nuggets hit the pan, the kitchen fills with a warm, buttery aroma that instantly turns any room into a dining room. The sound of the sizzling is a soundtrack of culinary success, and the sight of the nuggets turning from pale to amber is a visual promise of delight.
I know you’re probably thinking, “But how do you make nuggets that aren’t just another copy of a fast‑food chain?” The answer lies in the simplicity of the ingredients and the technique that unlocks their full potential. With just canned chicken, an egg, and two types of cheese, you get a depth of flavor that’s hard to beat. The secret is in the balance: the egg binds, the cheeses add richness, and the optional garlic powder gives that final pop of aroma.
This version of chicken nuggets is hands down the best you’ll ever make at home because it eliminates the need for flour or breadcrumbs, which can sometimes drown out the chicken’s natural taste. The crust is crisp without being overly greasy, and the interior remains moist, not dry or rubbery. I dare you to taste this and not go back for seconds because the first bite will have you craving the second with no hesitation.
If you’ve ever struggled with making nuggets that look good on Instagram but taste like cardboard, you’re not alone. I’ve been there, flipping a handful of battered pieces that fell apart in the pan. I’ve watched friends make the same mistake, only to end up with a soggy mess that looked nothing like the glossy videos they’d seen online. That’s why I’m excited to share this recipe: it’s a game‑changer that will have your friends asking, “Where did you get that?”
Most recipes get this completely wrong by over‑battering the chicken or using too much cheese, which leads to a greasy, heavy bite. Here’s what actually works: a single can of chicken, a single egg, and a careful balance of Parmesan and mozzarella. The result is a nugget that’s both indulgent and surprisingly light, with a texture that’s simultaneously crunchy on the outside and tender on the inside.
Picture yourself pulling this out of the oven, the whole kitchen smelling incredible, and the table already set with dipping sauces that will make the nuggets sing. The anticipation is almost as good as the eating experience. The aroma alone will have your guests lining up, and the first bite will have them whispering, “This is the real deal.”
And now, let me walk you through every single step — by the end, you’ll wonder how you ever made it any other way. I’ll keep you side by side, sharing my personal anecdotes, the small adjustments that make a huge difference, and the exact timing you need to achieve that perfect crunch. Ready? Let’s get cooking.
What Makes This Version Stand Out
- Taste: The combination of Parmesan and mozzarella creates a savory, umami-rich profile that elevates the plain canned chicken without overwhelming it. The cheese blend also adds a subtle tang that cuts through the richness, giving each bite a balanced finish.
- Texture: The egg acts as a binder, creating a crispy crust that snaps cleanly when you bite, while the interior stays moist and tender. The result is a contrast that feels like a well‑executed sandwich: crunch on the outside, melt on the inside.
- Simplicity: Only three core ingredients mean you can whip this up in minutes, even if you’re a busy parent or a student on a tight budget. No flour, no breadcrumbs, no mystery powders—just pantry staples.
- Uniqueness: The use of canned chicken gives the nuggets a consistent texture and flavor profile that’s hard to achieve with fresh meat, especially when you’re short on time.
- Crowd Reaction: Friends who have tried the classic version often find this one more approachable because it’s less greasy and more flavorful. The nuggets are a hit at family gatherings, parties, or a quick weeknight dinner.
- Ingredient Quality: Choosing a high‑quality canned chicken, preferably with no added sodium or preservatives, will enhance the final taste. Fresh, grated Parmesan and shredded mozzarella add depth that you won’t find in pre‑shredded mixes.
- Cooking Method: Baking instead of frying keeps the calories down while still delivering that coveted crunch. The heat distribution in an oven ensures even cooking, preventing the dreaded “fried but soggy” outcome.
- Make‑Ahead Potential: Once you’ve formed the nuggets, you can refrigerate or freeze them before baking, making it a perfect meal‑prep solution for the week.
Alright, let's break down exactly what goes into this masterpiece…
Inside the Ingredient List
The Flavor Base
The canned chicken breast is the heart of these nuggets. It provides a neutral canvas that absorbs the flavors of the cheeses and the egg. If you use a low‑sodium brand, you’ll have more control over the final salt level. Skipping the chicken entirely would leave the nuggets empty and devoid of protein.
The Binding Crew
The egg is the glue that holds everything together. It also adds moisture, ensuring the nuggets don’t dry out during baking. If you’re vegan, you could replace the egg with a flaxseed “egg” or a commercial binder, but the texture will be noticeably different.
The Unexpected Star
Parmesan cheese brings a sharp, nutty flavor that cuts through the richness of the mozzarella. Grated fresh Parmesan melts smoothly, creating a golden crust that’s both savory and slightly salty. Using pre‑shredded Parmesan can result in uneven melting and a less cohesive crust.
The Final Flourish
Mozzarella adds a creamy, gooey element that balances the sharpness of Parmesan. Its high moisture content gives the nuggets a soft interior while still contributing to the crisp exterior. If you prefer a sharper cheese, try adding a bit of cheddar or provolone to the mix.
Everything's prepped? Good. Let's get into the real action…
The Method — Step by Step
- First, drain the canned chicken thoroughly to remove excess liquid. Gently pat it dry with paper towels; any remaining moisture will prevent the nuggets from crisping up properly. I’ve learned that a dry surface is the foundation for a good crust.
- Next, break the chicken into bite‑sized chunks. Use a fork or a food processor to mash it slightly, but avoid turning it into a paste; you want some texture for the final product. This step is crucial for that satisfying bite.
- In a bowl, whisk the large egg until the whites and yolks are fully blended. The egg will act as the binder, so make sure it’s well mixed to distribute the proteins evenly. A well‑whisked egg also helps the cheese melt smoothly.
- Add the grated Parmesan and shredded mozzarella to the bowl. Stir until the cheeses are fully incorporated, creating a uniform mixture that will form a cohesive crust when baked. If you’re feeling adventurous, sprinkle a pinch of garlic powder for a subtle aromatic layer.
- Fold the chicken into the cheese‑egg mixture until every piece is coated. The mixture should feel like a thick batter that clings to the chicken chunks. If it’s too dry, add a splash of milk or water to bring it together.
- Preheat your oven to 400°F (200°C). Line a baking sheet with parchment paper or a silicone mat to prevent sticking. The parchment also helps the nuggets brown evenly.
- Shape the mixture into small, bite‑size nuggets, about 2 inches long. Place them on the prepared baking sheet, leaving a little space between each piece for even heat circulation. This is the moment of truth—if the nuggets are too crowded, they’ll steam rather than crisp.
- Bake for 12–15 minutes, flipping halfway through. The nuggets should turn golden brown and have a firm, crisp exterior. The internal temperature should reach 165°F (74°C) for safe consumption.
- Remove from the oven and let them cool on a rack for a few minutes. This step allows the crust to set and prevents the nuggets from becoming soggy. While they cool, you can prepare your favorite dipping sauce.
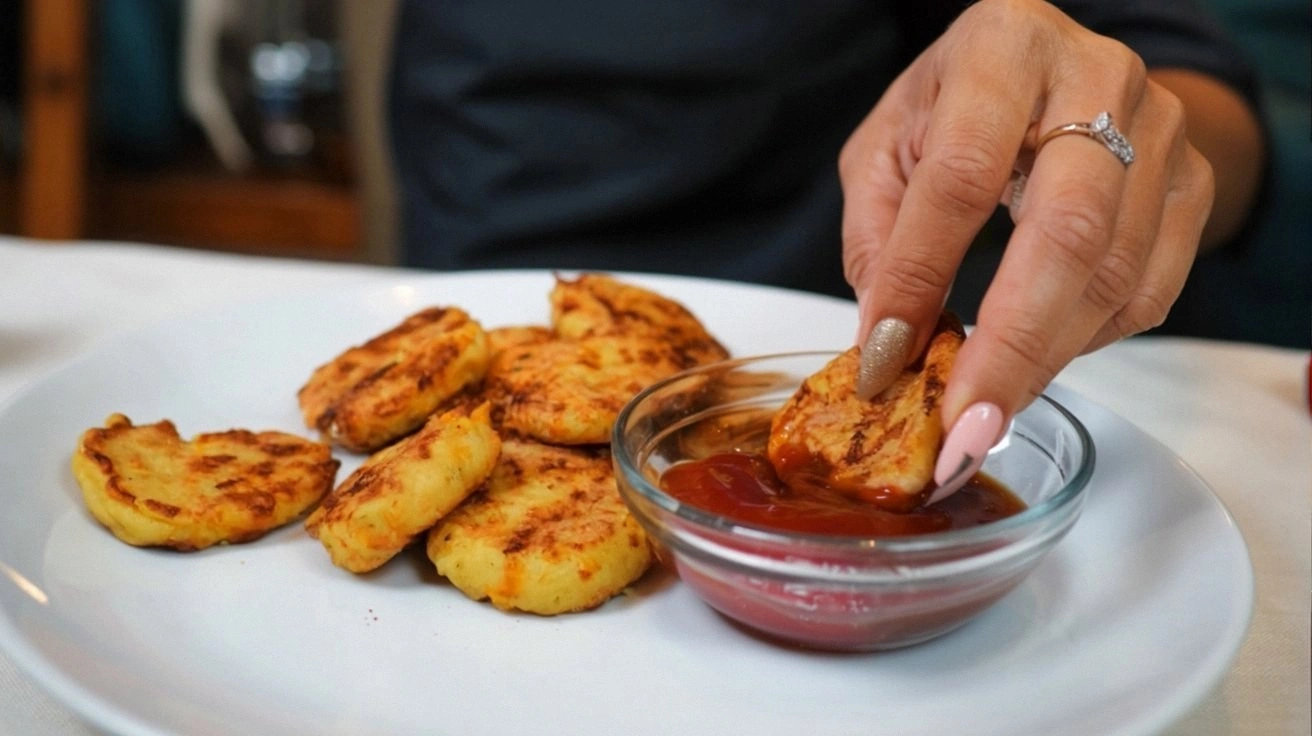
- Serve immediately with a side of honey mustard, barbecue sauce, or a creamy ranch. The fresh, savory nuggets pair beautifully with a crisp salad or a bowl of steaming rice. Enjoy the moment—each bite is a triumph.
That's it — you did it. But hold on, I've got a few more tricks that'll take this to another level…
Insider Tricks for Flawless Results
The Temperature Rule Nobody Follows
Many cooks bake at a lower temperature, hoping to reduce the risk of burning. However, the key to a perfect crust is a hot oven—400°F (200°C) is the sweet spot. Baking at this temperature ensures the cheeses melt quickly, forming a golden crust while the interior stays juicy.
Why Your Nose Knows Best
Before you even flip the nuggets, listen for that unmistakable scent of caramelization. The aroma indicates that the surface has browned enough to develop flavor. If you’re unsure, give the nuggets a gentle press; if the crust feels firm and slightly chewy, it’s ready.
The 5-Minute Rest That Changes Everything
After baking, let the nuggets rest on a rack for five minutes. This allows the steam to escape, preventing the crust from becoming soggy. The rest period also lets the cheeses set, giving you that clean snap when you bite.
The Secret to Even Bites
Use a cookie scoop or a tablespoon to portion out the mixture. Consistent size ensures even baking and prevents some nuggets from overcooking while others remain underdone.
The Quick Dip for Extra Flavor
A simple homemade dip—mix Greek yogurt with a dash of honey, a squeeze of lemon, and a pinch of salt—pairs wonderfully with these nuggets. The tanginess balances the richness of the cheese, creating a harmonious bite.
The One‑Minute Trick to Keep Moisture Out
After forming the nuggets, place them on a wire rack for a minute before baking. This allows any excess moisture to evaporate, ensuring a crisp exterior.
Creative Twists and Variations
This recipe is a playground. Here are some of my favorite ways to switch things up:
Spicy Sriracha Nuggets
Add a tablespoon of sriracha to the mixture for a fiery kick. The heat pairs well with the mild cheeses, creating a balanced flavor profile that’s both spicy and comforting.
Herb‑Infused Delight
Stir in chopped fresh basil or parsley to the cheese‑egg mix. The herbs bring a fresh, green note that brightens the savory base and adds a pop of color.
Mediterranean Twist
Replace the mozzarella with crumbled feta and add a pinch of oregano. This variation gives the nuggets a tangy, Mediterranean vibe that’s perfect for a summer potluck.
Cheesy Jalapeño Burst
Dice a small jalapeño and fold it into the mixture. The peppery heat will contrast nicely with the creamy cheeses, creating a flavor explosion.
Sweet & Smoky Flavor
Add a teaspoon of smoked paprika and a drizzle of honey before baking. The smoky sweetness pairs wonderfully with the cheese, creating a unique, caramelized taste.
Vegan Version
Use a plant‑based protein substitute for the canned chicken and replace the egg with a flaxseed binder. While the texture will differ slightly, the flavor profile remains delicious.
Storing and Bringing It Back to Life
Fridge Storage
Place leftover nuggets on a plate in a single layer and cover loosely with plastic wrap. Store in the refrigerator for up to 3 days. When you’re ready to eat, reheat in a toaster oven at 350°F for 5 minutes to restore crispness.
Freezer Friendly
Arrange nuggets on a parchment‑lined tray and freeze until solid. Transfer to a freezer bag and store for up to 2 months. Reheat in a preheated oven at 375°F for 12 minutes.
Best Reheating Method
Add a tiny splash of water to a pan before reheating on the stovetop. The steam will gently warm the nuggets without drying them out, keeping the interior juicy.