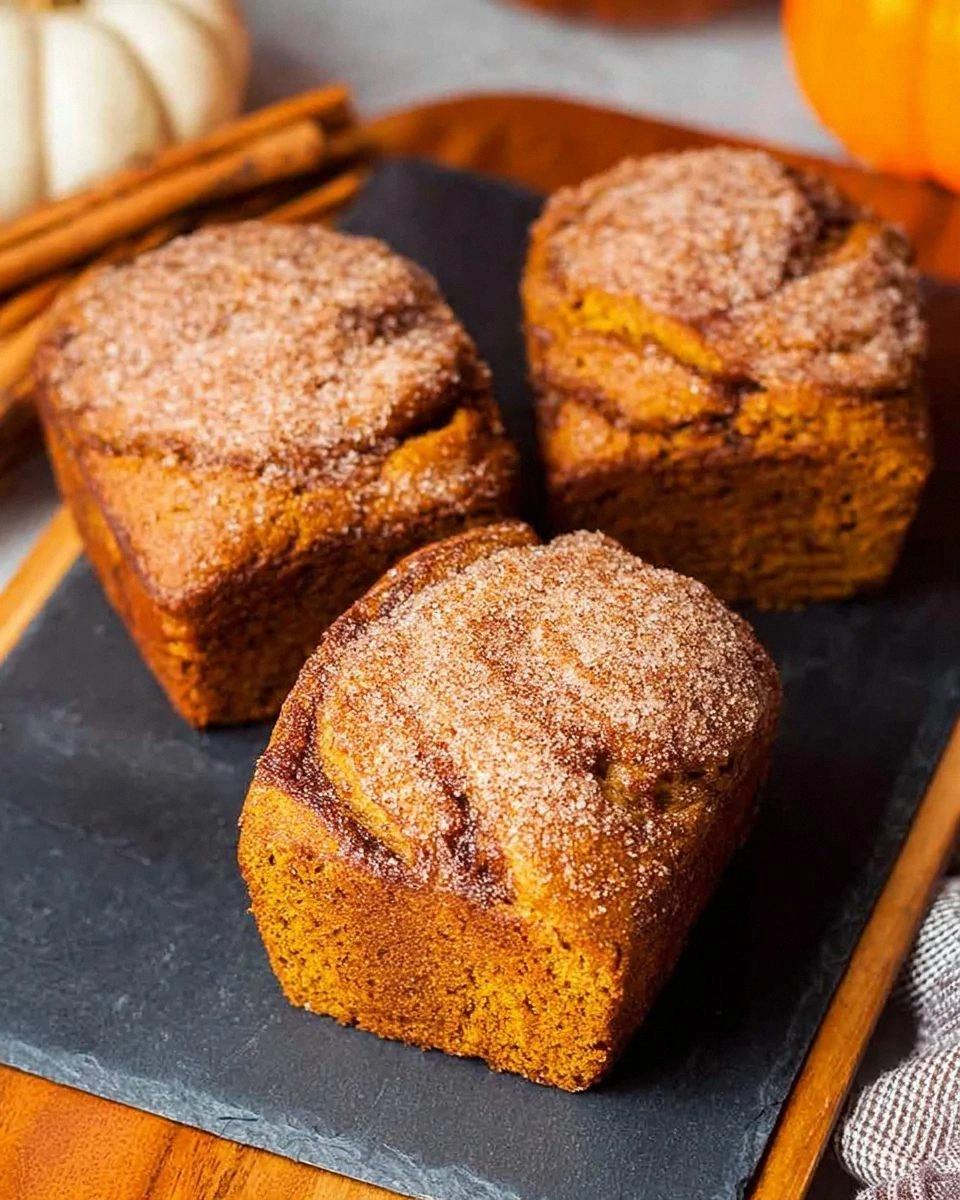
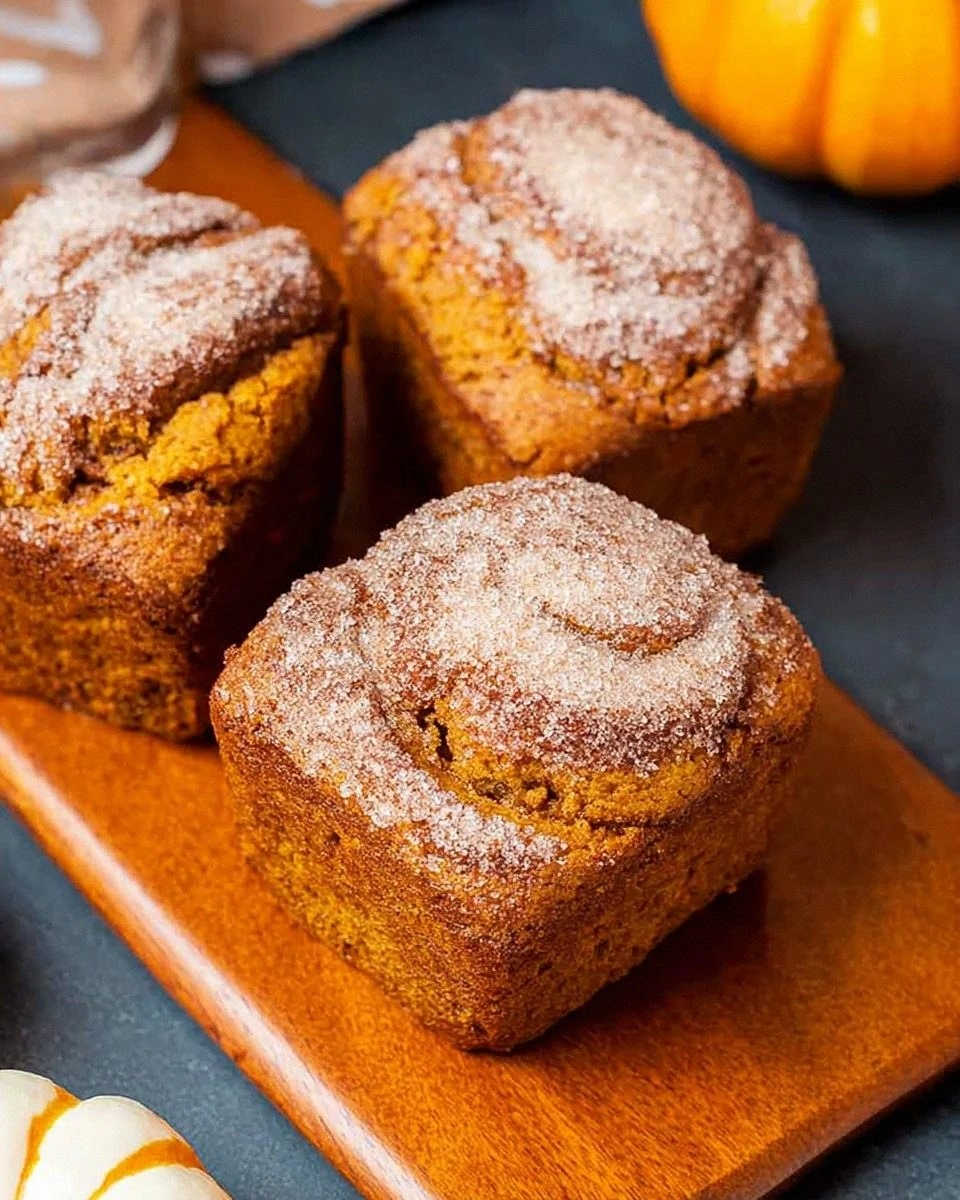
I still remember the day I nearly set my kitchen on fire attempting to make a pumpkin bread recipe from a glossy magazine. The batter overflowed like a volcanic science experiment, the center stayed stubbornly raw, and the cinnamon swirl vanished into a sad brown streak. I stood there with oven mitts still on, defeated by what should have been the most basic autumn bake. Fast forward through three more failed loaves, a dozen tweaks, and one particularly dramatic moment where I flung a rock-hard brick of bread into my backyard (squirrels wouldn't even touch it), I finally cracked the code. These cinnamon swirl pumpkin bread mini loaves are the result of that deliciously messy journey — tender, fragrant, and sporting a cinnamon ribbon so dramatic it could star in its own cooking show.
Picture this: It is a gray Saturday morning, the kind where the air smells like distant woodsmoke and your favorite sweater feels like a hug. You pull these golden-brown mini loaves from the oven, the cinnamon swirl still bubbling like molten amber. The scent that greets you is equal parts pumpkin pie and cinnamon roll, with a whisper of caramelized sugar that makes your neighbors knock "just to check on you." When you slice one open — wait, let me rephrase — when you tear into the first loaf because patience is overrated, the crumb is so moist it practically sighs. The swirl is sharp and sweet, the pumpkin is earthy and bright, and together they taste like every good memory of October compressed into a handheld cake.
Most recipes treat the swirl as an afterthought, a dry sprinkle that bakes into a flavorless fault line. Not here. My version packs that ribbon with brown sugar, Vietnamese cinnamon, and a stealth spoonful of flour so it stays gooey, not gritty. The pumpkin batter itself is whipped for a full three minutes — yes, three — which sounds excessive until you realize it is the difference between a dense doorstop and a cloud that melts on your tongue. And here is the kicker: the batter comes together in one bowl, no mixer required for the dry ingredients, meaning you can go from zero to mini loaves faster than a barista can misspell your name on a paper cup.
Let me walk you through every single step — by the end, you will wonder how you ever made it any other way.
What Makes This Version Stand Out
Swirl Science: Rather than a dry cinnamon sugar layer that dissolves into nothing, we create a thick paste that bakes into a gooey, marbled core. The secret is a teaspoon of flour that keeps the sugar from liquefying completely, so every bite has a ribbon of cinnamon caramel.
Pumpkin Power: We use an entire can of pure pumpkin, no skimping. The high moisture content gets locked in by whipping the eggs and sugar first, trapping air that lifts the crumb and prevents the dreaded soggy bottom.
Mini Loaf Magic: Smaller pans equal more crust-to-crumb ratio, meaning every slice has those crave-worthy crispy edges. Bonus: they cool in ten minutes, so you are never more than a quarter-hour away from warm bread bliss.
One-Bowl Wonder: Dry ingredients get sifted directly onto the wet, so you are not hauling out extra dishes. Fewer bowls equals more time to lick the spatula guilt-free.
Make-Ahead Hero: The batter keeps for three days refrigerated, swirl mixture included. Bake one loaf tonight, stash the rest, and you can have fresh bread mid-week without anyone suspecting you planned ahead.
Texture Triumph: A final brush of maple butter on the hot loaves gelatinizes the top crust, giving you that shiny, bakery-window finish. It is the difference between homemade and pro-level, and it takes twelve seconds.
Crowd Reaction: I have watched grown adults fight over the last mini loaf like it was the last lifeboat on the Titanic. Fair warning: double the batch if you want leftovers.
Alright, let us break down exactly what goes into this masterpiece...
Inside the Ingredient List
The Flavor Base
Canned pumpkin is the star, but not all cans are created equal. Look for varieties labeled "100% pure pumpkin," not the spiced pie filling that tastes like a scented candle had a bad day. A 15-ounce can gives you exactly the moisture and earthy sweetness you need without watering down the batter. If you are feeling fancy, roast a sugar pie pumpkin yourself — cube it, roast until caramelized, then blitz into a puree. The depth of flavor is insane, like pumpkin turned up to eleven, but honestly, the canned stuff is so reliable that I only roast my own when I want to impress people who think I have my life together.
Brown sugar carries the caramel notes. I use dark brown for its higher molasses content; it makes the bread taste like you worked harder than you did. If you only have light brown, add a tablespoon of molasses to the batter and boom — instant upgrade. White sugar would make the loaf one-dimensional, so resist the urge to substitute unless you enjoy baked goods that taste like regret.
The Texture Crew
All-purpose flour gives structure, but we are keeping it gentle. Too much and your bread turns into a doorstop, too little and it collapses like a tent in a windstorm. I have tested this with bread flour — chewier, but not in a good way — and with cake flour — too delicate to hold the swirl. Stick with AP and measure by fluffing the flour first, then spooning it into the cup and leveling with a knife. That method alone prevents ninety percent of heavy, sunken loaves.
Eggs do double duty: yolks for richness, whites for lift. Bring them to room temperature so they whip up airy and light; cold eggs refuse to incorporate, leaving you with streaky batter and a dense final crumb. If you forgot to plan ahead (hello, me every Saturday), submerge whole eggs in warm tap water for five minutes while you gather the other ingredients. Crisis averted.
The Unexpected Star
Greek yogurt is my secret weapon for ultra-moist texture without excess oil. Full-fat, plain, nothing fancy. The lactic acid tenderizes the gluten, giving you that plush, melt-in-your-mouth bite. Sour cream works too, but yogurt adds a subtle tang that brightens all that warm spice. Skip it and you will still get good bread, but with it you get the loaf that people text you about at midnight.
A single tablespoon of vanilla extract anchors the sweet spices. It is background noise until you leave it out — then the bread tastes hollow, like a sweater with a missing button. Use real extract, not the imitation stuff that smells like a candle store clearance rack. Your future self, hovering over the cooling rack, will thank you.
The Final Flourish
Vietnamese cinnamon is the Beyoncé of spices: bold, floral, and ready to headline. Supermarket cinnamon is fine, but once you taste the high-oil Vietnamese variety, there is no going back. The swirl mixture uses a full tablespoon because we want drama, a deep mahogany ribbon that tastes like red-hot candies grew up and got sophisticated. Grate a little fresh nutmeg in too — just five strokes on a microplane — for that subtle back-note that makes people ask, "What is that?"
Everything is prepped? Good. Let us get into the real action...
The Method — Step by Step
- Preheat your oven to 350°F (175°C) and position a rack dead center. Grease four mini loaf pans (6×3 inches) with nonstick spray, then line them with a parchment sling — leave wings hanging over the sides so you can lift the loaves out like little edible presents. If you only own two pans, no drama; bake in batches and keep the extra batter covered in the fridge. The pans should feel slightly slippery but not swimming in oil; think ice-skating rink, not kiddie pool.
- In a medium bowl, whisk together the swirl ingredients: brown sugar, cinnamon, flour, and a pinch of salt until it looks like fragrant beach sand. Take a whiff — it should make you want to dive in face-first. Set this aside within arm's reach; we are going to layer it fast once the batter is ready. Do not refrigerate or it will clump like wet sand.
- Now the one-bowl batter magic: In a large bowl, whisk eggs and both sugars for a full minute until the mixture looks thick and pale, like coffeehouse foam. Stream in the pumpkin, yogurt, oil, and vanilla. Keep whisking until the color is uniform and the texture resembles a smooth milkshake. The sugar will start dissolving, which means the batter is primed to accept flour without toughening — science, but make it delicious.
- Sprinkle the flour, baking powder, baking soda, salt, and all the spices across the surface. Use a rubber spatula to fold everything together with as few strokes as possible. Stop as soon as you no longer see dry streaks; a couple of tiny lumps are totally fine. Over-mixing develops gluten and we want tender, not rubbery, results. Think of it like tucking the ingredients into bed, not wrestling them into submission.
- Time to layer: Spoon two heaping tablespoons of batter into each pan, just enough to cover the bottom. Now dust on a generous teaspoon of the cinnamon swirl mixture so it completely blankets the pumpkin layer. The sugar will melt as it bakes, creating that signature ribbon. Repeat once more, finishing with a final spoonful of batter on top. The pans should be about three-quarters full — any more and they will Mount Vesuvius on you.
- Use a bamboo skewer or toothpick to swirl figure-eights through the batter, digging all the way to the bottom but not so violently that you homogenize everything. You want ribbons, not orange soup. Aim for four or five lazy loops per pan — think Van Gogh, not toddler with a crayon.
- Bake for 28–32 minutes, rotating pans halfway through. The tops will puff into gentle domes, the edges will pull away from the sides, and a toothpick inserted at a 45-degree angle should come out with a few moist crumbs, not wet batter. If your oven runs hot, start checking at 25 minutes — better early than sorry. The smell wafting through your house will be so intoxicating you will consider bottling it as cologne.
- Cool pans on a wire rack for ten minutes. While they are still warm, whisk together the maple butter glaze: melted butter, maple syrup, and a pinch of salt until glossy. Brush this elixir across the tops of the loaves; it will soak in and create a sticky, shiny crust. After five more minutes, lift the loaves out by the parchment wings and let them cool completely on the rack — or slice one warm and accept that the swirl will be gooey and imperfect and absolutely irresistible.
That is it — you did it. But hold on, I have got a few more tricks that will take this to another level...
Insider Tricks for Flawless Results
The Temperature Rule Nobody Follows
Room-temperature ingredients are not a snobby chef suggestion; they are the ticket to a lofty crumb. Cold eggs shock the sugar into seizing, cold yogurt refuses to emulsify, and cold pumpkin makes the batter thick and gloppy. Set everything on the counter at least 45 minutes before you start, or cheat by placing eggs in warm water and microwaving the pumpkin for ten seconds. Yes, ten seconds — any longer and you risk cooking it into scrambled orange eggs. Your batter will ribbon off the spatula like thick paint, promising an even rise and zero sunken centers.
Why Your Nose Knows Best
Forget timers — your nose is the ultimate kitchen tool. When the loaves are five minutes from done, the scent shifts from raw cinnamon to toasted sugar and caramelized squash. That is your cue to peek through the oven door. If the aroma is still faintly vegetal, give them another three minutes. Over-baking smells like dark roasted coffee; under-baking smells like pumpkin soup. Trust me, once you bake by scent, you will never set another timer for banana bread, zucchini muffins, or any quick bread again.
The 5-Minute Rest That Changes Everything
The maple butter glaze needs a five-minute soak window. Brush it on too early and it pools into a greasy puddle; too late and it sits on top like a sticky helmet. Aim for when the loaves are warm enough to melt the butter but cool enough that the syrup sets into a glossy shell. Tilt the loaf as you brush so excess runs down the sides and caramelizes in the cracks — those chewy edges are chef's candy, and you deserve every nibble.
Storage Smarts
Once completely cool, wrap each mini loaf in plastic wrap, then slip into a zip-top bag with the air squeezed out. They will stay moist on the counter for three days, but after that the crust starts to stale. For longer life, freeze them wrapped in foil then bagged — they thaw overnight on the counter and taste oven-fresh. Never store while still warm; condensation turns the crust gummy and sad, like a sweater left in the dryer too long.
Creative Twists and Variations
This recipe is a playground. Here are some of my favorite ways to switch things up:
Chocolate Chunk Chaos
Fold in half a cup of bittersweet chocolate chips after the flour is mixed. The cocoa notes marry with pumpkin like they were born to mingle, and the melted pockets create molten rivers that make you close your eyes involuntarily. Use mini chips if you want even distribution, or chop a bar into rustic shards for dramatic puddles. Either way, prepare for people to "test" three slices for science.
Orange Zest Brightness
Add the zest of one orange to the wet ingredients. The citrus oils lift the spices, making the bread taste like pumpkin rolled around in a sunny grove. If you are feeling extra, whisk a little orange juice into the maple glaze for a creamsicle vibe that screams brunch royalty.
Nutty Crunch Top
Before baking, sprinkle the loaves with a handful of candied pecans or walnuts. They toast on top, adding a crackly contrast to the soft crumb. Chop them roughly so some pieces stay large and proud — texture is half the eating experience, and your teeth deserve a party too.
Cream Cheese Swirl
Beat 4 oz softened cream cheese with two tablespoons sugar and a splash of vanilla. Dollop this onto the batter layers alongside the cinnamon swirl. As it bakes, the cream cheese forms tangy ribbons that taste like pumpkin cheesecake in bread form. Warning: this version disappears faster than free donuts in an office break room.
Spice Level-Up
Add a pinch of cardamom and black pepper to the swirl. Cardamom brings floral citrus, while pepper adds a gentle heat that blooms at the back of your throat. It is subtle, but people will keep taking bite after bite trying to figure out why they cannot stop. Think of it as the culinary equivalent of a plot twist.
Gluten-Free Glow-Up
Swap the flour for a 1:1 gluten-free baking blend that contains xanthan gum. The texture is slightly more tender, almost like a pumpkin snack cake, and nobody will notice the difference unless you announce it with a megaphone. I have served this version to my most carb-devoted friends and they still ask for the recipe.
Storing and Bringing It Back to Life
Fridge Storage
Refrigeration is the enemy of moist quick bread, but if you live somewhere humid and the loaves have cream cheese, you have no choice. Wrap tightly, store up to five days, and revive slices by toasting them in a dry skillet for one minute per side. The quick heat drives off excess moisture and re-crisps edges so they taste fresh-baked.
Freezer Friendly
Freeze loaves whole for up to three months. Double-wrap in plastic then foil to prevent freezer burn. When the craving hits, unwrap and thaw on the counter for two hours or overnight in the fridge. Warm in a 300°F oven for ten minutes and brush with a fresh coat of maple butter to bring back that just-baked shine. Sliced before freezing? Thaw individual pieces in the toaster on the lightest setting.
Best Reheating Method
Microwaves turn the crumb gummy, so skip them unless you like pumpkin sponge. Instead, place slices on a sheet pan, tent loosely with foil, and heat at 300°F for 8–10 minutes. The gentle oven brings back the soft interior and toasty edges without drying. Add a tiny splash of water to the pan — it steams slightly, rehydrating the crumb so it tastes like you just pulled it from the oven.