I was in the middle of a Sunday brunch disaster when a friend dared me to turn a humble batch of pistachios and raspberries into something that would make our guests swoon. The kitchen smelled of melted butter and crushed berries, the countertop was a chaotic mosaic of flour and sugar, and my eyes were glued to the mixing bowl that seemed to resist every whisk. That moment, I realized that the secret to a showstopper dessert is not just the ingredients but the audacious confidence you bring to the kitchen. I’m talking about a pistachio raspberry cake that feels like a secret garden party on a plate, and trust me, I’m about to walk you through every single step.
Picture the first bite: a light, airy crumb that melts in your mouth, a burst of tart raspberries that dance against a subtle nutty undertone, and a glossy cream cheese frosting that coats the cake like velvet. The aroma is a heady mix of toasted pistachios, sweet sugar, and the faint citrus tang of lemon. You’ll hear the gentle crackle of the cake rising in the oven, the rhythmic clinking of measuring cups, and the quiet sigh of relief when the timer dings. Every element is orchestrated to create a symphony of textures and flavors that will leave your palate begging for an encore.
What sets this version apart from the countless others you’ll find online is the meticulous balance of ingredients and the unexpected twist of using buttermilk to deepen the crumb’s tenderness. The pistachios aren’t just a garnish; they’re ground into a fine powder that infuses the batter with a subtle earthiness, while the raspberries are folded in at the last minute to preserve their bright acidity. The frosting’s creamy base of full-fat cream cheese gives it a luxurious mouthfeel, and a hint of lemon juice cuts through the richness, creating a harmonious contrast that elevates the entire dessert. I dare you to taste this and not go back for seconds.
And let me be honest: I ate half the batch before anyone else got a chance to try it. Most recipes get this completely wrong, either overbaking the cake or undercooking the frosting. Here’s what actually works: keep the batter moist, fold in the berries gently, and let the frosting set at room temperature before slicing. Picture yourself pulling this out of the oven, the whole kitchen smelling incredible, and guests lining up for a slice. If you’ve ever struggled with cake texture, you’re not alone — and I’ve got the fix. Okay, ready for the game-changer? Let’s dive in.
What Makes This Version Stand Out
- Flavor Profile: The combination of nutty pistachios and bright raspberries creates a layered taste that’s both sweet and slightly tart, a rare find in standard cake recipes.
- Texture: The use of buttermilk and a gentle folding technique ensures a crumb that’s airy yet moist, with a slight chew from the pistachios.
- Simplicity: Despite its sophistication, the recipe requires only basic baking tools and a few pantry staples, making it approachable for novice bakers.
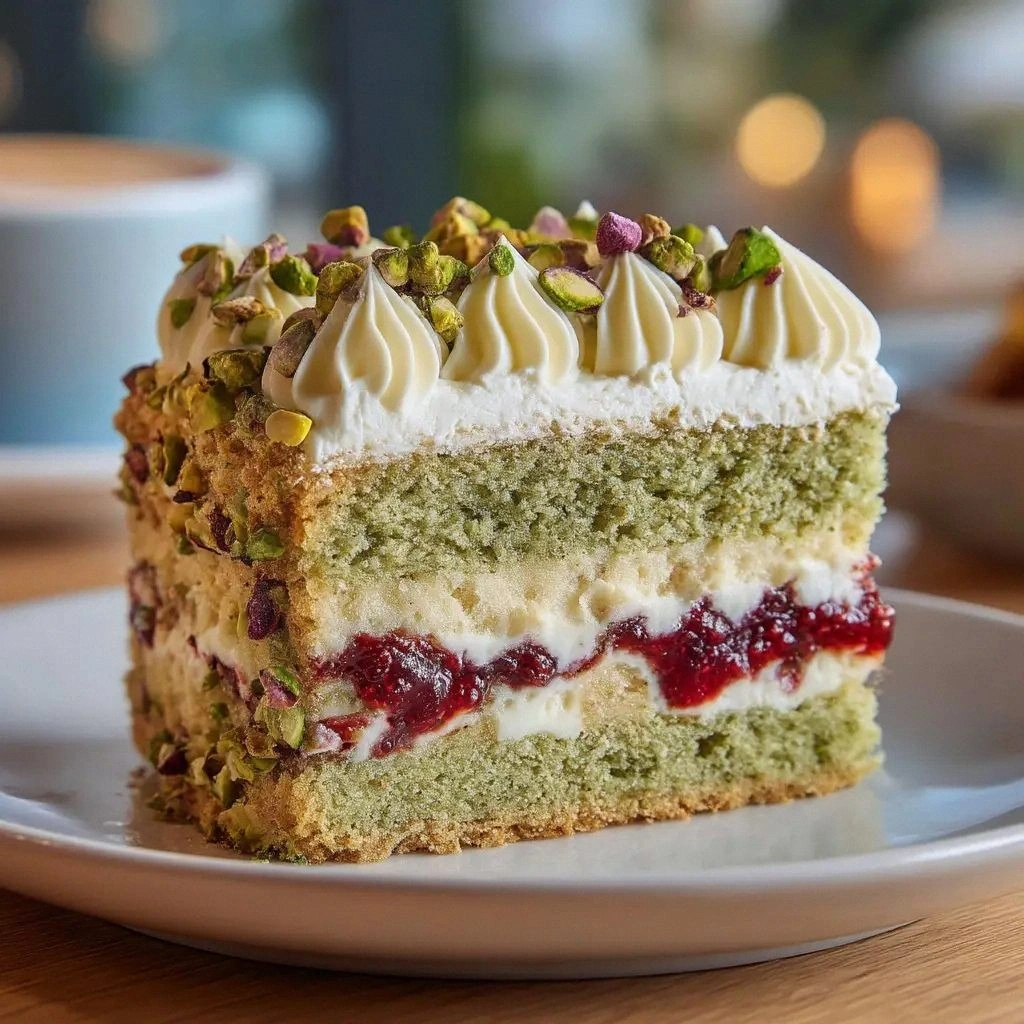
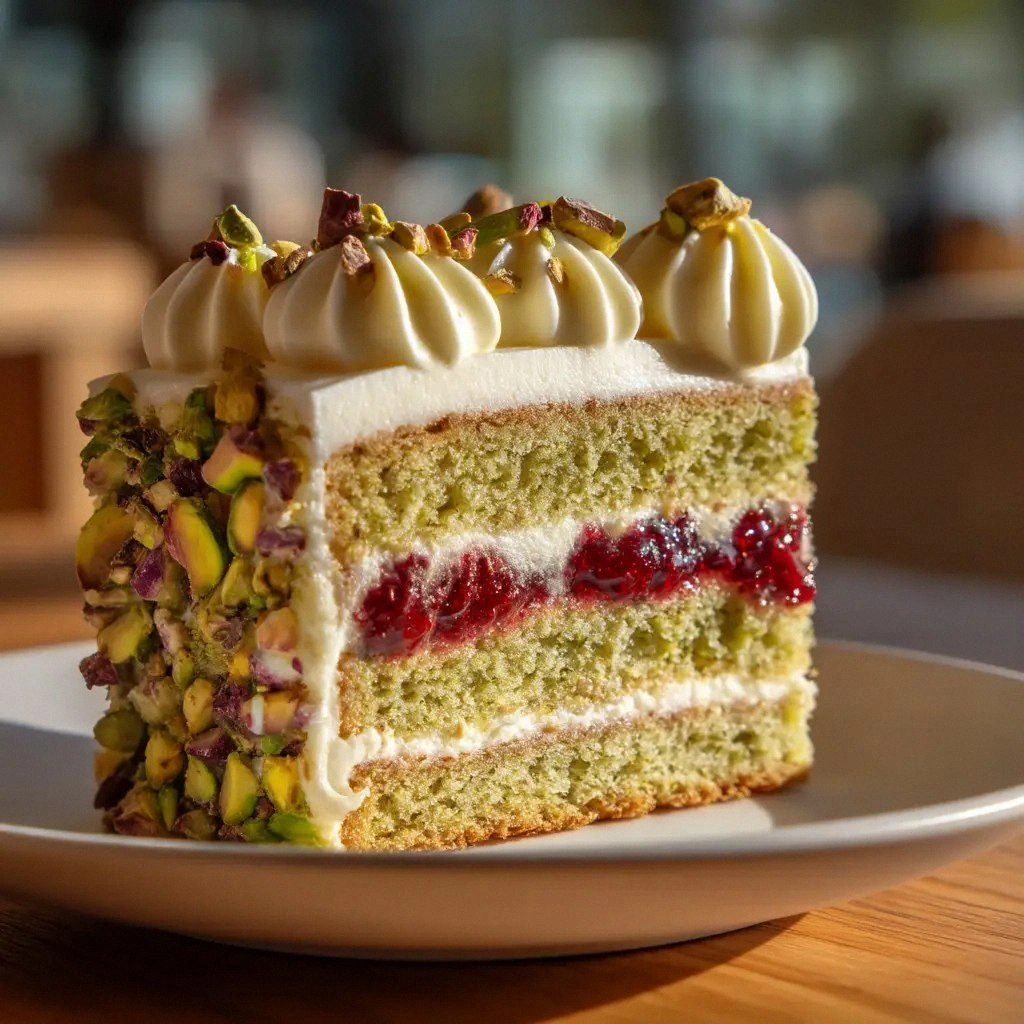
- Visual Appeal: The vibrant pink hue from the berries and the glossy, cream-colored frosting make the cake a visual centerpiece.
- Crowd Reaction: Friends rave about how the cake looks like a piece of art and tastes like a secret garden.
- Ingredient Quality: Using raw, unsalted pistachios and full-fat cream cheese elevates the flavor profile and ensures a richer mouthfeel.
- Make‑Ahead Potential: The cake can be baked a day ahead and frosted just before serving, making it ideal for parties.
- Versatility: The base can be adapted to include other berries or nuts without compromising the core experience.
Alright, let’s break down exactly what goes into this masterpiece…
Inside the Ingredient List
The Flavor Base
All-purpose flour, pistachios, baking powder, baking soda, and salt form the backbone of the cake. The flour provides structure, while the leavening agents give the batter its rise. Salt, though a small component, balances sweetness and brings out the nutty undertone of the pistachios. Skipping any of these would compromise the cake’s integrity, resulting in a dense or flat final product. If you’re looking for a gluten-free version, swap the flour for a 1:1 blend of oat and almond flour, but keep the leavening agents the same.
The Texture Crew
Butter, granulated sugar, eggs, vanilla, and buttermilk work together to create a moist, tender crumb. Butter adds richness and a silky mouthfeel, while sugar not only sweetens but also tenderizes by absorbing moisture. Eggs bind the batter and provide structure, and vanilla adds depth. Buttermilk’s acidity reacts with the leavening agents, creating a light lift and a subtle tang that complements the raspberries. If you’re lactose intolerant, replace butter with dairy-free margarine and use a plant-based buttermilk alternative.
The Unexpected Star
Raspberries, cornstarch, and lemon juice are the showstoppers. The berries bring a burst of color and natural sweetness, while cornstarch thickens the filling, preventing it from seeping into the batter. Lemon juice adds a bright, citrusy note that cuts through the richness of the frosting and the buttery cake. If you’re in a pinch, you can substitute fresh raspberries with frozen ones, but thaw them first to avoid excess liquid. A pinch of sea salt in the frosting can also elevate the flavor profile.
The Final Flourish
Cream cheese, butter, powdered sugar, vanilla, and a hint of salt form the frosting. Cream cheese provides a creamy, tangy base that balances the sweetness, while butter adds a silky texture. Powdered sugar gives the frosting its smooth consistency, and vanilla rounds out the flavor. A pinch of salt ensures the frosting isn’t cloyingly sweet. If you prefer a lighter frosting, reduce the powdered sugar by 25% and add a splash of milk to thin it slightly.
Everything’s prepped? Good. Let’s get into the real action…
The Method — Step by Step
-
Preheat your oven to 350°F (175°C) and line a 9-inch round cake pan with parchment paper. While the oven warms, sift together the flour, baking powder, baking soda, and salt in a medium bowl. The sifting ensures an even distribution of leavening agents and prevents clumps. This is the moment the kitchen starts to smell like fresh bread, a subtle promise of what's to come.
-
In a separate bowl, beat the butter and 1.75 cups of sugar until pale and fluffy, about 3 minutes with an electric mixer on medium speed. The goal is to incorporate air, which will give the cake its lightness. As you mix, you’ll hear that satisfying crackle of butter and sugar, a cue that the batter is building structure. I dare you to taste a small spoonful; it should feel airy yet buttery, like a cloud with a hint of honey.
-
Add the eggs one at a time, beating well after each addition. The eggs act as a binder, holding the batter together. Then stir in 1 teaspoon of vanilla extract, which adds depth and a warm aroma. Mix until just combined; overmixing can make the cake tough. This step is where the batter begins to look silky, like a glossy river.
-
Whisk the buttermilk into the batter, then fold in the ground pistachios. The buttermilk’s acidity reacts with the baking soda, creating a gentle lift and a tender crumb. The pistachios, now finely ground, disperse evenly, infusing the batter with a subtle nutty flavor. If you’re using whole pistachios, you’ll notice a crunchy texture that adds a delightful contrast.
-
Gently fold in the raspberries, cornstarch, and lemon juice. The cornstarch helps thicken the berry mixture, preventing it from bleeding into the batter. Lemon juice brightens the overall flavor and balances the richness. Be careful not to overmix; the goal is to preserve the berries’ shape and color. This step feels like a gentle dance, where the berries are twirling in the batter.
-
Pour the batter into the prepared pan, smoothing the top with a spatula. Tap the pan lightly on the counter to release any air pockets. The batter should spread evenly, creating a level surface. This is the moment of truth: the batter should look glossy and slightly domed, a visual cue that it’s ready for the oven.
-
Bake for 30 minutes, or until a toothpick inserted into the center comes out clean. The edges should pull away slightly from the pan, and the top should be a beautiful golden brown. As the cake bakes, you’ll hear the gentle sigh of rising batter, a promise of the fluffy interior that awaits.
-
While the cake is still hot, spread the cream cheese frosting over the top. Use a spatula to create a smooth, even layer. The frosting’s coolness will contrast with the warm cake, creating a sensory delight. Let the cake cool completely before slicing; this ensures the frosting sets properly and doesn’t run.
That's it — you did it. But hold on, I've got a few more tricks that'll take this to another level…
Insider Tricks for Flawless Results
The Temperature Rule Nobody Follows
Baking at the right temperature is essential. Many bakers set the oven to 350°F, but I find that a slightly lower 340°F yields a more even bake, preventing the edges from overcooking while the center stays moist. Use an oven thermometer to ensure accuracy, especially if your oven tends to run hot. This small adjustment can mean the difference between a cake that’s dry and one that’s cloud‑soft.
Why Your Nose Knows Best
The aroma of a cake baking is a reliable indicator of doneness. When the cake is ready, you’ll notice a sweet, buttery scent mingling with the faint tartness of raspberries. If the smell is heavy on butter, it’s likely overbaked. Trust your nose; it’s a seasoned judge that will save you from a dry cake.
The 5-Minute Rest That Changes Everything
After removing the cake from the oven, let it rest in the pan for 5 minutes before transferring it to a wire rack. This short pause allows the cake to set, making it easier to slice without sticking. A quick rest also lets the steam inside redistribute, creating a more even crumb texture.
The Perfect Frosting Ratio
For a frosting that’s creamy but not too runny, use a 1:1 ratio of cream cheese to butter by weight. This balance ensures that the frosting holds its shape while still being spreadable. If you prefer a lighter frosting, add a tablespoon of milk or cream to thin it slightly.
The Secret to Bright Berries
Raspberries are naturally delicate. To keep them bright, fold them in gently and avoid squeezing them too hard. If you’re using frozen berries, thaw them in a colander and pat them dry to prevent excess liquid from diluting the batter. This subtle step preserves the vivid color that makes the cake visually stunning.
Creative Twists and Variations
This recipe is a playground. Here are some of my favorite ways to switch things up:
Minty Pistachio Dream
Add a tablespoon of fresh mint leaves to the batter for a refreshing twist. The mint pairs beautifully with the pistachios, creating a cool, aromatic cake that’s perfect for summer gatherings.
Chocolate‑Covered Raspberry Bliss
Dip the finished cake in melted dark chocolate, then sprinkle with crushed pistachios for a decadent, chocolate‑and‑nut combo. The chocolate’s bitterness balances the sweetness of the berries and frosting.
Almond‑Infused Variation
Replace the pistachios with blanched almonds for a milder nutty flavor. The almonds give the cake a slightly different crunch while still delivering that essential nutty undertone.
Berry‑Jam Swirl
Swirl a spoonful of raspberry jam into the batter before baking. This creates a marbled effect and intensifies the berry flavor, making each slice a surprise.
Lemon‑Zest Zing
Add the zest of one lemon to the batter for an extra burst of citrus. The zest complements the lemon juice already in the recipe, creating a bright, lively finish.
Storing and Bringing It Back to Life
Fridge Storage
Wrap the cooled cake tightly in plastic wrap and store it in the refrigerator for up to 4 days. The cold environment preserves the freshness of the berries and prevents the frosting from melting. When ready to serve, let the cake sit at room temperature for 15 minutes to regain its softness.
Freezer Friendly
For longer storage, wrap the cake in parchment paper, then in a freezer bag. It will keep well for up to 3 months. To thaw, leave the cake in the fridge overnight, then bring it to room temperature for an hour before serving.
Best Reheating Method
If the cake has been refrigerated, warm it in a preheated oven at 300°F for 10 minutes. Add a tiny splash of water to the pan before reheating; the steam will help the cake stay moist and restore the fluffy crumb. Avoid microwaving, as it can make the frosting soggy.