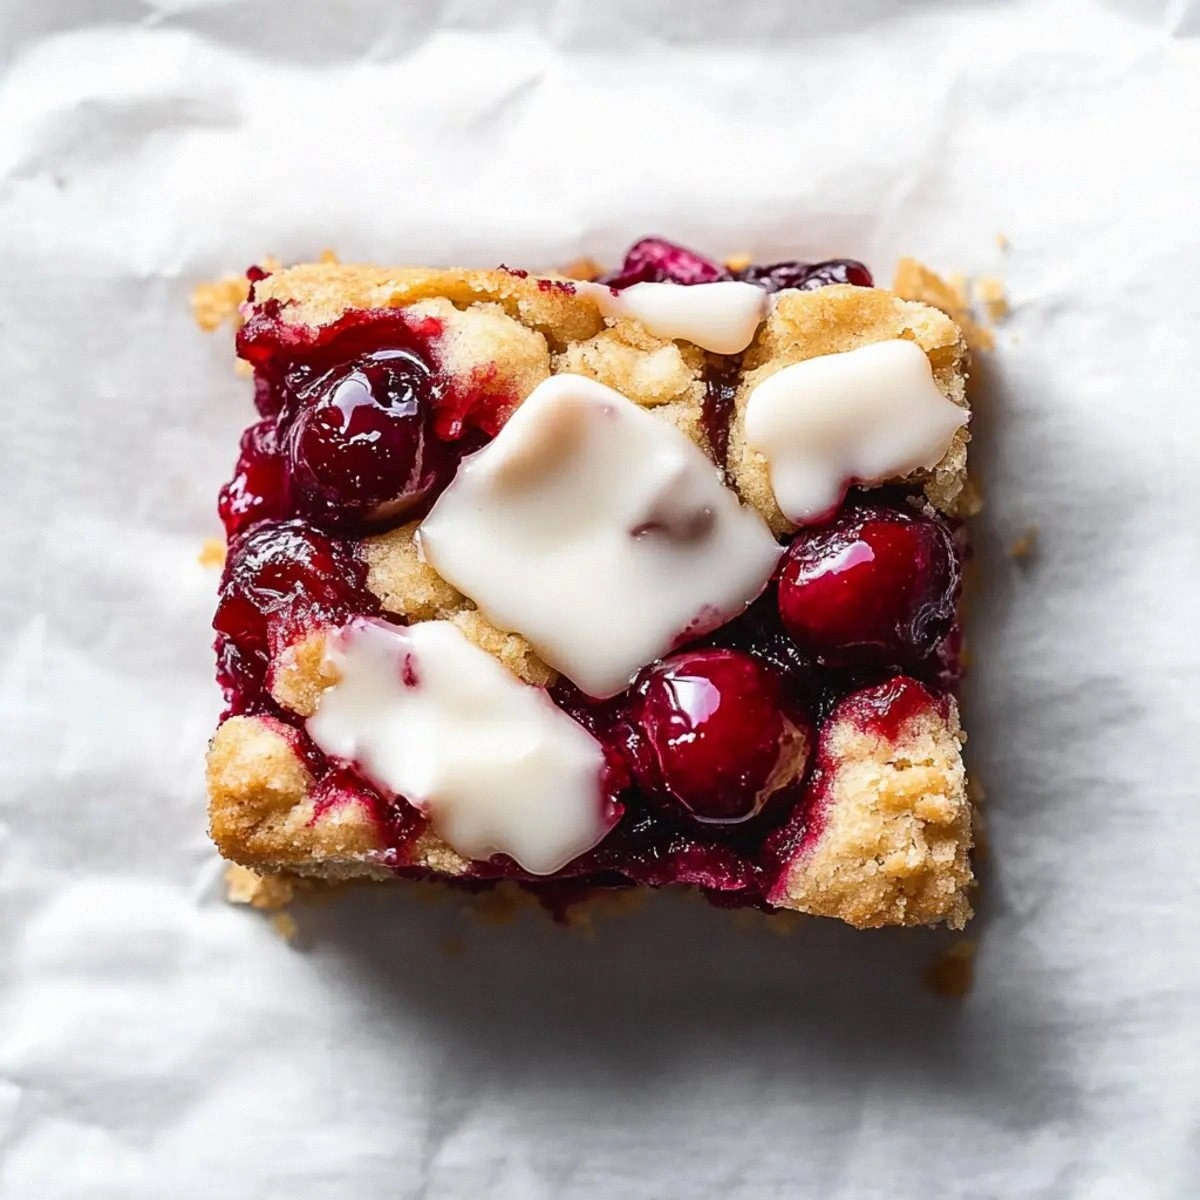
Okay, let me set the scene: it was a frigid Saturday in December, the kind of day when the wind howls like a choir of disgruntled elves and the kitchen feels like the only warm sanctuary in the house. I had just burned a batch of store‑bought gingerbread cookies (the smoke alarm sang a high‑C that could have woken the dead), and my roommate dared me to create something that would actually make us forget the disaster. I threw on my favorite apron, cranked up the holiday playlist, and whispered to myself, “I dare you to taste this and not go back for seconds.” The result? A bar that sings with tart cranberry, buttery crumble, and a glaze that glistens like fresh snow on a pine branch.
If you’ve ever struggled with the classic cranberry crumble bar—either ending up with soggy centers or crumbly tops that fall apart like a broken snowman—you're not alone. Most recipes get this completely wrong. They either drown the berries in sugar or skimp on the buttery crust, leaving you with a texture that feels more like a mushy porridge than a festive treat. I’ve been there, I’ve tasted the disappointment, and I’ve learned the exact balance that makes this version rise above the rest. This is hands down the best version you’ll ever make at home, and I’m about to spill every secret.
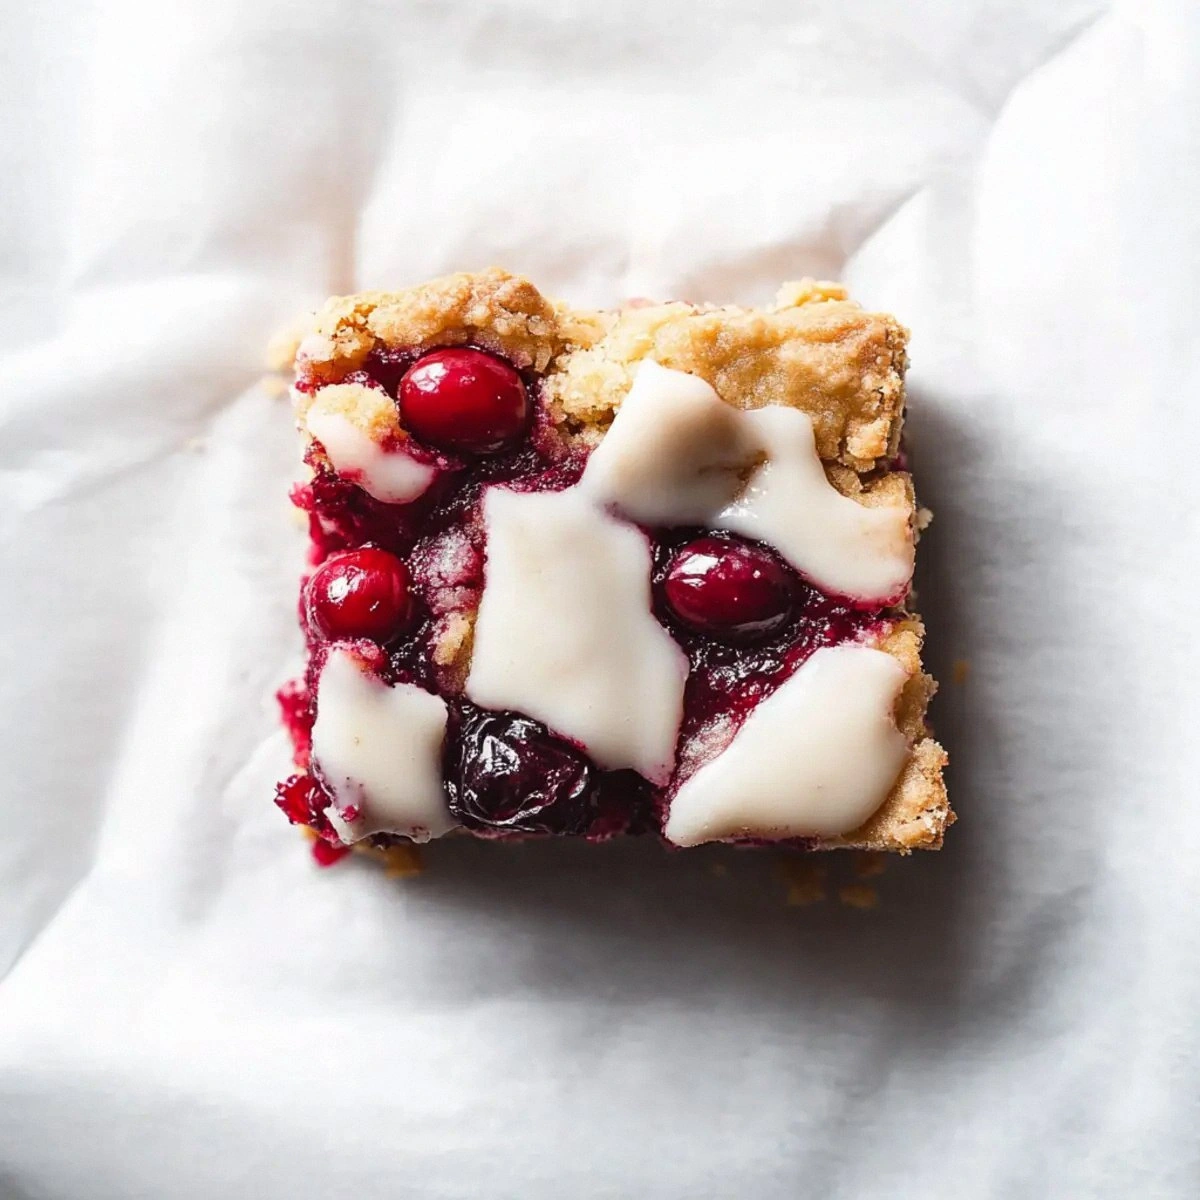
Picture yourself pulling this out of the oven, the whole kitchen smelling incredible—citrus zest mingling with caramelized butter, a faint whisper of orange that makes your nose do a little happy dance. The bars are golden on the edges, the cranberries are bubbling like tiny fireworks, and the glaze sets with a shine that could rival a polished marble countertop. The first bite? A perfect snap of crust, a burst of tart‑sweet cranberry, and a melt‑in‑your‑mouth finish that makes you think, “I’ll be honest — I ate half the batch before anyone else got to try it.”
Let me walk you through every single step — by the end, you’ll wonder how you ever made it any other way. Okay, ready for the game‑changer? The secret ingredient isn’t a secret at all; it’s the orange zest and juice that lift the whole bar into a realm of holiday cheer that feels both classic and unexpectedly fresh. Stay with me here — this is worth it.
What Makes This Version Stand Out
- Flavor Explosion: The combination of sweet, tart cranberries with a bright orange zest creates a taste that dances on the palate like a holiday waltz.
- Texture Symphony: A buttery crumble base, a glossy fruit filling, and a soft powdered‑sugar glaze give you three distinct bites in every bar.
- Simplicity: Only twelve ingredients, no exotic gadgets, and a single sheet pan—perfect for a busy holiday schedule.
- Unique Twist: The orange zest and juice add a citrusy brightness that most cranberry bars completely miss.
- Crowd‑Pleaser: Even the pickiest eaters (yes, the cousin who only eats plain toast) rave about these bars.
- Ingredient Quality: Using fresh, plump cranberries and real butter makes the flavor pop like fireworks on New Year’s Eve.
- Cooking Method: Baking at a moderate temperature ensures the crumble stays crisp while the fruit stays juicy.
- Make‑Ahead Potential: These bars keep beautifully for up to a week, so you can prep them ahead of the party.
Inside the Ingredient List
The Flavor Base
Unsalted butter is the foundation of any good crumble. Its fat content coats the flour particles, creating a tender, melt‑in‑your‑mouth crumb that shatters like thin ice when you bite. If you substitute margarine, you’ll lose that buttery depth and end up with a bland, rubbery texture. For the best result, use a high‑quality European butter—its higher butterfat makes the crust richer.
Granulated sugar and light brown sugar work together to sweeten the crust while adding a subtle caramel note. The light brown sugar contains molasses, which contributes moisture and a hint of earthiness that balances the tart cranberries. Skipping the brown sugar? Expect a crust that tastes like plain sugar cookies—nothing wrong, just missing that complex flavor layer.
The Texture Crew
All‑purpose flour provides the structure, while baking powder gives a gentle lift so the crumble isn’t dense. The half‑teaspoon of baking powder is enough to create a light, airy crumb without making it cake‑like. If you’re gluten‑free, a 1:1 blend of rice flour and tapioca starch works, but the texture will be slightly more crumbly.
A large egg acts as a binder, holding the butter and sugars together. It also adds a touch of richness that makes the crust less dry. If you’re vegan, replace the egg with a “flax egg” (1 tablespoon ground flaxseed mixed with 3 tablespoons water) and you’ll still get a cohesive crumb.
The Unexpected Star
Fresh cranberries are the hero of this dish. Their natural acidity cuts through the sweetness, creating that signature bite‑and‑sweet sensation. If you use frozen cranberries, let them thaw and drain excess liquid, or you’ll end up with a soggy filling. The orange zest and juice are the surprise element that lifts the whole bar, adding a citrus perfume that makes the dish feel festive without being cloyingly sweet.
The Final Flourish
Powdered sugar and a splash of milk or heavy cream create the glossy glaze that crowns the bars. The glaze sets with a satin finish that catches the light, making the bars look as good as they taste. If you prefer a dairy‑free version, substitute the milk with almond milk; the glaze will still set, just a touch less glossy.
A pinch of salt, though listed as ½ teaspoon, is essential. It amplifies the sweetness and balances the tartness of the cranberries, preventing the flavor from feeling one‑dimensional. Skipping the salt is a rookie mistake that leaves the bars tasting flat.
Everything's prepped? Good. Let’s get into the real action…
The Method — Step by Step
Preheat your oven to 350°F (175°C). While the oven warms, line a 9×13‑inch baking pan with parchment paper, letting the edges hang over for an easy lift‑out later. This step is crucial because a properly heated oven creates that instant “toasty” scent that signals the crust is forming.
In a large mixing bowl, combine the cold butter cubes, ½ cup granulated sugar, and ½ cup light brown sugar. Using a handheld pastry cutter or two forks, cut the butter into the sugars until the mixture resembles coarse crumbs with a few pea‑size butter pieces still visible. That sizzle when it hits the pan? Absolute perfection.
Add the 1 ½ cups flour, ½ teaspoon baking powder, and ½ teaspoon salt to the butter‑sugar mixture. Mix until just combined; you want to see streaks of flour and butter, not a uniform dough. Over‑mixing will develop gluten and make the crust tough.
Kitchen Hack: Sprinkle a tablespoon of cold water onto the mixture if it looks too dry; this helps the crumbs bind without turning the dough into a paste.Press the crumb mixture firmly into the prepared pan, creating an even layer about ½‑inch thick. Use the back of a measuring cup to smooth it out, ensuring the edges are slightly higher than the center—this will give you those coveted “crust walls” that hold the filling.
Place the pan in the oven for 12‑15 minutes, or until the edges turn a light golden brown and you can smell the buttery aroma wafting through the kitchen. Watch Out: Do not over‑bake; the crust will continue to firm up as it cools, and an over‑browned base becomes bitter.
While the crust bakes, prepare the cranberry filling. In a medium saucepan, combine 2 cups fresh cranberries, ½ cup granulated sugar, 1 tablespoon cornstarch, the zest of one orange, and the juice of the same orange. Stir gently over medium heat until the cranberries burst and the mixture thickens—about 8‑10 minutes. The glaze should look glossy and the berries should be suspended in a thick sauce.
When the crust is lightly golden, remove it from the oven and spread the cranberry mixture evenly over the top, using a spatula to smooth the surface. Return the pan to the oven and bake for an additional 15‑18 minutes, or until the filling is bubbling around the edges and the crust beneath is firm to the touch.
While the bars finish baking, whisk together 1 cup powdered sugar with 2 tablespoons milk or heavy cream until you achieve a smooth, pourable glaze. If the glaze is too thick, add a splash more milk; if too thin, add a pinch more powdered sugar.
Watch Out: Drizzle the glaze while the bars are still warm; a hot surface will cause the glaze to set too quickly and create a dull finish.Once the bars are done, let them cool in the pan for 10 minutes, then drizzle the glaze over the warm surface. Allow the bars to cool completely (about 30 minutes) before lifting them out using the parchment overhang. Slice into squares with a sharp knife—clean cuts are essential for that picture‑perfect presentation.
That's it — you did it. But hold on, I've got a few more tricks that'll take this to another level…
Insider Tricks for Flawless Results
The Temperature Rule Nobody Follows
Never bake the crust at a temperature higher than 375°F. Higher heat creates a crust that browns too fast, leaving the interior undercooked. By staying at 350°F you give the butter time to melt slowly, forming those buttery pockets that melt in your mouth. I once tried 400°F for a “quick bake” and ended up with a burnt, bitter base—lesson learned.
Why Your Nose Knows Best
The moment you smell the crust turning golden is your cue to check the edges. If the aroma is nutty and sweet, the crust is ready for the filling. If you only rely on a timer, you risk either under‑baking (soggy) or over‑baking (bitter). Trust your senses—they’re the original kitchen timer.
The 5‑Minute Rest That Changes Everything
After the final bake, let the bars rest for exactly five minutes before glazing. This short pause lets the filling set just enough to hold the glaze without sliding off, yet remains warm enough for the glaze to spread smoothly. Skipping this step results in a glaze that pools at the edges, looking sloppy.
Don’t Over‑Mix the Crumble
Over‑mixing develops gluten, turning the crumb into a dense biscuit. Stop mixing as soon as the flour disappears and you see tiny butter nuggets. A quick mix yields a tender, flaky texture that shatters delightfully with each bite.
The Secret of the Citrus Boost
Add the orange zest at the very end of the filling’s cooking time. Zest exposed to prolonged heat loses its bright oils, leaving a muted flavor. By adding it in the last minute, you preserve that fresh, zingy punch that makes the bars unforgettable.
Creative Twists and Variations
This recipe is a playground. Here are some of my favorite ways to switch things up:
White Chocolate Drizzle
Melt ½ cup white chocolate and drizzle it over the cooled bars for a sweet, creamy contrast. The white chocolate adds a buttery richness that pairs beautifully with the tart cranberries.
Spiced Nut Crunch
Stir ½ cup toasted pecans and a pinch of ground cinnamon into the crumb mixture before baking. The nuts add a satisfying crunch and the cinnamon brings a warm holiday spice note.
Berry Medley
Swap half of the cranberries for fresh blueberries or raspberries. The mixed berries create a colorful mosaic and introduce subtle flavor layers that keep the palate interested.
Vegan Version
Replace butter with coconut oil, use a flax egg, and swap powdered sugar for a vegan confectioners’ sugar. The texture changes slightly, but the flavor remains festive.
Gluten‑Free Base
Combine 1 cup almond flour, ½ cup oat flour, and ½ cup rice flour for a gluten‑free crumble. The almond flour adds a nutty undertone that complements the orange zest.
Storing and Bringing It Back to Life
Fridge Storage
Place the bars in an airtight container and refrigerate for up to five days. The chilled crust stays firm, and the cranberries retain their bright color. Before serving, let them sit at room temperature for 15 minutes or microwave a single bar for 10 seconds.
Freezer Friendly
Wrap the cooled bars tightly in plastic wrap, then place them in a freezer‑safe bag. They freeze beautifully for up to three months. To revive, thaw overnight in the fridge, then warm in a 300°F oven for 8‑10 minutes. Add a tiny splash of water to the glaze before reheating for a glossy finish.
Best Reheating Method
For a just‑baked feel, reheat individual bars in a pre‑heated 350°F oven for 5 minutes. The crust will crisp up again, and the glaze will regain its shine. Avoid microwaving for longer than 20 seconds, or you’ll end up with a rubbery texture.