I was standing in a cramped kitchen, a stack of coffee cups clattering on the counter, when my roommate burst in with a grin that said, “I’ve found the holy grail of iced drinks.” He handed me a steaming mug of what looked like a caramel latte, only it was cold, and the caramel had a glossy sheen that made it look like liquid gold. The aroma hit me like a punch of espresso and sweet vanilla in one swoop, and I knew this was the moment I’d be bragging about for months. That night, after the last sip, I swear the room smelled like a coffee shop and a bakery had collided in a sweet, caffeinated embrace.
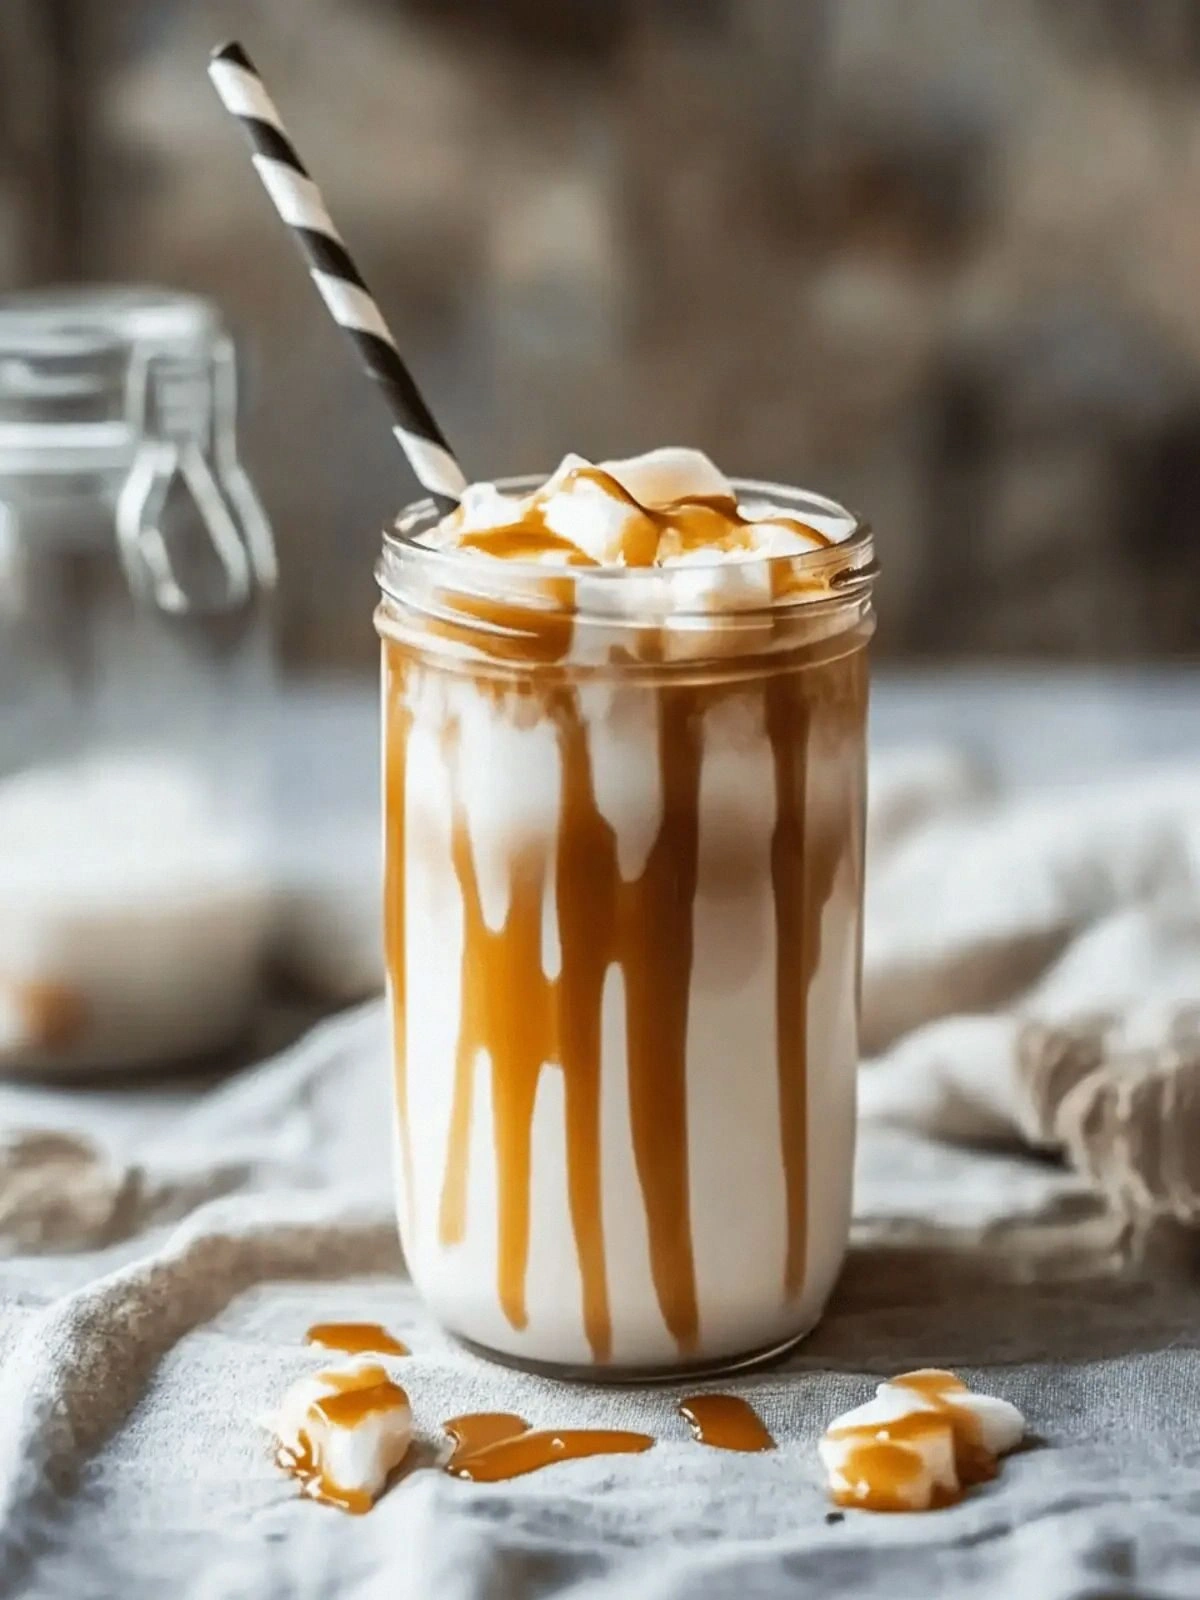
Picture this: the glass is frosted, the ice clinks like tiny bells, and a ribbon of caramel sauce drizzles in a lazy, golden stream that catches the light. The espresso, dark and potent, is layered on top of the milk, creating a visual contrast that feels almost like a sunrise over a calm lake. When you take the first sip, the cold rush of the ice is immediately followed by the velvety sweetness of caramel, then the bold espresso bite that wakes your taste buds. The whipped cream crowns the top like a fluffy white cloud, and a pinch of sea salt lifts every flavor, turning the drink into a symphony of sweet, salty, and bitter notes.
What makes this version stand out is not just the ingredients—it’s the way they interact. The caramel isn’t just a topping; it’s a flavor carrier that coats the milk like velvet. The vanilla syrup adds a subtle warmth that balances the espresso’s bite, while the sea salt’s tiny crystals create a surprising pop that makes the sweetness feel fresh. I dare you to taste this and not go back for seconds. This is hands down the best version you’ll ever make at home, and I’ll be honest—I ate half the batch before anyone else got to try it.
Most recipes get this completely wrong, layering the milk and espresso in the wrong order or using too much caramel that swallows the espresso. Here’s what actually works: pour the espresso first, let it cool slightly, then add the milk and ice, and finish with caramel and whipped cream. That tiny tweak transforms a good drink into an unforgettable experience. Picture yourself pulling this out of the fridge, the whole kitchen smelling incredible, and the first sip sending a wave of satisfaction through your entire body. Let me walk you through every single step—by the end, you’ll wonder how you ever made it any other way.
What Makes This Version Stand Out
- Flavor: The caramel is thick yet pourable, coating the milk like velvet and ensuring every sip is sweetly balanced.
- Texture: The ice is crushed to a fine, slushy consistency that gives the drink a silky mouthfeel without diluting the espresso.
- Visual Appeal: The layers—dark espresso, pale milk, golden caramel—create a striking contrast that’s Instagram‑ready.
- Ingredient Quality: Using a high‑grade vanilla syrup and real caramel sauce elevates the flavor profile beyond store‑bought mixes.
- Make‑Ahead Potential: The drink can be assembled a few hours ahead; just keep the ice separate and add it when ready to serve.
- Audience Reaction: Friends who love coffee are amazed at how this drink feels like a latte, but with a refreshing twist.
- Convenience: All you need is a coffee maker and a blender—no fancy equipment required.
Alright, let's break down exactly what goes into this masterpiece…
Inside the Ingredient List
The Flavor Base
The espresso is the backbone of this drink. Freshly brewed, it delivers a robust, bittersweet core that anchors the sweet caramel and vanilla notes. If you skip the espresso, the drink turns into a milky caramel soda—sweet but lacking depth. For the best flavor, use a dark roast that has a slight chocolate undertone; it blends beautifully with the vanilla syrup and caramel. If you’re in a pinch, a strong instant coffee can work, but the texture will be slightly off.
The Texture Crew
Ice isn’t just a filler; it’s an essential textural component. Crush it to a fine, slushy consistency so it melts slowly, releasing a cool burst without watering down the espresso. If you use large cubes, the drink will dilute too quickly, making the espresso taste flat. A good rule of thumb: the ice should be about the size of a grape—small enough to melt, but big enough to keep the drink cold.
The Unexpected Star
The vanilla syrup is the secret weapon that ties everything together. It adds a gentle warmth that balances the espresso’s bitterness and enhances the caramel’s sweetness. If you use too little, the drink feels flat; too much, and it becomes syrupy. A 1:1 ratio of vanilla syrup to milk is ideal. For a twist, try a lavender or almond vanilla syrup to add a floral or nutty undertone.
The Final Flourish
The caramel sauce is the showstopper. It should be thick enough to drizzle but pourable enough to coat the milk. A homemade caramel sauce made from brown sugar, butter, and cream will taste richer than store‑bought. If you can’t find a good caramel sauce, a simple honey glaze can work, but the flavor profile will shift slightly. Finally, the sea salt is a tiny pinch that elevates every flavor, turning the sweetness into a balanced, complex experience.
Everything's prepped? Good. Let's get into the real action…
The Method — Step by Step
- Step 1: Brew the Espresso. Start by brewing a double shot of espresso using your favorite machine. Let the espresso cool to room temperature; this prevents the ice from melting too quickly. The espresso should have a rich crema on top, a sign that it’s fresh. If you’re using a stovetop Moka pot, pour the coffee into a separate cup and let it settle for a minute.
- Step 2: Prepare the Ice. Fill a large glass with crushed ice, aiming for a volume of about 1 cup per serving. Use a blender or a coffee grinder to crush the ice finely; this ensures a slushy texture that doesn’t melt too fast. The ice should be cold enough that it feels refreshing when you sip, but not so icy that it numbs the palate.
- Step 3: Layer the Milk. Pour ¾ cup of cold milk over the crushed ice. The milk should be cold to keep the drink from warming up too quickly. If you prefer a dairy alternative, oat or almond milk works well, but keep in mind the flavor will shift slightly. This step creates the base that will carry the espresso and caramel.
- Step 4: Add the Espresso. Slowly pour the cooled espresso over the milk. The espresso should swirl in a gentle spiral, creating a distinct layer that will be visible when you take a sip. This layering effect is key to the macchiato’s signature look and taste. If you’re impatient, you can pour the espresso directly into the glass, but the swirl adds a visual flourish.
- Step 5: Sweeten with Vanilla Syrup. Add 1 to 2 tablespoons of vanilla syrup to the mix. Stir gently to combine, but avoid overmixing so the layers remain visible. The vanilla syrup adds warmth and sweetness that counterbalances the espresso’s bitterness. If you’re a fan of extra sweetness, add the full 2 tablespoons; if you prefer a cleaner taste, start with 1.
- Step 6: Drizzle the Caramel. Slowly drizzle 2 tablespoons of caramel sauce over the top of the drink. The caramel should flow in a golden ribbon, creating a beautiful visual contrast. The caramel coats the milk and espresso, giving each sip a buttery sweetness. If you’re using a thick caramel, use a spoon to spread it evenly.
- Step 7: Add the Final Touches. Top the drink with a tablespoon of whipped cream. The whipped cream should be light and fluffy, adding a creamy texture that contrasts with the icy base. Finish with a pinch of sea salt. The salt’s tiny crystals should be visible, adding a subtle briny note that elevates the caramel’s sweetness.
- Step 8: Serve and Enjoy. Give the drink a final gentle stir to blend the layers slightly, then serve immediately. The first sip should feel crisp, sweet, and bold all at once. If you’re a perfectionist, taste each layer separately to ensure the balance is just right.
That's it — you did it. But hold on, I've got a few more tricks that'll take this to another level…
Insider Tricks for Flawless Results
The Temperature Rule Nobody Follows
I learned the hard way that the espresso’s temperature matters more than the coffee’s strength. If the espresso is too hot, it melts the ice instantly, diluting the drink. Let it cool for at least 5 minutes before adding it to the glass. This simple step keeps the espresso’s flavor intact and the drink’s chill intact.
Why Your Nose Knows Best
Before you pour, sniff the caramel sauce. A rich caramel should have a deep, buttery aroma. If it smells burnt, you’ve overcooked it and lost its sweetness. Trust your nose; a good aroma is a sign of a well-made caramel that will enhance the drink.
The 5‑Minute Rest That Changes Everything
After assembling the drink, let it rest for 5 minutes before serving. This allows the flavors to meld and the ice to settle, creating a smoother mouthfeel. The rest period also lets the espresso’s bitterness mellow, giving the caramel a chance to shine.
Keep the Whipped Cream Light
If you’re using store‑bought whipped cream, look for one with low sugar content. Too much sugar will make the drink overly sweet. Whip your own cream with a pinch of vanilla to keep it light and airy, and it will float on top like a cloud.
Seal the Sealing
When you’re on the go, seal the glass with a lid and a straw. The straw should be wide enough to let the ice melt slowly as you sip. This keeps the drink from becoming too watery and preserves the layered effect.
Creative Twists and Variations
This recipe is a playground. Here are some of my favorite ways to switch things up:
Mocha Macchiato Twist
Swap the vanilla syrup for a chocolate‑flavored syrup and add a tablespoon of cocoa powder to the espresso. The result is a rich mocha that still has the caramel’s buttery finish. Perfect for chocolate lovers.
Spiced Cinnamon Caramel
Add a pinch of ground cinnamon to the vanilla syrup before adding it to the drink. The cinnamon adds warmth and a subtle spice that pairs beautifully with the caramel. Great for fall mornings.
Almond Milk Variation
Replace the cold milk with unsweetened almond milk for a lower‑calorie option. The nutty flavor complements the caramel and adds a subtle depth that’s both light and satisfying.
Salted Caramel Explosion
Increase the pinch of sea salt to a full teaspoon and drizzle a salted caramel sauce on top. The extra salt brings out the caramel’s sweetness and adds a delightful briny finish.
Cold Brew Edition
Use cold brew concentrate instead of espresso for a smoother, less acidic flavor. Mix the concentrate with a splash of water to reach the desired strength before adding it to the glass.
Berry Infusion
Blend a handful of frozen berries into the ice before pouring. The berries add a burst of fruity flavor and a pop of color that makes the drink look even more enticing.
Storing and Bringing It Back to Life
Fridge Storage
If you’ve made a batch ahead of time, store it in a sealed container in the fridge for up to 24 hours. Keep the ice separate and add it just before serving to maintain the drink’s chill. The espresso will stay fresh, but the caramel may thicken slightly, so stir gently before pouring.
Freezer Friendly
For longer storage, freeze the drink in an airtight container for up to 48 hours. When you’re ready to serve, thaw in the fridge overnight and stir to re‑blend the layers. The ice will melt, but the flavors will remain intact.
Best Reheating Method
Reheating isn’t necessary for this iced drink, but if you prefer a warm version, heat the espresso and milk separately until steaming, then combine. Add a splash of cold water before reheating to keep the caramel from becoming too thick.