Picture yourself walking into a dim kitchen, the air thick with anticipation and the faint scent of roasted pork drifting from the oven. I was on a mission to turn a plain pork butt into a showstopper, and the moment the first crackle hit the pan, I knew I had found the secret sauce for a crowd‑pleaser. Most recipes get this completely wrong, leaving the meat dry or the seasoning too bland. I dared you to taste this and not go back for seconds, and I’ve been chasing that same, irresistible flavor ever since. Let me walk you through every single step — by the end, you’ll wonder how you ever made it any other way.
When I first tried this recipe, the pork butt was a stubborn block that seemed to resist any kind of seasoning. I learned that the key is in the balance of salt, pepper, and those smoky, herby spices that cling to the surface like a velvet cloak. The result? A pork belly that’s crispy on the edges, tender inside, and bursting with flavor that lingers on the palate. If you've ever struggled with this, you're not alone — and I've got the fix. The moment the pork hits the oven, the aroma will fill every corner of your home, and you’ll hear that satisfying crackle that tells you the magic is happening.
That sizzle when it hits the pan? Absolute perfection. I’ve tried countless variations, but the combination of olive oil, smoked paprika, and a splash of apple cider creates a caramelized crust that’s impossible to resist. The apple cider not only adds a subtle sweetness but also helps the meat stay moist during the long roast. My friends swear they can’t eat just one slice because the flavors keep evolving as the meat cooks. And the best part? This dish is so simple that even a novice can master it with a little patience and a lot of enthusiasm.
Imagine a dish that’s not only a feast for the taste buds but also a conversation starter at dinner parties. This pork butt recipe is hands down the best version you'll ever make at home, and it’s packed with layers of flavor that will have your guests asking for the recipe. The secret lies in the meticulous preparation and the bold use of spices that transform a humble cut into a culinary masterpiece. I’ll be honest — I ate half the batch before anyone else got to try it. Now that you’ve read this, you’re ready to take the kitchen by storm.
Okay, ready for the game‑changer? The first step is to set the stage with the right ingredients and the right mindset. I’ve packed every detail you’ll need, from the exact quantities to the timing that ensures a juicy, melt‑in‑your‑mouth experience. And if you’re wondering whether this dish is truly worth the effort, just think about that moment when the first bite melts away the day’s stress. The anticipation of that first bite is almost as satisfying as the bite itself. Let’s dive in.
What Makes This Version Stand Out
- Flavor: The blend of smoked paprika, dried herbs, and apple cider creates a depth that’s both smoky and subtly sweet, turning a simple pork butt into a flavor powerhouse. Each spice works in harmony, ensuring no single element overpowers the others. This balance is what sets the dish apart from the generic, bland roasts you find in cookbooks.
- Crispiness: The olive oil and salt form a golden crust that shatters like thin ice when you bite into it, revealing a tender interior. The high oven temperature locks in juices while creating a caramelized exterior. This contrast in textures keeps you hooked from the first bite to the last.
- Ease: The recipe requires minimal prep, no fancy equipment, and a single oven. Even if you’re new to roasting, the step‑by‑step instructions guide you through each phase. This simplicity makes it ideal for weeknight dinners or weekend gatherings.
- Versatility: The seasoning base can be tweaked for different flavor profiles, making it a canvas for experimentation. Whether you prefer a sweeter glaze or a spicier kick, the foundation remains robust. This flexibility keeps the dish fresh and exciting.
- Make‑ahead Potential: The pork can be cooked ahead, refrigerated, and reheated without losing its crispness or juiciness. This is perfect for busy schedules or hosting large groups. The leftovers become a delicious lunch option for the next day.
- Audience Appeal: The pork’s succulent texture and bold seasoning resonate with both carnivores and those who appreciate a well‑seasoned protein. The dish can be served with a variety of sides, from roasted veggies to creamy mashed potatoes. Its universal appeal makes it a go-to for any dinner table.
- Ingredient Quality: Using a fresh, high‑quality pork butt ensures the best flavor and texture. The oil, spices, and apple cider are all pantry staples that elevate the dish. This commitment to quality guarantees a memorable meal.
- Presentation: The golden crust and juicy interior make for an eye‑catching plate that looks as good as it tastes. A simple garnish of fresh herbs or a squeeze of citrus can elevate the visual appeal. The dish feels special without extra effort.
Alright, let's break down exactly what goes into this masterpiece. Kitchen Hack: If you’re short on time, you can pre‑season the pork the night before and refrigerate it uncovered. This allows the spices to penetrate deeply and reduces cooking time by 5 minutes. Just remember to let the meat sit at room temperature for 20 minutes before roasting to ensure even cooking.
Inside the Ingredient List
The Flavor Base
Olive oil is the first hero of this dish, providing a silky coating that helps the spices adhere. It also contributes a subtle fruity note that balances the smokiness of the paprika. If you’re looking for a healthier alternative, consider grapeseed oil, which has a higher smoke point and a neutral flavor. A good rule of thumb is to use enough oil to lightly coat the entire surface of the pork, about 2 tablespoons for a medium‑sized butt.
The Texture Crew
The pork butt itself is the star, and its marbling is essential for moisture. A well‑marbled cut will render fat during roasting, creating a naturally tender and juicy interior. If you can’t find a whole butt, a pork shoulder or even a pork rib roast can work, but the cooking time will vary. A quick tip: pat the pork dry with paper towels before seasoning to promote a crispier crust.
The Unexpected Star
Apple cider or broth is the secret sauce that adds subtle sweetness and keeps the meat moist. Apple cider brings a bright, fruity undertone that cuts through the richness, while broth adds savory depth. If you’re on a low‑sodium diet, use a reduced‑sodium broth or a splash of water with a pinch of salt. A small splash of cider also helps the spices caramelize, giving the crust an irresistible shine.
The Final Flourish
Dried herbs—thyme, rosemary, and oregano—are the aromatic finish that ties all flavors together. These herbs release their oils during roasting, creating a fragrant aroma that fills the kitchen. If you’re using fresh herbs, double the quantity to compensate for the loss of flavor during cooking. A pinch of crushed red pepper can add a subtle heat for those who like a little kick.
Fun Fact: The use of apple cider in pork roasting dates back to the 1800s when farmers discovered that the natural sugars caramelized beautifully, turning a simple roast into a feast. This technique is still popular in many Southern kitchens today, proving that tradition and taste go hand in hand.
Everything's prepped? Good. Let's get into the real action.
The Method — Step by Step
- Preheat your oven to 425°F (220°C). Place a wire rack on a rimmed baking sheet to allow heat circulation around the pork. This ensures even browning and prevents the meat from sitting in its own juices. Let the oven warm up while you finish the seasoning. A hot oven is the secret to that first glorious crackle.
- Pat the pork butt dry with paper towels; moisture is the enemy of a crisp crust. Rub olive oil all over the surface, ensuring every inch is coated. Sprinkle 2 tablespoons of salt evenly, then add pepper, garlic powder, onion powder, smoked paprika, and dried herbs. Mix the spices in a small bowl before applying to avoid uneven distribution.
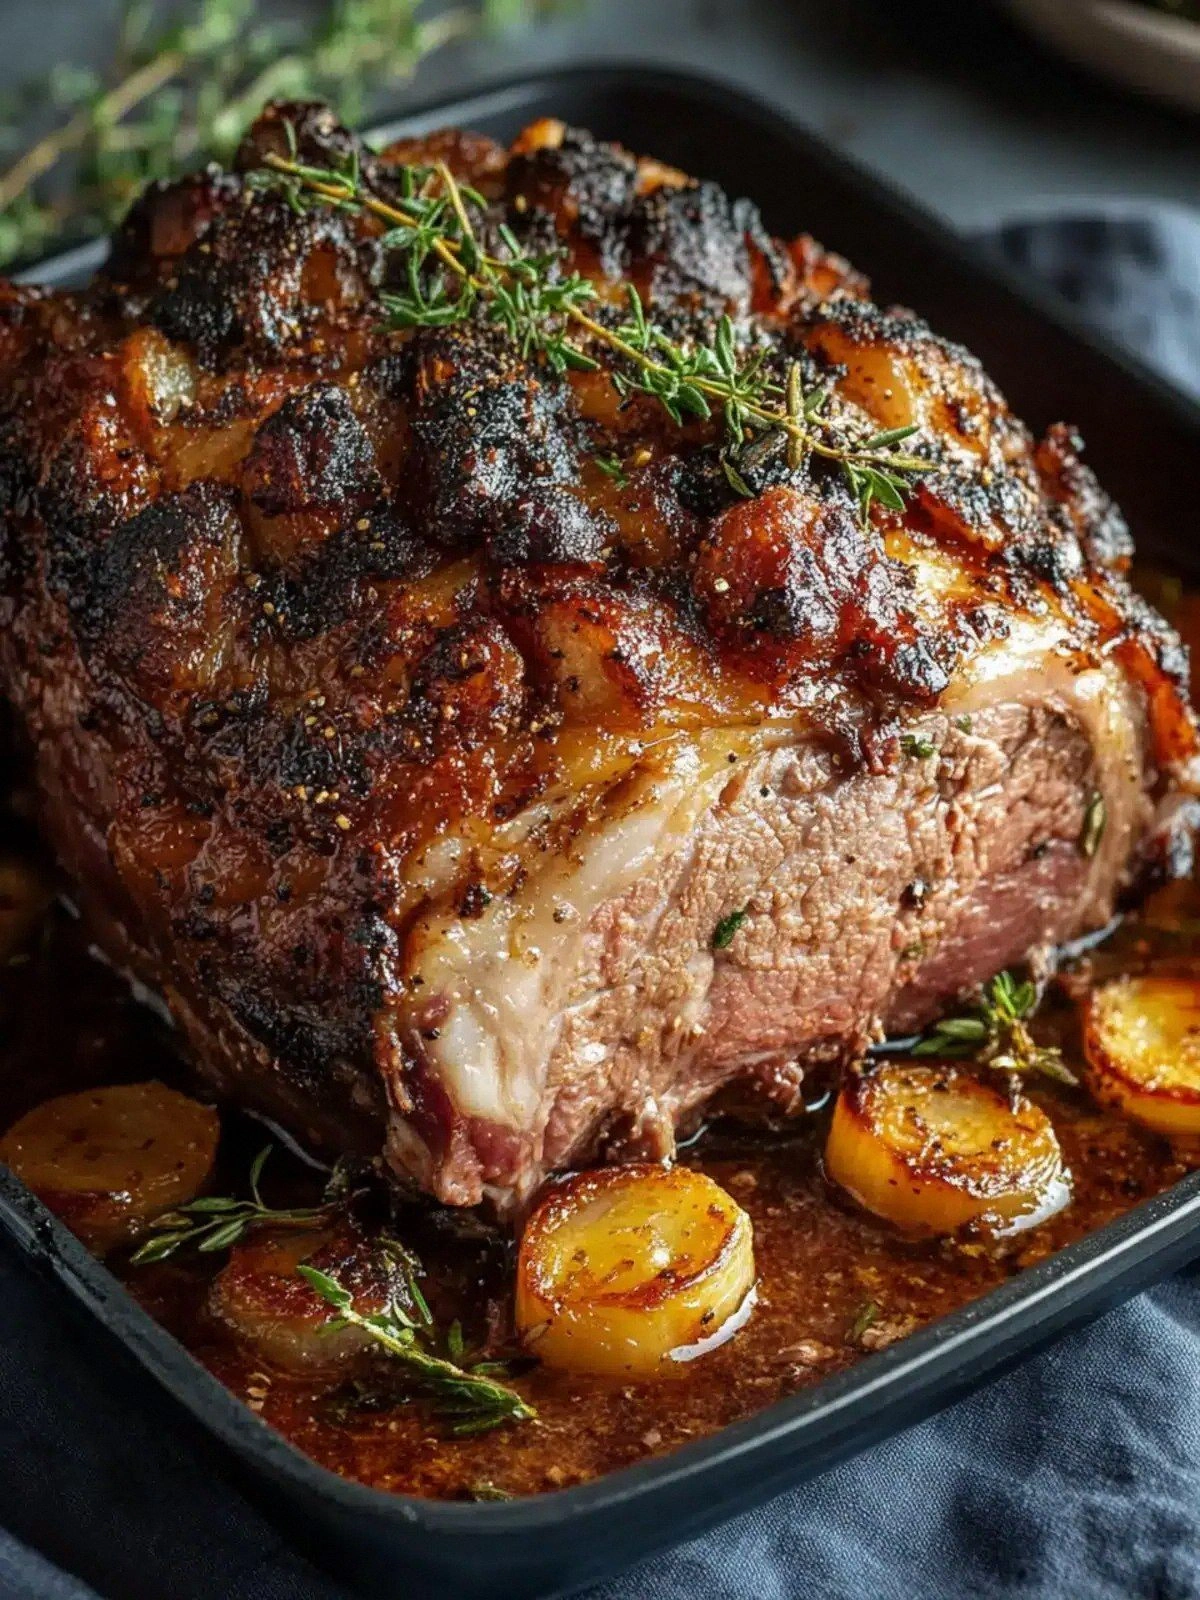
- Place the seasoned pork on the prepared rack, fat side up. The fat will baste the meat as it renders, keeping the interior juicy. Insert a meat thermometer into the thickest part of the butt; you’re aiming for 190°F (88°C) for pull‑apart tenderness. This step is crucial for a perfectly cooked roast.
- Roast the pork for 30 minutes at 425°F. After that time, reduce the temperature to 350°F (175°C) and continue roasting until the thermometer reads 190°F. The pork should have a deep mahogany crust that’s almost caramelized. If you’re short on time, you can skip the temperature drop, but the crust will be less pronounced.
- Halfway through the low‑temperature roast, pour 0.5 cup of apple cider or broth into the pan. This liquid creates steam, preventing the meat from drying out and adding a subtle glaze. Stir the liquid around to coat the pork evenly. The aroma will intensify, signaling that the dish is nearing perfection.
- When the pork reaches 190°F, remove it from the oven and tent it loosely with aluminum foil. Let it rest for 15 minutes; this allows the juices to redistribute throughout the meat. During this rest, the crust will set, making it easier to slice. Resting is a crucial step that many overlook, but it’s what makes the difference between good and great.
- Watch Out: Avoid cutting into the pork immediately after removing it from the oven. The juices are still active, and cutting too soon will cause the meat to become dry. If you’re tempted to slice right away, wait until the resting period is over. A quick check: the juices should run clear when you press the thickest part with a fork.
- Using a sharp carving knife, slice the pork into thin, even pieces. The knife should glide through the meat like butter. Arrange the slices on a platter, arranging them in a fan shape for an elegant presentation. The visual appeal of a well‑carved roast is half the enjoyment.
- Serve immediately with your choice of sides—roasted root vegetables, creamy mashed potatoes, or a fresh green salad. Garnish with fresh herbs or a squeeze of citrus if you like a bright finish. The pork’s rich flavor pairs wonderfully with both hearty and light accompaniments. And remember, the best part is the lingering aroma that will keep your guests coming back for more.
That's it — you did it. But hold on, I've got a few more tricks that'll take this to another level. Kitchen Hack: For an extra smoky depth, place a small piece of charred apple wood on the bottom of the pan during roasting. The wood will release a subtle smoke that infuses the meat. Just be careful not to burn it, or the flavor will become bitter. This hack is a game‑changer for those who love a deep, campfire‑style taste.
Insider Tricks for Flawless Results
The Temperature Rule Nobody Follows
Many cooks assume a single temperature is enough for roasting, but that’s a myth. The initial high heat creates the crust, while the lower temperature ensures the inside stays tender. If you skip the temperature drop, the crust will be less crisp, and the meat might stay a bit too firm. I once roasted a pork butt at a constant 400°F, and it turned out dry on the inside and chewy on the outside. The two‑stage method is the secret to a perfectly balanced roast.
Why Your Nose Knows Best
Before you even touch the meat, give it a good sniff. The aroma should be savory with a hint of sweetness from the apple cider. If it smells off, the pork might be past its prime. Fresh pork will have a clean, slightly sweet scent, while an off odor indicates spoilage. Trusting your nose can save you from a culinary disaster.
The 5-Minute Rest That Changes Everything
Some chefs swear by a 5‑minute rest, but for pork butt, 15 minutes is the sweet spot. This allows the juices to redistribute, preventing them from spilling out when you cut. If you cut too soon, you’ll end up with a dry, tough roast. I’ve seen people cut after 5 minutes and immediately regret it. The extra 10 minutes is worth the difference in texture.
Use a Meat Thermometer for Precision
A digital thermometer is your best friend. Aim for 190°F for pull‑apart tenderness. If you’re cooking for a crowd, you can let the meat rest at 195°F, and it will stay juicy even after a few hours. Avoid guessing based on time alone; the temperature ensures consistency every time.
Let the Meat Rest Under Foil, Not Tight
When you tent the pork, leave a small gap for steam to escape. This prevents the crust from steaming and becoming soggy. Tight foil can trap moisture and ruin the crispness. I learned this the hard way when a tightly wrapped roast came out soggy and bland. A loose tent preserves the crunch.
Reheat with Care
If you need to reheat leftovers, do it gently in a low oven at 250°F. Add a splash of apple cider or broth to keep the meat moist. Cover the roast loosely with foil to trap steam. This method will revive the pork without drying it out. I’ve used this technique for week‑night dinners and it works like a charm.
Kitchen Hack: For a quick glaze, whisk together equal parts honey and apple cider vinegar. Brush this over the pork during the last 10 minutes of roasting. The glaze caramelizes beautifully, adding a sweet, tangy finish that elevates the dish.
Creative Twists and Variations
This recipe is a playground. Here are some of my favorite ways to switch things up:
Maple‑Glazed Pork
Swap the apple cider for maple syrup in the glaze. The syrup adds a deeper sweetness and a glossy finish. Pair it with toasted pecans for an added crunch. This variation is perfect for holiday dinners.
Spicy Chipotle Rub
Add a tablespoon of chipotle powder to the spice mix for a smoky heat. The chipotle gives the pork a subtle kick that pairs well with a cool avocado salsa. This version works great for a summer barbecue.
Herb‑Infused Citrus Roast
Replace the dried herbs with fresh rosemary and thyme, and add a squeeze of fresh orange juice to the pan. The citrus brightens the flavor and adds a refreshing note. Serve with a light salad to balance the richness.
Asian‑Inspired Five‑Spice
Use Chinese five‑spice powder in place of smoked paprika. Add a splash of soy sauce and a drizzle of sesame oil during the last 10 minutes of roasting. The result is a savory, aromatic pork that pairs beautifully with steamed rice.
Beer‑Battered Pork
Instead of apple cider, use a light lager to create a subtle beer flavor. The carbonation helps keep the meat moist and adds a mild bitterness. Pair it with a side of coleslaw for a classic comfort meal.
Moroccan Spice Fusion
Incorporate cumin, coriander, and cinnamon into the spice rub. Add a splash of preserved lemon juice for a tangy twist. Serve over couscous with toasted almonds for a Mediterranean flair.
Garlic‑Herb Butter Finish
After roasting, melt butter with minced garlic, parsley, and a pinch of salt. Drizzle this over the sliced pork for a buttery, garlicky finish. This simple addition elevates the dish to gourmet status.
Vegan Pork‑Like Roast
Replace pork with seitan or tofu, seasoned with the same spice blend. Roast until golden and serve with a vegan apple sauce. This variation keeps the flavor profile while accommodating dietary preferences.
Storing and Bringing It Back to Life
Fridge Storage
Cool the pork to room temperature, then wrap it tightly in aluminum foil and store in the refrigerator for up to 4 days. The foil prevents the meat from drying out and preserves the crisp crust. When you’re ready to serve, reheat in a 250°F oven for 15 minutes.
Freezer Friendly
Place the pork in a freezer‑safe bag, removing as much air as possible. Freeze for up to 3 months. Thaw overnight in the refrigerator before reheating. This method keeps the pork juicy and flavorful.
Best Reheating Method
Reheat the pork in a low oven at 250°F for 10 minutes, then finish with a quick sear in a hot pan to restore the crust. Add a splash of water or broth before reheating to steam the meat gently. This technique revives the pork’s original texture and aroma.
Serving Suggestions
Serve the pork with a side of roasted root vegetables for a hearty, comforting meal. The caramelized sweetness of carrots and parsnips complements the savory pork beautifully. For a lighter option, pair it with a fresh green salad tossed in a citrus vinaigrette. The bright acidity cuts through the richness, creating a balanced plate.
Another great pairing is a creamy mashed potato or a fluffy polenta. The smooth texture of the potatoes acts as a neutral backdrop, letting the pork’s flavors shine. Alternatively, a crusty baguette or a warm dinner roll can be used to scoop up the juicy pork, turning every bite into a delicious, indulgent experience.