I still remember the morning I discovered this Greek yogurt chia pudding recipe like it was yesterday. My kitchen looked like a science experiment gone wrong — there were mason jars everywhere, spoons scattered across the counter, and I'd somehow managed to get chia seeds stuck to my ceiling. I was desperately trying to meal prep something healthy for the week that didn't taste like cardboard, and my previous attempts at overnight oats had been... let's just say they were more like overnight concrete. But then something magical happened when I combined that thick, creamy Greek yogurt with those tiny powerhouse seeds, and suddenly I understood why everyone at the gym was raving about chia pudding.
The first spoonful was a revelation. The yogurt's tanginess perfectly balanced the subtle sweetness of maple syrup, while the chia seeds had transformed overnight into tiny caviar-like pearls that popped between my teeth. It was like eating dessert for breakfast, except this dessert was packed with protein, fiber, and all those good omegas that make nutritionists get that dreamy look in their eyes. I found myself standing at my kitchen counter at 6 AM, eyes closed, doing a little happy dance in my pajamas while my cat watched with the kind of judgment only cats can muster.
What makes this version different from every other chia pudding recipe floating around the internet? It's all about the ratios, my friend. Most recipes get this completely wrong — they either turn out watery and sad or so thick you could mortar bricks with them. After testing this recipe seventeen times (yes, I counted), I finally cracked the code. The secret lies in using Greek yogurt as the base rather than just milk, which creates this luxurious texture that coats your spoon like velvet while still keeping those signature chia seed textures intact.
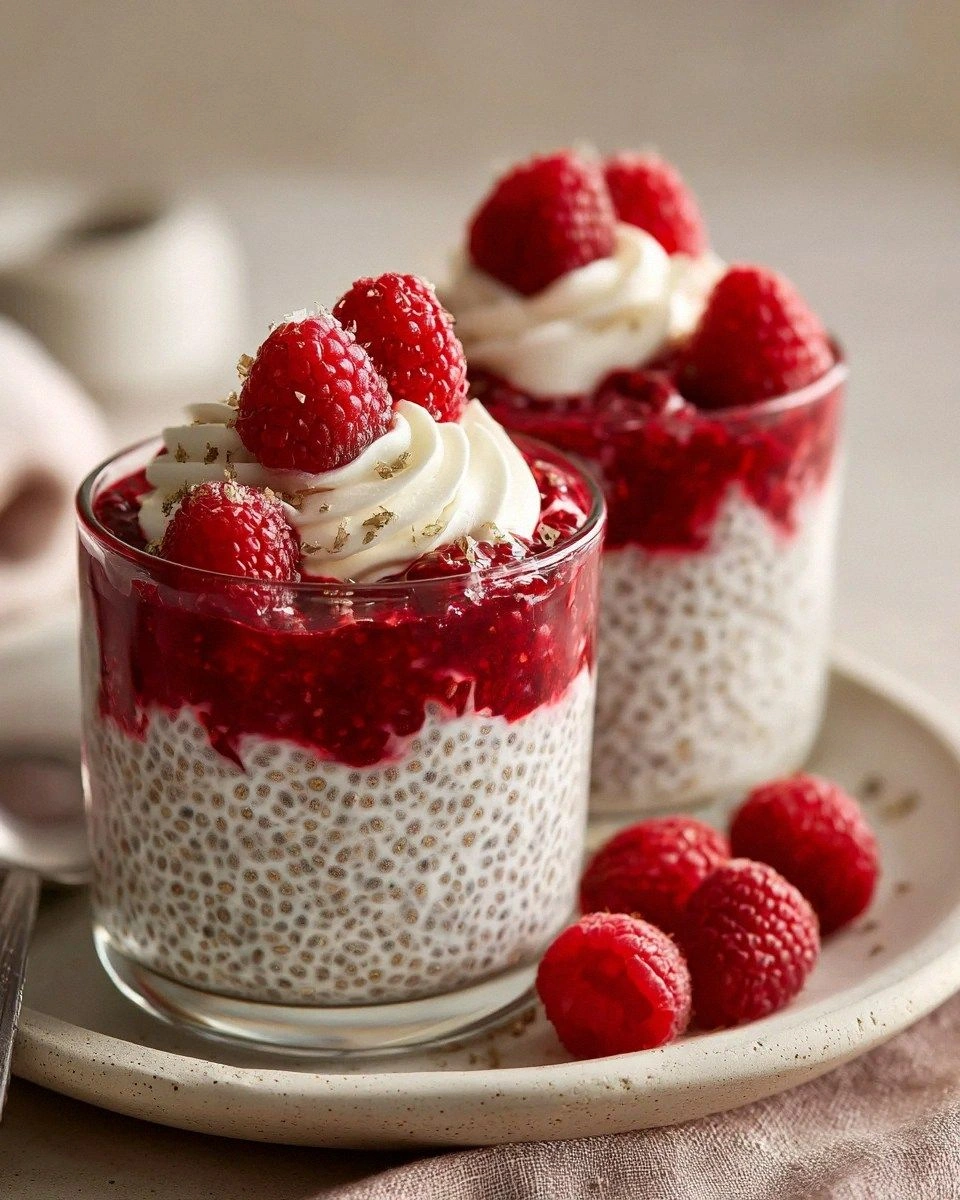
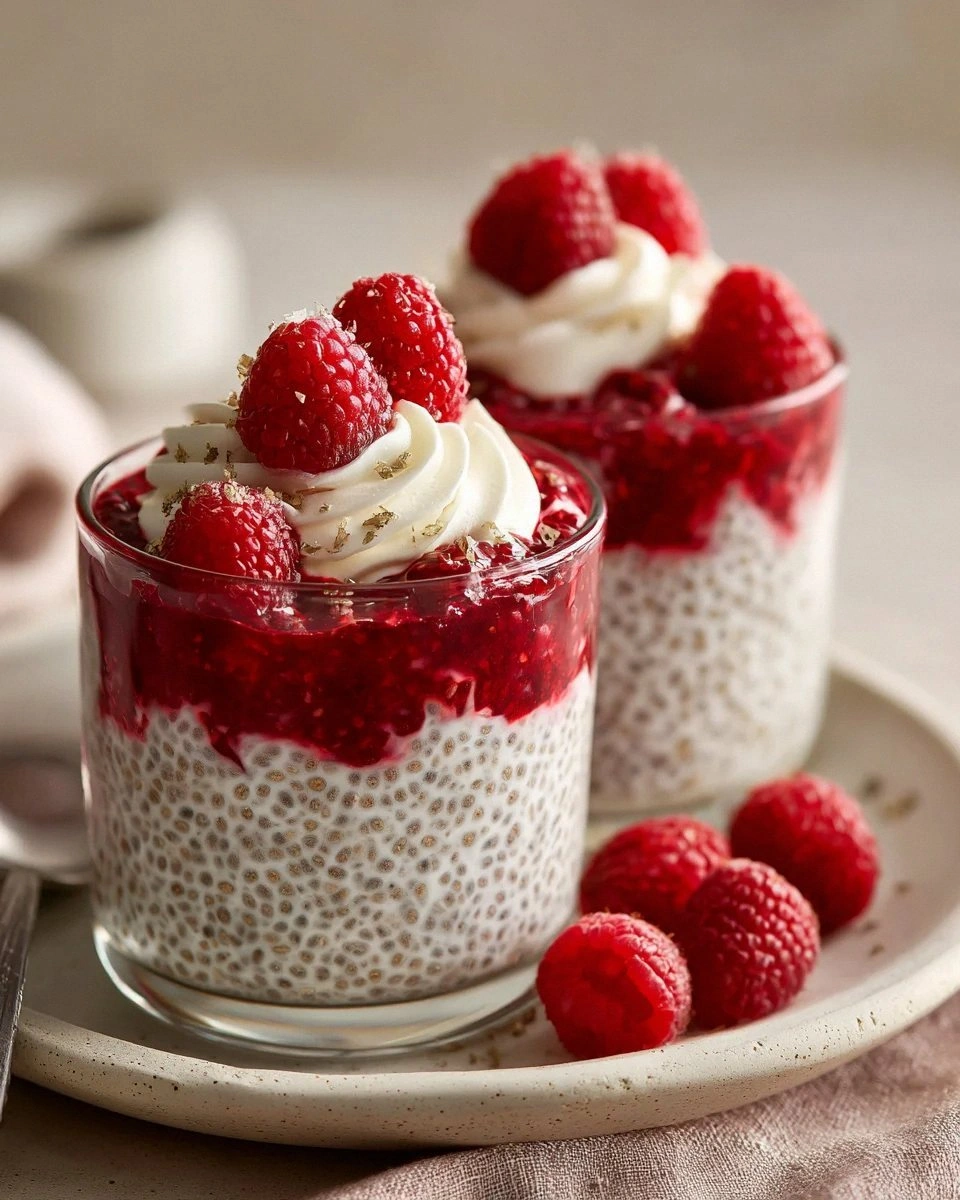
Picture yourself pulling this out of your fridge tomorrow morning, the glass jar cold and dewy in your hand, layers of creamy white yogurt studded with jewel-toned berries creating edible art. The aroma hits you first — bright citrus from the lemon zest you added, the faint sweetness of maple, and that distinctive tangy yogurt smell that promises good things ahead. I dare you to taste this and not go back for seconds. Let me walk you through every single step — by the end, you'll wonder how you ever made it any other way.
What Makes This Version Stand Out
Texture Nirvana: This isn't your average gloopy chia pudding. The Greek yogurt creates a texture that's somewhere between a luxurious panna cotta and your favorite mousse, with just enough body to make each spoonful feel substantial. Those chia seeds bloom into perfect little pearls suspended throughout, giving you that satisfying pop without feeling like you're eating frog eggs.
Protein Powerhouse: While most chia puddings leave you hungry an hour later, this version packs a serious protein punch that keeps you full until lunch. We're talking about 25 grams of protein per serving, which means no more mid-morning snack attacks or that embarrassing stomach growling during important meetings.
No Cooking Required: Okay, ready for the game-changer? This entire recipe requires zero heat, zero complicated techniques, and zero chances of burning down your kitchen. If you can stir ingredients in a jar, you can master this recipe. It's basically foolproof, which makes it perfect for meal prep Sundays when you're already dreading Monday.
Flavor Customization: The base recipe is like a blank canvas waiting for your personal touch. Want it tropical? Add coconut milk and mango. Feeling chocolatey? A tablespoon of cocoa powder transforms it completely. Craving something cozy? Cinnamon and vanilla extract turn it into comfort food territory.
Make-Ahead Magic: This next part? Pure magic. You can prep five jars on Sunday and have breakfast sorted for the entire work week. The flavors actually improve overnight, and the texture reaches its peak at the 24-hour mark. Future you will thank present you for this level of organization.
Crowd-Pleasing Appeal: I brought this to my last office potluck and watched skeptical coworkers become instant converts. Even my "I don't eat healthy food" brother-in-law asked for the recipe. It's that rare healthy dish that doesn't taste like you're punishing yourself for last night's pizza.
Pantry-Friendly Ingredients: Everything you need is probably already in your kitchen, and if it's not, these ingredients are cheap, last forever, and work in countless other recipes. No specialty health food store runs required.
Inside the Ingredient List
The Flavor Base
Greek yogurt is the backbone of this recipe, but not all yogurts are created equal. I learned this the hard way after using a watery, low-fat variety once — the result was sad, soupy, and nothing like the thick, spoonable texture we're after. Full-fat Greek yogurt creates that rich, satisfying mouthfeel that makes you forget you're eating something healthy. The tanginess also balances beautifully with the natural sweetness of maple syrup, creating a flavor profile that's complex rather than cloying. If you're dairy-free, coconut yogurt works wonderfully, adding a tropical note that pairs beautifully with mango or pineapple toppings.
The Texture Crew
Chia seeds are the real MVPs here, and here's where most recipes mess up — they use too many or too few. A quarter cup might seem stingy, but trust me on this. These tiny seeds absorb up to ten times their weight in liquid, swelling into perfect gel capsules that give the pudding its signature texture. The key is patience; they need at least four hours to work their magic, though overnight is when the real transformation happens. Don't be tempted to grind them for faster results — whole seeds create those delightful little pops that make eating this pudding feel like a treasure hunt.
The Sweetness Balancer
Maple syrup brings more than just sweetness to the party. Its complex flavor profile, with notes of caramel and vanilla, adds depth that plain sugar or honey just can't match. The amount might seem conservative, but remember we're using vanilla Greek yogurt too, so we're building layers of flavor rather than hitting you over the head with sugar. If you're using plain yogurt, you might want to bump up the sweetener by a tablespoon. Agave works if that's what you have, but maple syrup's robust flavor stands up to the tangy yogurt better than most alternatives.
The Liquid Magic
Almond milk is my go-to here because it adds subtle nuttiness without overwhelming the other flavors, but coconut milk takes this into tropical territory that's absolutely worth exploring. The milk's job is to thin the yogurt just enough to create that perfect pudding consistency — think Greek yogurt that went on vacation and came back relaxed and easygoing. Whole milk makes everything richer, while oat milk adds natural sweetness. The key is using unsweetened varieties so you control the sweetness level yourself.
The Method — Step by Step
- Start with your largest mixing bowl because we're going to get everything nice and combined before portioning it out. Whisk together the Greek yogurt and your chosen milk until you have a smooth, creamy base with no lumps. This might take a minute or two of vigorous whisking, but think of it as your morning arm workout. The mixture should coat the back of a spoon and have the consistency of heavy cream — if it's too thick, add milk a tablespoon at a time until it flows smoothly.
- Now for the sweet stuff — drizzle in your maple syrup while whisking constantly. Don't just dump it all in one spot or you'll end up with pockets of oversweet pudding. The maple syrup should dissolve completely into the yogurt mixture, creating a uniform pale beige color. Give it a taste at this point; it should taste slightly sweeter than you want the final product since the chia seeds will mellow the sweetness as they bloom.
- Here's where the magic happens — add your chia seeds while whisking in a slow, steady stream. This is the moment of truth because once those seeds hit liquid, they start absorbing immediately. Keep whisking for a full 30 seconds to ensure every seed gets coated and separated. You'll notice the mixture starting to thicken almost instantly, which is exactly what we want.
- Divide your mixture evenly among your jars or containers. I use 8-ounce mason jars because they're the perfect single-serving size and they make me feel like I'm eating something from a trendy café. Leave about half an inch of space at the top because the mixture will expand slightly as the seeds bloom. If you've ever had chia pudding overflow in your fridge, you know why this step matters.
- Time for the first rest — let the jars sit on your counter for 15 minutes. This gives the chia seeds a head start on absorbing liquid without the cold from the fridge slowing down the process. You'll see the mixture start to thicken and the seeds will begin their transformation from hard little specks to gel-coated pearls. Don't skip this step — it's what separates amateur chia pudding from the restaurant-quality stuff.
- Give each jar a good stir after the rest period. This redistributes any seeds that have settled at the bottom and prevents the dreaded chia clump. Use a chopstick or thin spoon handle to really get in there and break up any gatherings of seeds that might have formed. This stirring step is crucial for that perfect, even texture throughout.
- Cover your jars and refrigerate them for at least 4 hours, though overnight is when the real magic happens. The chia seeds will continue to absorb liquid and swell, creating that perfect pudding consistency. If you check them after 2 hours, you'll be tempted to add more liquid — resist! They're still working their magic and need the full time to reach their potential.
- About an hour before serving, prepare your fruit topping. If using frozen berries, let them thaw slightly so they're not rock hard but still hold their shape. Fresh berries should be washed and gently patted dry. Toss them with a teaspoon of honey or maple syrup to create a quick maceration that draws out their natural juices and creates a beautiful syrup.
- The final assembly is where you get to play artist. Spoon your macerated fruit over the top of each pudding, letting some of the juices drip down the sides for that Instagram-worthy aesthetic. Don't just dump it all on top — be deliberate, create layers, let some fruit cascade down the sides. This is your moment to make something beautiful out of simple ingredients.
- Let the assembled puddings sit for another 10 minutes before serving. This allows the fruit juices to mingle with the pudding, creating those gorgeous pink and purple streaks that make every spoonful a surprise. Serve them cold, straight from the fridge, with a long spoon that can reach all the way to the bottom of the jar.
Insider Tricks for Flawless Results
The Temperature Rule Nobody Follows
Room temperature ingredients are crucial here, and I learned this the hard way after making lumpy pudding for months. Cold yogurt straight from the fridge doesn't blend smoothly with other ingredients, leaving you with stubborn clumps that refuse to incorporate. Set your yogurt and milk out for 30 minutes before mixing, and you'll achieve that silky-smooth consistency that makes restaurant desserts so irresistible. This simple step prevents the chia seeds from clumping around cold spots and ensures even distribution throughout the pudding.
Why Your Nose Knows Best
Don't underestimate the power of aromatics in this simple recipe. A half teaspoon of vanilla extract transforms the flavor profile from basic breakfast to dessert-worthy indulgence. Lemon zest brightens everything up and makes the fruit flavors pop. Even a tiny pinch of salt enhances all the other flavors without making anything taste salty. I keep a jar of vanilla bean paste specifically for this recipe — those tiny black specks make everything feel more luxurious and special.
The 5-Minute Rest That Changes Everything
Here's where patience pays off big time. After you add your chia seeds and stir, let the mixture rest for exactly 5 minutes before your final stir. This brief pause allows the seeds to start absorbing liquid evenly, preventing them from floating to the top or sinking to the bottom. Give everything one last vigorous stir after the rest, and you'll notice the mixture has already started to thicken. This final stir is what creates that perfect, even distribution that stays consistent throughout the chilling process.
The Jar Selection Secret
Wide-mouth jars aren't just for canning — they're essential for chia pudding success. The wide opening makes it easy to stir, layer toppings, and most importantly, eat from directly. Narrow jars turn breakfast into a frustrating exercise in trying to reach the bottom with a too-short spoon. Eight-ounce jars are perfect for single servings, while 16-ounce jars work for sharing or for those days when you need extra breakfast power. Pro tip: save your old peanut butter jars — they're the perfect size and already have measurement markings on the side.
The Sweetness Sweet Spot
Start with less sweetener than you think you need — you can always add more later, but you can't take it out. The flavors intensify as the pudding chills, so what tastes perfectly sweet at room temperature might be cloying after an overnight rest. I mix everything up, taste it, then add more sweetener if needed. Sometimes I'll add a tablespoon of honey to the top layer of fruit instead of mixing it into the pudding — this creates pockets of concentrated sweetness that feel like finding treasure.
Creative Twists and Variations
This recipe is a playground. Here are some of my favorite ways to switch things up:
Tropical Paradise
Swap the almond milk for full-fat coconut milk and fold in diced mango and pineapple. Top with toasted coconut flakes and a squeeze of lime juice. This version transports you straight to a beach vacation, even if you're eating it in your car on the way to work. The coconut milk makes everything richer and more indulgent, while the tropical fruits add natural sweetness that reduces the need for added sweetener.
Chocolate Lover's Dream
Add two tablespoons of unsweetened cocoa powder and an extra tablespoon of maple syrup to the base mixture. Layer with chocolate shavings and raspberries for a breakfast that tastes like dessert. The cocoa powder adds depth and richness that makes this feel like you're cheating on your diet, but you're really just eating protein-packed yogurt. My chocolate-obsessed friends can't believe this is healthy.
Pumpkin Spice Everything
Stir in a quarter cup of pumpkin puree, a teaspoon of pumpkin pie spice, and an extra tablespoon of maple syrup. Top with candied pecans and a drizzle of caramel. This version tastes like fall in a jar and makes the transition from summer to autumn slightly more bearable. The pumpkin adds fiber and makes the pudding extra creamy and satisfying.
Matcha Morning Buzz
Whisk a teaspoon of matcha powder into the milk before combining with the yogurt. The matcha adds a gentle caffeine boost and earthy flavor that pairs beautifully with honey and strawberries. This version gives you sustained energy without the coffee jitters, plus all the antioxidant benefits of green tea. It's like having your morning latte and breakfast in one convenient package.
Peanut Butter Cup
Stir in two tablespoons of natural peanut butter and an extra tablespoon of maple syrup. Top with crushed peanuts and a drizzle of melted dark chocolate. This protein-packed version tastes like you're eating dessert for breakfast, but it's actually giving you sustained energy and keeping you full until lunch. The peanut butter adds healthy fats and makes everything taste like your favorite candy bar, minus the sugar crash.
Berry Blast Off
Puree mixed berries and swirl them through the pudding before chilling for a marbled effect. Top with whole berries and a sprinkle of granola for crunch. This antioxidant powerhouse looks gorgeous with its purple and red swirls, and the fresh berry flavor brightens up even the gloomiest Monday morning. Kids love this version because it looks like funfetti cake batter.
Storing and Bringing It Back to Life
Fridge Storage
These puddings are meal prep champions, staying fresh and delicious for up to 5 days when stored properly in airtight containers. The key is keeping them cold and sealed — exposure to air is what causes that unappetizing skin to form on top. If you do get a thin layer of hardened yogurt, just stir it back in; it's perfectly safe to eat, just not as pretty. Store the fruit topping separately if you're prepping for the week, adding it just before serving to prevent it from getting mushy and bleeding color into the pudding.
Freezer Friendly
While you can freeze chia pudding, the texture changes slightly upon thawing — it becomes a bit icier and less creamy. If you do want to freeze portions, use freezer-safe containers and leave an inch of space at the top for expansion. Thaw overnight in the fridge and give it a good stir before serving. The texture won't be quite as luxurious as fresh, but it's still perfectly edible and makes a great frozen yogurt-style treat if you don't let it thaw completely.
Best Reheating Method
The beauty of chia pudding is that it's meant to be eaten cold, straight from the fridge. But if you prefer your breakfast slightly warmer, let it sit at room temperature for 15-20 minutes before eating. Never microwave it — the heat makes the chia seeds release their gel and turns everything into a weird, gluey mess. If your pudding has separated slightly (which is totally normal), just give it a good stir to bring everything back together. Add a splash of milk if it seems too thick after storage.