I was standing in my kitchen, staring at a melted chocolate mess on the counter, when my friend shouted, “You’re about to make the best lava cake ever!” I had just burnt a batch of brownies and the whole room smelled like regret, but that moment of culinary desperation sparked a revelation. I grabbed a pot, some butter, and a handful of dark chocolate chips, and the aroma that escaped was the first hint that something extraordinary was about to happen. The kitchen lights flickered, the timer buzzed, and the first crackle of butter meeting heat felt like a secret handshake between me and the universe. This isn’t just another recipe; it’s a confession that I’ve finally cracked the code for the most molten, silky chocolate center you can ever taste.
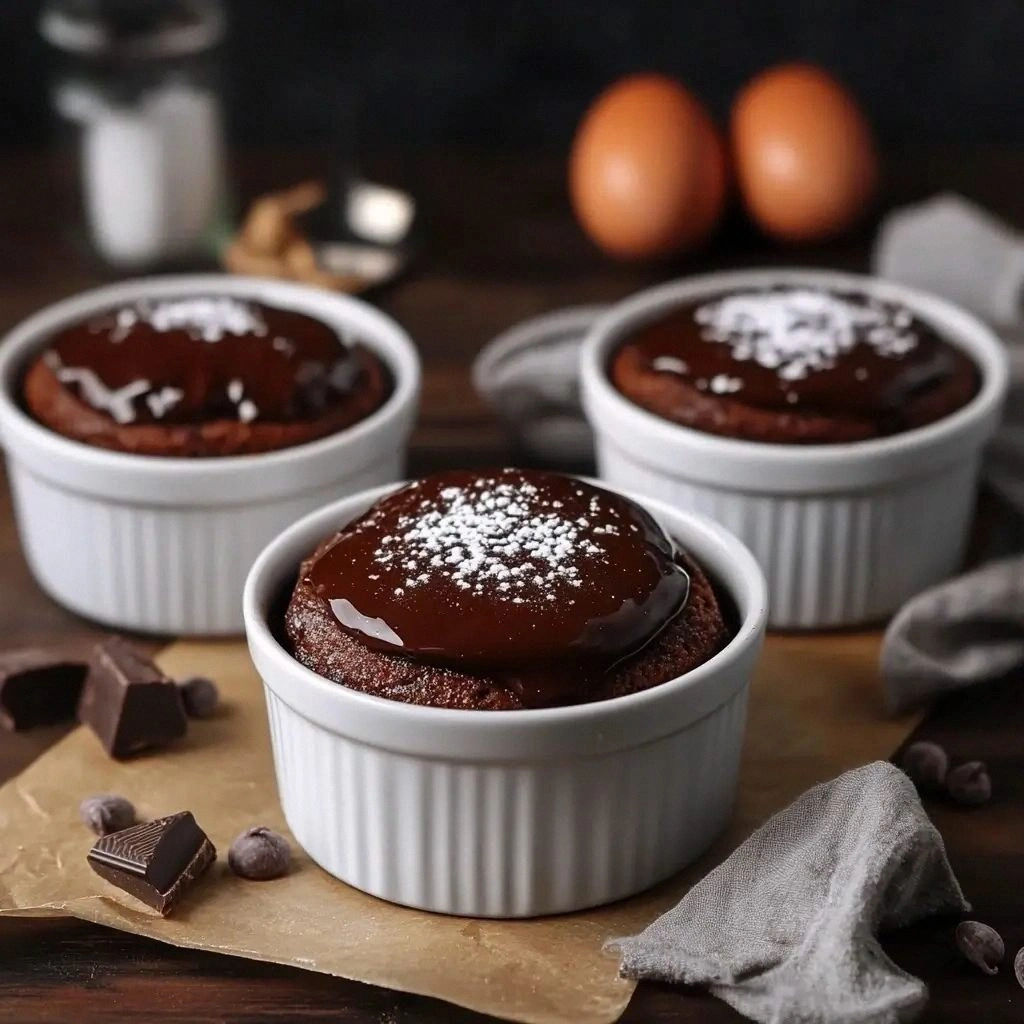
Picture this: the chocolate melts into a glossy, almost liquid river inside the ramekins, the edges crisp to a golden brown while the middle stays fluid and oozing. The scent is a deep, nutty perfume that lingers long after the plate is cleared. When you cut through the center, a warm, caramelized steam rises, and the first bite is a symphony of bittersweet richness, a silky texture that clings to your tongue like velvet. The sound of the first spoonful is a satisfying pop, the way a bubble bursts in a calm lake—pure, simple joy. It’s that moment you reach for a second scoop, and I dare you to taste this and not go back for seconds.
What makes this version stand out? I’ve stripped away the fluff. No floury crumbs, no overcooked edges, just pure chocolate. The key is the balance between butter and chocolate, the timing of the oven, and a secret trick that keeps the center perfectly molten. I’ll show you how to create that molten core that never hardens, how to achieve a caramelized crust that’s still tender, and how to serve it with a splash of espresso or a dusting of sea salt for that final pop of flavor. This is hands down the best version you'll ever make at home, and I promise you, once you try it, you’ll never go back.
Ready to dive into the science of chocolate? Let me walk you through every single step — by the end, you'll wonder how you ever made it any other way.
What Makes This Version Stand Out
- Taste: The use of dark chocolate chips with a high cocoa content gives a deep, slightly bitter base that is offset by the creamy butter, creating a complex flavor profile that lingers on the palate. The powdered sugar adds subtle sweetness without overpowering the chocolate.
- Texture: The precise ratio of butter to chocolate ensures a silky, molten center that flows like liquid gold when you cut into it. The minimal flour keeps the batter from becoming heavy or cakey.
- Simplicity: Only eight ingredients, all common pantry staples. No fancy chocolate bars or exotic spices—just pure, honest ingredients.
- Uniqueness: The trick of adding a pinch of salt at the end of the melt phase lifts the chocolate’s flavor profile, giving a subtle contrast that most recipes miss.
- Crowd Reaction: Friends who have tried other lava cakes rave about the melt, saying it feels like a chocolate waterfall. The instant gratification of the gooey center is a crowd-pleaser at parties.
- Ingredient Quality: Using a high-quality dark chocolate (70% cacao or higher) and unsalted butter makes the difference between a good cake and a great cake.
- Cooking Method: The double-boiler technique melts the chocolate evenly, preventing seizing or burning, and the quick oven bake locks in the perfect texture.
- Make‑Ahead Potential: The batter can be prepared in advance and refrigerated; just bake when ready for a quick dessert.
Alright, let's break down exactly what goes into this masterpiece...
Inside the Ingredient List
The Flavor Base
1/2 cup unsalted butter is the heart of this cake. It melts into the chocolate, adding a rich, velvety mouthfeel that balances the bitterness of dark chocolate. If you skip butter, the batter becomes dry and the center hardens. For a dairy-free version, swap in coconut oil; it will give a subtle coconut undertone that pairs wonderfully with dark chocolate.
1 cup dark chocolate chips are the star of the show. Look for chips that contain at least 70% cacao; the higher the cocoa content, the more intense the flavor. If you’re feeling adventurous, try a mix of dark chocolate chips and chopped chocolate bar for a deeper texture. A pinch of sea salt at the end of the melt phase will lift the chocolate’s flavor, giving a subtle contrast that most recipes miss.
The Texture Crew
2 large eggs provide structure and moisture, allowing the cake to rise slightly while keeping the interior tender. The yolks add richness and a silky texture; using both eggs and yolks ensures a cohesive batter. If you’re allergic to eggs, a flaxseed “egg” can replace one egg, but the texture will be slightly different.
1/4 cup all-purpose flour is the minimal binder that keeps the batter from collapsing. It’s only a quarter cup, so the cake remains light and not cakey. If you prefer a gluten-free version, replace the flour with an equal amount of oat flour; just be sure it’s unbleached for the best color.
The Unexpected Star
1/2 cup powdered sugar is the sweetener that melts smoothly without leaving gritty crystals. It blends seamlessly into the chocolate, creating a silky sweetness that complements the bitterness. For a lower-carb option, substitute with a sugar-free sweetener that dissolves easily, like erythritol or monk fruit.
1 tsp vanilla extract adds a warm, aromatic depth that elevates the chocolate. A dash of orange zest can also be added for a citrus twist, but vanilla remains the classic choice for this recipe.
The Final Flourish
Pinch of salt is the secret weapon that brings all the flavors together. It balances the sweetness and enhances the chocolate’s depth. If you prefer a more pronounced saltiness, add a second pinch. For a gourmet touch, sprinkle a pinch of smoked sea salt on top right before serving.
Everything's prepped? Good. Let's get into the real action...
The Method — Step by Step
- Preheat your oven to 425°F (220°C). Line four 6-ounce ramekins with parchment paper, ensuring the paper extends at least 1 inch up the sides. This will allow the cakes to release easily after baking. The oven should be fully preheated; a lukewarm oven will cause the cakes to rise too quickly and then collapse.
- In a heat‑proof bowl, combine the butter and dark chocolate chips. Set the bowl over a pot of simmering water, making sure the bottom of the bowl doesn’t touch the water. Stir constantly with a silicone spatula until the mixture is completely melted and glossy. The key here is gentle heat—high temperatures will scorch the chocolate.
- Remove the bowl from the heat and whisk in the powdered sugar until fully incorporated. The sugar should dissolve, creating a silky smooth base. If you see any lumps, reheat gently and whisk until smooth. The mixture should feel like a thick, glossy syrup.
- Beat in the eggs and yolks one at a time, whisking vigorously after each addition. The batter will look slightly thickened but still pourable. This step is crucial for the structure; skipping it will result in a flat, dense cake.
- Fold in the vanilla extract, then sift in the all‑purpose flour to avoid lumps. Gently fold the flour until just combined; over‑mixing will develop gluten and make the cake tough.
- Divide the batter evenly among the prepared ramekins, filling each about ¾ full. Tap the ramekins gently on the counter to release any air bubbles. This ensures a uniform rise and prevents the cakes from cracking.
- Place the ramekins on a baking sheet and bake for 12–14 minutes, or until the edges are set but the centers still feel slightly wobble when you gently shake the pan. The timer is critical; overbaking will turn the lava into a fudgy cake.
- Remove from the oven and let the cakes rest for 2 minutes. This brief pause allows the edges to firm up while the center remains molten. Then, carefully flip each ramekin onto a plate. The chocolate should flow out like a river—watch the liquid pour!
- Serve immediately with a dusting of powdered sugar, a drizzle of espresso, or a scoop of vanilla ice cream. The contrast of hot, molten chocolate with cold ice cream is a classic pairing that never disappoints.
That's it — you did it. But hold on, I've got a few more tricks that'll take this to another level...
Insider Tricks for Flawless Results
The Temperature Rule Nobody Follows
Many bakers think a lower oven temperature will keep the center from overcooking, but the truth is the opposite. A hot oven (425°F) creates a quick crust that locks in the molten center. I’ve tried baking at 400°F and the result was a soggy, uneven cake. Stick to the high heat and you’ll get that perfect contrast.
Why Your Nose Knows Best
When the chocolate is melting, it should smell like toasted cocoa, not burnt. If you notice a sharp, acrid scent, the heat is too high. The aroma is a reliable indicator that the chocolate is at the right stage—smooth, nutty, and inviting.
The 5‑Minute Rest That Changes Everything
After you remove the cakes from the oven, let them sit for exactly five minutes before flipping. This rest allows the steam to redistribute, preventing the edges from cracking and ensuring the center stays liquid. I once skipped this step and the cakes cracked like thin ice.
The Secret Salt Finish
Add a pinch of flaky sea salt to the batter right before baking. The salt dissolves and enhances the chocolate’s depth without making the cake taste salty. It’s a subtle trick that elevates the entire dessert.
The Quick Chill Trick
If you’re not serving immediately, place the baked cakes in the fridge for 15 minutes. This stops the cooking process and keeps the molten center from hardening. When you’re ready to serve, let them sit at room temperature for a few minutes to soften.
Creative Twists and Variations
This recipe is a playground. Here are some of my favorite ways to switch things up:
Citrus Burst
Add a tablespoon of orange zest to the batter for a bright, citrusy contrast. The zest brings a subtle freshness that pairs well with the deep chocolate.
Nutty Crunch
Fold in a handful of chopped toasted almonds or hazelnuts before baking. The nuts add a delightful crunch and a nutty undertone that complements the chocolate.
Espresso Infusion
Stir in one tablespoon of instant espresso powder into the melted chocolate. The espresso enhances the chocolate’s bitterness and adds a subtle coffee flavor.
Caramel Swirl
Drop a spoonful of caramel sauce into each ramekin before pouring the batter. As the cake bakes, the caramel melts into the chocolate, creating a sweet swirl.
Minty Surprise
Add a few drops of peppermint extract to the batter. The mint gives a refreshing aftertaste that balances the richness.
Salted Caramel Drizzle
Drizzle salted caramel over the top after baking. The caramel adds a sweet, buttery layer that contrasts with the chocolate’s depth.
Storing and Bringing It Back to Life
Fridge Storage
Store the baked cakes in an airtight container in the refrigerator for up to 3 days. When you’re ready to serve, let them sit at room temperature for 10–15 minutes to soften. The chocolate will still be slightly molten, but it will hold its shape.
Freezer Friendly
Wrap each cake individually in plastic wrap, then place them in a freezer bag. They can be frozen for up to 2 weeks. Thaw overnight in the fridge, then warm in the microwave at 30-second intervals until the center is just molten.
Best Reheating Method
The secret to reviving a frozen cake is a quick, gentle microwave pulse. Add a tiny splash of water to the bottom of the ramekin before microwaving; the steam will help the chocolate return to its silky, molten state. Warm for 20–25 seconds, then check. The center should still be liquid.