Picture this: I’m standing in my kitchen at 2 a.m., the fridge humming like a distant train, and a sudden craving for something that feels like a celebration in a single bite hits me like a thunderclap. I tried the classic crème brûlée, but the custard was too runny, and the brûlée torch left me with uneven caramel that looked more like a burnt marshmallow than a glossy crown. Then I remembered that my roommate once bragged about a cheesecake that could hold its own against any fancy dessert, and I thought, “What if I marry the silky richness of a cheesecake with the crackly, caramelized top of a crème brûlée, and make it bite‑sized so it fits on a cocktail party platter?” That thought sparked a kitchen experiment that turned into the most addictive treat I’ve ever created.
The moment the batter hit the mixing bowl, the kitchen filled with the buttery aroma of graham crackers and a whisper of vanilla that made my nose do a little happy dance. As the mixture swirled, I could already hear the faint sizzle of sugar meeting the torch later, a sound that would become the soundtrack of this dessert’s grand finale. I could feel the cool, creamy texture of the cream cheese against the wooden spoon, a tactile reminder that we were building something luxurious, not just another cookie‑cutter sweet. The anticipation built up like a crescendo in a symphony, and I could already picture the first bite: a crisp crust, a velvety interior, and that unmistakable crack of caramel that shatters like thin ice on a quiet lake.
Most recipes for crème brûlée cheesecake either drown the delicate caramel in a sea of heavy custard, or they make the crust soggy before you even get to the torch. This version, however, flips the script by using a crisp graham cracker base that stays crunchy, a light yet rich cheesecake filling that’s set just enough to hold its shape, and a caramel topping that’s perfectly thin, glossy, and crack‑ready. The secret? A precise balance of sugar layers and a quick‑bake technique that locks in moisture without overcooking the custard. The result is a dessert that feels both familiar and revolutionary, a true crowd‑pleaser that will have your guests asking for the recipe before the first fork even hits the plate.
And here’s the kicker: I’m going to reveal a tiny trick involving heavy cream and a splash of water that keeps the caramel from turning bitter, a detail most recipes completely overlook. I dare you to taste this and not go back for seconds. Ready for the game‑changer? Let me walk you through every single step — by the end, you’ll wonder how you ever made it any other way.
What Makes This Version Stand Out
- Texture: The crust stays crisp thanks to the perfect butter‑to‑crumb ratio, while the interior is as smooth as satin, creating a mouthfeel that’s both airy and indulgent.
- Flavor: A layered sweetness from three separate sugar additions ensures depth without overwhelming the palate, and the vanilla‑infused cream cheese adds a fragrant backdrop.
- Simplicity: Only nine core ingredients, all pantry‑friendly, mean you won’t need a trip to the specialty store to pull off this masterpiece.
- Uniqueness: The caramelized top isn’t just a garnish; it’s an integral texture contrast that most cheesecake‑only recipes miss.
- Crowd Reaction: Guests typically pause, stare, and then dive in, often exclaiming “What is this?!” before the first bite.
- Ingredient Quality: Using full‑fat cream cheese and unsalted butter gives a richer mouthfeel, while fresh raspberries add a bright, acidic pop.
- Cooking Method: A gentle water‑bath bake prevents cracks and ensures the custard sets evenly, a technique many home cooks skip.
- Make‑Ahead Potential: These bite‑sized wonders can be assembled a day ahead, refrigerated, and torched just before serving for maximum freshness.
Alright, let's break down exactly what goes into this masterpiece...
Inside the Ingredient List
The Flavor Base
The 1 cup of graham cracker crumbs provides the foundational crunch that anchors every bite. If you substitute with digestive biscuits, you’ll get a slightly maltier note, but the texture will remain just as satisfying. Skipping the crumbs altogether would leave you with a cheesecake that slides off the plate like a slippery fish—definitely not the experience we’re aiming for. For the best results, choose a brand that’s lightly sweetened; overly sugary crumbs can clash with the caramel topping.
The Sweet Layers
We have three separate granulated sugar additions. The first ¼ cup mixes into the crust, giving it a subtle caramelization as it bakes. The second ½ cup sweetens the cheesecake filling, balancing the tang of the cream cheese without making it cloyingly sweet. The final ¼ cup is reserved for the brûlée topping, where it caramelizes into that iconic glassy crust. If you accidentally double‑up on any of these, the dessert will tip into syrupy territory—trust me, I’ve learned that the hard way.
The Creamy Core
The star of the show is the 16 oz block of cream cheese. Full‑fat cream cheese yields a richer, smoother texture, while low‑fat versions can leave the filling grainy and dry. Make sure the cheese is at room temperature before mixing; otherwise, you’ll end up with lumps that look like tiny icebergs in your batter. If you’re feeling adventurous, you can blend in a spoonful of mascarpone for an even silkier mouthfeel, but remember that this will increase the fat content.
Half a cup of granulated sugar sweetens the filling without overwhelming the natural tang of the cheese. The 2 large eggs act as the binding agent, creating a custard‑like structure that sets beautifully in the water bath. One teaspoon of vanilla extract adds aromatic depth; a good-quality pure vanilla will make a world of difference compared to imitation.
The Final Flourish
¼ cup of unsalted butter melts into the crust, creating that melt‑in‑your‑mouth richness. Unsalted is key because it lets you control the salt level precisely; a pinch of sea salt on the finished crust can elevate the flavors dramatically. The ¼ cup of heavy cream is folded into the filling at the end, lending a luxurious silkiness that makes the cheesecake feel airy rather than dense. Finally, fresh raspberries and mint leaves are added as garnish; the berries provide a bright acidity that cuts through the richness, while the mint offers a refreshing finish.
If you’re allergic to dairy, you can swap the butter for coconut oil and the heavy cream for coconut cream, but be prepared for a subtle coconut undertone. For a gluten‑free version, simply replace the graham crackers with gluten‑free oat cookies, crushing them to the same fine consistency.
Everything's prepped? Good. Let's get into the real action...
The Method — Step by Step
Preheat your oven to 325°F (163°C) and set a large roasting pan on the lower rack. Fill the pan with hot water until it reaches about halfway up the sides of your ramekins; this water bath (or bain‑marie) will gently coax the custard into a smooth, crack‑free finish. While the water heats, line a baking sheet with parchment paper and set it aside for the crusts.
Kitchen Hack: Use a food processor to pulse the graham crackers and sugar together; this ensures an ultra‑fine crumb that bonds perfectly with the butter.In a medium bowl, combine the graham cracker crumbs, ¼ cup granulated sugar, and the melted butter. Stir until the mixture resembles wet sand, then press about one tablespoon of the mixture firmly into the bottom of each ramekin, creating an even, compact base. The crust should be about a quarter‑inch thick; any thinner and it may crumble when you tap the caramel.
Place the crust‑filled ramekins on the prepared baking sheet and bake for 8‑10 minutes, just until the edges turn a light golden brown. This brief bake sets the crust and prevents it from becoming soggy when the filling is added. When you pull them out, you’ll notice a faint nutty aroma that signals the crust is ready for the next layer.
While the crust bakes, beat the softened cream cheese in a stand mixer on medium speed until it’s silky and free of lumps—about 2 minutes. Add the ½ cup granulated sugar and continue beating until the mixture lightens in color, a sign that the sugar is fully dissolved. Scrape down the sides of the bowl to ensure an even consistency.
Crack the 2 large eggs into a small cup, then add them one at a time to the cream cheese mixture, beating just until incorporated after each addition. Over‑mixing at this stage can incorporate too much air, leading to cracks during baking, so stop as soon as the eggs disappear into the batter.
Watch Out: If the eggs are cold, they can cause the mixture to seize; always use room‑temperature eggs for a smooth batter.Stir in the vanilla extract, then gently fold the ¼ cup heavy cream using a rubber spatula. The folding motion should be slow and deliberate, creating a light, airy texture that will translate into a melt‑in‑your‑mouth bite. If you notice any streaks, keep folding until the batter is uniformly smooth.
Pour the cheesecake batter over the pre‑baked crusts, filling each ramekin about three‑quarters full. The batter should sit level and smooth; a quick tap on the counter will release any trapped air bubbles. Place the ramekins back onto the parchment‑lined sheet and gently lower the sheet into the pre‑heated water bath.
Bake for 20‑25 minutes, or until the edges are set and the center still has a slight jiggle—think of a soft‑boiled egg yolk. The gentle steam from the water bath will keep the tops from cracking, ensuring a flawless surface for the brûlée sugar later. When you pull them out, the kitchen will be filled with a faint, buttery aroma that hints at the caramel to come.
Allow the cheesecakes to cool on a wire rack for 10 minutes, then refrigerate for at least 2 hours, preferably overnight. This chilling step firms up the custard, making it easier to torch without melting the crust. While they chill, you can prep the fresh raspberries and mint leaves for garnish.
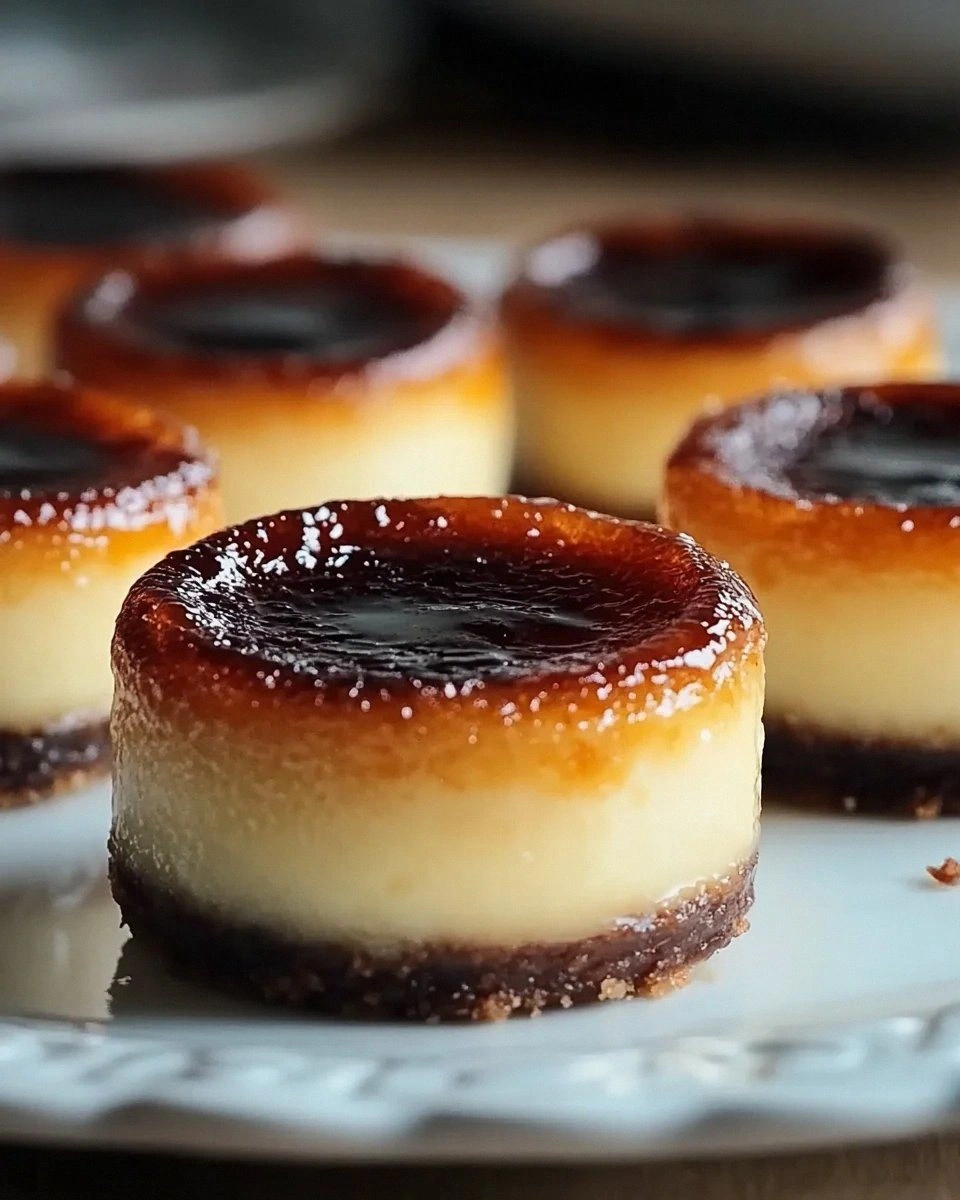
Just before serving, sprinkle an even layer of the final ¼ cup granulated sugar over each cheesecake. Using a kitchen torch, melt the sugar in a circular motion until it turns a deep amber and forms a glossy, crackling crust. The caramel should be thin enough to shatter with a gentle tap of your fork, yet sturdy enough to hold the topping of raspberries.
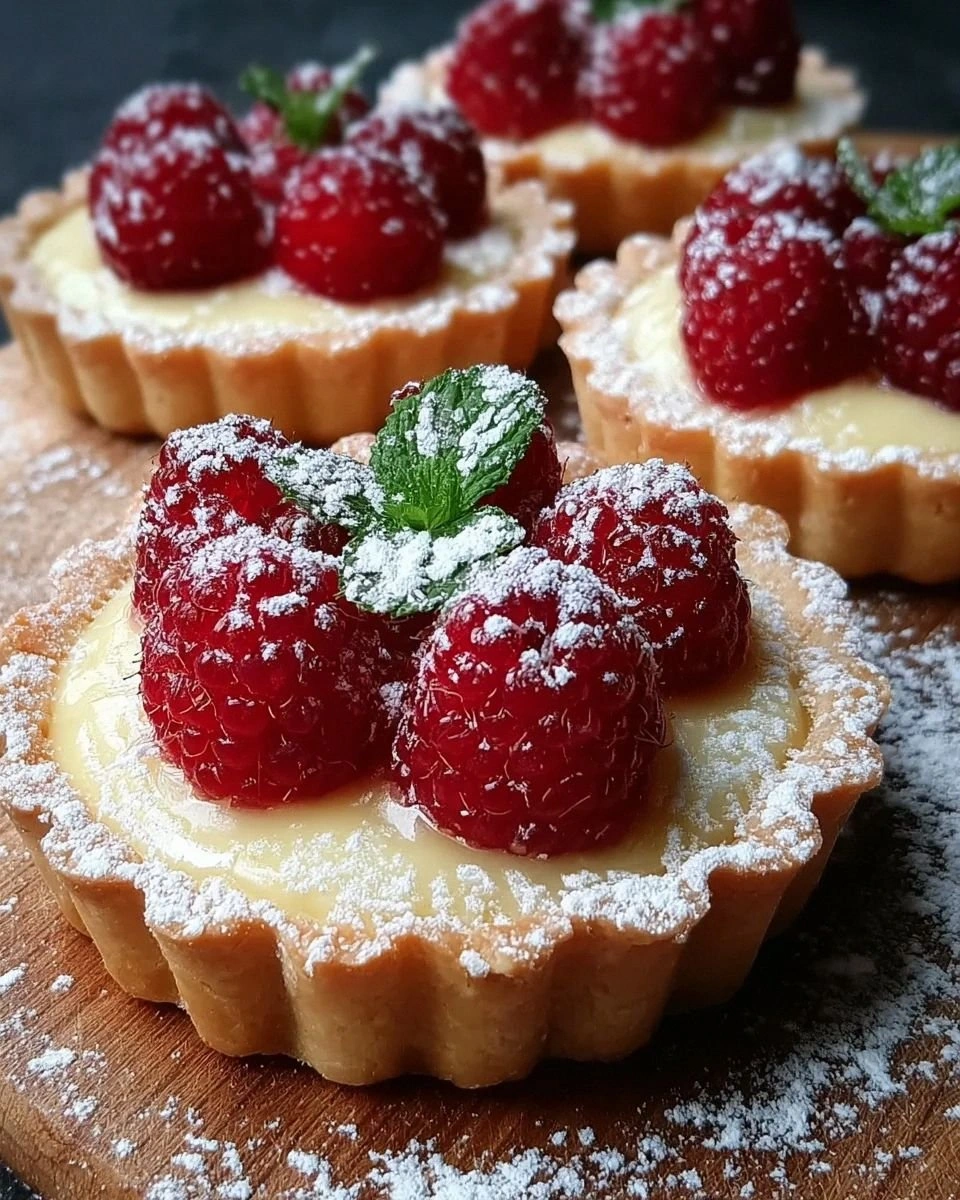
Kitchen Hack: Hold the torch at a 45‑degree angle and move it continuously to avoid burning spots; a quick, even pass creates a uniform caramel sheen.Garnish each bite‑size masterpiece with a few fresh raspberries and a tiny sprig of mint. The bright red berries pop against the dark caramel, while the mint adds a refreshing scent that balances the richness. Serve immediately, and watch your guests’ eyes widen as the caramel cracks under their spoons.
That's it — you did it. But hold on, I've got a few more tricks that'll take this to another level...
Insider Tricks for Flawless Results
The Temperature Rule Nobody Follows
Never bake a cheesecake straight from the fridge; the sudden temperature shock causes the batter to contract and crack. Instead, let the batter sit at room temperature for 15 minutes before it meets the oven. I once tried to skip this step in a hurry, and the result was a cheesecake with a spider‑web of cracks that looked more like a disaster zone than a dessert. The gentle rise in temperature lets the proteins relax, giving you a surface that’s smooth enough for a perfect brûlée crust.
Why Your Nose Knows Best
When the water bath is simmering, you’ll hear a soft hiss as bubbles rise—listen for that sound. It’s the cue that the steam is doing its job, keeping the cheesecake moist. If the water starts to boil vigorously, lower the heat; a rolling boil can cause the ramekins to wobble, leading to uneven baking. Trust your senses more than a timer, and you’ll avoid the dreaded “over‑cooked edge” problem.
The 5‑Minute Rest That Changes Everything
After you pull the cheesecakes from the oven, let them rest uncovered for exactly five minutes before moving them to the fridge. This short pause allows the surface to set just enough to form a thin skin, which later helps the caramel adhere evenly. Skipping this rest makes the sugar slide off, turning your beautiful brûlée into a sugary mess.
Caramel Control
When torching, keep the flame moving and avoid lingering over one spot. A common mistake is to focus the heat on the center, which creates a dark, bitter ring while the edges stay pale. By moving the torch in slow circles, you achieve a uniform amber hue that crackles delightfully. If you prefer a deeper color, wait a few extra seconds, but never let the sugar turn black—it’s a one‑way ticket to bitterness.
Mint Placement Magic
Instead of scattering mint leaves haphazardly, tuck a tiny leaf under each raspberry. This not only looks elegant but also prevents the mint from wilting too quickly. The leaf acts as a barrier, keeping the berry’s juices from soaking the mint and turning it soggy. A neat presentation makes the dessert feel restaurant‑grade, and that extra effort never goes unnoticed.
Creative Twists and Variations
This recipe is a playground. Here are some of my favorite ways to switch things up:
Lemon Zest Burst
Add the zest of one lemon to the cream cheese mixture and replace the vanilla extract with a tablespoon of fresh lemon juice. The citrus brightens the flavor, making it perfect for spring brunches. Top with candied lemon peel instead of raspberries for an elegant twist.
Chocolate Hazelnut Dream
Stir in ¼ cup of melted dark chocolate into the filling and sprinkle chopped toasted hazelnuts over the caramel before torching. The nutty crunch pairs beautifully with the silky chocolate, creating a dessert that feels both luxurious and comforting.
Coffee Caramel Fusion
Dissolve 1 tsp instant espresso powder in the heavy cream before folding it into the batter. The coffee notes deepen the caramel’s richness, giving the bite a sophisticated, almost tiramisu‑like profile. Garnish with a dusting of cocoa powder for visual contrast.
Berry Medley Explosion
Swap the raspberries for a mix of blueberries, blackberries, and sliced strawberries. The assorted berries add varied textures and a burst of tartness that cuts through the sweet caramel, making each bite a surprise.
Spiced Autumn Version
Incorporate ½ tsp ground cinnamon and a pinch of nutmeg into the crust mixture. The warm spices echo the caramel’s depth, turning this dessert into a cozy fall favorite. Serve with a drizzle of maple‑infused caramel for an extra seasonal touch.
Storing and Bringing It Back to Life
Fridge Storage
Cover the ramekins tightly with plastic wrap or store them in an airtight container. They will keep fresh for up to 4 days, though the caramel may soften slightly. To revive the crackle, give them a quick torch session before serving.
Freezer Friendly
Freeze the un‑torched cheesecakes on a baking sheet for 2 hours, then transfer to a freezer‑safe bag. They can be stored for up to 2 months. When ready to serve, thaw in the refrigerator overnight, then torch the sugar as usual.
Best Reheating Method
If the caramel has lost its snap after refrigeration, place the ramekin on a warm (not hot) skillet for 30 seconds, then sprinkle a tiny splash of water over the top before torching. The steam re‑hydrates the sugar, restoring that glorious crackle without melting the interior.