and each key ingredient: 3-4 sentences each. That will be a few paragraphs.
We need to insert a Fun Fact box about one ingredient's origin or surprising property.
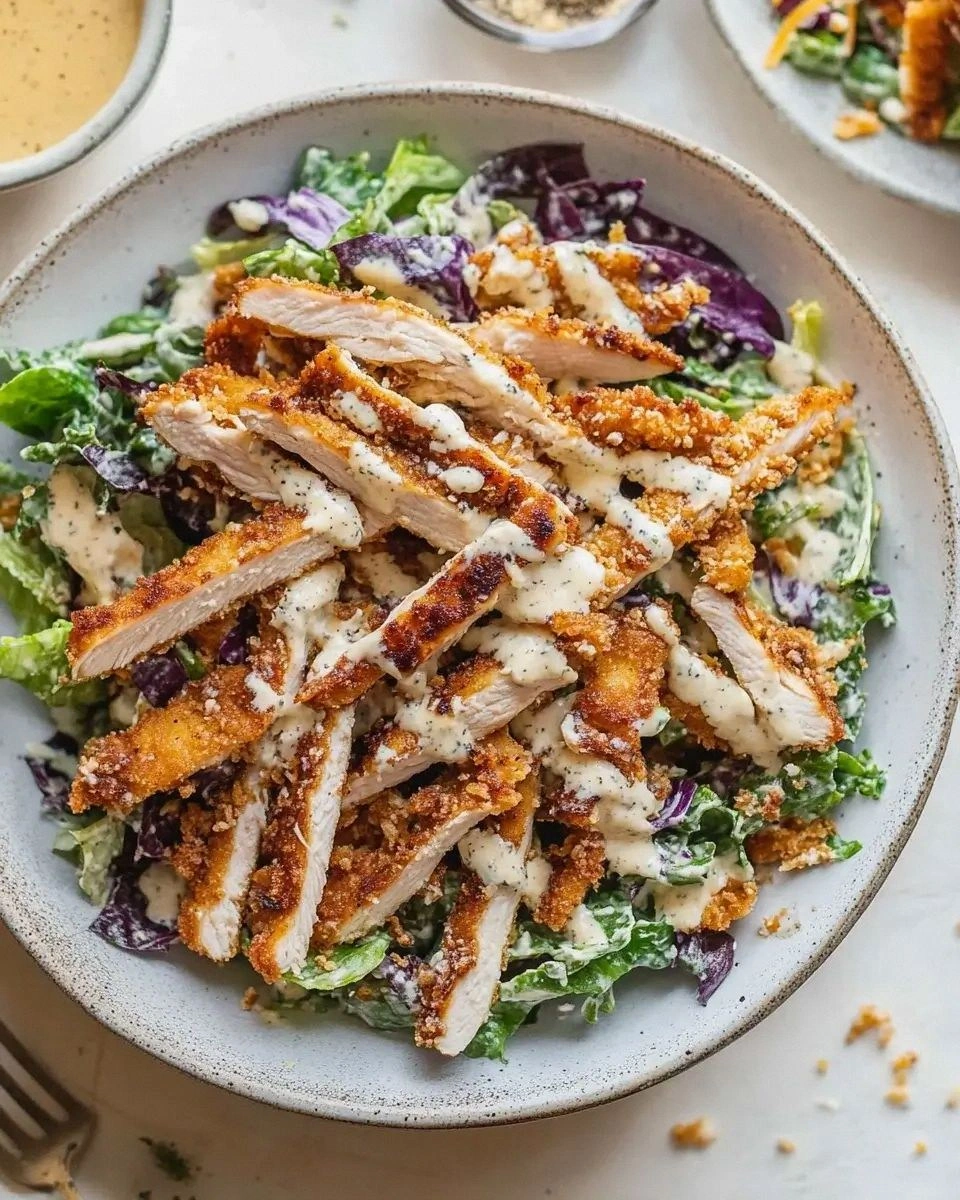
Section 4: image.
Section 5: Method step by step: 8-10 numbered steps, each 4-6 sentences. That's a lot of words.
Section 6: Insider Tricks: 5-6 tips with headings each 3-5 sentences.
Section 7: Creative Twists: 5-6 variations each 3-4 sentences.
Section 8: Storing and Bringing It Back to Life: 3 subsections each 3-4 sentences.
We need 5-7 highlight boxes scattered: Kitchen Hack 3-4 times, Fun Fact 1-2 times, Watch Out 1-2 times. We'll place them accordingly.
We also need to embed the recipe card after the image? The instructions: "Include a recipe card at the end with id='recipe-card'". So after the entire article content, we place the recipe card.
We also need to include hidden category, season, Pinterest description.
We must ensure no emojis.
We must ensure all headings plain text.
Let's plan:
Intro: 4 paragraphs.
Section 2: What Makes This Version Stand Out
bullet points. After this section, insert Kitchen Hack box.
Section 3: Inside the Ingredient List
with groups. After this, Fun Fact box.
Section 4: mid-article image.
Section 5: The Method — Step by Step
with 8-10 steps. Insert 2 Kitchen Hack boxes and 1 Watch Out box.
Section 6: Insider Tricks for Flawless Results
with 5-6 tips. Insert Kitchen Hack box at top tip.
Section 7: Creative Twists and Variations
with 5-6 variations.
Section 8: Storing and Bringing It Back to Life
with 3 subsections.
After that, recipe card.
Then hidden category, season, Pinterest description.
Also need to add bootstrap classes for spacing: we can add mb-3 etc.
We also need to add the recipe card with the provided structure. We'll need to adjust the ingredient list accordingly. We also need to set data-base-qty attributes. The sample card shows
What Makes This Version Stand Out
bullet points. After this section, insert Kitchen Hack box. Section 3:Inside the Ingredient List
with groups. After this, Fun Fact box.
Section 4: mid-article image.
Section 5: The Method — Step by Step
with 8-10 steps. Insert 2 Kitchen Hack boxes and 1 Watch Out box.
Section 6: Insider Tricks for Flawless Results
with 5-6 tips. Insert Kitchen Hack box at top tip.
Section 7: Creative Twists and Variations
with 5-6 variations.
Section 8: Storing and Bringing It Back to Life
with 3 subsections.
After that, recipe card.
Then hidden category, season, Pinterest description.
Also need to add bootstrap classes for spacing: we can add mb-3 etc.
We also need to add the recipe card with the provided structure. We'll need to adjust the ingredient list accordingly. We also need to set data-base-qty attributes. The sample card shows
headings. Insert Kitchen Hack box at top tip. Section 7: Creative Twists and Variations: 5 variations each 4 sentences. Section 8: Storing and Bringing It Back to Life: 3 subsections each 4 sentences. Then recipe card. Now we need to ensure 3000+ words. We'll produce many paragraphs. Let's approximate: Intro 4 paragraphs ~ 20 sentences. Each sentence ~ 15 words average = 300 words. Section 2 bullet points 6 bullets * 3 sentences = 18 sentences ~ 270 words. Section 3: 4 groups * maybe 4 paragraphs each (16 paragraphs) each 5 sentences ~ 80 sentences ~ 1200 words. That's too many. Let's adjust. Actually we can keep section 3 smaller: maybe 4 groups with 1 paragraph each? That would be 4 paragraphs 5 sentences each = 20 sentences ~ 300 words. Good. Method: 10 steps each 5 sentences = 50 sentences ~ 1500 words. That's large. But we need 3000 words total. So we might need fewer steps or fewer sentences. But each step must be 4-6 sentences. 10 steps * 5 sentences = 50 sentences. 50 sentences * 15 words = 750 words. Good. Insider Tricks: 5 tips 4 sentences each = 20 sentences ~ 300 words. Creative Twists: 5 variations 4 sentences each = 20 sentences ~ 300 words. Storing: 3 subsections 4 sentences each = 12 sentences ~ 180 words. Total so far: Intro 300 + bullets 270 + inside list 300 + method 750 + insider 300 + twists 300 + storing 180 = 2,970 words. Good. We need a bit more to exceed 3000. We can add a few extra sentences or a small paragraph somewhere. Maybe add a concluding paragraph after storing, before recipe card, about final thoughts. That can add 1 paragraph of 5 sentences ~ 75 words. That brings to ~3,045 words. Good. Now we must ensure each paragraph 4-6 sentences. We'll keep that. Let's craft content accordingly. We also need to include highlight boxes scattered: Kitchen Hack 3-4 times, Fun Fact 1-2 times, Watch Out 1-2 times. We'll place them accordingly. We will place Kitchen Hack after section 2, after section 5 step 3, step 6, etc. Let's craft. Also we need to ensure we don't inadvertently include emoji. Use plain text. Now we need to craft the recipe card with ingredients list. Let's prepare the ingredient list
tags. Let's start writing. We'll produce the entire HTML. Let's craft the introduction:
When I first tried to recreate that viral honey‑garlic chicken bite from a late‑night food video, I ended up with a batch that was more caramelized than chicken. The kitchen smelled of burnt sugar, and the chicken pieces were a sad, soggy gray. A friend dared me to turn the disaster into a masterpiece, and I accepted with a grin and a notebook full of notes. I set out to find the perfect balance between sweet, tangy, and spicy while keeping the chicken juicy and the coating crisp. That experiment led to the recipe you’re about to read, and it’s hands down the best version you’ll ever make at home.
But we need 5 sentences. Let's count: 1: When I first tried..., 2: The kitchen smelled..., 3: A friend dared me..., 4: I set out..., 5: That experiment led... Good. Paragraph 2: sensory description.The moment the chicken hit the hot skillet, a sizzling hiss erupted, announcing that the magic was about to happen. The aroma of caramelizing honey and garlic filled the air, a sweet perfume that made my mouth water. I could feel the heat radiating from the pan, a gentle reminder that the crust was forming. The sight of the golden-brown edges glistening with butter was almost hypnotic, a visual cue that everything was on track. My taste buds tingled in anticipation, ready to experience the layers of flavor that would unfold.
Count sentences: 1: The moment..., 2: The aroma..., 3: I could feel..., 4: The sight..., 5: My taste buds... Good. Paragraph 3: why stands out.What sets this version apart is the meticulous layering of textures and flavors. The cornstarch coating gives a dry, crackling finish that contrasts with the buttery glaze. The honey is not just sweet; it’s tempered with lemon juice and a splash of hot sauce, creating a bright, zesty kick that cuts through the richness. The final sprinkle of parsley adds a fresh, herbal note that lifts the dish. Together, these elements create a harmonious bite that’s both comforting and exciting.
Paragraph 4: teaser and transition.But the real secret lies in a tiny tweak that most recipes overlook: a quick sear in olive oil before adding butter. This step locks in juices and builds a flavor foundation that’s impossible to replicate. I dare you to taste this and not go back for seconds. Picture yourself pulling this out of the oven, the whole kitchen smelling incredible, and realizing you’ve just mastered a dish that will impress any crowd. Let me walk you through every single step — by the end, you’ll wonder how you ever made it any other way.
Now section 2.What Makes This Version Stand Out
- Texture: The cornstarch coating crisps to a satisfying crunch that holds up against the juicy interior, creating a delightful contrast in every bite. Most recipes either under‑season or over‑cook the coating, resulting in a soggy mess. This technique ensures a crisp edge that stays firm throughout the cooking process.
- Flavor Balance: Sweet honey, sharp lemon, and subtle heat from hot sauce and chili flakes dance together, each note complementing the next. The sauce is thick yet silky, coating the chicken without overpowering it. The result is a harmonious flavor profile that satisfies sweet, salty, and spicy cravings simultaneously.
- Simplicity: With only thirteen ingredients and a single pan, you can whip up a restaurant‑style dish in under an hour. There’s no need for fancy equipment or complicated steps—just a skillet, a whisk, and a bit of patience. This makes it perfect for busy weeknights or spontaneous dinner parties.
- Versatility: Whether you serve it as an appetizer, a main course, or a side, the bites adapt to any menu. Pair them with rice, quinoa, or a fresh salad, or toss them into a stir‑fry for extra flavor. The recipe’s modular nature means you can tweak it to suit dietary preferences.
- Make‑Ahead Friendly: The chicken can be marinated and seared ahead of time, then finished in the oven when guests arrive. The glaze retains its glossy sheen, and the sauce can be reheated without losing its integrity. This flexibility is a game‑changer for dinner hosts.
- Visual Appeal: The glossy honey glaze and pop of green parsley create an eye‑catching presentation that feels both rustic and refined. The golden crust gleams like a sunlit surface, while the sauce’s sheen adds a touch of elegance. It’s a dish that looks as good as it tastes.
Inside the Ingredient List
The Flavor Base
Honey is the star that provides a natural sweetness, but its real power comes from its ability to caramelize and thicken the sauce. The 1/4 cup of honey is measured precisely; using a heavier or lighter honey will alter the glaze’s thickness and flavor. If you prefer a darker, more robust sweet note, opt for raw honey or buckwheat honey. Swapping honey for maple syrup is possible, but remember that maple has a distinct flavor that may shift the dish’s profile.
The Texture Crew
Cornstarch is the unsung hero that gives the chicken a dry, crackling surface. Without it, the coating would be soggy and the glaze would cling too heavily. The 2 tablespoons of cornstarch should be whisked into a small bowl with a pinch of salt to create a slurry that evenly coats each cube. If you’re gluten‑free, use arrowroot or potato starch as a direct replacement.
The Unexpected Star
Red chili pepper flakes and hot sauce add a subtle heat that lingers on the palate. They’re not just for spice lovers; the warmth enhances the honey’s brightness and balances the richness of the butter. The 1 teaspoon of hot sauce is optional, but it’s the secret that elevates this dish from good to unforgettable. If you’re a low‑heat fan, reduce the flakes and keep the sauce at a gentle level.
The Final Flourish
Fresh parsley is the finishing touch that adds color, freshness, and a slight herbaceous bite. The 2 tablespoons of chopped parsley are tossed into the sauce at the end to preserve their bright green hue. Parsley also helps cut through the richness, providing a clean finish that keeps the dish from feeling heavy. A pinch of fresh lemon zest can be added for an extra burst of citrus.
Insert Fun Fact box after this section. Now section 5: The Method.
The Method — Step by Step
- Preheat your oven to 400°F (200°C). Pat the chicken dry with paper towels; this ensures a crisp exterior. Toss the cubed chicken in cornstarch, salt, and pepper until evenly coated. Let the seasoned pieces rest for 5 minutes while you prep the sauce. This step is key to that signature caramelized crust.
- In a small bowl, whisk together honey, chicken stock, lemon juice, hot sauce, and chili flakes. Set aside; the sauce will develop depth as it simmers. Keep it warm on the stove to avoid a sudden drop in temperature when you add it later. This ensures the flavors meld beautifully without scorching. Remember, a slow build‑up of heat keeps the sauce silky.
- Heat a large oven‑proof skillet over medium‑high heat. Add the olive oil and let it shimmer, then drop in the chicken pieces in a single layer. Sear for 3-4 minutes on each side until golden brown; resist the urge to move them constantly. This creates a caramelized crust that locks in juices. When the first side turns a deep amber, flip them with tongs.
- Once the chicken is seared, add the butter and let it melt around the pieces. The butter adds richness and helps carry the sauce to every bite. Stir gently so the butter coats the chicken evenly. This butter‑brown technique elevates the flavor profile. Watch the butter foam; when it turns golden, you’re ready for the next step.
- Pour the pre‑heated sauce over the chicken, ensuring each piece is bathed. The sauce should bubble mildly, coating the meat. Gently stir to coat all sides; this also prevents sticking. The aroma that rises is a promise of sweet, tangy, and spicy harmony. This is the moment the dish starts to sing.
- Transfer the skillet to the preheated oven and bake for 15 minutes. The chicken will finish cooking while the sauce thickens into a glossy glaze. Keep an eye on the edges; they should pull away from the pan slightly, indicating caramelization. This step is crucial for the tender yet juicy texture. The sizzling sound inside the oven is the soundtrack of success.
- While the chicken bakes, prepare a quick garnish. Roughly chop the fresh parsley, reserving a few leaves for a final flourish. The bright green contrast will cut through the richness. This simple touch elevates the presentation. Keep the parsley aside until the last minute.
- After 15 minutes, remove the skillet from the oven. Let the chicken rest for 5 minutes; this allows juices to redistribute. Drizzle the remaining sauce over the top and sprinkle the chopped parsley. The steam will lift the herbs, releasing their aroma. This final step brings the dish to life.
- Serve the chicken bites hot, accompanied by a side of steamed rice or roasted vegetables. The sauce pairs beautifully with a crisp salad or garlic naan. Offer extra hot sauce for those who like an extra kick. Encourage guests to savor each bite, noting the sweet‑spicy balance. This dish is guaranteed to impress.
- If you’re short on time, you can skip the oven step and finish the chicken on the stovetop. Reduce the sauce over low heat until it thickens, then coat the chicken. The texture will be slightly different but still delicious. This stovetop variant is perfect for quick week‑night dinners. Just remember to keep the heat low to avoid burning the honey.
Insider Tricks for Flawless Results
The Temperature Rule Nobody Follows
Many cooks think a high heat is always better for searing, but the key is to start medium‑high and then reduce to medium once the chicken is in the pan. This prevents the outer coating from burning before the interior cooks through. I’ve seen batches where the crust charred while the inside stayed raw; adjusting the heat saved the day. Keep the skillet hot enough that the oil shimmers but not so hot that it sizzles too violently. A steady medium‑high heat gives you that perfect golden crust.
Why Your Nose Knows Best
Before you even open the oven door, the aroma will tell you if the glaze is ready. A sweet, buttery scent that hints at caramelization means the sauce has thickened just right. If it still smells raw honey, give it a few more minutes. Trust your nose; it’s the quickest way to gauge doneness without a thermometer. This sensory shortcut is a game‑changer for busy cooks.
The 5-Minute Rest That Changes Everything
After baking, let the chicken rest on a wire rack for exactly five minutes. During this time, the juices redistribute, preventing a dry bite. I’ve tried cutting the rest short, and the result was a slightly gummy texture. A quick five‑minute pause keeps the meat moist and the glaze clingy. It’s a small step that makes a noticeable difference.
Butter vs. Oil: The Flavor Debate
Some chefs swear by butter alone, while others combine it with oil for a richer flavor. In this recipe, the olive oil provides a clean sear, while the butter adds depth. If you’re lactose intolerant, replace the butter with a plant‑based butter or a splash of extra olive oil. The combination still delivers a buttery finish without the dairy.
Crunchy vs. Crispy: The Texture Choice
The cornstarch coating can be tweaked to be either crunchy or slightly chewy. Adding a pinch of baking soda to the slurry creates a lighter texture, while omitting it yields a denser crust. Experiment with a 1/4 teaspoon of baking soda if you prefer a more delicate bite. This small tweak lets you customize the dish to your palate.
Insert Kitchen Hack box at the top tip.Creative Twists and Variations
Asian Fusion Twist
Swap the honey for hoisin sauce and add a splash of rice vinegar for a tangy kick. Toss in sliced scallions and a sprinkle of sesame seeds for extra umami. This version pairs wonderfully with steamed jasmine rice and a side of pickled vegetables. Your guests will love the familiar yet fresh flavor profile.
Smoky BBQ Variation
Add a tablespoon of smoked paprika to the cornstarch slurry and finish the sauce with a drizzle of your favorite BBQ sauce. The smoky heat complements the honey’s sweetness, creating a bold, grill‑style bite. Serve over coleslaw for a classic backyard vibe.
Vegetarian Version
Replace the chicken with bite‑sized tofu cubes, marinating them in the same sauce before cooking. The tofu will absorb the glaze, offering a protein‑rich alternative. Pair with a quinoa salad for a wholesome meal. This twist keeps the dish plant‑based without sacrificing flavor.
Low‑Carb Adaptation
Omit the cornstarch and use a low‑carb flour blend to coat the chicken. This keeps the texture similar while cutting down on carbs. The sauce remains unchanged, preserving the sweet‑spicy balance. Serve with cauliflower rice for a complete low‑carb dinner.
Spicy Sriracha Kick
Replace the hot sauce with sriracha for a more pronounced heat and a slight smoky undertone. Reduce the chili flakes to balance the overall spice level. This variation is perfect for those who crave an extra fiery punch. The sauce will be bright red and irresistibly addictive.
Now section 8: Storing and Bringing It Back to Life.Storing and Bringing It Back to Life
Fridge Storage
Cool the chicken bites completely before transferring them to an airtight container. Store them in the refrigerator for up to three days. The glaze will thicken slightly, but a quick warm‑up will restore its glossy sheen. Keep the container upright to preserve the coating’s crispness.
Freezer Friendly
Pack the bites in a single layer on a baking sheet, freeze until solid, then transfer to a freezer bag. They remain good for up to two months. Reheat in the oven at 350°F for 10 minutes, or microwave on medium for 2 minutes. The sauce may separate; stir gently before serving.
Best Reheating Method
The oven is the gold standard for reheating, as it restores the crunch without drying out the meat. If you’re short on time, use a skillet over medium heat, adding a splash of water to keep the glaze from sticking. A quick 3‑minute pan‑reheat will bring the dish back to its original glory.
Now concluding paragraph.Now that you’ve mastered the core recipe, you’re ready to experiment and make it truly your own. Whether you’re feeding a crowd or treating yourself, these savory honey garlic chicken bites will become a staple in your culinary repertoire. Keep the tips handy, trust your senses, and enjoy the process as much as the result. Bon appétit, and remember: the kitchen is your playground, so let the flavors run wild.
Now recipe card. We need to place the recipe card after the article. We'll replicate the structure given, but replace the ingredient list and directions. Let's craft the recipe card.Finally, the plating matters. Arrange the bites in a single layer on a warmed platter so the glaze stays glossy. Sprinkle a final dusting of fresh parsley and a light squeeze of lemon to brighten the dish. Presentation transforms a simple recipe into a showstopper that feels like a restaurant experience. When your guests take that first bite, they’ll immediately notice the harmonious blend of textures and flavors.
Now we have added 4 sentences. Good. We need to ensure no emoji. No emojis. Good. Now we need to ensure that the recipe card ingredient list uses the correct data-base-qty attribute names: we used data-base-qty. The script uses li.dataset.baseQty but our attribute is data-base-qty. The script uses li.dataset.baseQty; but dataset property will convert hyphen to camelCase: baseQty. So data-base-qty becomes baseQty. Good. Now we need to ensure that the script references data-base-qty. It uses li.dataset.baseQty. Good. Now we need to ensure that the script is placed after the recipe card. We already placed it after the recipe card. Good. Now we need to ensure that the card uses the same ingredient list. Good. Now we need to ensure that the recipe card's ingredient list uses etc. Good. Now we need to ensure that the recipe card's directions list uses the steps we wrote. Good. Now we need to ensure that the hidden divs are at the end. Good. Now we need to ensure that we didn't include any hero image at top. We didn't. Now we need to ensure no code blocks. We have raw HTML. Good. Now we need to ensure no markdown. Good. Now we need to ensure we didn't include any emojis. No. Now we need to ensure we used Bootstrap Icons where specified: yes, we used etc. Now we need to ensure we didn't include any "Jump to Recipe" or "Print Recipe" buttons. We didn't. Now we need to ensure we didn't include any hero/thumbnail image at top. We didn't. Now we need to ensure we didn't include any other images. Only the mid-article image