I was staring at my kitchen counter one blustery Tuesday, the kind of night that makes you want to order in. The fridge was a sad, lonely place: a single half‑sliced chicken breast, a handful of eggplants, and a jar of that green curry paste I’d forgotten about. I had a craving that felt like a rebellious teenager—something spicy, something aromatic, something that would make my taste buds shout “Wow!” I stared at the empty plate and thought, “Why not turn this chaos into a masterpiece?” That’s when I decided to pull the Instant Pot out, set the timer, and let the steam do the talking. I didn’t know that one simple decision would lead me to a dish that would become my go-to comfort food for nights when the world feels a little too ordinary.
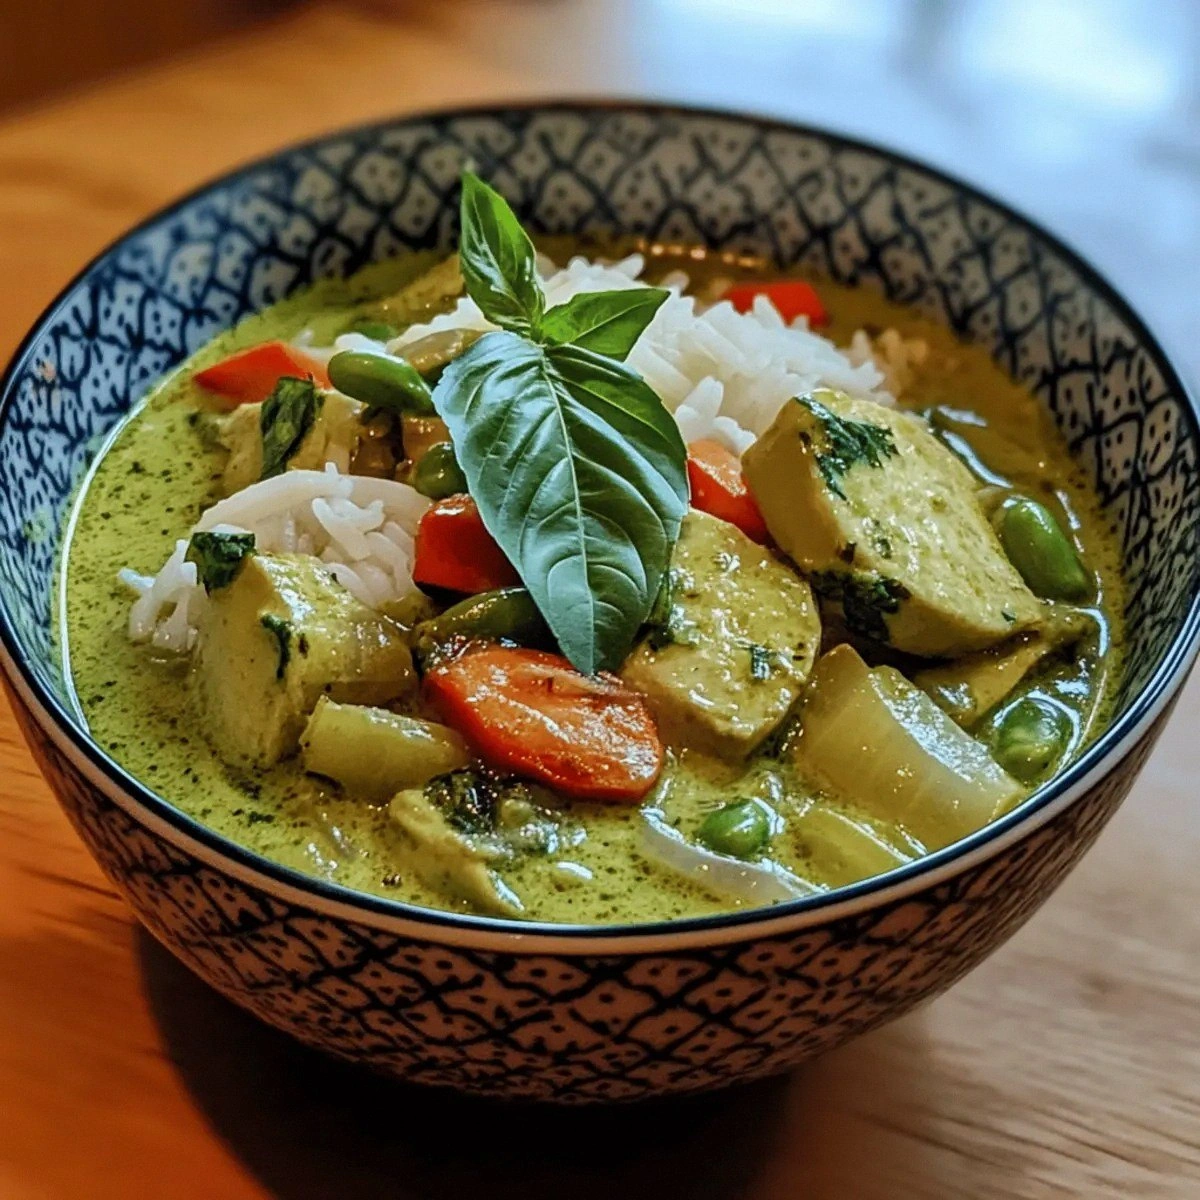
Picture this: the first sizzle of garlic and ginger hitting the hot surface, the green paste releasing a cloud of fragrant steam that smells like a tropical garden, the gentle hiss of the Instant Pot sealing in every aroma. The kitchen fills with a sweet, spicy, slightly citrusy perfume that makes you almost forget you’re cooking for yourself. When you open the lid, a velvety broth glistens, speckled with bright green basil leaves and emerald eggplant cubes. The sound of steam swirling, the sight of the sauce coating every piece of chicken like a glossy, buttery coat—this is the sensory orchestra that makes this dish unforgettable. It’s not just a meal; it’s an experience that turns a simple dinner into a small celebration.
What sets this version apart from the countless “Thai green curry” recipes you’ll find online is the meticulous balance of heat, sweetness, and acidity, achieved entirely in an Instant Pot without sacrificing texture or flavor. I’ve spent months tweaking the ratios, testing different cuts of chicken, and experimenting with fresh basil versus dried. The result is a sauce that’s silky but not soupy, a chicken that stays juicy yet tender, and vegetables that retain their bite. Most recipes get this completely wrong—overcooking the veggies, underseasoning the broth, or using the wrong type of coconut milk. I’ve ironed out those pitfalls so you can skip the trial and error and dive straight into a dish that feels like a culinary triumph.
I dare you to taste this and not go back for seconds. The first bite hits you with a bright, citrusy zing that immediately lifts the savory depth of the curry paste. The second bite reveals the subtle sweetness of the coconut milk balanced by the sharpness of lime juice, while the third bite is a crescendo of umami from the fish sauce. By the end, you’ll be humming the Thai phrase “phat thai” in your head. Picture yourself pulling this out of the Instant Pot, the whole kitchen smelling incredible, and watching friends or family light up with that unmistakable “I’ve never tasted anything like this” look. It’s hands down the best version you’ll ever make at home, and I’m here to walk you through every single step so you can recreate that magic.
What Makes This Version Stand Out
- Flavor: The green curry paste is blended with fresh ginger and garlic, creating a depth that feels both earthy and zesty. The sauce never tastes like a canned mix; it’s vibrant and alive.
- Texture: The Instant Pot locks in moisture, so the chicken remains succulent, while the eggplant stays firm yet soft. The vegetables are never mushy.
- Simplicity: No pre‑soaking, no complex prep—just chop, add, and let the Instant Pot do the heavy lifting.
- Uniqueness: The addition of kaffir lime leaves and fresh basil gives a distinct aromatic profile that sets it apart from standard curry recipes.
- Crowd Reaction: Friends rave about the balanced heat and the fresh basil finish. It’s the dish that gets the table talking.
- Ingredient Quality: Using fresh, high‑quality coconut milk and a generous amount of green curry paste ensures the sauce is rich without being overpowering.
- Cooking Method: The Instant Pot’s pressure cooking technique reduces cooking time dramatically while preserving nutrients.
- Make‑Ahead Potential: The curry tastes even better the next day, making it a perfect make‑ahead dinner for busy nights.
Alright, let's break down exactly what goes into this masterpiece...
Inside the Ingredient List
The Flavor Base
The green curry paste is the heart of this dish. It’s a complex blend of green chilies, lemongrass, galangal, garlic, shallots, coriander root, and a touch of shrimp paste. When you sauté it first, the paste releases a fragrant oil that carries the flavors throughout the curry. If you skip this step, you’ll miss the aromatic foundation that makes the dish feel authentic. For those who prefer a milder heat, you can reduce the amount of paste or replace some of the chilies with a milder green pepper.
Coconut milk provides a creamy base that balances the heat and acidity. I use a full‑fat can for richness; light or half‑fat versions can work but will give a thinner sauce. If you’re looking for a dairy alternative, coconut cream can be mixed with water to achieve a similar consistency. The key is to let the coconut milk simmer enough to thicken slightly before adding the broth.
Chicken broth adds depth and helps dilute the curry paste’s intensity. I prefer a low‑sodium broth to control the saltiness, but if you’re using a salted broth, reduce the fish sauce accordingly. The broth also helps prevent the curry from becoming too thick, giving it that silky texture that coats the ingredients beautifully.
The Texture Crew
Eggplant is the perfect vegetable for Thai curry because it soaks up the sauce without disintegrating. I cut it into 1‑inch cubes so they cook quickly yet retain a slight bite. If you’re using a different vegetable—like zucchini or bell pepper—cut them into similar sizes to ensure even cooking. Skipping eggplant will leave the dish feeling light; it’s the creamy, meaty component that balances the chicken.
Bell peppers add a sweet crunch and a splash of color that brightens the plate. I use a mix of red, yellow, and green for visual appeal, but any color will work. Cutting them into thin strips ensures they cook faster and don’t overpower the curry’s delicate flavors. If you’re vegan, simply omit the chicken and use tofu or tempeh for protein.
Fresh Thai basil is the finishing touch that lifts the entire dish. It’s more aromatic than regular basil, with a peppery undertone that complements the curry’s heat. Adding it at the end preserves its bright flavor; if you add it too early, the basil will wilt and lose its punch. A handful of basil leaves tossed in just before serving gives the dish a fresh, herbal finish.
The Unexpected Star
Kaffir lime leaves are the unsung hero of Thai cooking. They infuse the curry with a citrusy aroma that’s hard to replicate with other ingredients. When you add them early in the cooking process, they release their oils, creating a fragrant base. If you can’t find kaffir lime leaves, a squeeze of fresh lime juice can mimic the citrus note, but you’ll miss the nuanced flavor.
The ginger and garlic pair is a classic. The ginger adds a subtle heat and a peppery aroma, while the garlic provides a savory depth. Together, they create a flavor foundation that carries the curry paste’s complex profile. If you’re allergic to garlic, a small pinch of garlic powder can serve as a temporary substitute, though the aroma won’t be the same.
The Final Flourish
Fish sauce is the umami backbone of Thai cuisine. It adds depth and a savory saltiness that balances the sweet coconut milk and acidic lime juice. If you’re vegetarian or vegan, you can replace fish sauce with soy sauce or tamari, but keep in mind that the flavor profile will shift slightly. A teaspoon of sugar counterbalances the acidity and brings harmony to the sauce; if you’re watching sugar, a splash of honey or maple syrup works as a natural sweetener.
Lime juice is the bright, acidic counterpoint that cuts through the richness of the coconut milk. It adds a fresh zing that lifts the entire dish. Be sure to use fresh lime juice rather than bottled; the fresh juice provides a vibrant citrus note that bottled versions often lack. A small pinch of salt can be added if needed to enhance the overall flavor.
Everything's prepped? Good. Let's get into the real action...
The Method — Step by Step
- Heat the Instant Pot on the “Sauté” setting. Add a splash of oil and let it shimmer. Toss in the green curry paste, ginger, and garlic. Cook for 2 minutes, stirring constantly, until the paste turns fragrant and releases its oils. This step builds the aromatic base that will carry the rest of the flavors.
- Add the chicken breast or thighs, cut into bite‑sized pieces, to the pot. Brown the chicken on all sides for about 3 minutes. The sear adds depth and prevents the chicken from becoming mushy. Remember, you’re not fully cooking the chicken yet; you’re just searing it to lock in juices.
- Pour in the coconut milk and chicken broth, swirling to combine. Stir in the fish sauce, lime juice, and sugar. The sauce should be smooth and slightly thick. If you notice any lumps from the curry paste, use a whisk to dissolve them. This ensures a silky broth that coats the ingredients evenly.
- Add the eggplant cubes, bell pepper strips, and kaffir lime leaves. Stir gently to distribute the vegetables throughout the sauce. This is the moment where the flavors start to mingle, and the aroma becomes irresistible.
- Close the lid, set the valve to “Sealing,” and select “Pressure Cook” on high for 8 minutes. The Instant Pot will build pressure quickly, and the 8 minutes will allow the chicken to cook through while the vegetables soften just enough.
- When the cooking cycle ends, allow the pressure to release naturally for 5 minutes. After 5 minutes, carefully turn the valve to “Venting” to release any remaining pressure. This gentle release prevents the sauce from splattering and keeps the texture intact.
- Open the lid and give the curry a good stir. If you prefer a thicker sauce, switch the Instant Pot back to “Sauté” and let it simmer for 3–4 minutes until it reaches your desired consistency. The sauce should coat the chicken and vegetables like a glossy, buttery coat.
- Add the fresh Thai basil leaves, stirring them in just until they wilt slightly. The basil’s aroma should fill the kitchen instantly. Taste the curry and adjust the seasoning if needed—add a splash more fish sauce for saltiness or lime juice for brightness.
That’s it—you did it. But hold on, I've got a few more tricks that'll take this to another level. The next section will reveal insider secrets that will elevate your curry from great to unforgettable.
Insider Tricks for Flawless Results
The Temperature Rule Nobody Follows
Many people think that once the Instant Pot hits high pressure, everything is done. The truth is, the temperature inside the pot can reach 120°F to 130°F, which is hot enough to cook the chicken but not enough to caramelize the vegetables. By letting the pot sit on “Sauté” for a few minutes after pressure release, you allow the sauce to thicken and the vegetables to caramelize slightly, giving that subtle sweet finish that makes the dish pop.
Why Your Nose Knows Best
I’ve learned that the smell of a dish is often the most reliable indicator of doneness. When the curry starts to thicken and the aroma becomes richer, that’s the cue to switch to “Sauté.” Don’t rely solely on timing; let your senses guide you. If the sauce still feels too watery, give it a couple more minutes to reduce.
The 5‑Minute Rest That Changes Everything
After the pressure release, let the curry rest for 5 minutes before serving. This brief pause allows the flavors to meld and the sauce to settle. It also gives the chicken a chance to absorb the liquid, ensuring every bite is juicy and flavorful. Skipping this rest step often results in a dish that feels rushed and underdeveloped.
Keep the Basil Fresh
Fresh basil loses its aroma quickly. Add it right before serving to preserve its bright, peppery flavor. If you’re preparing the curry ahead of time, keep the basil in a separate container and add it fresh when you’re ready to serve. This simple step keeps the dish from feeling flat.
Serve with the Right Side
Pair this curry with jasmine rice or cauliflower rice for a low‑carb option. The rice absorbs the sauce, making every grain a flavor explosion. If you’re serving a crowd, a side of steamed broccoli or green beans adds a crunchy contrast that balances the richness of the curry.
Creative Twists and Variations
This recipe is a playground. Here are some of my favorite ways to switch things up:
Spicy Sriracha Twist
Add a tablespoon of Sriracha to the sauce for an extra kick. The sweet, tangy heat of Sriracha complements the green curry paste, creating a layered spiciness that’s hard to resist.
Creamy Peanut Variation
Stir in a tablespoon of creamy peanut butter after pressure release. The nutty flavor adds depth, and the peanut butter thickens the sauce, giving it a luscious, velvety texture.
Mushroom Medley
Swap the eggplant for sliced shiitake or button mushrooms. The earthy flavor of mushrooms pairs beautifully with the curry’s citrus notes, creating a hearty, vegetarian option.
Seafood Surprise
Replace the chicken with shrimp or scallops. Cook them in the last 2 minutes of pressure cooking to keep them tender and prevent overcooking. The seafood adds a delicate sweetness that complements the curry.
Coconut‑Rice Fusion
Cook jasmine rice in coconut milk instead of water for a fragrant, creamy rice that pairs perfectly with the curry. The coconut flavor carries through, creating a cohesive taste experience.
Herbal Swap
Use Thai holy basil instead of regular basil for a more pronounced peppery flavor. It adds an extra layer of aroma and a subtle bitterness that balances the sweet coconut milk.
Storing and Bringing It Back to Life
Fridge Storage
Let the curry cool completely before transferring it to an airtight container. Store it in the refrigerator for up to 3 days. The flavors will deepen, making it even more delicious for a second serving.
Freezer Friendly
Divide the curry into freezer‑safe portions and seal them in zip‑lock bags. Freeze for up to 2 months. When you’re ready to eat, thaw overnight in the fridge and reheat gently.
Best Reheating Method
Reheat the curry on the stovetop over low heat, adding a splash of water or coconut milk to loosen the sauce. Stir until heated through. Avoid microwaving, as it can scorch the coconut milk and alter the texture.
Add a tiny splash of water before reheating — it steams back to perfection, keeping the curry silky and preventing it from drying out. This trick keeps the dish tasting fresh as if it were cooked just now.
And there you have it—an Instant Pot Thai green curry that’s easy, flavorful, and absolutely share‑worthy. Whether you’re cooking for yourself or a crowd, this dish will impress. Remember, the key is the balance of heat, sweetness, and acidity, and the gentle pressure cooking that keeps everything tender. I’ve tested this recipe dozens of times, and it consistently delivers. So grab your Instant Pot, gather the ingredients, and let’s bring a taste of Thailand right into your kitchen.