I swear I was standing over a pot of boiling water, listening to the faint hum of my fridge, when my roommate shouted, “You’re never going to finish that bag of strawberries if you don’t do something with them!” That moment sparked a kitchen showdown that ended with me daring myself to create the ultimate breakfast‑brunch hybrid: a strawberry‑cheesecake cinnamon roll that could convert even the most stubborn cereal‑only crowd. I tossed the idea into the air like a pancake flip and, after a few failed attempts that left me with soggy dough and a kitchen that smelled like burnt sugar, I finally nailed the perfect balance of fluffy dough, tangy cream cheese, and fresh‑kissed strawberries. I dare you to taste this and not go back for seconds.
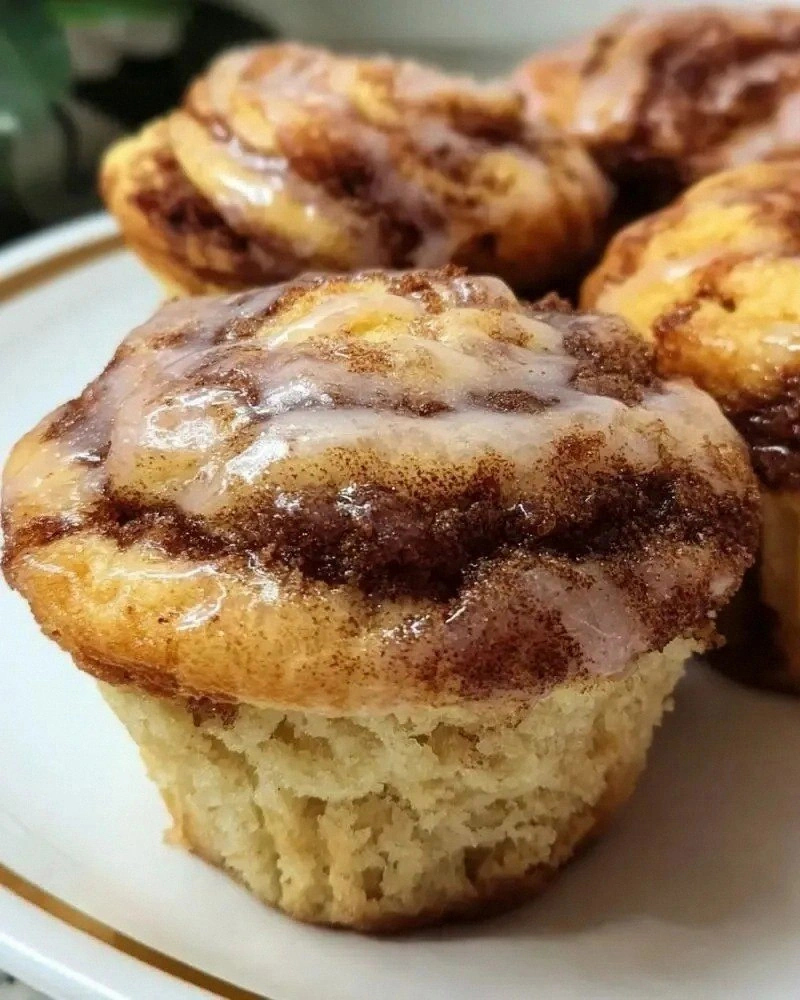
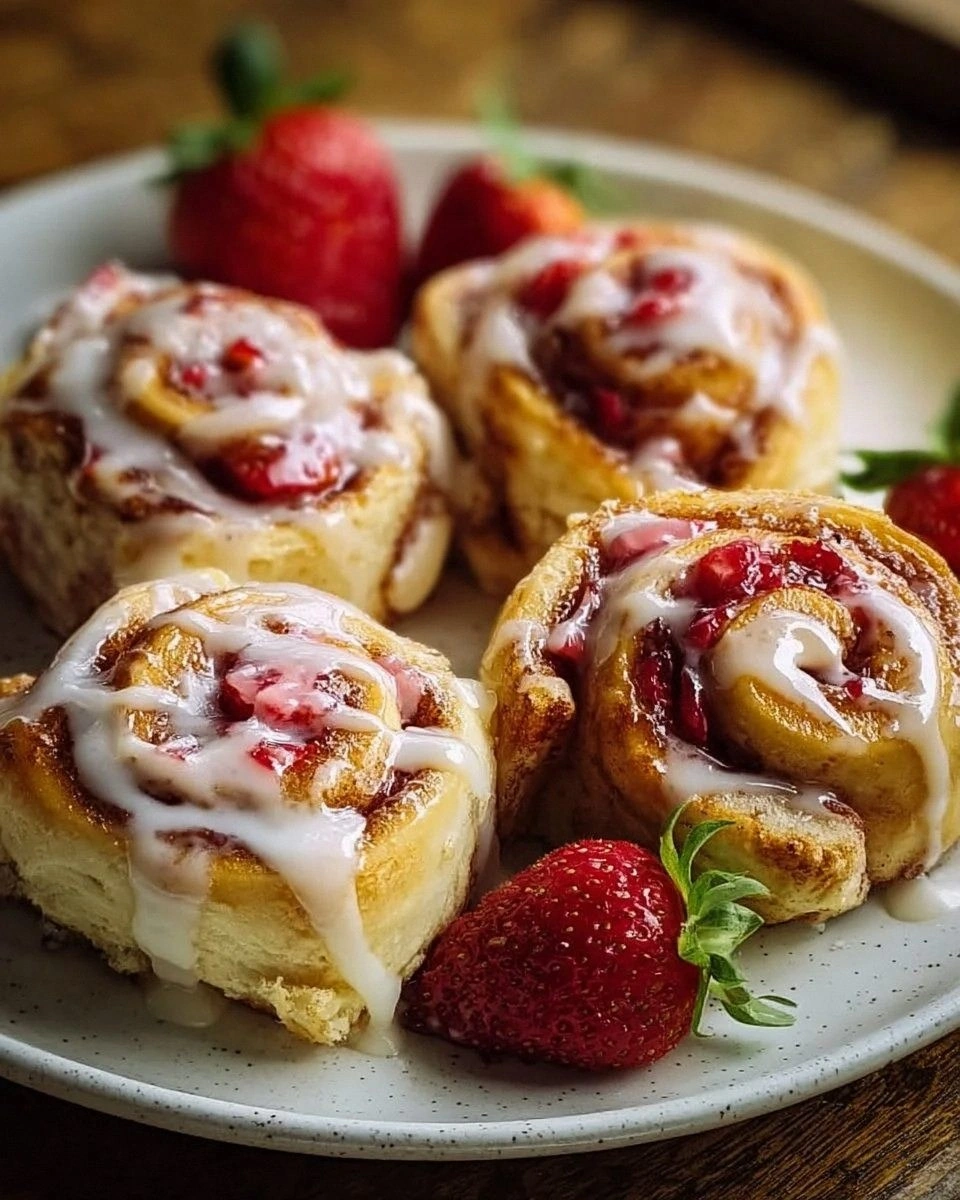
Picture this: a golden‑brown swirl emerging from the oven, steam curling up like a lazy cat, the sweet aroma of cinnamon mingling with the bright, slightly floral perfume of ripe strawberries. The first bite is a symphony—crackly, buttery edges give way to a soft, pillowy interior that cradles a creamy cheesecake filling, while the strawberry pieces burst like tiny fireworks of juicy sweetness. The powdered‑sugar glaze drizzles over the top, catching the light and promising a melt‑in‑your‑mouth finish that feels like dessert and breakfast had a love child. If you’ve ever struggled with dry rolls or bland fillings, you’re not alone — and I’ve got the fix.
What truly sets this version apart is a handful of game‑changing tweaks: a splash of vanilla in the dough to deepen flavor, a quick chill of the dough before rolling to keep the layers airy, and a secret “cheesecake swirl” technique that distributes the cream cheese evenly without turning the dough into a soggy mess. Most recipes get the filling ratio completely wrong, ending up with a clumpy mess or a dry roll that looks pretty but disappoints on the palate. Here’s what actually works: a 1‑to‑1 ratio of cream cheese to strawberries, a gentle fold that preserves the dough’s structure, and a final bake at a precise 350°F to achieve that coveted caramelized edge.
Okay, ready for the game‑changer? I’m about to walk you through every single step — by the end, you’ll wonder how you ever made it any other way. This next part? Pure magic. Stay with me here — this is worth it.
What Makes This Version Stand Out
- Taste: The sweet‑tart strawberry pairs with a subtle tang from the cream cheese, creating a balanced flavor that sings without overwhelming your palate.
- Texture: A buttery, flaky crust gives way to a cloud‑like interior, while the filling stays luxuriously smooth, never grainy.
- Simplicity: No fancy equipment, just a stand mixer or even a sturdy whisk, and you’ll have bakery‑level results.
- Uniqueness: The “cheesecake swirl” technique is rarely seen in cinnamon roll recipes, giving you that surprise burst of creamy goodness.
- Crowd Reaction: I’ve watched grown‑ups and kids alike gasp, smile, and immediately ask for a second serving—this is hands down the best version you’ll ever make at home.
- Ingredient Quality: Fresh strawberries and high‑fat cream cheese make the difference between a bland roll and a flavor explosion.
- Cooking Method: A gentle rise, a brief chill, and a precise bake ensure every roll is uniformly golden and perfectly risen.
- Make‑Ahead Potential: You can prepare the dough and filling a day ahead, freeze the rolled pieces, and bake fresh whenever the craving hits.
Inside the Ingredient List
The Flavor Base
All‑purpose flour is the backbone of any good roll, providing structure while still allowing the dough to stay tender. If you substitute bread flour, you’ll get a chewier texture that can feel too dense for a sweet roll. For a lighter crumb, sift the flour twice before measuring; this introduces air and prevents clumps that could turn your dough into a brick. The granulated sugar not only sweetens the dough but also feeds the yeast, encouraging a steady rise. A pinch of salt amplifies every flavor, acting like a conductor that brings the whole orchestra together.
The Texture Crew
Instant yeast is the hero that saves you time; no need to proof it separately—just mix it straight into the dry ingredients and watch it work its magic. Warm milk (around 110°F) hydrates the flour and activates the yeast without shocking it, creating that airy, pillowy texture we crave. Melted unsalted butter adds richness and helps the dough develop a silky mouthfeel; if you use salted butter, you’ll need to cut back on the added salt. The large egg binds everything together, contributing both structure and a subtle golden hue to the crust.
The Unexpected Star
Cream cheese, softened to room temperature, is the secret weapon that turns a regular cinnamon roll into a cheesecake‑infused masterpiece. Its high fat content ensures a velvety filling that doesn’t curdle when baked. Fresh strawberries, chopped just before folding into the filling, add bursts of juicy acidity that cut through the richness of the cheese. Powdered sugar and vanilla extract sweeten and round out the flavor profile, while a final drizzle of powdered sugar adds a delicate snow‑like finish that’s as pretty as it is tasty.
The Final Flourish
A drizzle of optional powdered sugar right before serving adds a glossy finish that catches the eye and adds a hint of extra sweetness. If you’re watching sugar intake, you can skip the drizzle and still enjoy the natural sweetness from the strawberries and cream cheese. For a richer glaze, whisk together a tablespoon of melted butter with the powdered sugar and a splash of milk; this creates a glossy, buttery coating that clings to every swirl. Finally, a light dusting of cinnamon on top of the glaze intensifies the aromatic profile, making the rolls irresistibly fragrant.
Everything's prepped? Good. Let's get into the real action...
The Method — Step by Step
In a large mixing bowl, whisk together the flour, granulated sugar, instant yeast, and salt. The dry mixture should look uniform, with the yeast evenly dispersed; this prevents pockets of over‑fermentation later on. Make a well in the center and pour in the warm milk, melted butter, and the beaten egg. As you stir, the dough will come together into a shaggy ball that clings to the sides of the bowl. Let it rest for 5 minutes—this is the autolyse phase that helps the gluten relax and the dough become more extensible.
Kitchen Hack: If your kitchen is chilly, place the bowl in a turned‑off oven with the light on; the gentle warmth keeps the dough from cooling too quickly.Turn the dough out onto a lightly floured surface and knead for about 8 minutes, or until it’s smooth, elastic, and no longer sticks to your hands. You’ll know it’s ready when you can stretch a small piece thin enough to read through it without tearing—a sign of well‑developed gluten. Shape the dough into a ball, place it back in the bowl, cover with a damp towel, and let it rise in a warm spot for 1 hour, or until doubled in size. While you wait, the kitchen will start to fill with a faint, yeasty aroma that promises good things.
While the dough rises, prepare the cheesecake filling: in a medium bowl, combine the softened cream cheese, powdered sugar, and vanilla extract. Beat until the mixture is silky and free of lumps—think of a smooth frosting you could spread on a cake without scraping the bowl. Gently fold in the chopped strawberries, being careful not to crush them; you want those little pockets of fruit to stay intact for bursts of flavor later. Set the filling aside, covered, while the dough finishes its first rise.
Once the dough has doubled, punch it down gently to release excess gas, then let it rest for 10 minutes. This short rest relaxes the gluten, making the dough easier to roll out without springing back. Lightly flour your work surface, then roll the dough into a rectangle about ¼ inch thick, roughly 12×18 inches. The surface should feel soft but not sticky; if it sticks, dust a little more flour on top and the rolling pin.
Now comes the “cheesecake swirl” magic: spread the cream cheese–strawberry mixture evenly over the rolled‑out dough, leaving a ½‑inch border around the edges. Use a spatula to smooth the filling, creating a uniform layer that will melt into the dough as it bakes. Sprinkle an additional tablespoon of granulated sugar over the filling; this caramelizes during baking, giving the rolls a subtle crunch on the top.
Watch Out: Avoid over‑filling; too much filling can cause the rolls to leak and become soggy in the middle.Starting from the long side, carefully roll the dough into a tight log, pinching the seam to seal. The tighter you roll, the more defined the swirl will be, and the less likely the filling will escape. Cut the log into 12 equal pieces using a sharp, lightly floured knife—each piece should be about 1½ inches thick. Place the rolls seam‑side down in a greased 9×13‑inch baking dish, spacing them evenly so they have room to puff without touching.
Cover the pan loosely with plastic wrap and let the rolls proof for a second time, about 30 minutes, until they puff up noticeably. During this stage, the rolls should look slightly risen and the surface will become a bit glossy. Preheat your oven to 350°F (175°C) while they proof; the timing is crucial—baking too hot will brown the exterior before the interior fully cooks, while too low will leave the rolls dense.
Bake the rolls for 25‑30 minutes, or until the tops are a deep golden brown and the edges pull away from the pan, creating a crisp border that shatters like thin ice when you bite into it. Halfway through, rotate the pan to ensure even browning; this small step makes a huge difference in the final appearance. When the rolls are done, remove them from the oven and let them cool in the pan for 5 minutes—this lets the steam settle, preventing sogginess.
While the rolls are still warm, drizzle a generous amount of powdered sugar glaze over the top. The heat will melt the glaze, allowing it to seep into the crevices and coat each swirl with a glossy sheen. Serve the rolls warm, with a side of extra fresh strawberries if you like, and watch as your friends reach for seconds without even thinking about it. That sizzle when the glaze hits the hot rolls? Absolute perfection.
That's it — you did it. But hold on, I've got a few more tricks that'll take this to another level...
Insider Tricks for Flawless Results
The Temperature Rule Nobody Follows
Never let your dough rise in a drafty kitchen; a stable temperature of 78‑80°F yields the most consistent rise. If you live in a cooler climate, create a makeshift proofing box by placing the bowl in a turned‑off oven with a pan of hot water on the bottom rack. This gentle humidity keeps the dough from forming a dry crust, which can inhibit expansion. I once tried to speed up the rise by cranking the heat, only to end up with over‑fermented dough that tasted sour and had a gummy texture. Trust the slow and steady approach, and you’ll get that perfect airy crumb every time.
Why Your Nose Knows Best
Your sense of smell is a reliable indicator of dough readiness. When the dough has risen, it will emit a sweet, yeasty scent that’s slightly nutty—if you smell anything sour, it’s a sign of over‑fermentation. During the second proof, a faint buttery aroma will develop as the fats in the butter begin to melt into the dough. If the kitchen starts to smell like alcohol, you’ve likely let the dough sit too long; the yeast is breaking down sugars into ethanol. Trust those olfactory cues and you’ll avoid the dreaded “flat roll” disaster.
The 5‑Minute Rest That Changes Everything
After you roll the dough into a log, let it rest for exactly five minutes before cutting. This short pause allows the gluten to relax again, preventing the rolls from springing back when you slice them. A friend once skipped this step and ended up with uneven, misshapen rolls that looked like a bad hair day. Those five minutes also give the filling a chance to settle, reducing the risk of it oozing out during baking. It’s a tiny habit that makes a massive difference in the final presentation.
The Secret Butter Brush
Brushing the tops with melted butter before the final bake creates a glossy, caramelized crust that’s both beautiful and flavorful. The butter interacts with the sugar on the surface, producing a Maillard reaction that adds depth and a slight crunch. If you want an extra layer of decadence, mix a pinch of cinnamon into the butter before brushing. I once tried a spray oil instead of butter and the rolls turned out pale and lacked that signature bite. Keep the butter, and you’ll get that restaurant‑quality shine.
Cooling the Right Way
Let the rolls cool in the pan for exactly five minutes, then transfer them to a wire rack. This prevents the bottoms from becoming soggy due to trapped steam. A common mistake is to leave them in the pan too long; the residual heat continues to cook the underside, turning it rubbery. By moving them to a rack, you allow air to circulate, preserving the crisp bottom while keeping the interior soft. If you’re serving them later, a quick reheat in a 300°F oven for five minutes restores that fresh‑out‑of‑the‑oven texture.
Creative Twists and Variations
This recipe is a playground. Here are some of my favorite ways to switch things up:
Chocolate‑Hazelnut Dream
Swap the strawberry‑cream cheese filling for a mixture of hazelnut spread, melted chocolate, and a hint of espresso. The nutty‑chocolate combo adds a sophisticated twist that’s perfect for a holiday brunch. Top with toasted hazelnuts for extra crunch.
Lemon Blueberry Burst
Replace strawberries with fresh blueberries and add a tablespoon of lemon zest to the cream cheese filling. The citrus brightens the flavor, while the blueberries provide a pop of juiciness. Finish with a lemon‑glaze drizzle for a tangy finish.
Nutty Apple Crumble
Incorporate finely diced apples sautéed with cinnamon and a handful of chopped walnuts into the filling. The apple adds a comforting, autumnal sweetness, while walnuts give a satisfying crunch. Sprinkle a crumble topping made from flour, brown sugar, and butter before the final bake.
Pumpkin Spice Delight
Mix pumpkin puree into the cream cheese filling and add pumpkin pie spice for a fall‑inspired version. The creamy pumpkin melds beautifully with the cinnamon roll dough, creating a cozy, warm flavor profile. Drizzle with maple‑infused glaze for extra depth.
Matcha Green Tea Fusion
Add a teaspoon of matcha powder to the dough and a touch of honey to the filling for an Asian‑inspired twist. The subtle earthiness of matcha balances the sweet cream cheese, while the honey adds a floral note. Dust the finished rolls with a light sprinkle of additional matcha for visual flair.
Storing and Bringing It Back to Life
Fridge Storage
Allow the rolls to cool completely, then store them in an airtight container in the refrigerator for up to three days. The moisture from the filling keeps them from drying out, while the container prevents them from absorbing other fridge odors. When you’re ready to eat, gently reheat them in a 300°F oven for 5‑7 minutes, covered with foil to retain softness.
Freezer Friendly
Wrap each cooled roll tightly in plastic wrap, then place them in a freezer‑safe zip‑top bag. They’ll keep for up to two months. To bake from frozen, add an extra five minutes to the bake time and consider covering the tops with foil halfway through to prevent over‑browning. A quick splash of water on the tray before reheating creates steam that revives the fluffy interior.
Best Reheating Method
For the ultimate “just‑out‑of‑the‑oven” experience, preheat your oven to 325°F, place the rolls on a parchment‑lined baking sheet, and sprinkle a teaspoon of water over each roll. Cover loosely with foil and heat for 8‑10 minutes. The water turns into steam, rejuvenating the crumb while keeping the glaze glossy. Serve immediately for maximum melt‑in‑your‑mouth pleasure.