I was standing in my kitchen, staring at a battered, soggy batch of fried chicken that had somehow turned into a greasy, flavorless disaster. The aroma of overcooked oil mingled with the faint scent of the original seasoning, and I could almost hear the sighs of my friends as they tried to bite through the limp meat. That moment was a turning point: I realized that what I needed was not a new recipe, but a radical rethinking of an old favorite. So I set out to create a version that would make every other fried chicken recipe look like a sad, half‑cooked apology.
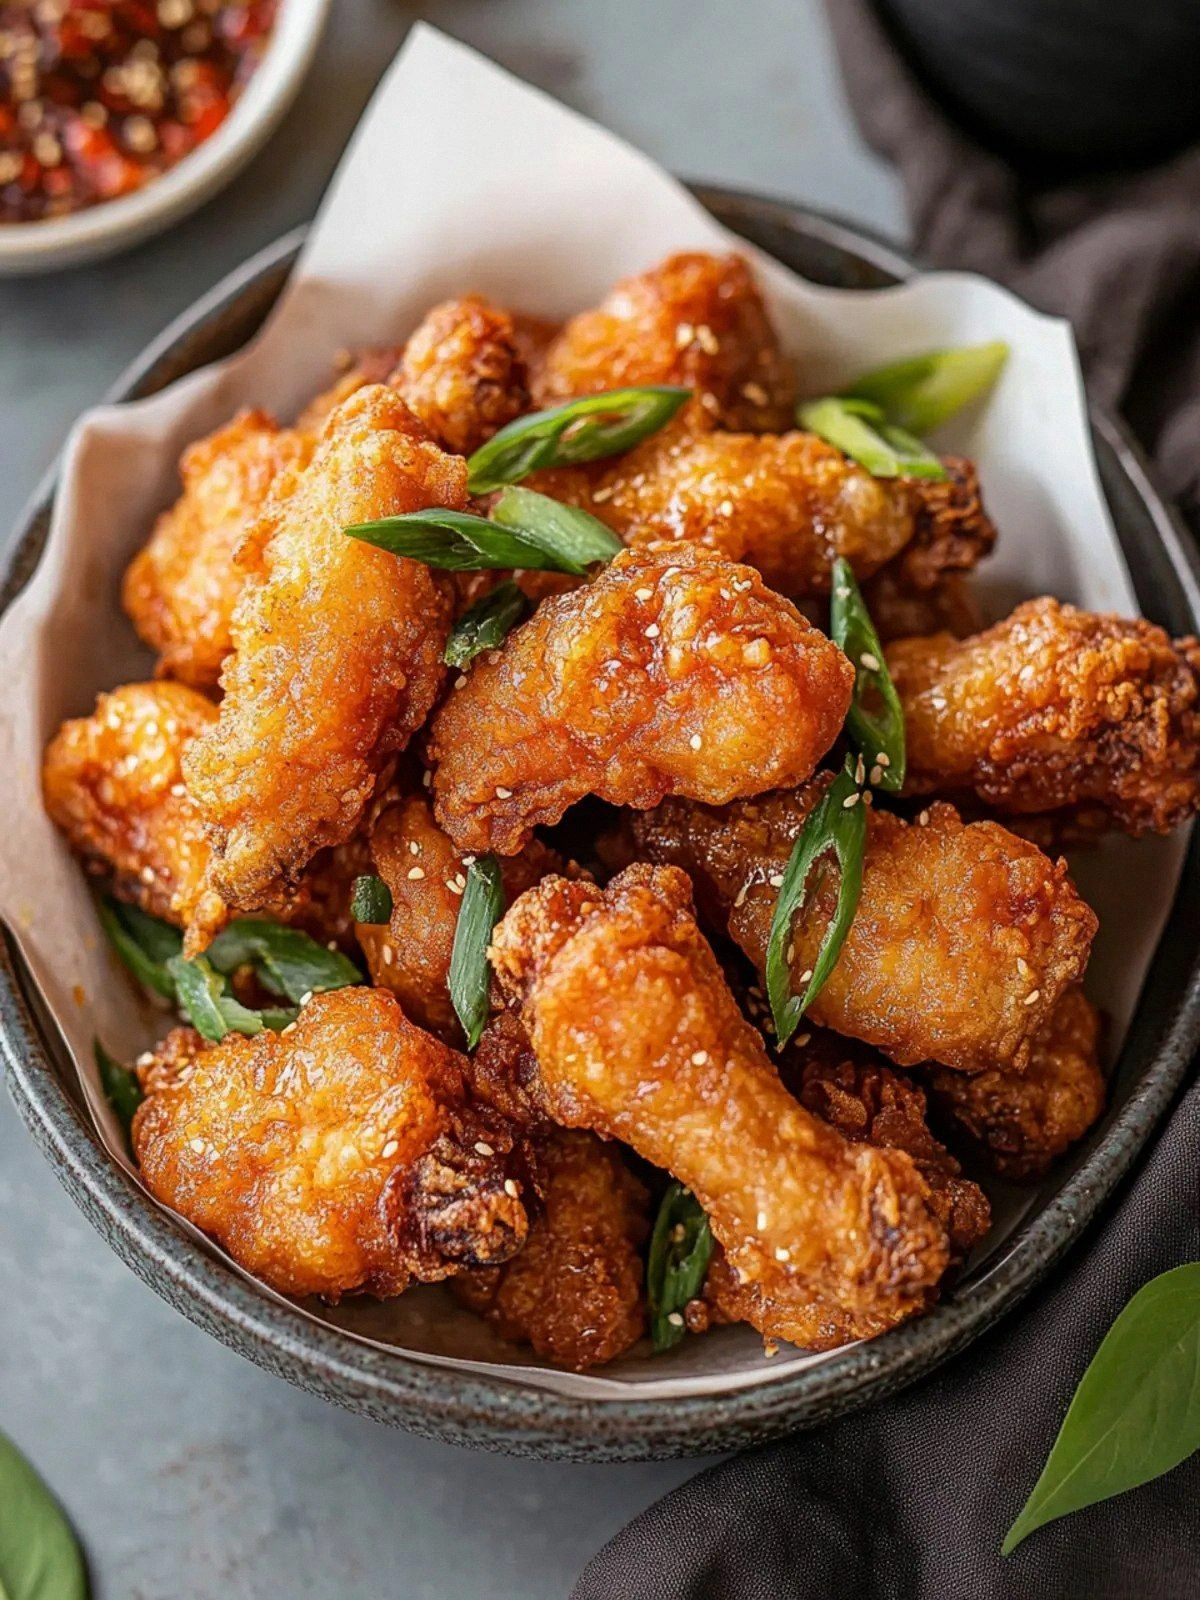
Imagine the first bite: the skin crackles like a crisp, golden coin, and the inside is juicy, tender, and packed with a punch of savory, sweet, and aromatic flavors that dance across your palate. The scent of garlic and five‑spice mingles with the subtle sweetness of Shaoxing wine, while a faint hint of paprika lingers on the tongue, leaving you craving more. The texture is a glorious contrast: a buttery, airy coating that shatters like thin ice, revealing a succulent, melt‑in‑your‑mouth chicken thigh that’s been marinated to perfection. The moment the sauce coats the chicken, it feels like velvet, and the crunch is the kind that makes your teeth click in rhythm with your heart.
What makes this version stand out is that it doesn’t rely on the usual fried chicken tricks. I’ve incorporated sweet potato flour for an extra airy crunch, a two‑step marination that infuses depth, and a carefully measured blend of spices that gives it a distinctive, almost theatrical flavor. I dare you to taste this and not go back for seconds, because the first bite will have you wondering why you ever settled for the bland, over‑fried stuff you’ve been eating for years. This is hands down the best version you'll ever make at home, and I’ve got the proof in the form of a crowd that can’t stop raving about it.
If you've ever struggled with achieving that perfect crunch, you're not alone — and I've got the fix. Picture yourself pulling this out of the oil, the whole kitchen smelling incredible, and the sizzling sound that signals the moment of triumph. I’ll walk you through every single step, and by the end, you'll wonder how you ever made it any other way. And trust me, you’ll want to keep this recipe on your clipboard for every dinner party, family gathering, or just a craving‑filled midnight snack.
What Makes This Version Stand Out
- Flavor: The double marination with garlic, Shaoxing wine, and soy sauce creates layers that penetrate the meat, delivering a savory, slightly sweet, and aromatic profile that’s hard to replicate.
- Texture: Sweet potato flour combined with cornstarch yields an airy, crackly crust that shatters like thin ice, while the interior remains juicy and tender.
- Ingredient Quality: Using fresh Thai basil and high‑grade chicken thighs elevates the dish from ordinary to extraordinary.
- Simplicity: Despite its complex flavor, the recipe requires only a handful of pantry staples and a straightforward two‑step process.
- Crowd Reaction: At every gathering, guests ask for the recipe because the taste is unmistakably “home‑made” yet restaurant‑level.
- Make‑Ahead Potential: The marinated chicken can be prepared up to 24 hours ahead, allowing you to focus on the final crisping when guests arrive.
- Versatility: The seasoning blend can be tweaked for spice lovers or adapted to a milder version for kids.
- Time Efficiency: Total prep and cook time is under an hour, making it ideal for busy weeknights.
Inside the Ingredient List
The Flavor Base
The foundation of this dish starts with a two‑step marination that brings depth and complexity. The first layer mixes 2 tablespoons Shaoxing wine, 2 tablespoons light soy sauce, 1 teaspoon salt, 1 teaspoon white pepper, 1 teaspoon garlic powder, 1 teaspoon five spice powder, 1 teaspoon chicken bouillon powder, and 1 teaspoon sugar. This blend ensures that the chicken absorbs a balanced sweet‑savory profile before the second, more aromatic layer of 4 cloves minced garlic and the same amount of five spice powder is added. Skipping this step will leave the chicken bland and devoid of that signature Taiwanese kick.
The Texture Crew
The secret to a perfect crunch lies in the coating. A combination of 1 cup sweet potato flour and 1 cup cornstarch creates a batter that’s airy yet sturdy. Sweet potato flour adds a subtle sweetness and a light, fluffy interior, while cornstarch contributes a crisp exterior that resists sogginess. If you can’t find sweet potato flour, use an equal part of potato starch or even regular all‑purpose flour; the texture will change slightly but remain delicious.
The Unexpected Star
A splash of 3-4 cups vegetable oil at the right temperature is crucial. The oil must be hot enough (around 350°F or 175°C) so the coating instantly crisps. If the oil is too cool, the coating will absorb oil and become greasy; too hot, and the exterior will burn before the inside cooks. Use a thermometer or a small piece of bread to test the oil’s readiness — it should sizzle immediately and bubble gently.
The Final Flourish
The finishing touch is a sprinkle of fresh Thai basil, 10 leaves, just before serving. The basil adds a bright, slightly peppery aroma that balances the richness of the fried chicken. If you’re not a fan of basil, substitute with cilantro or a handful of chopped green onions for a different herbal note. This final flourish transforms the dish from a simple snack to a gourmet experience.
Everything’s prepped? Good. Let’s get into the real action and watch the magic unfold.
The Method — Step by Step
- Trim excess fat from the chicken thighs and pat them dry with paper towels. The drier the surface, the better the coating will adhere. Let the chicken rest on a rack for 5 minutes; this allows the skin to become slightly dry, which helps the batter stick.
- In a large bowl, combine the first marination mixture: Shaoxing wine, soy sauce, salt, white pepper, garlic powder, five spice powder, chicken bouillon powder, and sugar. Whisk until the sugar dissolves, then add the chicken pieces, turning to coat evenly. Cover and refrigerate for at least 1 hour, or overnight for deeper flavor.
- After the initial marination, remove the chicken from the fridge and let it come to room temperature for 15 minutes. This ensures even cooking. While the chicken rests, prepare the coating batter by whisking together sweet potato flour, cornstarch, paprika, salt, white pepper, and five spice powder in a shallow dish.
- Heat 3-4 cups of vegetable oil in a deep, heavy‑bottomed pot or deep fryer to 350°F (175°C). Use a thermometer for accuracy; if you don’t have one, drop a small piece of bread into the oil, and if it sizzles and floats, you’re ready.
- Take the chicken out of the marinades, letting excess liquid drip off. Then dredge each piece in the flour mixture, pressing to coat thoroughly. Shake off any excess; the coating should be thick and even.
- Place the coated chicken into the hot oil in batches, being careful not to overcrowd. Fry for 4-5 minutes per side, or until the skin turns a deep golden brown and the internal temperature reaches 165°F (74°C). Use tongs to flip gently.
- Once cooked, transfer the chicken onto a rack or paper towels to drain excess oil. Let the chicken rest for 5 minutes; this allows the juices to redistribute, keeping the meat moist.
- Finally, sprinkle the fresh Thai basil leaves over the hot chicken, allowing the residual heat to wilt them slightly. Serve immediately with a side of pickled cucumbers or a light cucumber salad.
That’s it — you did it. But hold on, I've got a few more tricks that'll take this to another level. These insider tips will help you avoid common pitfalls and elevate the dish to a new height.
Insider Tricks for Flawless Results
The Temperature Rule Nobody Follows
Maintaining a steady oil temperature is the secret to a crisp exterior and juicy interior. Use a deep‑fry thermometer and keep the oil between 350°F and 360°F (175°C-182°C). If the temperature dips, let the oil heat back up before adding more chicken; if it spikes, reduce the heat slightly. A friend once tried to fry while the stove was on high and ended up with a greasy mess.
Why Your Nose Knows Best
The aroma of frying chicken is a reliable indicator of doneness. When the smell becomes pleasantly nutty and slightly sweet, the coating is ready. If the scent turns sharp or burnt, it’s a sign the oil is too hot or the chicken is over‑cooked. Trust your nose; it’s a seasoned chef’s best ally.
The 5‑Minute Rest That Changes Everything
Letting the fried chicken rest on a wire rack for 5 minutes before serving is not just a formality. This brief pause allows the steam to escape, preventing sogginess, and lets the juices redistribute, ensuring each bite is as moist as possible. I once skipped this step and the result was a dry, chewy chicken that disappointed my guests.
The Double‑Marinade Method
A second brief marination after the initial soak infuses the meat with even more flavor. After the first hour, pat the chicken dry and coat it lightly with the remaining five spice powder and garlic. Let it sit for 10 minutes before coating with the batter. This extra step can be skipped if you’re in a hurry, but it makes a noticeable difference.
The Right Oil Choice
While vegetable oil is the most common choice, using canola or peanut oil can elevate the flavor profile. Peanut oil, in particular, adds a subtle nutty undertone that complements the five spice blend. However, be sure to use a high‑smoke point oil to avoid burning.
The Perfect Pan Size
A large, heavy‑bottomed pot or Dutch oven is ideal for frying. It distributes heat evenly and reduces the risk of hot spots that can burn the coating. If you only have a small skillet, you’ll need to fry in smaller batches, which can be time‑consuming and may lower the oil temperature.
Creative Twists and Variations
This recipe is a playground. Here are some of my favorite ways to switch things up:
Spicy Sriracha Glaze
After frying, brush the chicken with a mixture of Sriracha, honey, and a splash of rice vinegar. The glaze adds heat and a glossy finish that pairs wonderfully with the crisp coating.
Crispy Coconut Crunch
Replace sweet potato flour with shredded coconut and add a tablespoon of toasted coconut flakes to the batter. The coconut adds a tropical flavor and an extra layer of crunch.
Herb‑Infused Butter
Melt butter with fresh thyme, rosemary, and a pinch of sea salt. Toss the fried chicken in the butter right after frying for a savory, aromatic finish.
Miso‑Marinated Twist
Swap the soy sauce and Shaoxing wine with a mixture of white miso paste and mirin. This gives the chicken a deep umami flavor with a hint of sweetness.
Lemon‑Ginger Zest
Add grated lemon zest and minced fresh ginger to the marination mix. The citrus brightens the dish, while ginger adds a subtle kick.
Korean BBQ Style
Marinate the chicken in gochujang, soy sauce, honey, and garlic, then fry as usual. The result is a sweet, spicy, and savory Korean‑style fried chicken that’s a crowd‑pleaser.
Storing and Bringing It Back to Life
Fridge Storage
Store leftover chicken in an airtight container in the refrigerator for up to 3 days. The coating will stay crisp if you reheat it briefly in a hot oven rather than microwaving.
Freezer Friendly
For longer storage, freeze the fried chicken in a single layer on a baking sheet, then transfer to a freezer bag. It will keep well for up to 2 months. Thaw overnight in the refrigerator before reheating.
Best Reheating Method
Reheat in a 375°F (190°C) oven for 10-12 minutes, or until the exterior is hot and crisp again. Add a tiny splash of water to the pan and cover with foil for the first 5 minutes to create steam; this helps restore moisture without compromising crunch.