Introduction
I remember the night I first stumbled onto the internet, eyes glued to a glossy magazine that promised “the best cupcakes ever” and my kitchen turned into a battlefield of flour clouds and burnt batter. I had a craving that could only be satisfied by a cupcake that looked like it had been kissed by a pastry wizard, but every recipe I tried ended in soggy centers or a crumb that fell apart like a bad joke. That’s when I found the copycat Magnolia Bakery recipe that turned my kitchen into a bakery on a Friday night. The aroma that filled the air was a sweet, buttery promise, and the sound of the oven door closing felt like a secret handshake with the culinary gods.
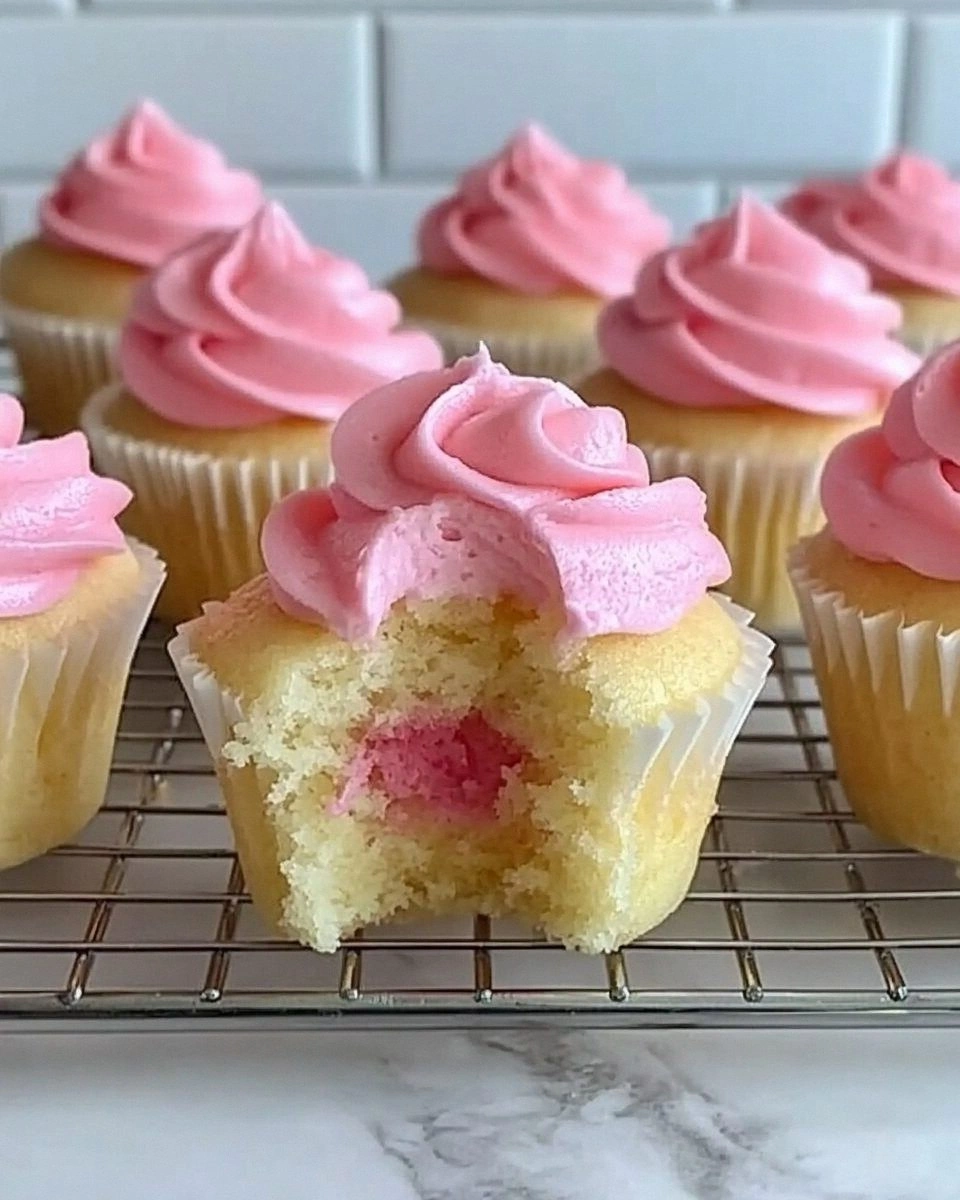
Picture this: a golden dome of cake, a glossy buttercream frosting that swirls like a cloud, and a faint hint of vanilla that lingers long after you’ve taken a bite. The texture is a paradox—soft, airy inside, yet with a subtle bite that makes you chew a second time just to savor the richness. I could taste the buttery crunch of the crust, feel the silky frosting melt on my tongue, hear the gentle pop of the oven releasing steam, and smell the faint scent of fresh vanilla and butter. It’s a multi-sensory experience that turns a simple snack into a celebration.
What makes this version stand out from every other cupcake recipe out there is that it doesn’t just replicate a flavor; it captures the essence of Magnolia’s original in a way that’s both authentic and approachable. The batter is balanced, the frosting is silky, and the finish is a glossy sheen that would make any bakery owner blush. I’ll reveal a trick that most people miss: the subtle addition of sour cream that keeps the cupcakes moist without making them heavy. This is the kind of detail that turns a good cupcake into a legendary one.
I dare you to taste this and not go back for seconds. If you’ve ever struggled with cupcakes that turn out too dry or too dense, you’re not alone—and I’ve got the fix. Let me walk you through every single step, from the first whisk to the final drizzle, and by the end, you’ll wonder how you ever made them any other way.
What Makes This Version Stand Out
- Flavor: The batter delivers a buttery, vanilla-rich taste that feels like a warm hug, while the frosting balances sweetness with a subtle tang from the sour cream.
- Texture: The cupcakes are airy yet firm, with a crumb that holds together like a well‑written story, and a frosting that melts in your mouth.
- Simplicity: With only a handful of pantry staples, you can achieve a bakery-quality result without a trip to the specialty store.
- Uniqueness: The inclusion of sour cream and a dash of almond extract gives these cupcakes a depth that sets them apart from standard vanilla cupcakes.
- Crowd Reaction: Friends who’ve tasted these cupcakes often say, “I can’t believe you made this at home!”—a testament to the recipe’s authenticity.
- Ingredient Quality: Using real butter and fresh eggs elevates the flavor profile, turning a simple dessert into an indulgent treat.
- Cooking Method: The step‑by‑step technique ensures even baking and prevents the dreaded “wet center” that plagues many homemade cupcakes.
- Make‑Ahead Potential: You can bake the cupcakes a day ahead, freeze them, and still enjoy them fresh after a quick reheating.
Alright, let’s break down exactly what goes into this masterpiece…
Inside the Ingredient List
The Flavor Base
At the heart of this cupcake lies a trio of classic flavors—flour, sugar, and butter. Flour provides structure; sugar sweetens; butter adds richness and a glossy finish. Skipping any of these will leave the cupcakes feeling flat or dry. If you’re aiming for a lighter batter, use cake flour instead of all‑purpose; it’s lower in protein and will yield a finer crumb.
The Texture Crew
Eggs, milk, and sour cream form the texture crew. Eggs bind the batter and give it lift; milk keeps the batter moist and ensures a tender crumb; sour cream adds a subtle tang that counters the sweetness and locks in moisture. If you can’t find sour cream, Greek yogurt works as a decent substitute, but it may alter the flavor slightly. Choosing whole milk over skim will give you a richer taste.
The Unexpected Star
Almond extract is the unexpected star that elevates the vanilla flavor profile. It gives the cupcakes a nutty undertone that’s reminiscent of a freshly baked almond cake. If you’re allergic, simply omit it; the cupcakes will still be delicious, though slightly less complex.
The Final Flourish
Baking powder, baking soda, and salt are the final flourish that ensures the cupcakes rise evenly and have a balanced flavor. Baking powder is the leavening agent that reacts when wet; baking soda reacts with the acidic sour cream to create bubbles. Salt sharpens the sweetness and balances the overall flavor. If you forget the baking soda, the cupcakes may rise too slowly and turn out dense.
Everything's prepped? Good. Let’s get into the real action…
The Method — Step by Step
- Preheat your oven to 350°F (175°C) and line a 12‑cup muffin tin with paper liners. The parchment ensures easy removal and a neat finish. If you’re using a metal tin, lightly grease it with butter or non‑stick spray to avoid sticking. This step is crucial for even baking.
- In a large bowl, whisk together the flour, baking powder, baking soda, and salt. Sifting these together removes lumps and ensures a smooth batter. Keep this dry mixture aside; you’ll add the wet ingredients next.
- In another bowl, beat the butter and sugar until pale and fluffy—about 3 minutes with an electric mixer. The goal is to incorporate air, which will help the cupcakes rise. Watch the batter turn from creamy to light yellow as the sugar dissolves.
- Add the eggs one at a time, beating well after each addition. The batter should look glossy and smooth. This step is the moment of truth—don’t rush it; each egg must be fully incorporated before adding the next.
- Stir in the vanilla and almond extracts. These liquids carry the flavor, so make sure they’re evenly distributed. A swirl of vanilla is all it takes to elevate the entire batter.
- Alternately add the dry mix and the milk, starting and ending with the dry mix. Stir just until combined; overmixing will create a dense crumb. The batter should be thick yet pourable.
- Fold in the sour cream gently. The tangy cream not only adds moisture but also balances the sweetness. The batter will look slightly lumpy—don’t worry, it will smooth out as it bakes.
- Fill each paper liner about 2/3 full with batter. The cupcakes need room to rise but not so much that they overflow. Tap the tin gently on the counter to release any air pockets.
- Bake for 18–22 minutes, or until a toothpick inserted into the center comes out clean. The tops should be golden brown, not over‑browned. Keep a close eye on the last few minutes; oven temperatures can vary.
- Let the cupcakes cool in the tin for 5 minutes, then transfer them to a wire rack to cool completely. Cooling prevents the frosting from melting too quickly and ensures a crisp crumb.
That’s it— you did it. But hold on, I’ve got a few more tricks that will take this to another level…
Insider Tricks for Flawless Results
The Temperature Rule Nobody Follows
Many bakers bake at 375°F, thinking higher heat means faster rise. In reality, 350°F gives the cupcakes a gentle rise and a golden crust without drying the interior. I’ve baked at 400°F once, and the cupcakes were over‑browned on the edges while still raw inside. Stick to 350°F for consistent results.
Why Your Nose Knows Best
The scent of freshly baked cupcakes is a powerful indicator of doneness. When the aroma is sweet, buttery, and slightly nutty, it’s a sign the cupcakes are perfectly baked. If you’re unsure, take a quick peek; the tops should be just starting to pull away from the paper liners.
The 5-Minute Rest That Changes Everything
After removing the cupcakes from the oven, let them rest in the tin for 5 minutes. This pause allows the heat to redistribute, preventing a sudden temperature drop that can cause the cupcakes to sink or crack. I’ve seen cupcakes that sink in the middle after cooling too quickly—this simple rest fixes that.
The Creamy Frosting Technique
To achieve that glossy, smooth frosting, beat the butter until it’s light and fluffy before adding powdered sugar. If the butter is too warm, the frosting will be grainy; if too cold, it won’t spread evenly. I use a stand mixer on low speed, then increase to medium once the sugar is incorporated.
The Secret Ingredient for Moisture
A splash of milk or cream in the frosting adds a subtle sheen and keeps the frosting from drying out. I add just 1 tablespoon of whole milk and whisk until the frosting is silky. This trick keeps the frosting from cracking as it sets.
Creative Twists and Variations
Chocolate Lover’s Delight
Swap 1 cup of flour for 1 cup of cocoa powder, reduce the sugar by 1/4 cup, and add 1/4 cup of melted dark chocolate to the batter. The result is a decadent chocolate cupcake with a rich, velvety frosting that’s still buttery.
Citrus Burst
Add zest from one orange and replace the vanilla with 1 tsp of lemon zest. The bright citrus notes cut through the sweetness, creating a refreshing cupcake that pairs perfectly with a glass of sparkling water.
Berry Bliss
Fold 1 cup of fresh blueberries into the batter after the sour cream. The berries burst in the oven, giving the cupcakes a burst of natural sweetness and a pop of color that makes them Instagram‑ready.
Nutty Crunch
Add 1/2 cup of chopped pecans or walnuts to the batter and sprinkle toasted nuts on top before frosting. The crunchy texture contrasts beautifully with the soft crumb and adds a nutty aroma.
Caramel Swirl
Drizzle caramel sauce into the batter before filling the tins, creating a marbled effect. The caramel adds a buttery sweetness that pairs well with a dollop of sea salt on top.
Matcha Magic
Replace 1 cup of flour with 1 cup of matcha powder and reduce sugar by 1/4 cup. The green tea flavor gives the cupcakes a subtle earthiness and a beautiful green hue.
Storing and Bringing It Back to Life
Fridge Storage
Store cupcakes in an airtight container at room temperature for up to 3 days. Keep them in a cool, dry place away from direct sunlight. If you’re adding frosting, store the frosting separately to keep it from melting.
Freezer Friendly
Freeze cupcakes in a single layer on a parchment‑lined tray for 1 hour, then transfer them to a zip‑lock bag. They can be stored in the freezer for up to 2 months. When ready to serve, thaw at room temperature for 30 minutes.
Best Reheating Method
Reheat frozen cupcakes in a preheated oven at 300°F for 10 minutes or until warm. Add a tiny splash of water to the baking tray before reheating; it steams the cupcakes back to perfection, keeping the crumb moist.