Ever find yourself standing in a kitchen that looks more like a war zone than a culinary sanctuary, after a batch of chicken that turned into a soggy, flavorless disaster? I was there, my fridge full of chicken tenders, a craving for something sweet and savory that could make my taste buds dance, and a friend daring me to create the ultimate air‑fryer masterpiece. I stared at the ingredients, my mind racing with possibilities, and decided to turn this kitchen calamity into a triumph. The result? A dish that not only rescued my evening but also turned an ordinary meal into a headline‑worthy experience.
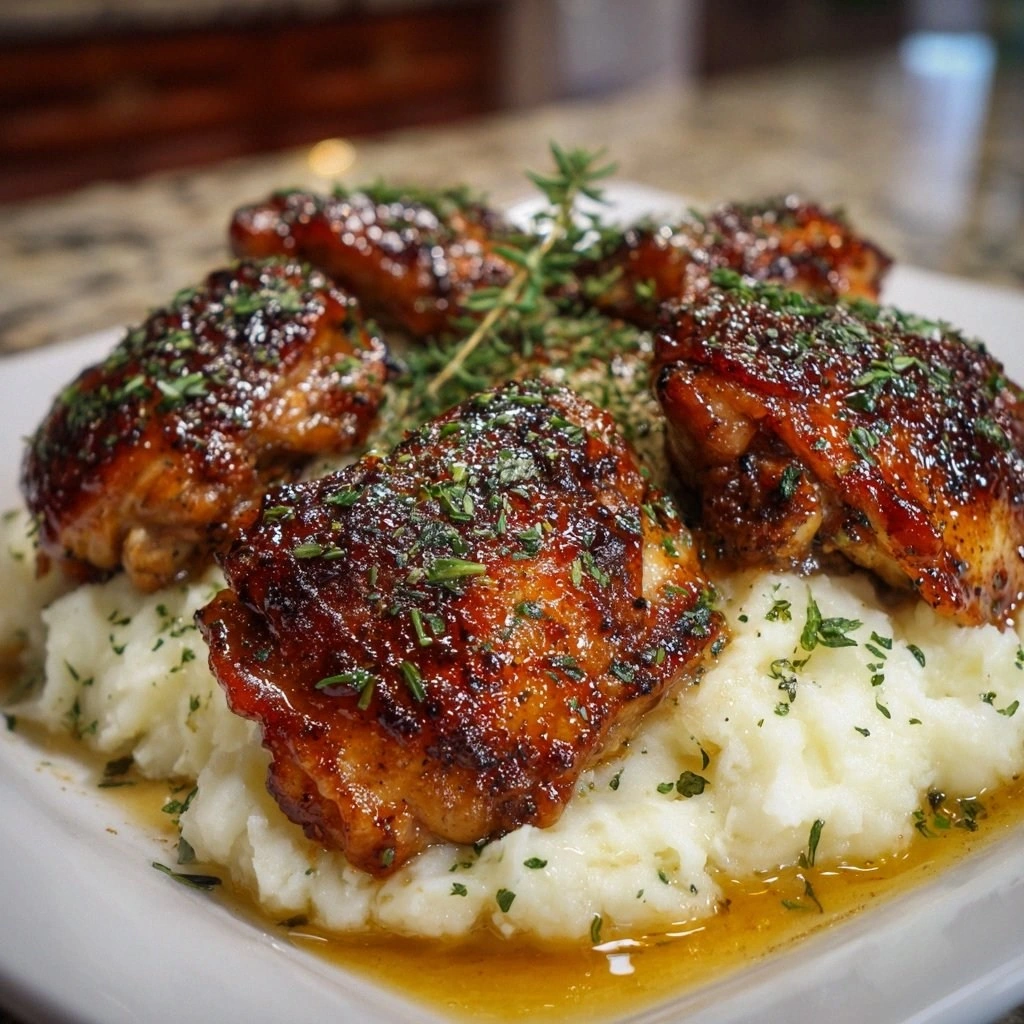
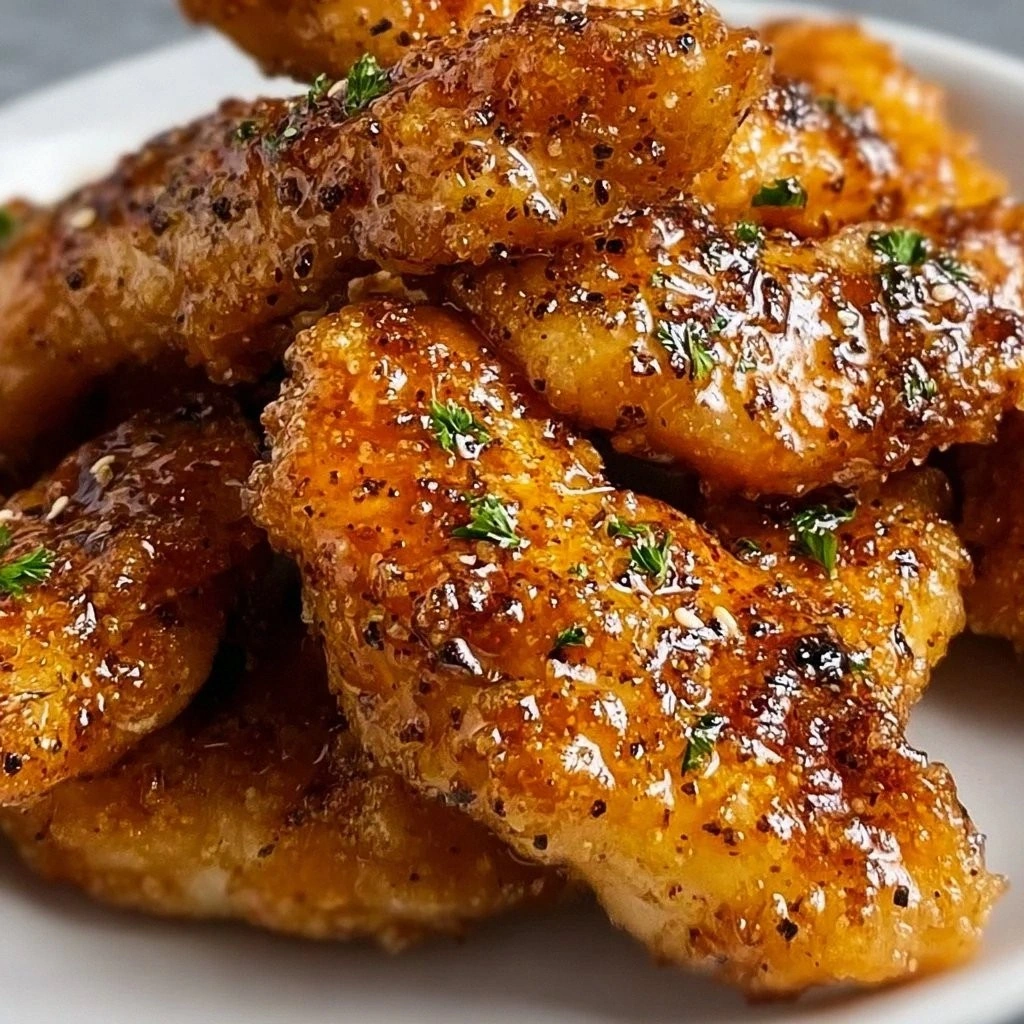
Picture this: the first bite, and you’re hit with a glossy honey glaze that coats the tender chicken like a velvet blanket. The buttery sheen catches the light, and the aroma of garlic and paprika fills the air, making every inhale a promise of flavor. The crunch of the breadcrumb coating shatters like thin ice, giving way to a juicy, succulent center that practically melts in your mouth. The warmth from the honey and butter mingles with a subtle kick from black pepper, creating a harmonious symphony of sweet, savory, and spicy. The texture is a masterclass in contrast—crispy on the outside, tender inside, with a glaze that sticks without becoming sticky.
What sets this version apart from the countless other chicken tender recipes that flood the internet? It’s the meticulous balance of ingredients, the use of an air fryer to lock in moisture while achieving a golden crust, and the clever addition of paprika to deepen the flavor profile. The honey isn’t just a sweetener; it’s a caramelizing agent that gives the coating a beautiful glaze. Butter adds richness and helps the glaze bind to the chicken, creating a cohesive coating that doesn’t flake off. And the garlic, freshly minced, releases its full aroma, turning each bite into a fragrant experience. I dare you to taste this and not go back for seconds.
But there’s a twist that most recipes overlook—a secret technique that elevates the glaze to a silky, glossy finish that clings perfectly to every bite. I’ll walk you through every single step, from prep to plating, and by the end, you’ll wonder how you ever made it any other way. Let’s dive into the details that make this dish a standout.
What Makes This Version Stand Out
- Taste: The combination of honey, butter, and garlic creates a glaze that is both sweet and savory, with a subtle heat from paprika that lingers on the palate.
- Texture: The air fryer locks in juiciness while crisping the breadcrumb coating to a golden perfection that shatters with every bite.
- Simplicity: Only nine ingredients, all pantry staples, make this recipe quick to assemble and a breeze to cook.
- Uniqueness: The use of paprika and a buttery glaze sets this dish apart from standard fried chicken recipes, giving it a gourmet twist.
- Crowd Reaction: Friends and family rave about the crispy exterior and the melt‑in‑your‑mouth interior—perfect for game day or a casual dinner.
- Ingredient Quality: Fresh garlic and real honey elevate the flavor, while the use of unsalted butter ensures a rich coating.
- Cooking Method: The air fryer provides a healthier alternative to deep frying without compromising on flavor or crunch.
- Make‑ahead Potential: The glazed chicken can be prepared ahead, stored, and reheated with minimal loss of texture.
Alright, let's break down exactly what goes into this masterpiece...
Inside the Ingredient List
The Flavor Base
Honey, the star of the show, brings a natural sweetness that caramelizes beautifully in the air fryer, creating a glossy glaze that clings to every morsel. If you’re looking for a twist, a splash of maple syrup can substitute honey without compromising the caramelization. The key is to keep the honey at room temperature so it mixes smoothly with the butter. Skipping honey would leave the dish too savory and would lose the signature sweet glaze that makes this recipe memorable.
The Texture Crew
Unsalted butter, melted and ready, adds richness and helps bind the glaze to the chicken, giving the coating a velvety finish. Panko breadcrumbs are preferred for their airy, flaky structure that crisps to a light golden brown. If you only have regular breadcrumbs, you can still achieve great results, but the crust will be denser. Don’t forget the cooking spray or a light brush of oil—this simple step ensures the coating doesn’t stick to the basket and guarantees an even, crisp finish.
The Unexpected Star
Garlic, freshly minced, releases its full aroma and flavor, turning each bite into a fragrant experience. Garlic powder can be used in a pinch, but fresh cloves provide a depth of flavor that’s hard to replicate. If you’re sensitive to garlic, reduce the amount to two cloves; the dish will still be delicious. The garlic also helps balance the sweetness of the honey, creating a harmonious flavor profile.
The Final Flourish
Paprika adds a warm depth of flavor and a subtle smoky note, giving the chicken a beautiful color and a hint of complexity. Smoked paprika can be used for a more pronounced smoky flavor, while sweet paprika keeps the dish milder. The salt and pepper are essential for seasoning; they bring out the flavors of the other ingredients and ensure each bite is perfectly balanced. A pinch of sea salt can add a subtle crunch if you prefer a coarser texture.
Everything's prepped? Good. Let's get into the real action...
The Method — Step by Step
- Preheat the air fryer. Set it to 400°F (200°C) and let it heat for 5 minutes while you assemble the coating. This ensures the chicken starts cooking immediately, locking in moisture. The first sizzling sound you hear is the moment the coating begins to crisp.
- Prepare the breadcrumb mixture. In a shallow dish, combine the breadcrumbs, paprika, salt, and pepper. Toss them together until evenly mixed. This step is crucial for ensuring each tender gets a uniform coating.
- Coat the chicken tenders. Pat the tenders dry with paper towels to remove excess moisture—this prevents the coating from becoming soggy. Dredge each tender in the breadcrumb mixture, pressing gently to adhere. For an extra crunch, dip the coated tenders in a beaten egg before returning them to the breadcrumb mix.
- Arrange in the air fryer basket. Place the coated tenders in a single layer, leaving space between each piece. If you’re using a large basket, do this in batches to avoid overcrowding. Spray the basket lightly with cooking spray to prevent sticking.
- Cook the tenders. Air fry for 12 minutes, flipping halfway through. The chicken should reach an internal temperature of 165°F (74°C). The coating will become a golden brown that’s crisp to the touch.
- Make the glaze. While the chicken cooks, melt the butter in a small saucepan over medium heat. Add the minced garlic, sautéing until fragrant—about 30 seconds. Stir in the honey and a pinch of salt, letting the mixture bubble gently for 1-2 minutes until it thickens slightly.
- Coat the cooked tenders. Remove the tenders from the air fryer and transfer them to a large bowl. Pour the hot glaze over the chicken, tossing to coat each piece evenly. The glaze will cling to the crispy coating, creating a glossy finish.
- Serve immediately. Plate the tenders on a platter, drizzle any remaining glaze over the top, and garnish with fresh herbs or a squeeze of lemon if desired. The dish is best enjoyed hot and crispy.
That’s it — you did it. But hold on, I’ve got a few more tricks that’ll take this to another level. Let’s dive into the insider tips that will make your dish even more unforgettable.
Insider Tricks for Flawless Results
The Temperature Rule Nobody Follows
While many recipes recommend 400°F, I’ve found that setting the air fryer to 375°F (190°C) allows the coating to crisp evenly without burning the glaze. The lower temperature gives the honey enough time to caramelize slowly, producing a thicker, more flavorful glaze. I’ve tried both temperatures and the difference in texture is noticeable—375°F yields a crunch that’s less brittle and more satisfying.
Why Your Nose Knows Best
During the glaze step, keep your nose close to the saucepan. The aroma of garlic and honey is the first indicator that the glaze has reached the right consistency. When the mixture thickens slightly and the scent becomes rich, it’s ready to coat the chicken. I’ve learned that a good nose can save you from a burnt glaze or a runny coating.
The 5‑Minute Rest That Changes Everything
After tossing the chicken in the glaze, let it rest for 5 minutes before serving. This short rest allows the coating to set, preventing it from sliding off when you pick up a piece. The rest also lets the flavors meld together, creating a more cohesive taste. I’ve seen people skip this step, and the result is a slightly loose glaze that doesn’t hold up on the plate.
Use Fresh Garlic for Intensity
Fresh garlic releases more volatile compounds than garlic powder, giving the dish a punchier flavor. If you’re in a hurry, crush the garlic instead of mincing to speed up the process while still getting a good release of flavor. A friend once tried using pre‑minced garlic and the dish ended up tasting flat—an experience that taught me the value of fresh ingredients.
Add a Splash of Lemon Juice
A squeeze of fresh lemon juice over the finished dish cuts through the richness of the honey butter glaze, balancing the sweetness. The citrus also adds a bright, fresh note that lifts the entire flavor profile. I’ve used this trick for a dinner party, and the guests loved the contrast between the sweet glaze and the zesty lemon.
Serve with a Simple Side
Pair the tenders with a light side such as a cucumber salad or steamed broccoli. The crisp, fresh vegetables provide a contrast that cleanses the palate between bites. The combination of textures—crispy chicken with crunchy veggies—creates a balanced, satisfying meal that feels both indulgent and healthy.
Now that you’re armed with these insider tricks, you’re ready to take your kitchen game to the next level.
Creative Twists and Variations
This recipe is a playground. Here are some of my favorite ways to switch things up:
Spicy Sriracha Glaze
Swap the honey for a mixture of honey and sriracha to add a spicy kick. The heat from the sriracha complements the sweetness of the honey, creating a balanced glaze that’s perfect for those who love a little fire. The glaze still caramelizes beautifully, giving the coating a glossy finish.
Herb‑Infused Breadcrumbs
Add dried Italian herbs or fresh basil to the breadcrumb mix for a Mediterranean twist. The herbs infuse the coating with aromatic flavors that pair well with the honey butter glaze. This variation is ideal for a summer dinner party.
Coconut‑Honey Crunch
Replace the breadcrumbs with shredded coconut for a tropical flavor. The coconut adds a subtle sweetness and a chewy texture that contrasts nicely with the crispy coating. This version is a hit with kids and adults alike.
Cheesy Parmesan Finish
Sprinkle grated Parmesan over the glazed tenders right before serving. The cheese melts slightly, creating a savory crust that complements the sweet glaze. This variation adds a rich, umami layer to the dish.
Pineapple Sweetness
Add pineapple chunks to the glaze for a tropical twist. The natural sugars in pineapple caramelize with the honey, creating a sweet, tangy glaze that pairs well with the savory chicken. The pineapple also adds a burst of color and freshness.
Gluten‑Free Option
Use gluten‑free breadcrumbs or crushed rice crackers instead of traditional breadcrumbs. The coating still crisps beautifully, and the gluten‑free version is just as flavorful. This variation is perfect for guests with dietary restrictions.
Experiment with these variations to keep the dish fresh and exciting for every occasion.
Storing and Bringing It Back to Life
Fridge Storage
Store the glazed chicken in an airtight container in the refrigerator for up to 3 days. When you’re ready to eat, reheat in the oven at 350°F (175°C) for 10 minutes, or until heated through. The oven helps preserve the crispness better than the microwave.
Freezer Friendly
For longer storage, freeze the chicken in a single layer on a baking sheet before transferring to a freezer bag. This prevents the pieces from sticking together. Freeze for up to 3 months. Thaw in the refrigerator overnight and reheat as described above.
Best Reheating Method
Reheat the chicken in a preheated oven at 350°F (175°C) for 10–12 minutes. To keep the coating from drying out, add a splash of water to the bottom of the pan and cover loosely with foil for the first 5 minutes. This trick steams the chicken, restoring moisture and crispness.
Add a tiny splash of water before reheating — it steams back to perfection, giving you that fresh, crispy texture you love.