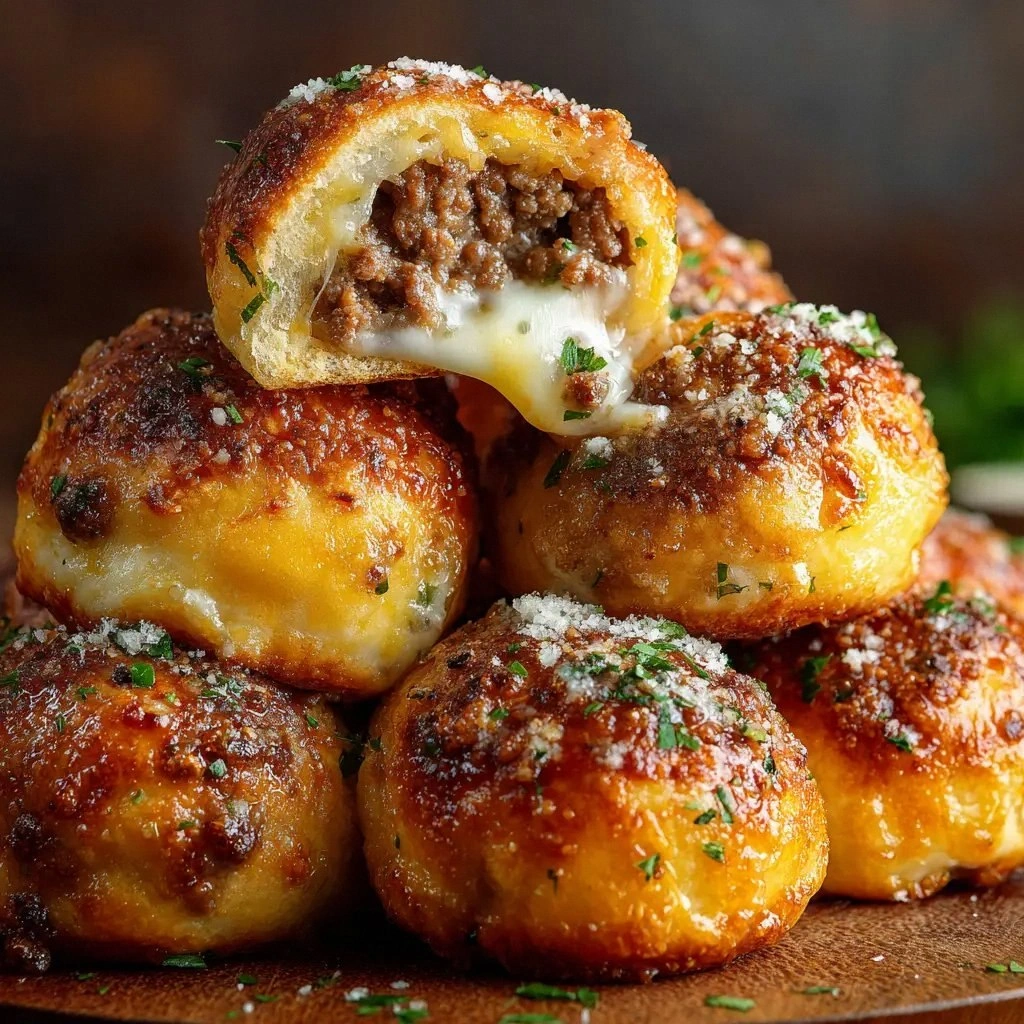
Picture this: the kitchen is a battlefield, the stove a war zone, and you’re the commander. A week ago I tried to recreate the famous “Garlic Parmesan Cheeseburger” from that viral TikTok, but the result was a sad, soggy mess that even my cat wouldn’t touch. I was so frustrated that I almost threw the skillet in the trash, but a sudden craving for something that could make a crowd swoon sparked a midnight experiment. I grabbed a can of biscuits, a block of cheddar, and a handful of garlic, and I was determined to turn that flop into a triumph.
The smell that hit me first was that unmistakable buttery aroma, mingling with the sharp tang of fresh parsley and the earthy bite of garlic. The sizzling sound of ground beef hitting the hot pan was like applause in a stadium—each sizzle a promise of flavor. I could taste the potential in my mouth even before the first bite: a juicy patty, a cheesy melt, and a biscuit that would crack like a perfect snowflake. The texture was already forming in my mind—a crisp exterior, a soft, buttery interior, and a gooey cheese bridge that would tie everything together.
What sets this version apart is that it’s not just a “cheeseburger” with a biscuit wrapper. It’s a symphony of textures, a crescendo of umami, and a dish that can be served for dinner, a snack, or even a show-stopping party appetizer. I dared you to taste this and not go back for seconds. And I’m not exaggerating when I say this is hands down the best version you’ll ever make at home. The secret? A meticulous layering of flavors, a precise balance of heat and richness, and a simple, foolproof technique that even a kitchen rookie can master.
If you’ve ever struggled with a greasy burger that falls apart, or a biscuit that turns out doughy, you’re not alone—and I’ve got the fix. Picture yourself pulling this out of the oven, the whole kitchen smelling incredible, and the first bite sending a wave of satisfaction through your taste buds. And now, stay with me here—this is worth it. Let me walk you through every single step, and by the end, you’ll wonder how you ever made it any other way.
What Makes This Version Stand Out
- Taste: The combination of sharp cheddar, Parmesan, and a whisper of Worcestershire sauce creates a depth that feels both familiar and adventurous. The garlic is not just an additive; it’s a foundational note that cuts through the richness of the cheese.
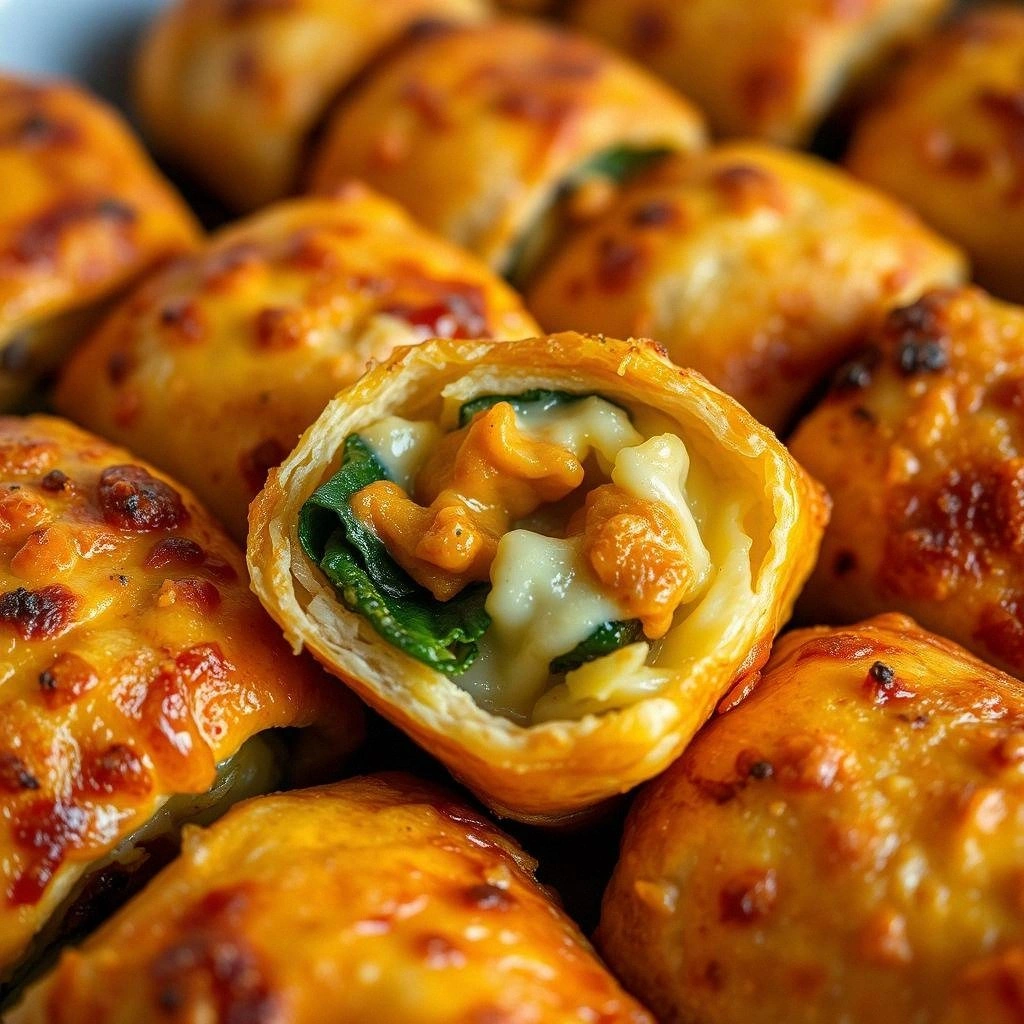
- Texture: The biscuit acts as a buttery, airy canvas that holds the patty and cheese without becoming soggy. The cheddar melts into a silky bridge, while the biscuit’s crust crisps up to a delightful crunch.
- Simplicity: With just a handful of ingredients and a single pan, you can deliver a gourmet experience without a complicated prep list.
- Uniqueness: Unlike typical burgers, this recipe uses refrigerated biscuits as buns, giving it an unexpected twist that feels indulgent yet approachable.
- Crowd Reaction: Friends who have tried this say they’re “hooked” after one bite—an instant crowd pleaser at gatherings or game nights.
- Ingredient Quality: Using lean ground beef keeps the dish juicy while reducing excess fat, and the sharp cheddar adds a sharp bite that balances the sweetness of the biscuit.
- Cooking Method: The technique of searing the patty first, then baking the biscuit with butter, ensures even cooking and flavor infusion.
- Make‑ahead Potential: The assembled burgers can be refrigerated for up to 24 hours, then reheated in the oven, making it a stress‑free option for busy evenings.
Alright, let's break down exactly what goes into this masterpiece. And before we dive into the ingredients, here’s a quick kitchen hack that will save you time and keep your skillet clean.
Inside the Ingredient List
The Flavor Base
The 1 lb lean ground beef is the heart of this dish. Lean beef keeps the burger from becoming overly greasy, yet it still retains enough moisture to stay juicy. When you season it with 1/2 tsp salt and 1/4 tsp black pepper, you’re creating a simple, clean flavor profile that lets the other components shine. If you skip the salt, the burger will taste flat; the pepper adds a subtle heat that complements the garlic.
The 2 cloves of minced garlic are more than just an additive—they’re the aromatic backbone. Garlic’s natural sweetness balances the savory beef and the sharp cheddar, while its pungency adds depth. If you’re a garlic purist, feel free to increase the amount, but be careful not to overpower the other flavors.
Worcestershire sauce, at 1 tbsp, introduces a tangy, umami note that elevates the beef’s natural flavors. It’s a small splash that can make a huge difference, especially when paired with the sharp cheddar. If you’re vegan or have a dietary restriction, a splash of soy sauce can mimic the umami punch.
The Texture Crew
The 1/2 cup diced yellow onion adds a subtle crunch and a sweet undertone. When sautéed until translucent, it caramelizes just enough to provide a gentle sweetness that balances the garlic’s bite. If you prefer a milder onion flavor, try using white onion or even shallots for a more delicate profile.
The 4 oz sharp cheddar cheese is the star of the cheese department. Its sharpness cuts through the buttery biscuit and the rich beef, creating a harmonious contrast. If you want a milder cheese, mozzarella or Monterey Jack can work, but the sharp cheddar is what gives this recipe its signature bite.
The 1 can refrigerated large biscuits are the unconventional bun. These biscuits are pre‑baked and ready to go, saving you the trouble of making a fresh bun from scratch. The biscuit’s dough is soft yet sturdy, making it perfect for holding the patty and cheese without disintegrating. If you’re a fan of a sweeter bun, you could try a cinnamon raisin biscuit, but the savory biscuit works best with this flavor profile.
The Unexpected Star
The 4 tbsp unsalted butter is more than just a cooking fat—it’s the source of that deep, buttery aroma that lures you in. When melted and brushed over the biscuit halves, it creates a golden, crisp exterior that’s both fragrant and crunchy. If you’re watching your calories, a tablespoon of olive oil can replace the butter, but the buttery flavor is hard to replace.
The 1/2 tsp garlic powder is a subtle enhancer. It’s not meant to replace the fresh garlic but to reinforce its presence, ensuring every bite is infused with garlic’s warm, comforting flavor. If you’re allergic to garlic, you can omit this step and still enjoy a delicious burger.
The Final Flourish
The 2 tbsp grated Parmesan cheese adds a nutty, salty finish that complements the sharp cheddar. When sprinkled on top of the melted cheese, it creates a golden crust that’s both visually appealing and deliciously savory. If you’re a fan of a stronger cheese, feel free to use a heavier Parmesan or even a Pecorino Romano for a sharper finish.
Finally, the 1 tbsp fresh parsley adds a bright, herbal note that cuts through the richness. The parsley also adds a pop of color that makes the dish look as good as it tastes. If you’re out of parsley, a pinch of chives or dill can offer a similar freshness.
Everything's prepped? Good. Let's get into the real action. But first, a quick fun fact about one of the ingredients that will blow your mind.
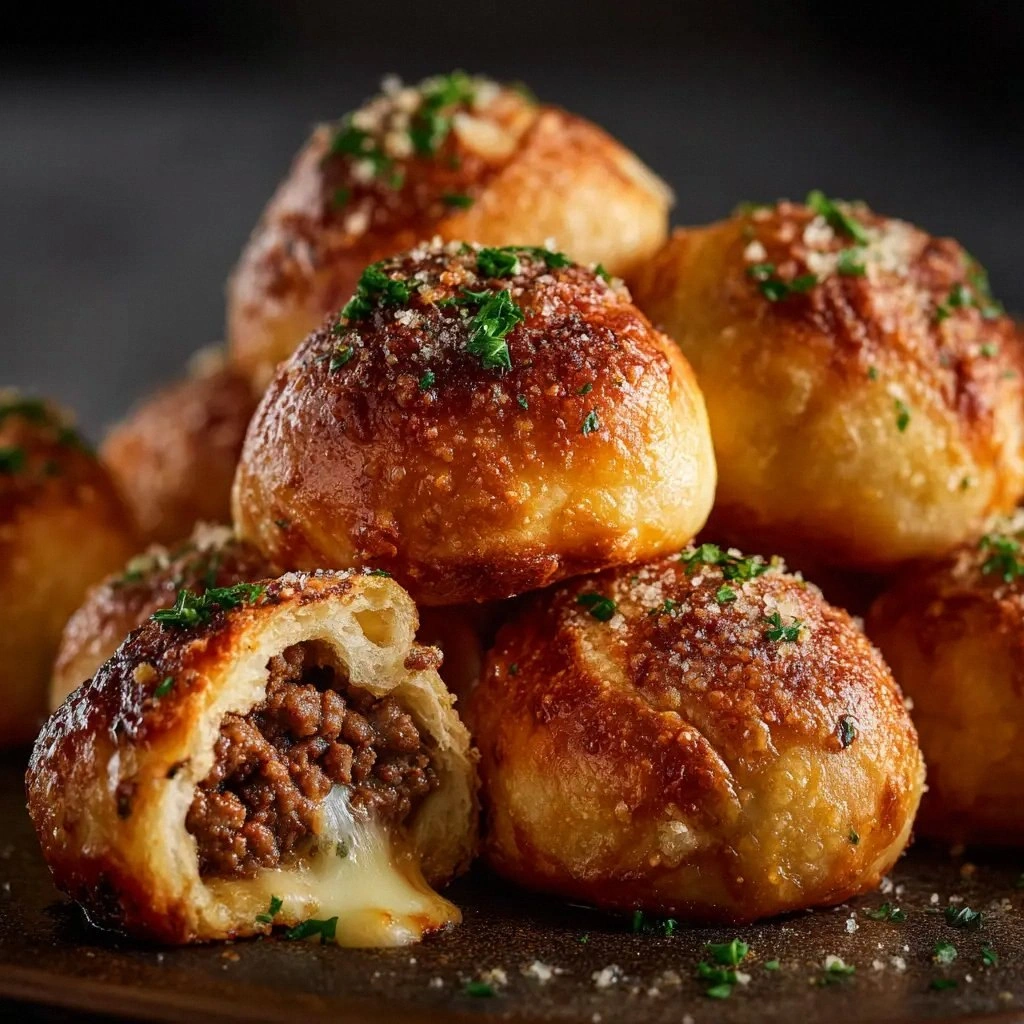
The Method — Step by Step
- Step 1: Prep the beef. In a large bowl, combine the 1 lb ground beef with 1/2 tsp salt, 1/4 tsp black pepper, 2 cloves minced garlic, 1 tbsp Worcestershire sauce, and 1/2 cup diced onion. Mix gently with your hands until just combined; overmixing can make the patty tough. Let the mixture rest for 10 minutes at room temperature; this helps the flavors meld.
- Step 2: Form the patties. Divide the meat mixture into 4 equal portions and shape each into a 3/4-inch thick patty. Make a small indentation in the center of each patty with your thumb; this prevents the burger from bulging as it cooks. Place the patties on a plate and cover loosely with plastic wrap to keep them from drying out.
- Step 3: Sear the patties. Heat a large cast‑iron skillet over medium‑high heat and add 1 tsp of oil. When the oil shimmers, place the patties in the pan, skin side down. Sear for 3 minutes, then flip and cook for an additional 2 minutes. The goal is a golden crust, not a fully cooked patty; we’ll finish them in the oven.
- Step 4: Prepare the biscuits. While the patties sear, preheat your oven to 375°F (190°C). Unroll the biscuits and cut each into halves, creating a top and bottom half. Brush each half with melted butter (4 tbsp total) and sprinkle with 1/2 tsp garlic powder. Arrange the halves on a parchment‑lined baking sheet, butter side up.
- Step 5: Bake the biscuit halves. Place the sheet in the oven and bake for 8 minutes, or until the edges are golden brown and the centers are puffed. Watch closely—overbaking will dry out the biscuits. Once done, remove from the oven and set aside.
- Step 6: Finish the burgers in the oven. Place the seared patties on top of the baked biscuit halves (butter side down), and top each patty with 1 oz of sharp cheddar. Cover the baking sheet with foil and return to the oven for 8 minutes, or until the cheese melts and the burgers reach an internal temperature of 160°F (71°C). The foil keeps the biscuits from over‑browning while the cheese melts.
- Step 7: Add the finishing touches. Once the cheese has melted, remove the sheet from the oven and sprinkle 2 tbsp grated Parmesan over the burgers. Return the sheet to the oven for 2 minutes, just long enough for the Parmesan to develop a golden crust.
- Step 8: Assemble and serve. Carefully lift each burger with a spatula and place it on a plate. Garnish with a sprinkle of fresh parsley, drizzle a little olive oil if desired, and serve immediately. The first bite will have that buttery crunch, a molten cheddar bridge, and a burst of garlic that will leave you craving more.
That's it — you did it. But hold on, I've got a few more tricks that'll take this to another level. These insider tips will help you avoid common pitfalls and elevate the flavor profile even further.
Insider Tricks for Flawless Results
The Temperature Rule Nobody Follows
Many cooks overcook the patty, thinking a fully cooked burger is a sign of quality. In reality, a patty that is slightly underdone on the inside will stay juicy once finished in the oven. Aim for an internal temperature of 140°F (60°C) before transferring to the oven, then let it rise to 160°F (71°C) during baking. This technique keeps the burger tender and prevents a dry, rubbery texture.
Why Your Nose Knows Best
When the butter starts to brown and the cheese begins to melt, your nose will give you a clear cue. A rich, buttery scent signals that the biscuit is perfectly crisp. If you’re tempted to pull the sheet out too early, let it stay a minute longer; the aroma will be your best indicator of doneness.
The 5-Minute Rest That Changes Everything
After removing the burgers from the oven, let them rest on a wire rack for 5 minutes. This rest period allows the juices to redistribute, preventing a watery bite. It also gives the cheese a chance to set, creating a smoother melt when you cut into the patty.
Butter vs. Oil: The Secret Sauce
If you’re looking to cut calories, replace the butter with a light olive oil. The oil will still provide a crisp crust, but you’ll lose some of the buttery flavor. For the fullest experience, stick with butter, but remember that a tablespoon of oil can be a suitable substitute if you’re watching your intake.
The Garlic Pairing Playbook
The fresh garlic gives a punchy bite, while the garlic powder offers a subtle, lingering warmth. If you’re a garlic lover, consider adding a pinch of crushed red pepper to the beef mixture for a hint of heat. This small tweak transforms the burger into a fiery, flavor-packed masterpiece.
Creative Twists and Variations
This recipe is a playground. Here are some of my favorite ways to switch things up:
Spicy Jalapeño Burst
Add sliced jalapeños to the beef mixture for a kick that pairs beautifully with the sharp cheddar. The heat will contrast the buttery biscuit, creating a balanced flavor profile that’s perfect for chili nights.
Mushroom & Swiss Fusion
Sauté sliced mushrooms in a bit of butter, then fold them into the beef before forming patties. Swap the sharp cheddar for Swiss cheese; the mild, nutty flavor of Swiss complements the earthy mushrooms and adds a new dimension.
Herb‑Infused Biscuit
Mix chopped fresh rosemary, thyme, and oregano into the biscuit dough before baking. The herbal aroma will mingle with the garlic and cheddar, creating a fragrant, savory bun that elevates the entire dish.
Cheddar & Caramelized Onion Delight
Caramelize the diced onions until deep brown before adding them to the beef mixture. The sweetness of caramelized onions balances the sharpness of the cheddar, resulting in a burger that feels both indulgent and comforting.
Bacon‑Wrapped Biscuit Burger
Wrap each patty in a slice of cooked bacon before placing it on the biscuit. The smoky bacon adds a new layer of flavor and creates a crunchy exterior that contrasts nicely with the buttery biscuit.
Vegan Version
Swap the ground beef for a plant‑based patty, use a dairy‑free cheddar alternative, and replace the butter with a plant‑based butter. The result is a vegan burger that still delivers that buttery, cheesy, garlicky experience.
Storing and Bringing It Back to Life
Fridge Storage
Store the assembled burgers in an airtight container in the refrigerator for up to 24 hours. The biscuits may soften slightly, so it’s best to reheat them in the oven for a few minutes to restore their crispness. If you’re in a hurry, a quick 30‑second burst in the microwave will warm the burger, but the biscuit may become soggy.
Freezer Friendly
Wrap each burger individually in parchment paper and then place them in a freezer bag. Freeze for up to 3 months. To reheat, thaw overnight in the refrigerator or use the microwave’s defrost setting. Finish the burger in the oven at 350°F (175°C) for 10 minutes to revive the crisp crust.
Best Reheating Method
The ideal reheating method is to place the burger on a baking sheet, cover loosely with foil, and heat at 350°F (175°C) for 10–12 minutes. Add a splash of water to the bottom of the pan to create steam; this will keep the biscuit from drying out. Once the cheese is melty again, serve immediately for the best experience.