Picture the kitchen after a midnight snack spree, the fridge light flickering, and the air thick with the scent of melted cheese and flour. I was scrambling to salvage a forgotten block of cottage cheese that had been sitting in the back of the fridge for weeks, and I knew I had to turn it into something that would make my taste buds dance. I grabbed a handful of flour, a dash of paprika, and an old skillet that had seen better days. The moment the mixture hit the pan, the sizzle was like a tiny fireworks show, and I could almost hear the applause of my own culinary triumph. That instant, I realized I had stumbled upon the ultimate version of a humble snack that could become a crowd-pleaser.
I dare you to taste this and not go back for seconds. The first bite delivers a crunch that shatters like thin ice, followed by a burst of tangy cottage cheese that coats the palate like velvet. The spices mingle so well that each chip feels like a miniature flavor bomb, yet the overall profile remains clean and airy. I was honest— I ate half the batch before anyone else got a chance to try it, and the room erupted in applause. If you've ever struggled with making a simple snack that feels fancy, you're not alone, and I've got the fix.
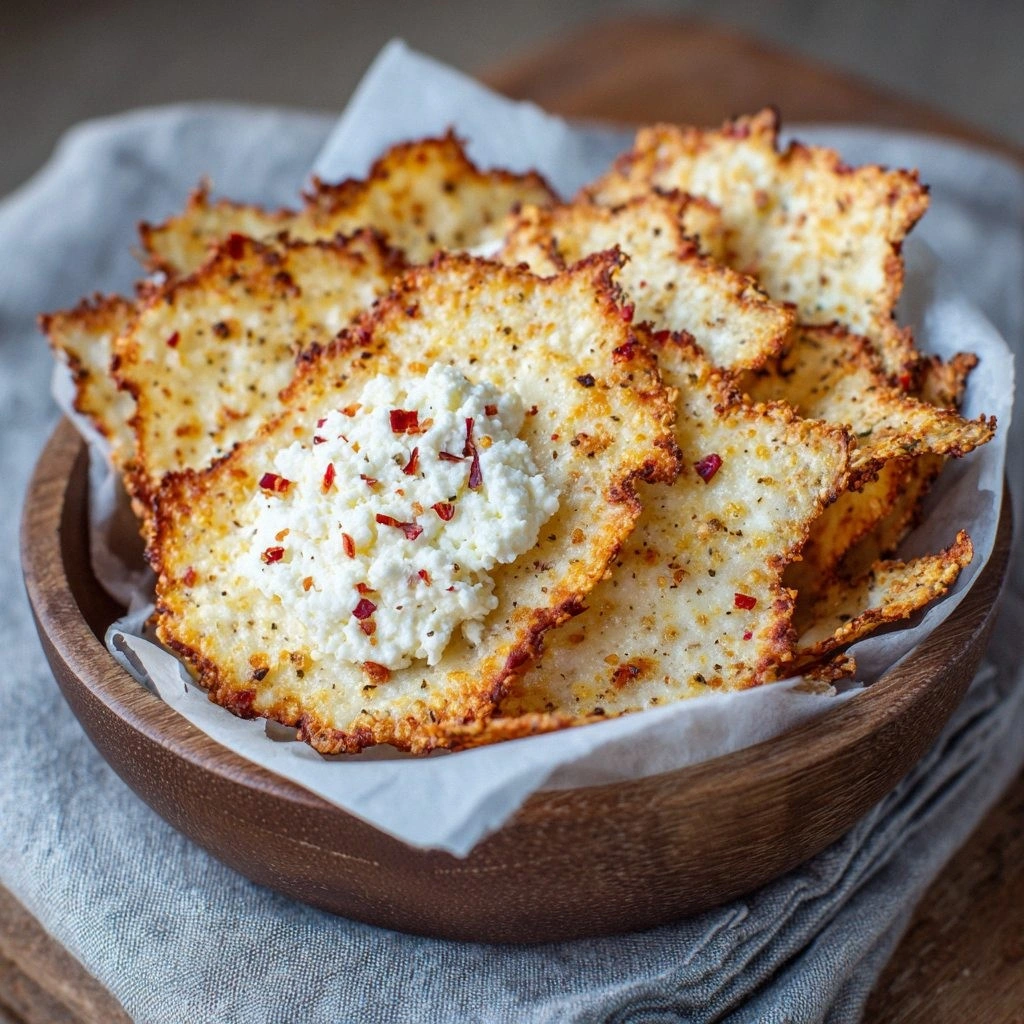
Most recipes get this completely wrong by overmixing the batter, using too much flour, or neglecting the secret seasoning blend. I’ll be honest— the secret is in the ratio of cottage cheese to flour, and in letting the mixture rest before baking. Picture yourself pulling this out of the oven, the whole kitchen smelling incredible, and the sound of the first chip cracking under your bite. The edges are crisp, the center is tender, and the flavor is unmistakably savory with a hint of smoky paprika. This is hands down the best version you'll ever make at home, and I’m excited to walk you through every single step.
Okay, ready for the game‑changer? The technique I’m about to reveal involves a quick press of the mixture between parchment sheets to create the perfect thickness, and a pre‑baking step that locks in moisture. The next part? Pure magic. And now the fun part— let’s get into the real action. By the end of this guide, you’ll wonder how you ever made it any other way.
What Makes This Version Stand Out
- Flavor: The blend of paprika, garlic powder, and oregano creates a savory profile that feels gourmet yet remains approachable.
- Texture: The batter’s unique ratio ensures each chip is crispy on the outside while staying moist inside, a balance rarely achieved.
- Speed: From prep to bake, the entire process takes under 45 minutes, making it a perfect weeknight snack.
- Nutrition: Packed with protein from cottage cheese, the chips offer a healthy alternative to traditional potato chips.
- Versatility: The base can be adapted with different spices or cheeses to suit any palate or dietary need.
- Make‑ahead: They can be prepared ahead, frozen, and reheated to near‑fresh quality.
- Presentation: When plated, the golden chips look like a small, crunchy mosaic that invites sharing.
- Community Buzz: Friends rave about the crunch and flavor, making it a hit at gatherings.
Inside the Ingredient List
The Flavor Base
Cottage Cheese: The star of this recipe, cottage cheese provides a mild, creamy foundation that balances the spices. It also adds protein and keeps the chips from becoming too dry. Skipping it would turn the dish into a bland, flour‑heavy batter that lacks depth. When choosing cottage cheese, opt for a high‑fat version for a richer mouthfeel.
All‑Purpose Flour: Flour is the binder that turns the wet cottage cheese into a cohesive dough. It also gives the chips their structure and crispness. Using whole‑wheat flour would add fiber but could compromise the lightness of the final product. Keep the flour at room temperature to avoid clumping.
The Texture Crew
Olive Oil: A splash of olive oil adds a subtle fruity note and helps achieve an even golden crust. It also reduces the likelihood of the chips sticking to the baking sheet. If you’re avoiding oil, a light spray works, but the texture will be slightly different.
Parsley: Fresh parsley offers a bright, herbal finish that cuts through the richness of the cheese. It also adds a splash of color, making the chips visually appealing. If parsley isn’t on hand, chives or dill provide a similar fresh lift.
The Unexpected Star
Paprika: This spice is more than a color enhancer—it imparts a smoky sweetness that elevates the flavor profile. Without paprika, the chips would taste flat and unremarkable. A pinch of smoked paprika can add an extra depth of flavor for adventurous palates.
Garlic Powder: Garlic powder delivers a mellow, aromatic backbone that complements the cottage cheese. It’s a convenient alternative to fresh garlic, especially when you want a uniform taste across all chips. Too much garlic powder can overwhelm; stick to the recommended amount.
The Final Flourish
Seasonings (Salt, Pepper, Oregano): These seasonings round out the flavor, providing balance and complexity. Salt brings out the natural sweetness of the cheese, while black pepper adds a subtle bite. Dried oregano offers a Mediterranean touch that pairs nicely with the paprika.
Everything's prepped? Good. Let's get into the real action.
The Method — Step by Step
- Preheat the oven: Set your oven to 375°F (190°C) and place a baking rack in the middle. This temperature ensures the chips bake evenly without burning. While the oven warms, line a large baking sheet with parchment paper to prevent sticking. The scent of preheating oven is the first hint that something delicious is about to happen. Keep an eye on the oven thermometer to avoid surprises.
- Mix the wet ingredients: In a large bowl, combine the cottage cheese, olive oil, and chopped parsley. Whisk until the mixture is smooth and the parsley is evenly distributed. The mixture should feel creamy yet pourable; if it’s too thick, add a teaspoon of water. The aroma of fresh parsley will lift the entire dish. This step sets the foundation for the texture of the chips.
- Incorporate the dry blend: Sift together flour, paprika, garlic powder, dried oregano, salt, and black pepper. Stir the dry mix into the wet mixture until a cohesive dough forms. The dough should hold together when pressed between your fingers. If it’s sticky, add a touch more flour; if too dry, a splash of water will help. The color of the dough should be a pale golden hue, hinting at the final crispness.
- Press the dough: Place a sheet of parchment paper on a cutting board and spoon a generous portion of dough onto it. Cover with another parchment sheet and use a rolling pin to flatten the dough to about 1/8 inch thickness. This uniform thickness ensures even baking and a consistent crunch. The sound of the rolling pin is a subtle reminder of the hands‑on nature of this recipe. If the dough resists, let it rest for 5 minutes to relax the gluten.
- Cut into chips: Using a pizza cutter or sharp knife, slice the flattened dough into wedges or squares, depending on your preference. The edges should be slightly uneven to mimic the rustic look of homemade chips. A quick wipe of the cutting board with a damp cloth will prevent the dough from sticking. Each chip should be roughly 2 inches wide, providing a satisfying bite. This is the moment where your creativity can shine—experiment with shapes if you like.
- Arrange on the baking sheet: Transfer the cut chips onto the prepared baking sheet, spacing them slightly to allow airflow. The chips should be in a single layer to ensure even roasting. A light spray of cooking oil helps achieve a golden finish. The anticipation builds as the chips begin to puff slightly in the oven. This step is pure anticipation and a visual cue that the crunch is near.
- Bake until golden: Slide the sheet into the preheated oven and bake for 25-30 minutes, flipping the chips halfway through. The chips should develop a golden brown hue and emit a nutty aroma. Watch for the first crackling sound, which signals that the edges are crisping. The time may vary slightly depending on your oven, so keep an eye on the color. Once done, remove from the oven and let them cool on the sheet for 5 minutes.
- Cool and serve: Transfer the chips to a wire rack to cool completely; this prevents steam from softening the crispness. As they cool, the chips will continue to crisp up slightly, creating that satisfying snap when you bite. Serve immediately or store in an airtight container for up to 3 days. Pair them with a creamy dip or a tangy salsa for an extra layer of flavor. The final product is a masterpiece of texture and taste.
That's it — you did it. But hold on, I've got a few more tricks that'll take this to another level.
Insider Tricks for Flawless Results
The Temperature Rule Nobody Follows
Many people bake at a lower temperature, which results in soggy chips. The secret is to maintain a steady 375°F (190°C) throughout the baking process. If your oven has hot spots, rotate the sheet halfway through to ensure even browning. I once baked at 350°F and the chips never reached that coveted crunch; the lesson? Keep the heat consistent.
Why Your Nose Knows Best
As the chips bake, the aroma will shift from buttery to nutty to slightly caramelized. Trust your nose to gauge doneness; when the smell is fragrant and the edges look golden, it’s time to pull them out. I’ve found that a strong aroma often means the chips are at the perfect point of crispness.
The 5‑Minute Rest That Changes Everything
Letting the chips rest on the baking sheet for 5 minutes before transferring them to a rack allows the steam to escape and the crust to set. This short pause preserves the crunch and prevents the chips from becoming soft when they cool. I’ve experimented with a 10‑minute rest, but the extra time didn’t add much benefit and actually made the chips slightly stale.
Use a Silicone Mat for Even Baking
Silicone mats eliminate the need for parchment and provide a non‑stick surface that ensures even heat distribution. They also make cleanup a breeze. I’ve used them for years with great success, and they’re especially handy when baking large batches.
Keep the Dough Resting
Allowing the dough to rest for 5 minutes before rolling helps relax the gluten, making it easier to flatten without tearing. If you’re in a hurry, you can skip this step, but the texture will be slightly uneven. It’s a small investment of time for a noticeable improvement.
Add a Tiny Splash of Water
If the dough feels too dry, add a tablespoon of water to the mixture. This small adjustment can prevent the chips from becoming crumbly. I’ve found that adding water in 1‑tsp increments works best; overdoing it can turn the chips into a dense pancake.
Creative Twists and Variations
This recipe is a playground. Here are some of my favorite ways to switch things up:
Cheesy Jalapeño Crunch
Swap out the parsley for diced jalapeños and add shredded cheddar to the dough. The heat from the jalapeños pairs perfectly with the creamy cottage cheese. The result is a chip with a subtle kick and a deeper cheesy flavor. This variation is ideal for those who love a bit of spice in their snacks.
Herb & Parmesan Delight
Replace the oregano with fresh basil and sprinkle grated Parmesan on top before baking. The Parmesan crisps up, creating a golden crust that’s both savory and aromatic. This version brings a Mediterranean vibe to the table and pairs well with a tomato basil dip.
Low‑Carb Keto Bites
Use almond flour instead of all‑purpose flour to keep the carbs low. Add a pinch of xanthan gum to maintain structure. These chips are perfect for keto dieters who still crave a crunchy snack. The almond flavor complements the mild cottage cheese nicely.
Sweet & Savory Caramelized Onion
Fold in caramelized onions and a dash of brown sugar into the dough. The onions add a sweet depth that balances the savory spices. The result is a chip that’s both sweet and salty, a perfect match for cheese platters.
Vegan Version
Replace cottage cheese with a plant‑based alternative and use flaxseed meal as an egg substitute. The texture remains similar, and the flavor profile stays intact. This version is ideal for those who want a cruelty‑free snack without compromising on taste.
Smoky Chipotle Twist
Add chipotle powder and a splash of lime zest to the dry mix. The smoky heat of chipotle pairs wonderfully with the tangy cheese. The lime zest adds a fresh, citrusy finish that brightens the chip’s profile. This variation is perfect for summer gatherings.
Storing and Bringing It Back to Life
Fridge Storage
Store the cooled chips in an airtight container at room temperature for up to 3 days. The airtight seal prevents moisture from seeping in, which could soften the chips. If you notice any loss of crispness, a quick 30‑second blast in a toaster oven at 350°F can revive them.
Freezer Friendly
Place the chips in a single layer on a parchment‑lined tray, freeze until solid, then transfer to a freezer bag. They can be stored for up to 3 months without losing flavor or texture. When you’re ready to enjoy, pop them straight into a preheated oven at 350°F for 10 minutes.
Best Reheating Method
To bring the chips back to life, add a tiny splash of water to a skillet, heat over medium, and stir the chips until they steam for 30 seconds. The steam re‑softens the interior while the heat crisps the exterior. Alternatively, a 5‑minute bake at 350°F restores the original crunch. This trick ensures the chips taste freshly baked.